

Install dependencies
Vertex AI Workbench user-managed notebooks is deprecated . On April 14, 2025, support for user-managed notebooks ended and the ability to create user-managed notebooks instances was removed. Existing instances will continue to function until March 30, 2026, but patches, updates, and upgrades won't be available. To continue using Vertex AI Workbench, we recommend that you migrate your user-managed notebooks instances to Vertex AI Workbench instances .
After you create a user-managed notebooks instance, you might need to install software that your notebook depends on. You can install dependencies by adding install commands to a file in your notebook or by using a terminal window.
An advantage of adding install commands to a file is that, when you share a notebook, the commands to install the dependencies are saved with the notebook and are available to users that you share the notebook with.
Install dependencies from a user-managed notebooks instance
To install Python packages from a user-managed notebooks instance:
-
In the Google Cloud console, go to the User-managed notebookspage.
-
Select the instance where you want to install dependencies.
-
Click Open JupyterLab.
-
To add a notebook file, you can use the menu or the Launcher.
Menu
-
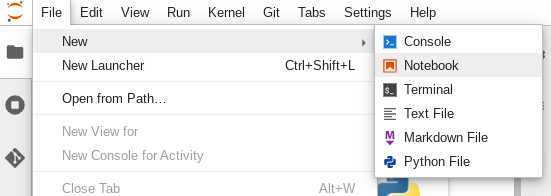
To add a new notebook file from the menu, select File > New > Notebook.
-
In the Select kerneldialog, select the kernel for your new notebook, for example, Python 3, and then click Select.
Your new notebook file opens.
Launcher
-
To add a new Python 3 notebook file from the Launcher, select File > New > Launcher.
-
Click the Python 3tile.
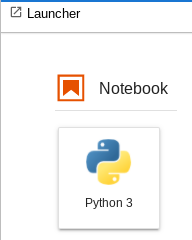
Your new notebook file opens.
-
-
Rename your new notebook file.
Menu
-
Select File > Rename notebook. The Rename filedialog opens.
-
In the New namefield, change
Untitled.ipynbto something meaningful, such asinstall.ipynb. -
Click Rename.
Launcher
-
Right-click the
Untitled.ipynbtab and then click Rename notebook. The Rename filedialog opens. -
In the New namefield, change
Untitled.ipynbto something meaningful, such asinstall.ipynb. -
Click Rename.
-
-
Install dependencies as follows.
When you open your new notebook, there is a default code cell where you can enter code, in this case Python 3.
To install the mxnet deep learning library in a Python 3 notebook, enter the following command in the code cell:
%pip install mxnet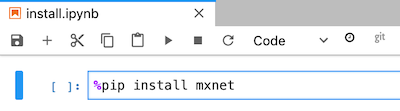
-
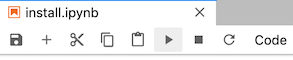
Click the run button to run the install command.
-
When installation is complete, select Kernel > Restart kernelto restart the kernel and ensure the library is available for import.
-
Select File > Save notebookto save the notebook.
Install dependencies from a terminal
To connect to a terminal, you can use your JupyterLab notebook or SSH . To install Python packages from a terminal:
-
In the Google Cloud console, go to the User-managed notebookspage.
-
Select the instance where you want to install dependencies.
-
Click Open JupyterLab.
-
To open a terminal window, you can use the menu or the Launcher.
Menu
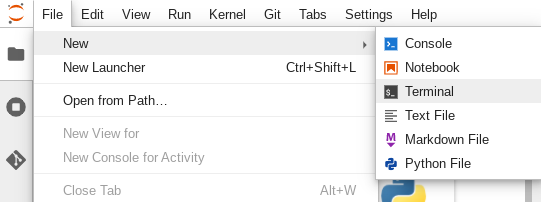
To open a terminal window from the menu, select File > New > Terminal.
The terminal window opens.
Launcher
-
To open a terminal window from the Launcher, select File > New > Launcher.
-
In Other, click the Terminaltile.
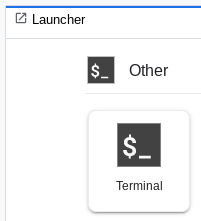
The terminal window opens.
-
-
In the terminal window, enter the command to install the software dependency for your user-managed notebooks instance.
To install the mxnet deep learning library for Python 3 notebooks, enter the following command:
pip3 install mxnet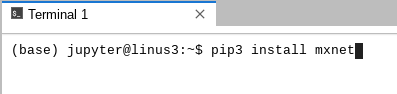
-
When installation is complete, restart the kernel to make sure the library is available for import. In every open notebook file in the same user-managed notebooks instance, select Kernel > Restart kernel.
-
Select File > Save notebookto save the notebook.