

1. Before you begin
Geospatial Creator, powered by ARCore and Google Maps Platform, lets you create augmented-reality (AR) experiences in the Unity editor. It uses Google's Photorealistic 3D Tiles API to preview what the experience looks like in the real world without the need to physically visit that location.
In this codelab, you get started with the Geospatial Creator. You get the quickstart Unity project set up and learn how to operate the editor. After that, you import an asset into the scene and position it into the digital twin of the world. You add an animation to the asset to bring it to life. Finally, you view the content on your device in AR.

Prerequisites
- Basic knowledge of AR
What you'll learn
- How to set up the ARCore Geospatial Creator project in Unity.
- How to navigate the
Sceneview. - How to place a 3D asset within the
Sceneview. - How to add a simple behavior to the asset.
- How to run the AR experience on your device.
What you'll need
- An installation of Unity Hub .
- A supported Android or iOS device configured for app development.
- For Android target devices, Android Studio installed and configured to build Android apps, and Google Play Services for AR installed on the Android development device.
- For iOS target devices, Xcode .
2. Set up your development environment
To retrieve Photorealistic 3D Tiles data from Google Cloud, you need to set up authorization.
Set up a Google Cloud project
- Create a project in Google Cloud console
.
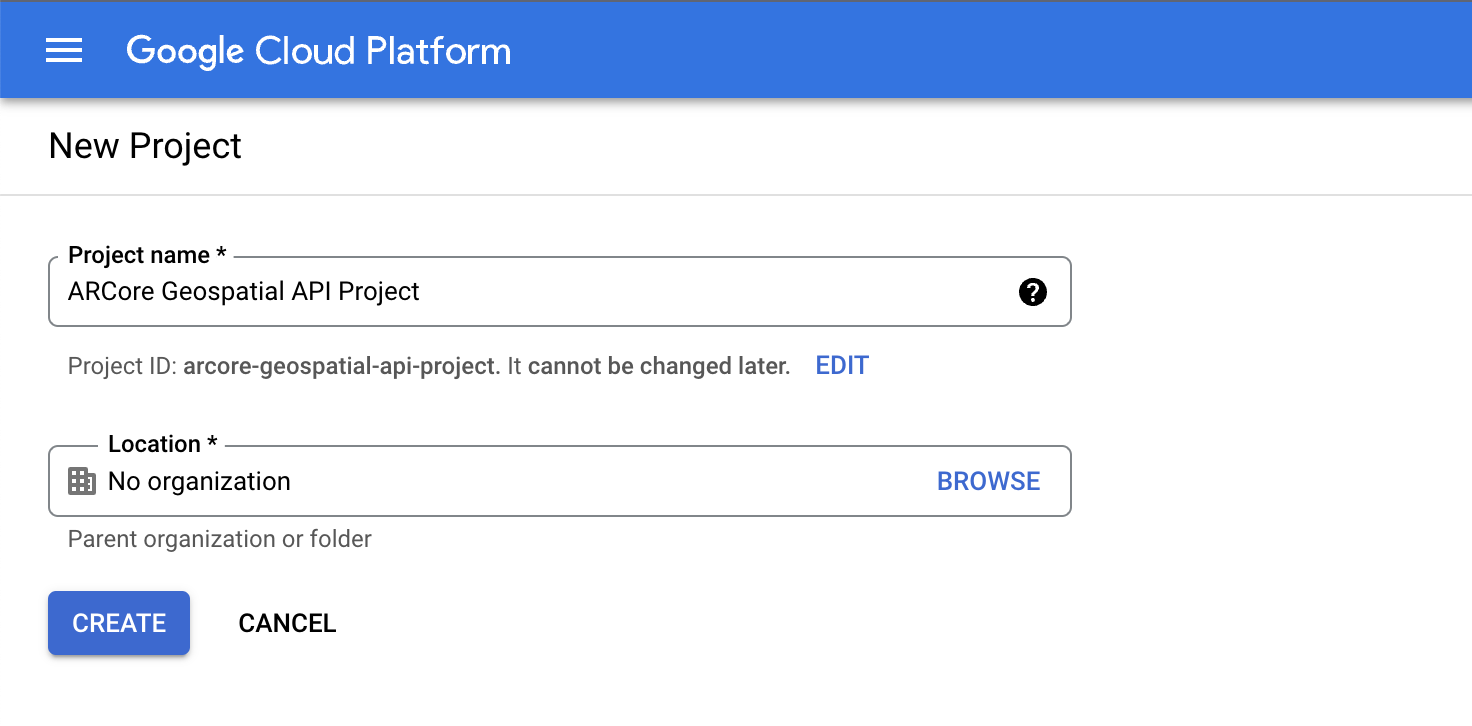
- In the Project nametext box, enter an appropriate name, such as
ARCore Geospatial API project, and then choose any location. - Click Create.
- In the Google Cloud console on the project-selector page, click Create Project.
Enable the 3D Tiles API
To enable the 3D Tiles API, click the following button, and then select Enable:
Enable the ARCore API
To enable the ARCore API, click the following button, and then select Enable:
Create an API key for your project
- In Google Cloud console under APIs & services, select Credentials.
- At the top of the page, click Create Credentials, and then select API Key.
- Note the key because you need it for the next steps.
Set up the software
To get started with Geospatial Editor, follow these steps:
- In Unity Hub, create a 3Dproject with Unity version 2021.3.17f1 or higher.
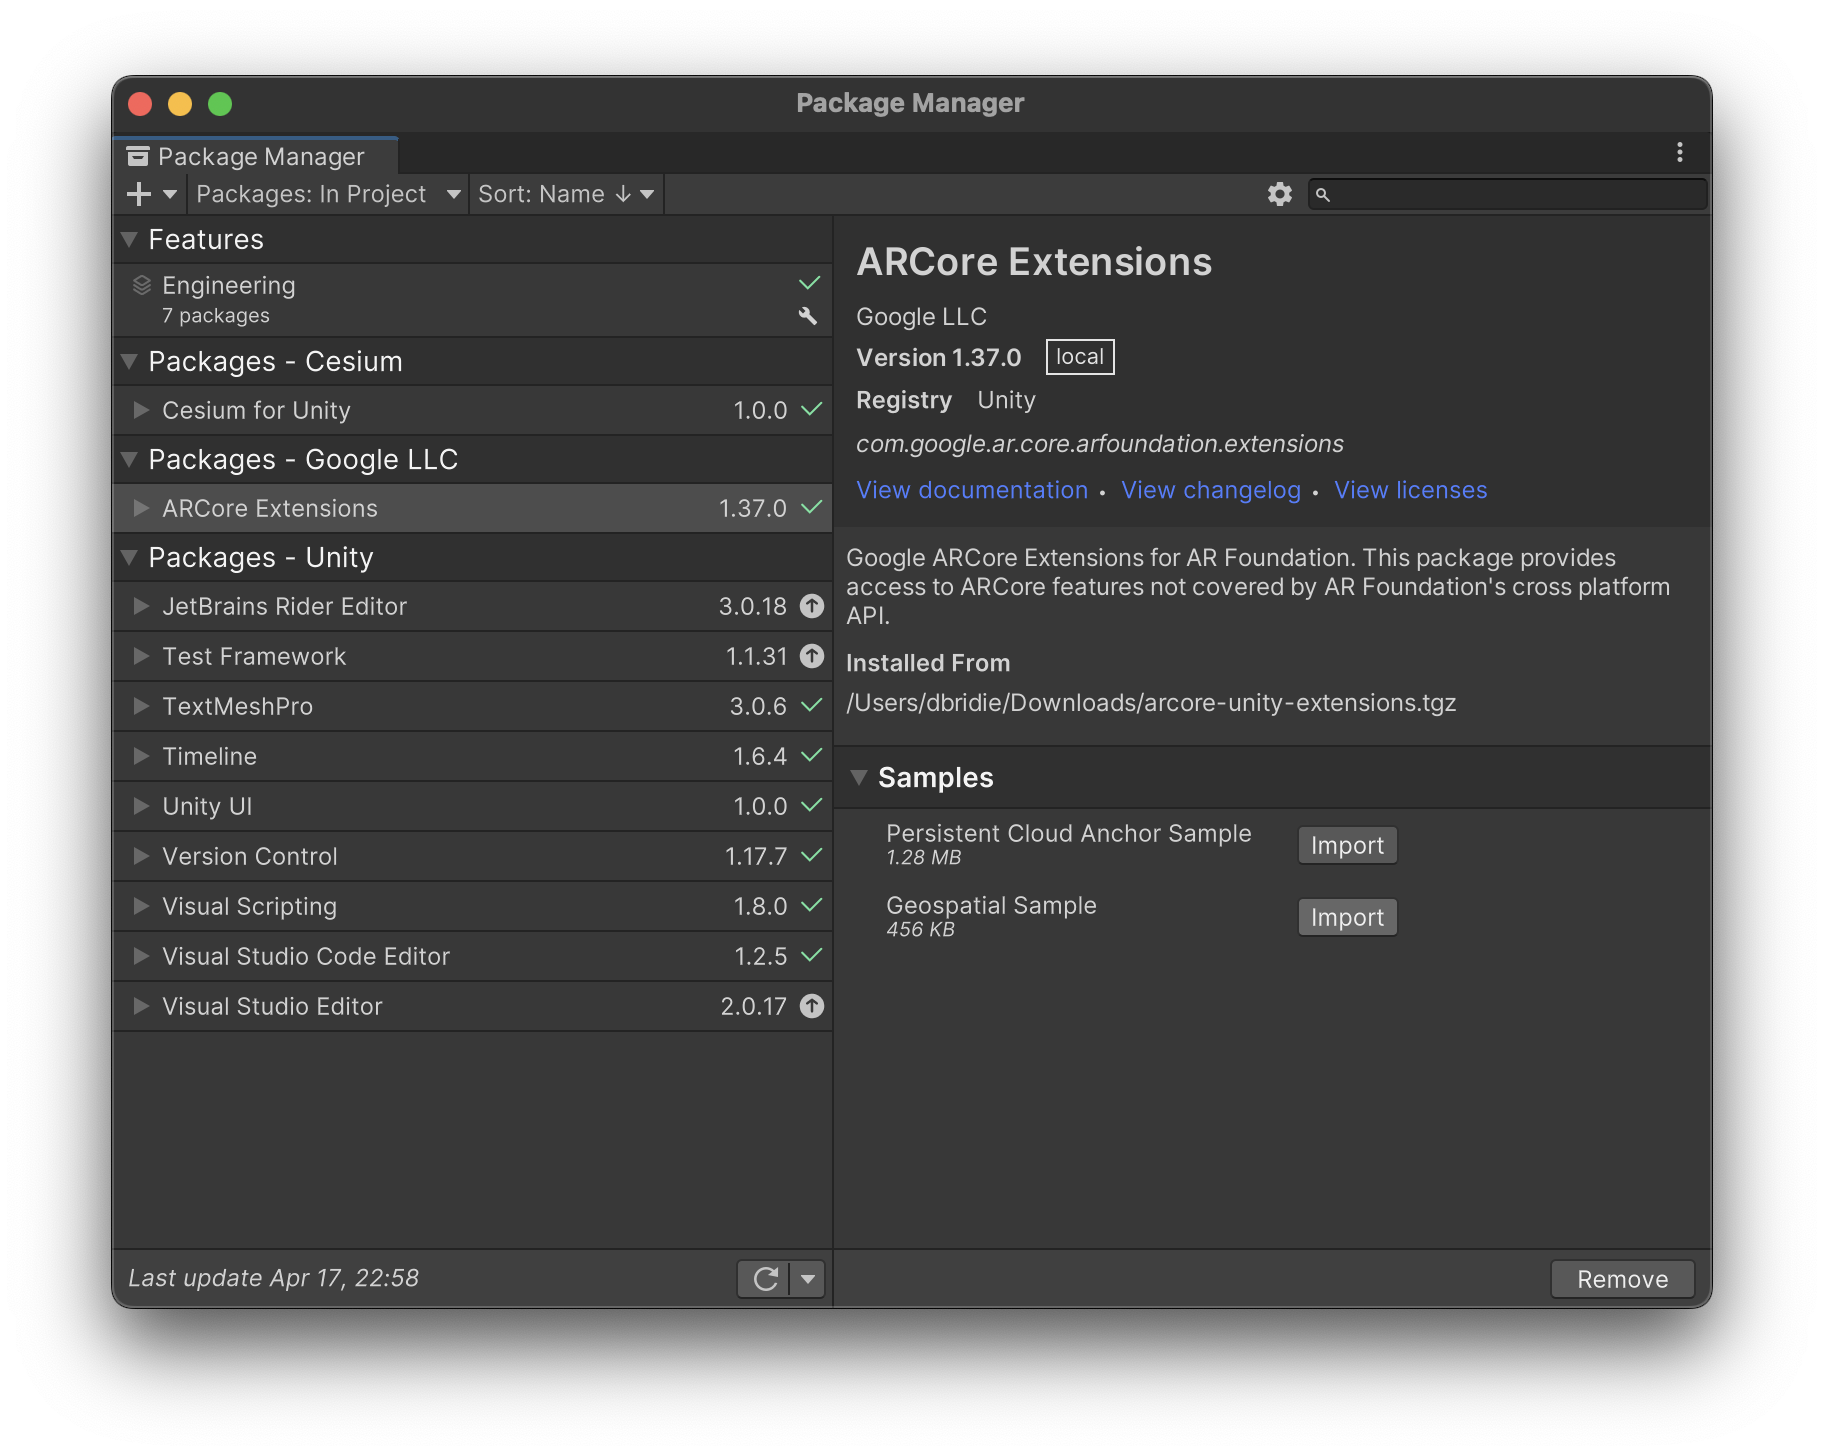
- Click Window > Package Manager, and then follow these steps to add the necessary packages:
- If it isn't installed already, follow these steps to install Shader Graph:
- Click In Project > Unity Registry.
- Install Shader Graph.
Set up the sample scene with ARCore objects
- In the Projectpanel, click Assets > Samples > ARCore Extensions > 1.37.0 > Geospatial Sample > Scenes > Geospatial.
- Click Layers, and then disable the UI layer.
- Click Edit > Project Settings > XR Plug-in Management > ARCore Extensions.
- Configure an API key authorization strategy for your target platform.
- Enable the Geospatialand Geospatial Creatoroptional features.
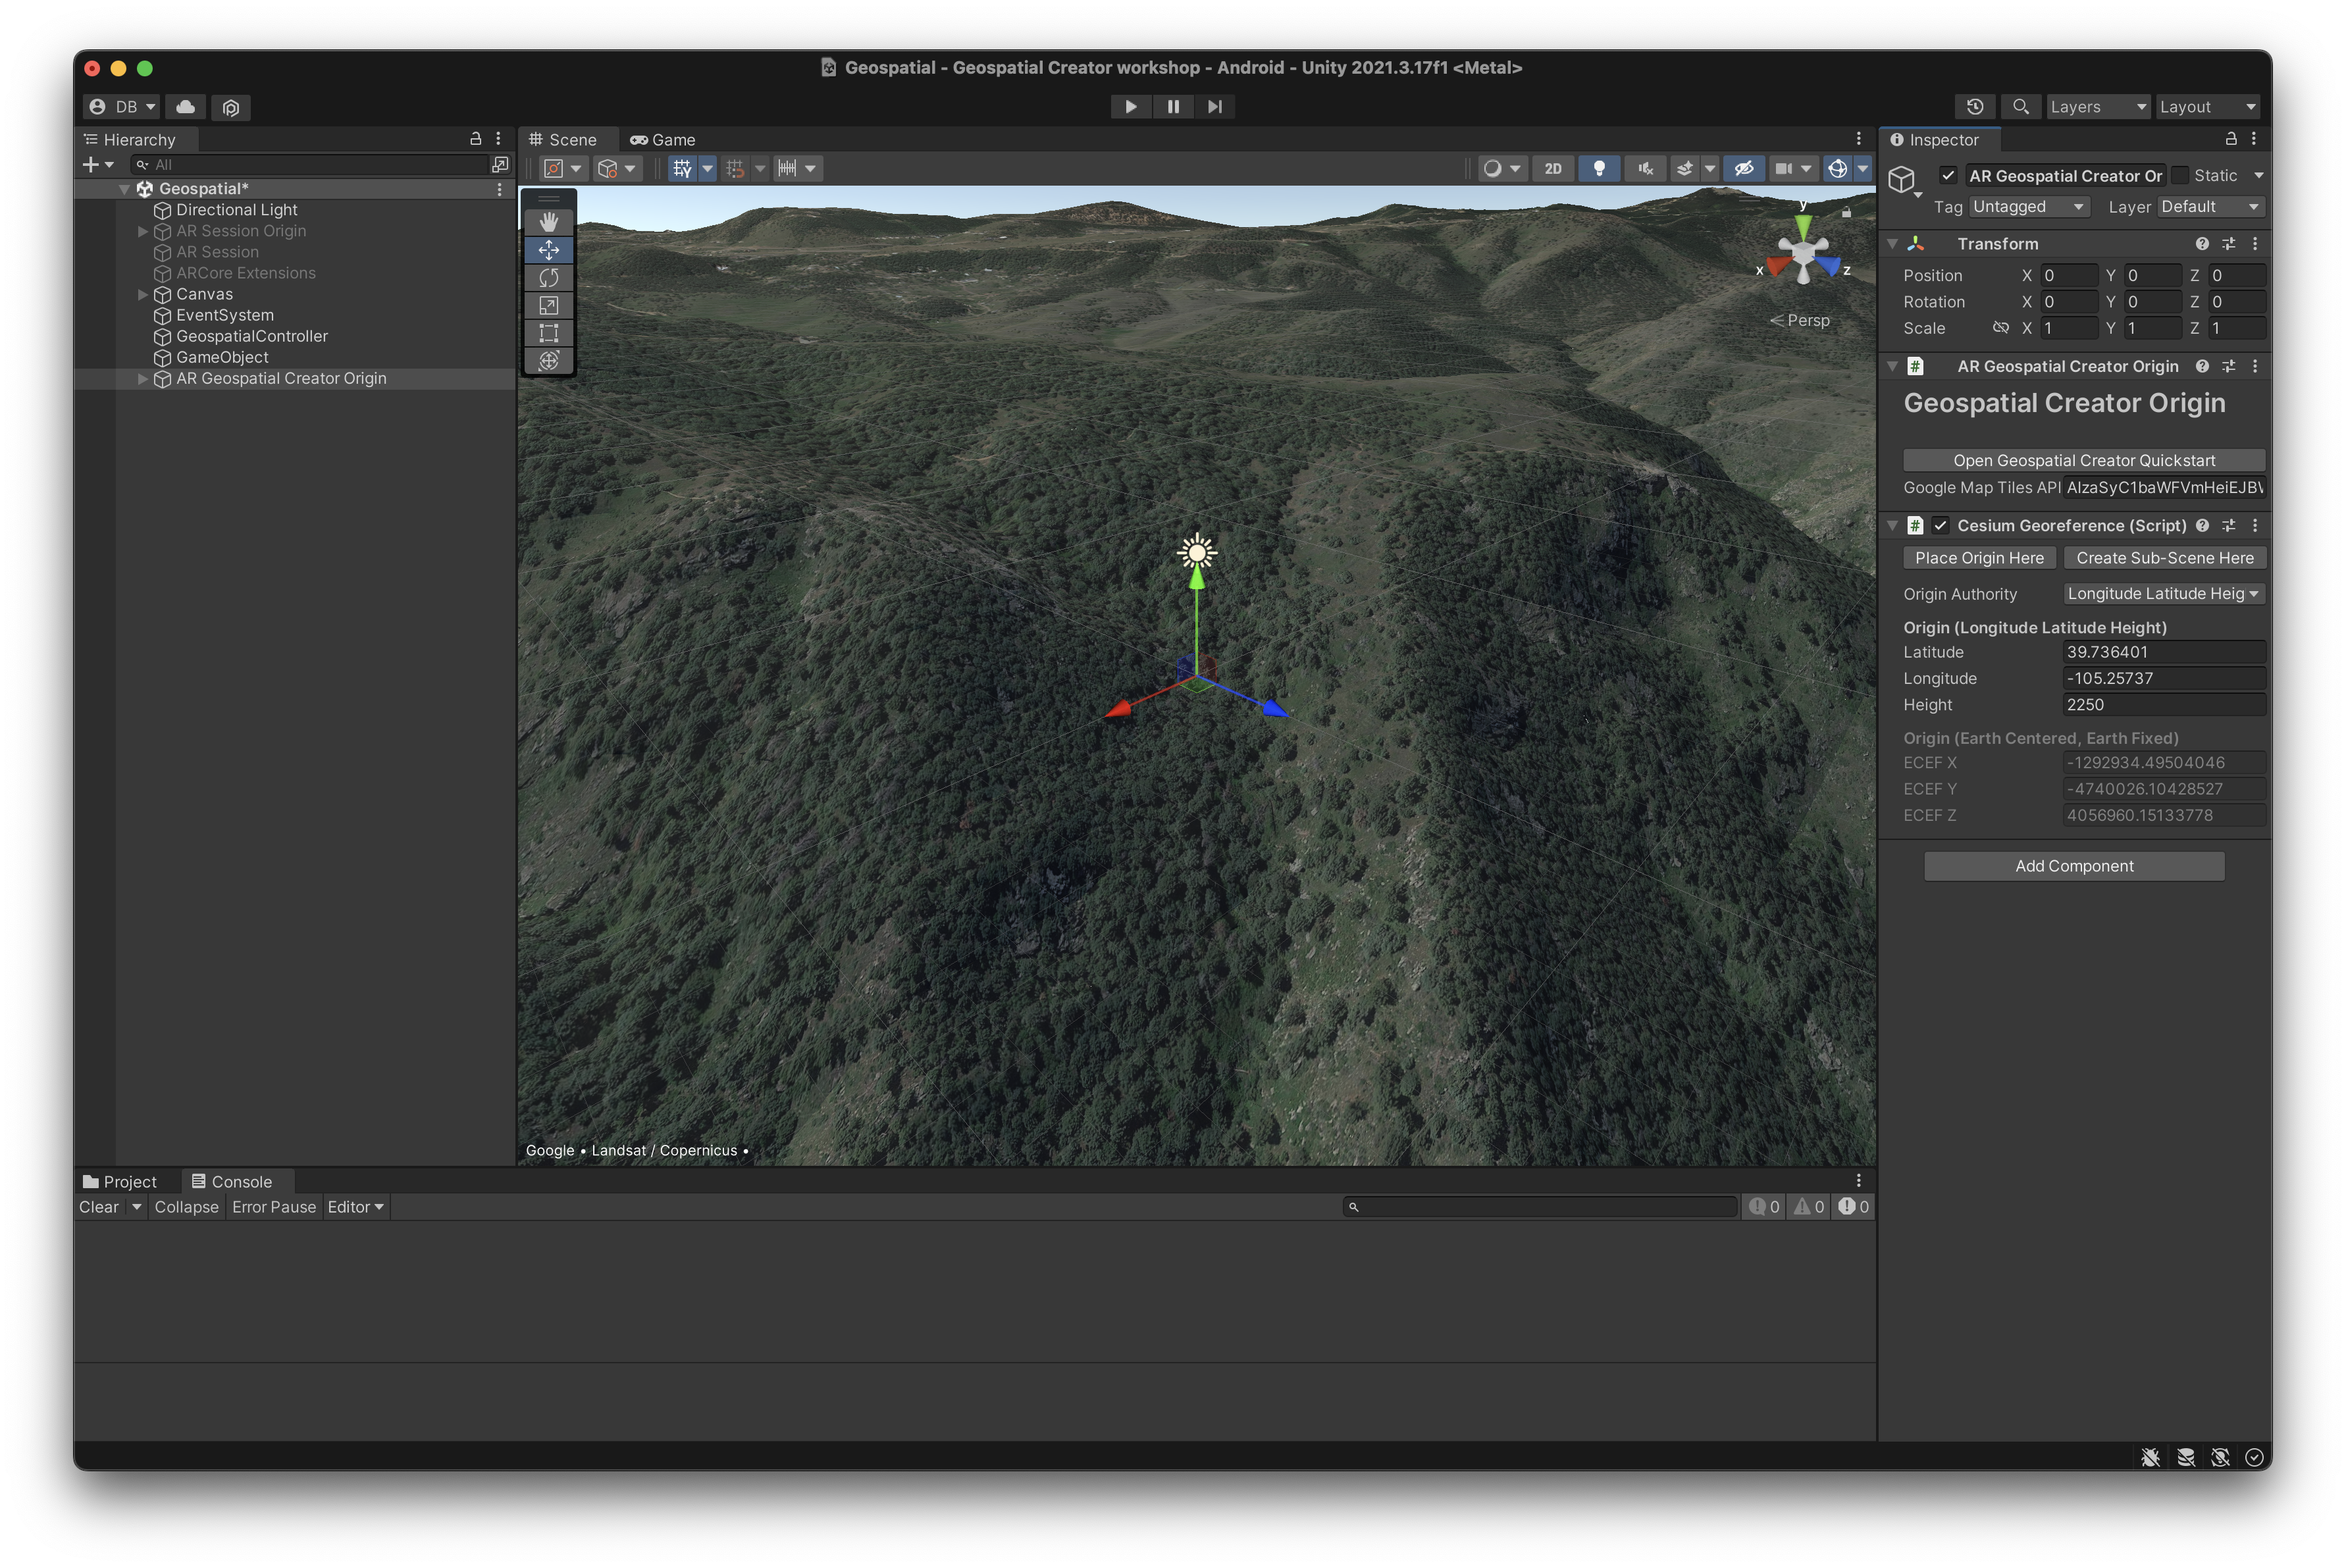
- In the Hierarchypanel, click + > XR > Geospatial Creator Origin.
- In the Hierarchypanel, select AR Geospatial Creator Origin.
- In the Inspectorpanel under Geospatial Creator Origin, click Add Cesium Georeference Component.
- In the Google Maps Tile API Keytext box, insert the API key, and then press
Enter(orreturnon macOS).
3. Navigate the Unity Scene view
In this step, you view the 3D representation of the area around you.
Change the location of the 3D view
To change the location of the 3D Photorealistic Tiles preview to an area near you, follow these steps:
- In the Hierarchypanel, select the AR Geospatial Creator Origingame object.
- In the Inspectorpanel, follow these steps to change the Latitudeand Longitudevalues to a location near you:
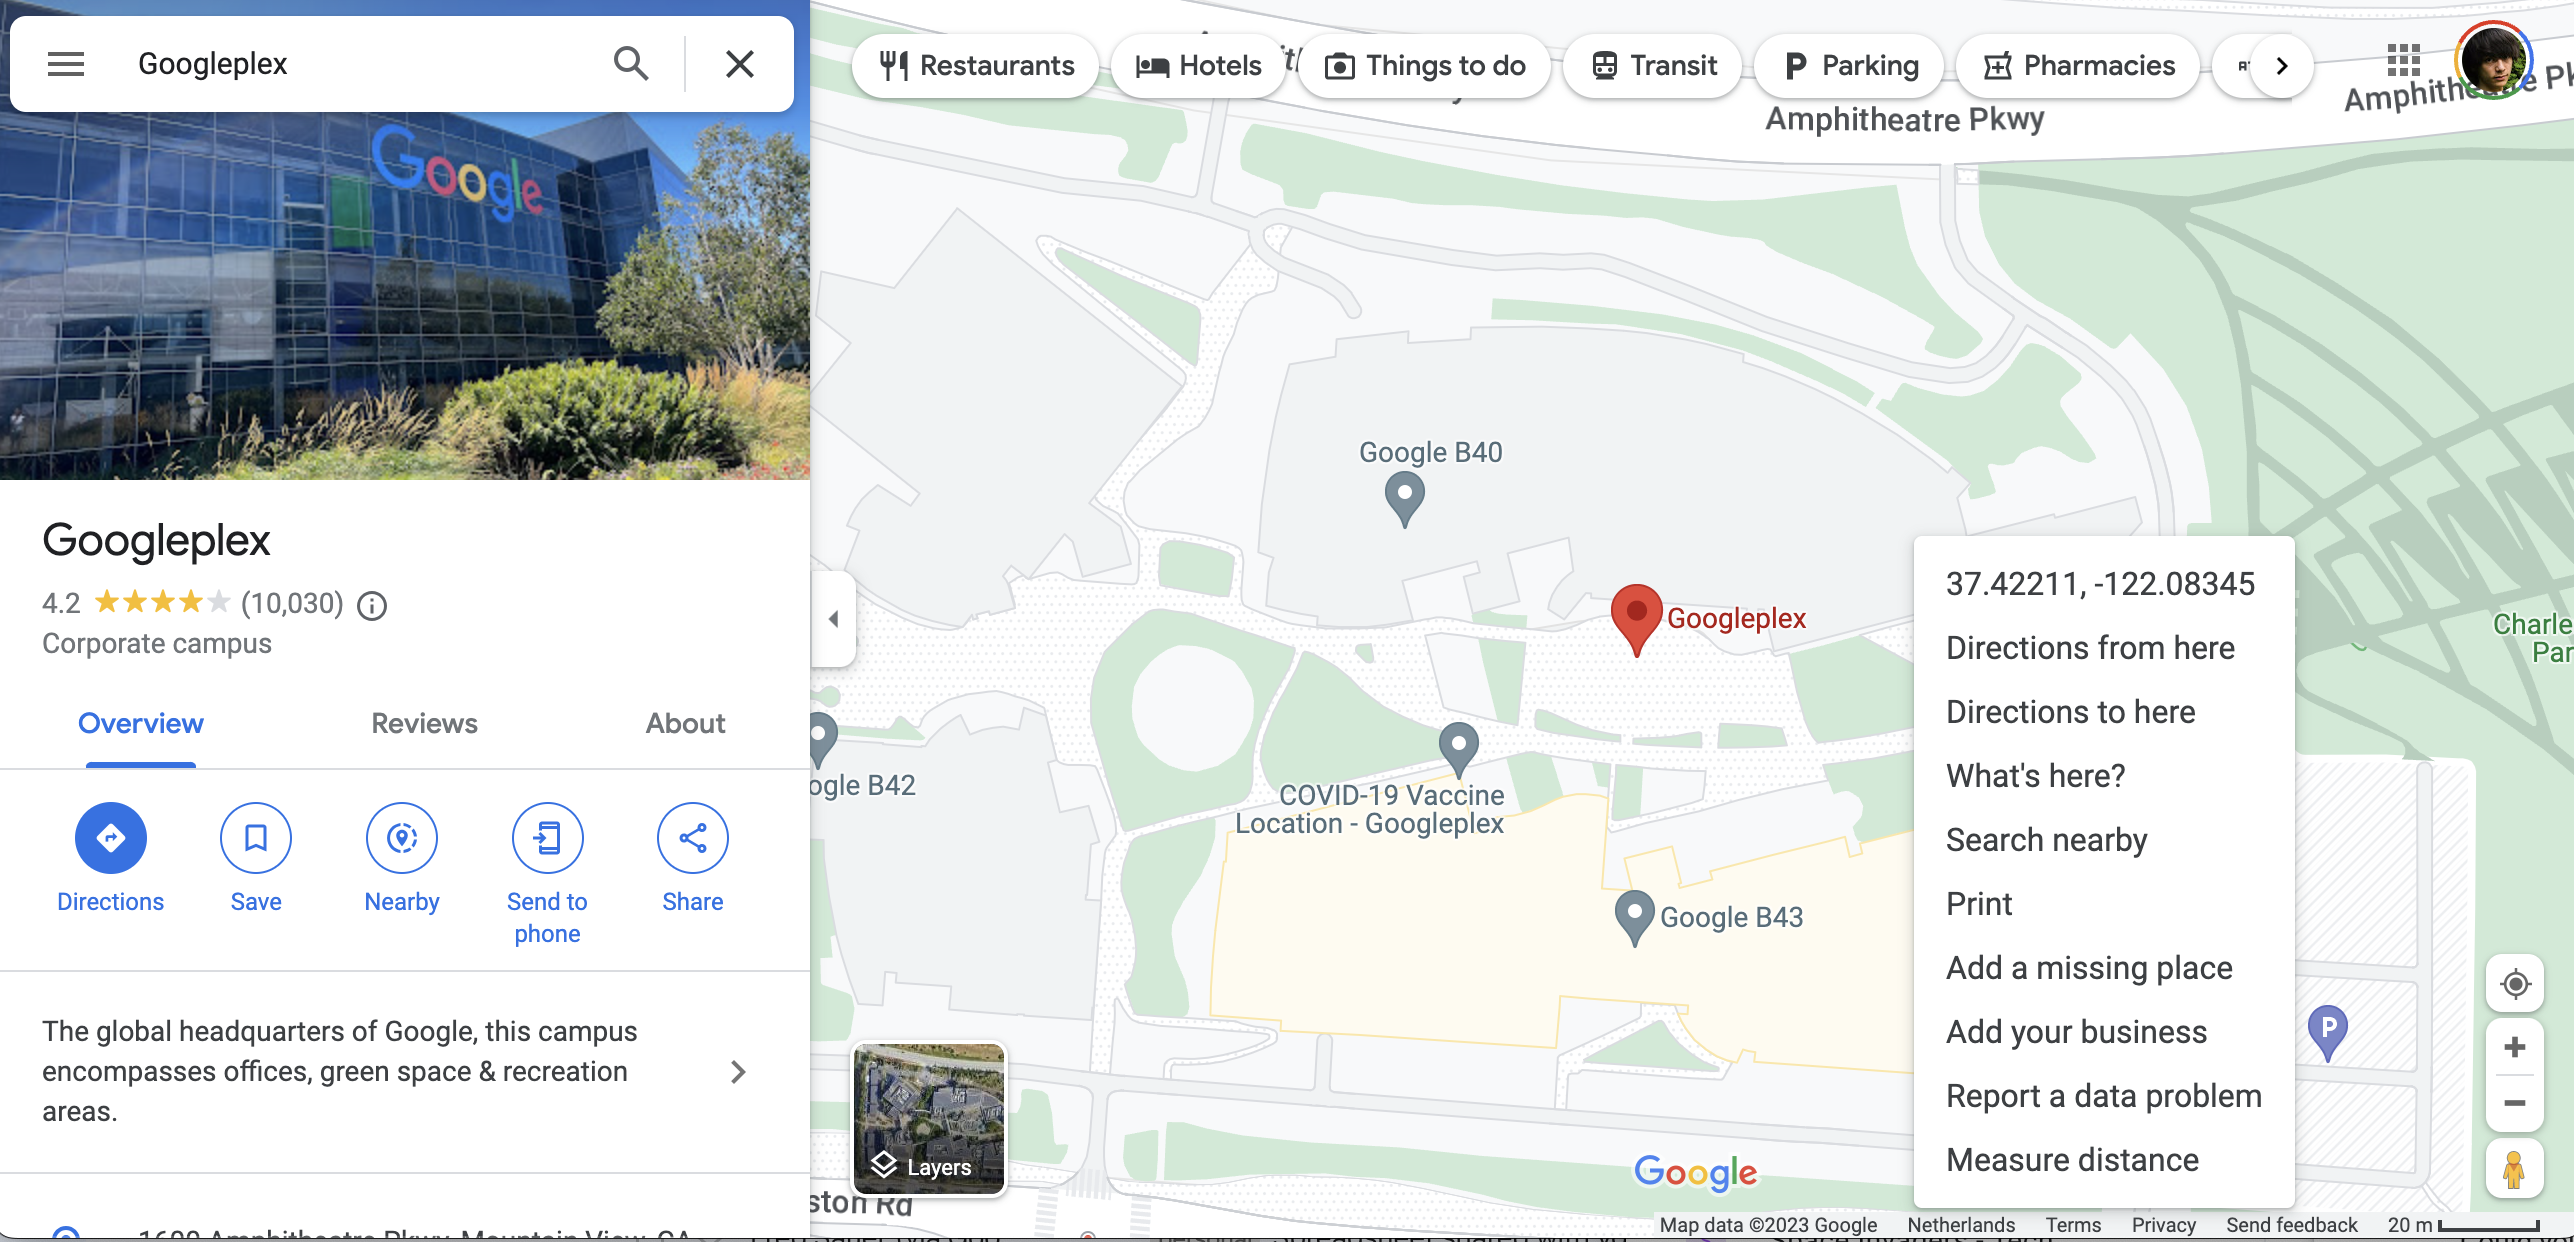
- Use Google Maps to find a location near you.
- Right-click the map, and then select the provided coordinates to copy them to your clipboard.
 After you modify the values, the 3D representation of the world in the Scenewindow changes:
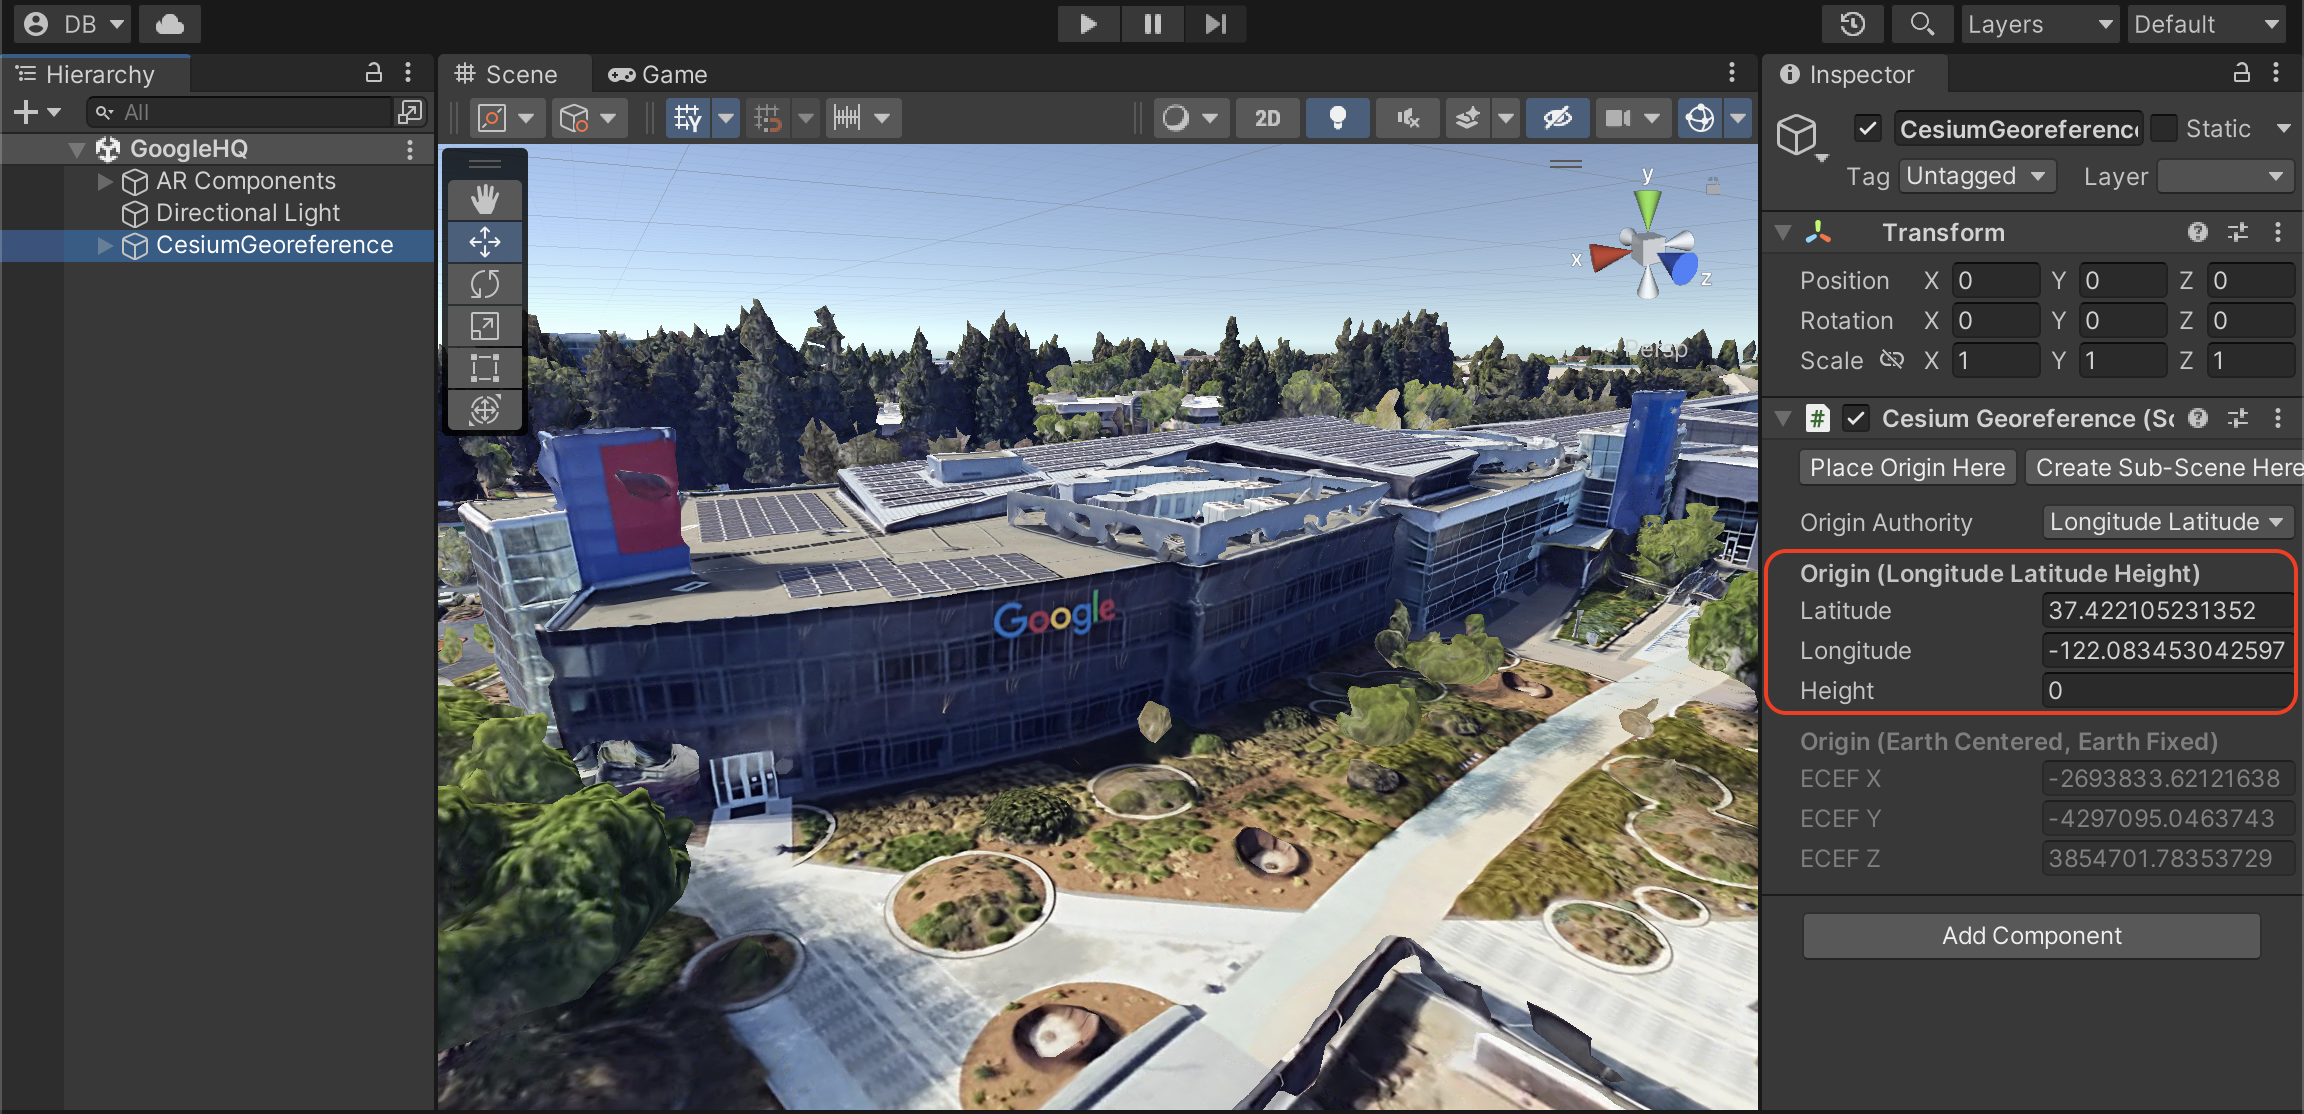
Control the viewport camera
To find a location near you where you want to put your Geospatially anchored content, follow these steps:
- Use the up and down arrow keys to move the camera forward and backward.
- Use the left and right arrow keys to pan the view.
- While moving, press and hold
Shiftto move faster. - If you get lost, in the Hierarchypanel, select the AR Geospatial Creator Originobject, and then press
Fto recenter the view on it.
4. Import and place a 3D asset
After you decide on a location near you, you need to import an asset that appears in your AR experience, and is anchored near the location that you selected.
Import a 3D asset
To help you with this codelab, we prepared a sample asset for you to use in your project.
To import the sample asset, follow these steps:
- .
- Extract the zip archive.
- Click Assets > Import new asset. The four assets are imported into your project.
- In the Projectpanel, drag the Tiger modelasset into the Scenepanel.
Resize and reposition the asset
To put your asset in the right place, follow these steps:
- In the Hierarchypanel, ensure that the Tiger modelasset is selected.
- In the
Sceneview, ensure that the Scale toolis enabled, and then drag the white cube to adjust the size of the asset to your preference.
- In the
Sceneview, ensure that the Move toolis enabled, and then select the red, blue, or green controls, and drag your mouse to reposition the asset. Each colored control locks a certain dimension and lets you move an object along that axis.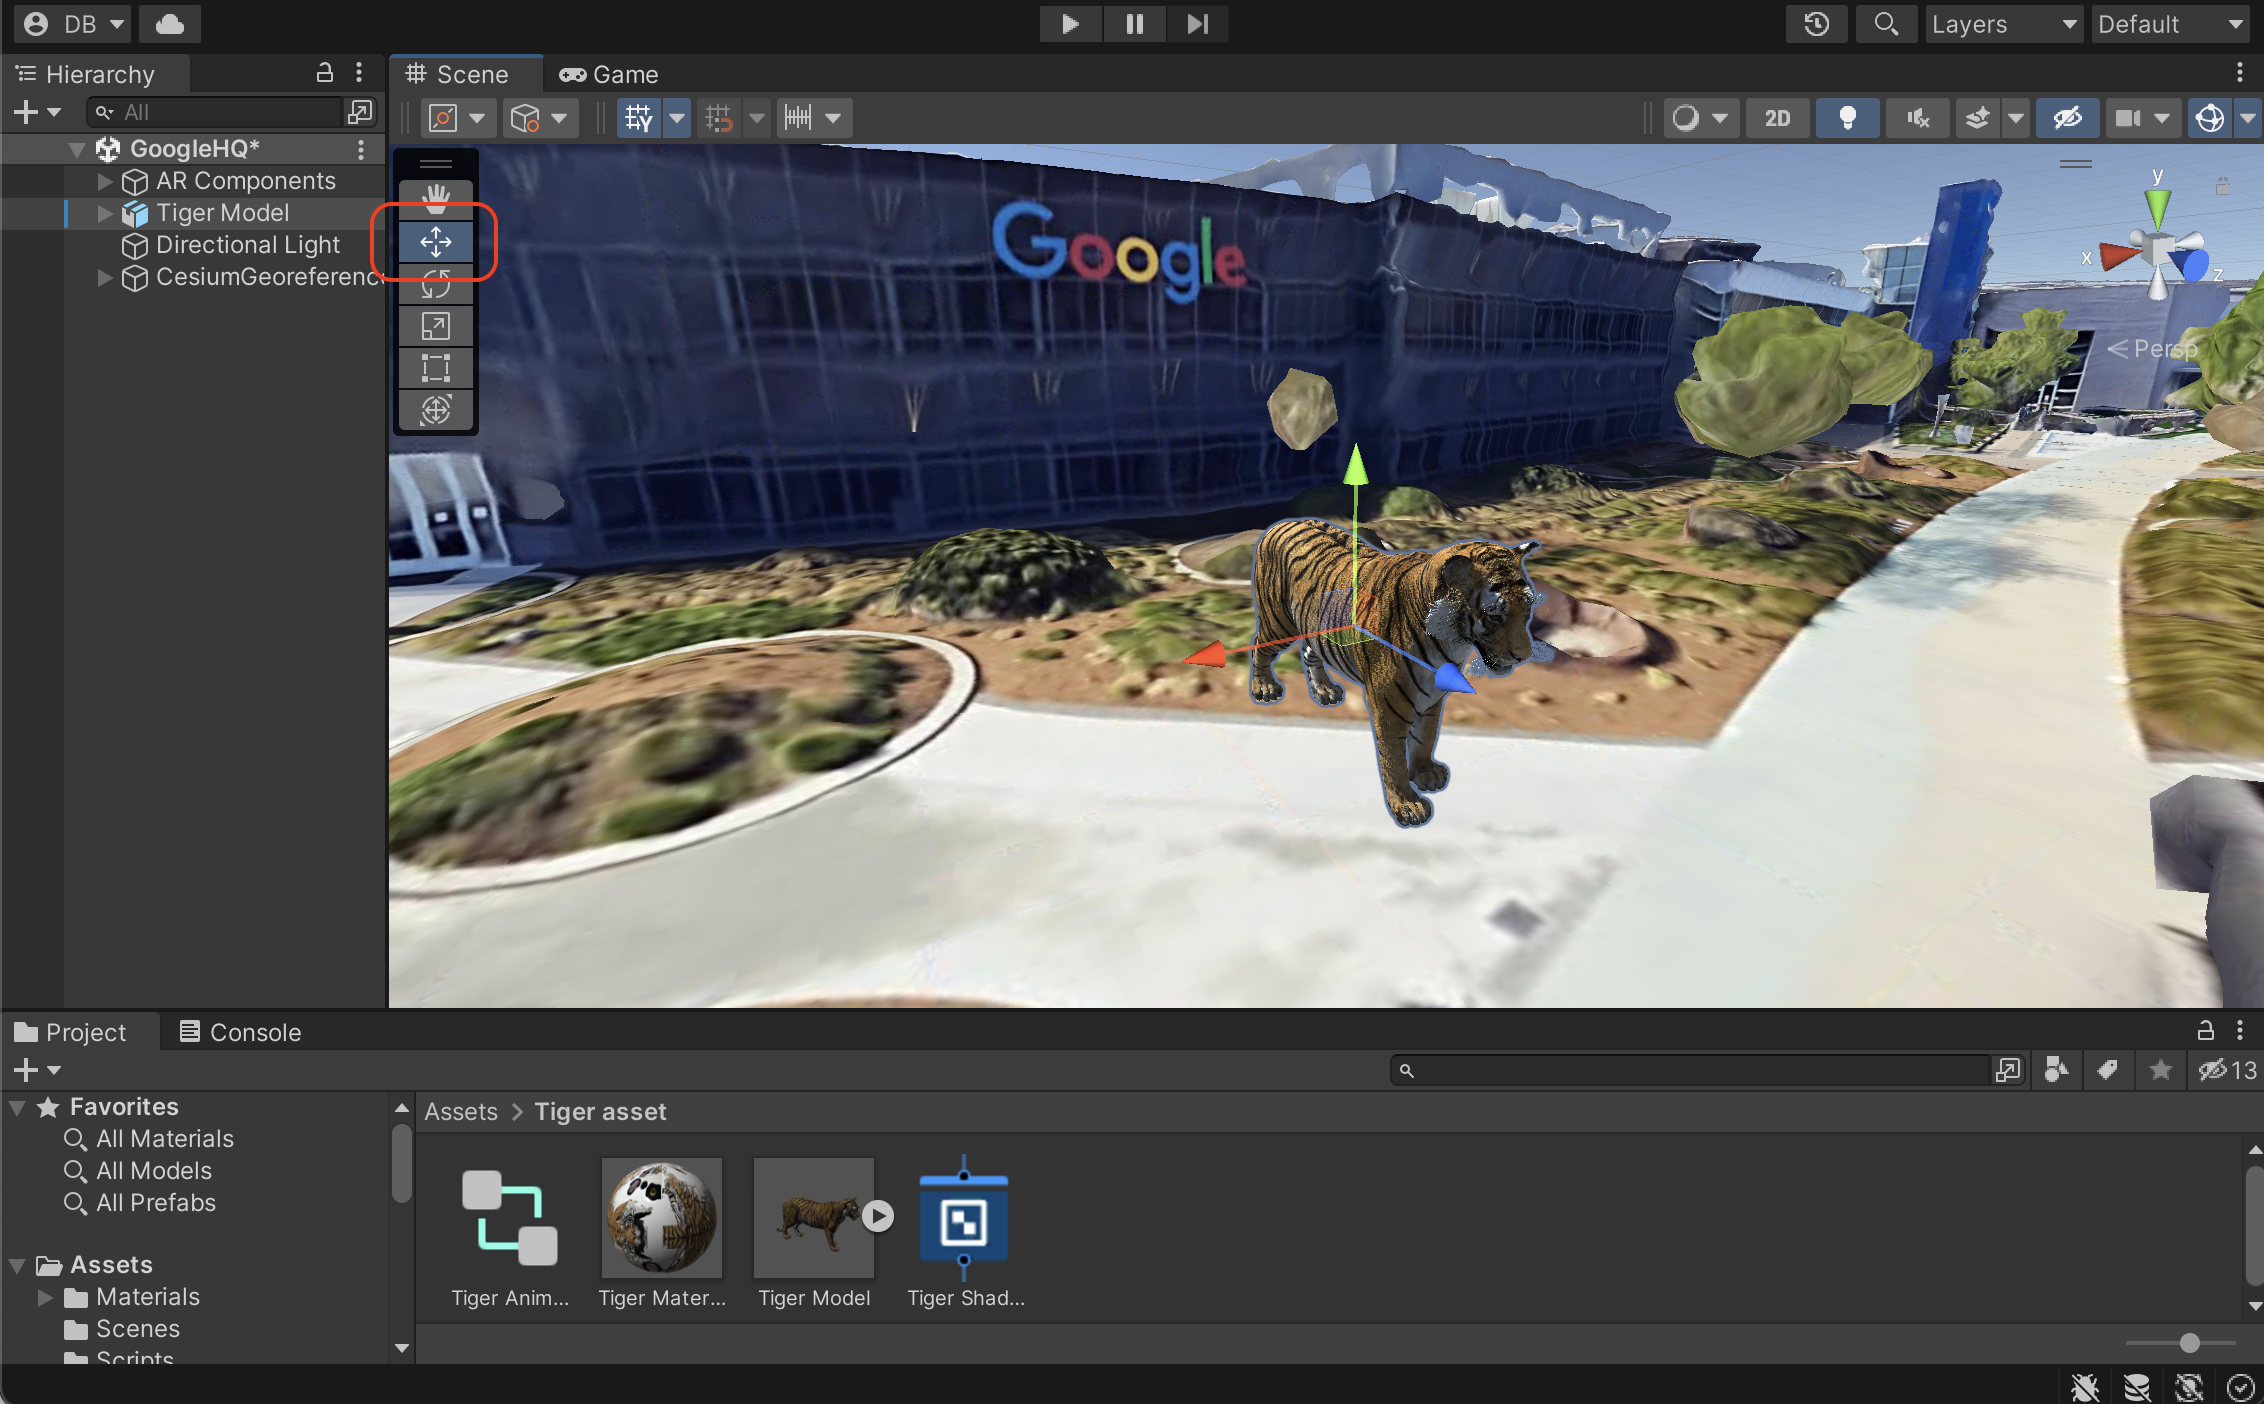
Geospatially anchor the asset
To anchor your content to the real world, follow these steps:
- In the Hierarchypanel, ensure that the Tiger modelasset is selected.
- In the Inspectorpanel, press Add Componentto add a AR Geospatial Creator Anchor.
5. Bring your asset to life
The Unity editor lets you program delightful AR experiences with the power of the Unity ecosystem.
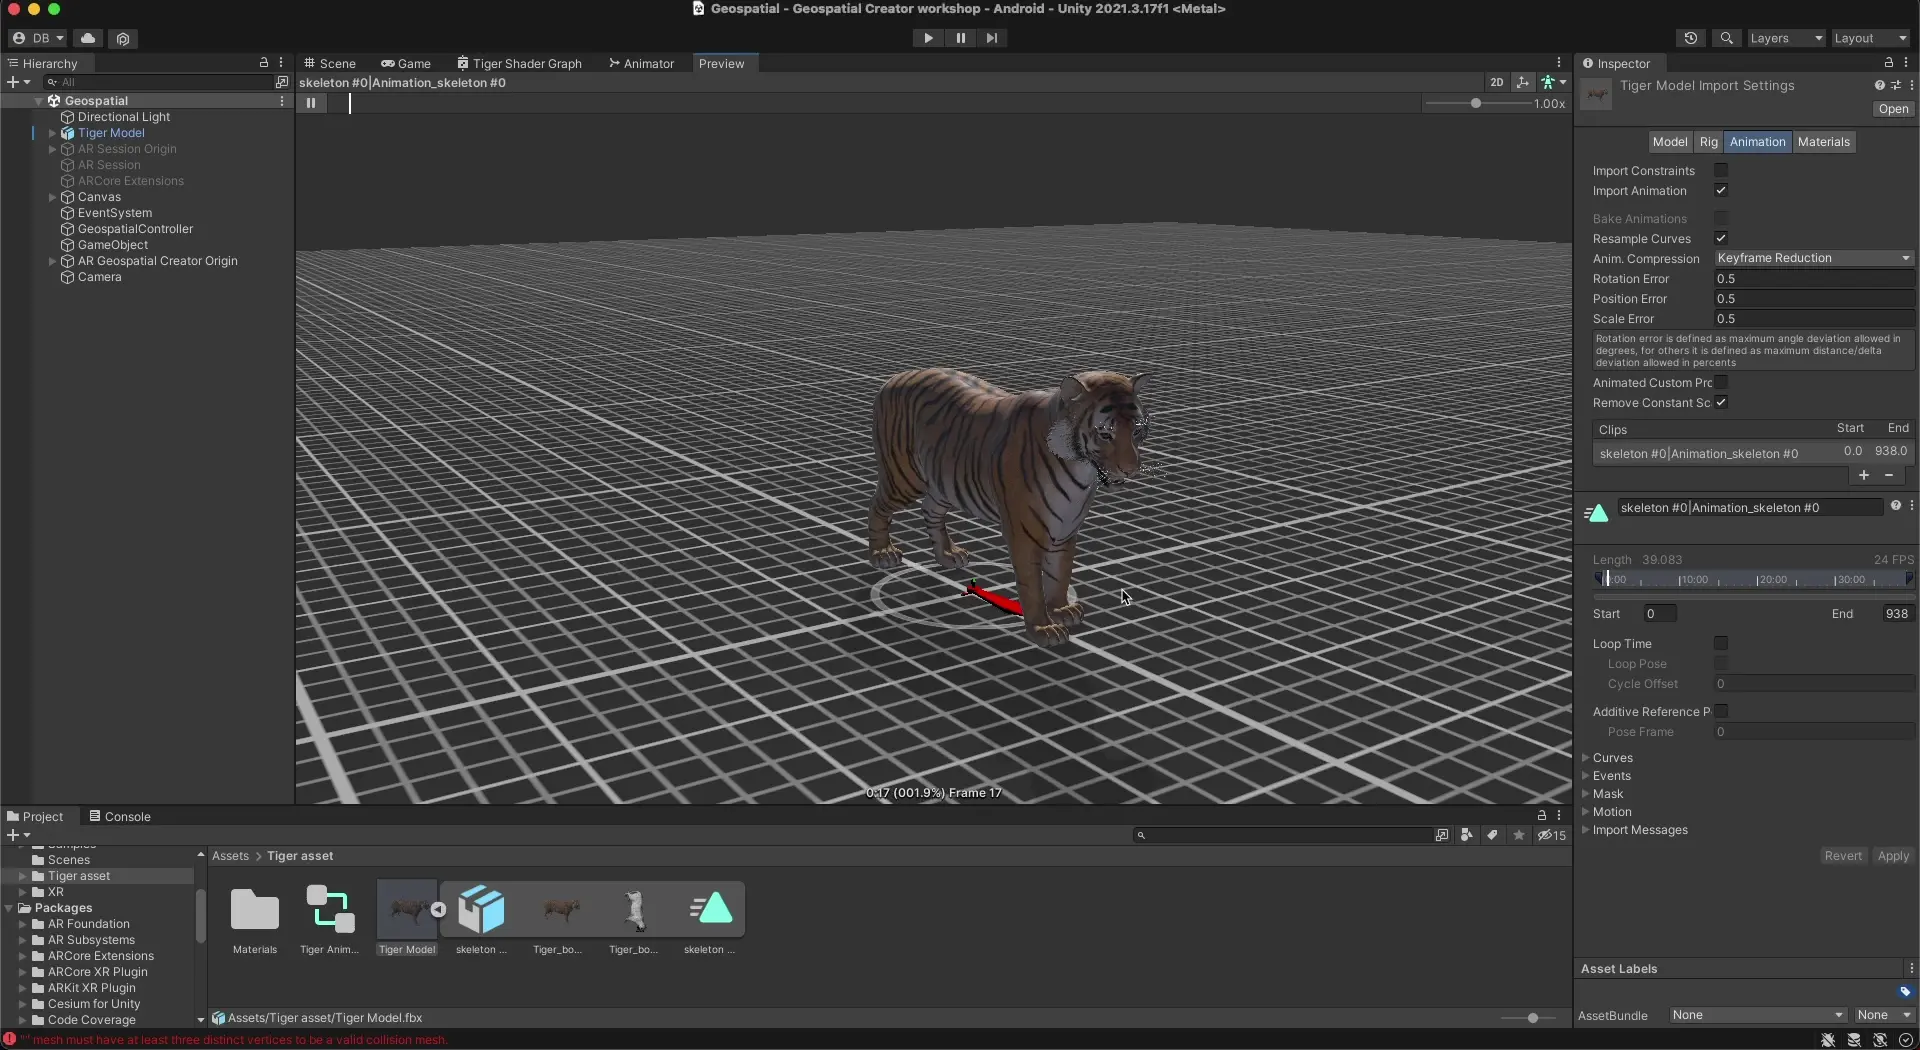
To use one of the animations provided in the starter project to animate the tiger on a loop, follow these steps:
- In the Hierarchypanel, select the Tiger model.
- Click Add Componentto add an animator.
- In the Animatorsection, select a Controller, and then use the provided Tiger idle animation controllerasset.
6. View the asset in AR
Finally, you view the asset in AR on your ARCore-supported Android or iOS device.
Run the app on your device
- Click File > Build Settings, and then select either the Androidor iOSbuild platforms.
- Click Switch platform.
- Follow additional steps to configure player settings .
- Ensure that your development device is connected and configured for development.
- Click Build and run.
7. Conclusion
Congratulations! You learned how to use Geospatial Creator in Unity to create a Geospatial AR experience.