

1. Overview
Whether you are embarking on a road trip, planning your daily commute, or navigating a bustling city, getting from point A to point B is more than just knowing where you want to go. A reliable route generation tool is essential.
With Google Maps Platform, you can add a dynamic map into your application, let users quickly input locations with autocomplete, and display routes on the map.
This Codelab guides developers through building a web application using Maps JavaScript API , Place Autocomplete , and the Routes API . You will learn how to integrate multiple Google Maps Platform APIs through a customizable tutorial.
What you'll build
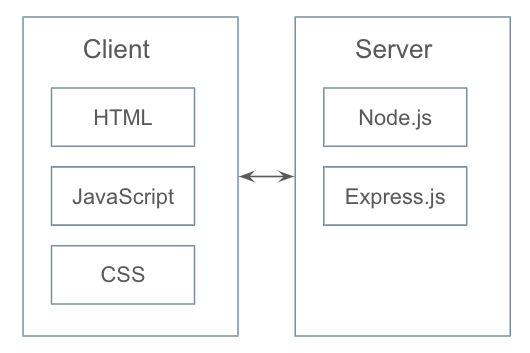
This Codelab will guide you in building a web application using HTML, CSS, JavaScript, and a Node.js backend.

What you'll learn
- How to enable Google Maps Platform APIs
- How to integrate a dynamic map into a web application
- How to integrate Places Autocomplete service
- How to request a route through the Routes API
- How to display the route on a dynamic map
- How to create a Map ID
- How to add Advanced Markers to a dynamic map
What you'll need
- A Google Cloud Project
- Maps JavaScript API
- Places API(Place Autocomplete)
- Routes API
- Basic knowledge of HTML and CSS
- Familiarity using Javascript/Node.js
Sample code
The full solution and the step-by-step code are available on GitHub . The code doesn't include required Node packages. Install the necessary dependencies before executing the code. Details of the required packages can be found in the package.json file(explained in Step 3).
2. Set up project and enable APIs
For the enablement step, you will need to enable the Maps JavaScript API , Place Autocomplete , and the Routes API .
Set up Google Maps Platform
If you do not already have a Google Cloud Platform account and a project with billing enabled, please see the Getting Started with Google Maps Platform guide to create a billing account and a project.
- In the Cloud Console
, click the project drop-down menu and select the project that you want to use for this codelab.

- Enable the Google Maps Platform APIs required for this codelab in the Maps API Library page . To do so, follow the steps in this video or this documentation .
- Generate an API key in the Credentials page of Cloud Console. You can follow the steps in this video or this documentation . All requests to Google Maps Platform require an API key.
3. Set up a Node.js project
In this lab, we will use Node.js to collect the origin and destination from the web and request the route through the Routes API.
Assuming you have already installed Node.js , create a directory that you will use to run this project:
  $

 mkdir

 ac_routes
 $

 cd

 ac_routes
Initialize a new Node.js package in the directory for your application:
  $

 npm

 init
This command prompts you for a number of things, such as the name and version of your application. For now, you can simply hit RETURN to accept the defaults for most of them. The default entry point is index.js, you can change it to your main file. In this lab, the main file is function/server.js(more details in step 6).
Additionally, feel free to install your preferred framework and modules. This lab uses web framework( Express ) and body parser( body-parser ). Find more details in the package.json file.
4. Create a dynamic map
Now that we have our Node.js backend in place, let's explore the necessary steps for the client side.
- Create an HTML page for the application
- Create a CSS file for styling
- Load Google Maps JavaScript API into the HTML page
- Paste in your API key into the script tag to authenticate your application
- Create a JavaScript file to handle the application functionality
Create an HTML page
- Create a new directory in your project folder(ac_routes in this case)
$ mkdir public $ cd public - In the public directory, create index.html
- Copy the following code into index.html
< !
 DOCTYPE

 html
>
< html
>
< head
>
< title>GMP

 Autocomplete

 +

 Routes
< /
 title
>
< meta

 charset
 =
 "utf-8"
>
< link

 rel
 =
 "stylesheet"

 type
 =
 "text/css"

 href
 =
 "style.css"
>
< /
 head
>
< body
>
< div

 class
 =
 "container"
>
< !--

 Start

 of

 the

 container

 for

 map

 --
>
< div

 class
 =
 "main"
>
< div

 id
 =
 "map"
>< /
 div
>
< /
 div
>
< !--

 End

 of

 the

 container

 for

 map

 --
>
< /div
>
< /body
>
< /html
>
Create a CSS file
- Create style.css in the public directory
- Copy the following code into style.css:
 html
 ,

 body

 {
 height
 :

 100
 %
 ;}

 body

 {

 background
 :

 #fff
 ;

 font
 -
 family
 :

 "Helvetica Neue"
 ,

 Helvetica
 ,

 Roboto
 ,

 Arial
 ,

 sans
 -
 serif
 ;

 font
 -
 style
 :

 normal
 ;

 font
 -
 weight
 :

 normal
 ;

 font
 -
 size
 :
 16
 px
 ;

 line
 -
 height
 :

 1.5
 ;

 margin
 :

 0
 ;

 padding
 :

 0
 ;

 }

 .
 container

 {
 display
 :
 flex
 ;

 width
 :
 90
 %
 ;

 padding
 :
 100
 px

 0
 ;

 margin
 :
 0

 auto
 ;}

 .
 main

 {
 width
 :
 70
 %
 ;

 height
 :
 800
 px
 ;}

 #map

 {
 height
 :
 100
 %
 ;

 border
 -
 radius
 :
 20
 px
 ;}
Load Maps JavaScript API
In this lab, we will use dynamic library import to load the Maps JavaScript API. Find more details here .
In the index.html, copy the following code before the closing body tag. Replace "YOUR_API_KEY" with your own API key.
 < script
> (
 g
 =
> {
 var

 h
 ,
 a
 ,
 k
 ,
 p
 =
 "The Google Maps JavaScript API"
 ,
 c
 =
 "google"
 ,
 l
 =
 "importLibrary"
 ,
 q
 =
 "__ib__"
 ,
 m
 =
 document
 ,
 b
 =
 window
 ;
 b
 =
 b
 [
 c
 ]
 ||
 (
 b
 [
 c
 ]
 =
 {});
 var

 d
 =
 b
 .
 maps
 ||
 (
 b
 .
 maps
 =
 {}),
 r
 =
 new

 Set
 ,
 e
 =
 new

 URLSearchParams
 ,
 u
 =
 ()
 =
> h
 ||
 (
 h
 =
 new

 Promise
 (
 async
 (
 f
 ,
 n
 )
 =
> {
 await

 (
 a
 =
 m
 .
 createElement
 (
 "script"
 ));
 e
 .
 set
 (
 "libraries"
 ,[...
 r
 ]
 +
 ""
 );
 for
 (
 k

 in

 g
 )
 e
 .
 set
 (
 k
 .
 replace
 (
 /[A-Z]/g
 ,
 t
 =
> "_"
 +
 t
 [
 0
 ].
 toLowerCase
 ()),
 g
 [
 k
 ]);
 e
 .
 set
 (
 "callback"
 ,
 c
 +
 ".maps."
 +
 q
 );
 a
 .
 src
 =
 `https://maps.
 ${
 c
 }
 apis.com/maps/api/js?`
 +
 e
 ;
 d
 [
 q
 ]
 =
 f
 ;
 a
 .
 onerror
 =
 ()
 =
> h
 =
 n
 (
 Error
 (
 p
 +
 " could not load."
 ));
 a
 .
 nonce
 =
 m
 .
 querySelector
 (
 "script[nonce]"
 )
 ?
 .
 nonce
 ||
 ""
 ;
 m
 .
 head
 .
 append
 (
 a
 )}));
 d
 [
 l
 ]
 ?
 console
 .
 warn
 (
 p
 +
 " only loads once. Ignoring:"
 ,
 g
 )
 :
 d
 [
 l
 ]
 =
 (
 f
 ,...
 n
 )
 =
> r
 .
 add
 (
 f
 )
&& u
 ().
 then
 (()
 =
> d
 [
 l
 ](
 f
 ,...
 n
 ))})({
 key
 :

 "YOUR_API_KEY"
 ,

 v
 :

 "weekly"
 });
< /script
>
Create a JavaScript file
- In the public directory, create app.js
- Copy the following code into app.js
 (
 function
 (){

 let

 map
 ;

 async

 function

 initMap
 ()

 {

 const

 {

 Map

 }

 =

 await

 google
 .
 maps
 .
 importLibrary
 (
 'maps'
 );

 map

 =

 new

 Map
 (
 document
 .
 getElementById
 (
 'map'
 ),

 {

 center
 :

 {

 lat
 :

 -
 34.397
 ,

 lng
 :

 150.644

 },

 zoom
 :

 8
 ,

 mapId
 :

 'DEMO_MAP_ID'

 });

 }

 initMap
 ();

 }());
The DEMO_MAP_ID
is an ID that can be used for code samples which require a Maps ID. This ID is not intended for use in production applications and cannot be used for features which require cloud styling. In this lab, we require a Map ID for Advanced Markers in the later stage. Find more details about creating a Map ID
for your application.
Link the JavaScript file
In the index.html, link the app.js before the closing body tag and after the script tag of loading Maps JavaScript API.
 < script

 type
 =
 "text/JavaScript"

 src
 =
 "app.js"
>< /
 script
>
Full sample code
The full code up to this point is available on GitHub:step1_createDynamicMap
5. Input addresses for origin and destination
- Add two text fields in the index.html for origin and destination input
- Import Autocomplete library
- Bind Autocomplete service to the origin and destination text fields
Add text fields
In the index.html, add following code as the first child of the div
with class of container
.
 < div

 class
 =
 "aside"
>
< div

 class
 =
 "inputgroup"
>
< label

 for
 =
 "origin"
> Start
< /
 label
>
< input

 type
 =
 "text"

 id
 =
 "origin"

 name
 =
 "origin"

 class
 =
 "input-location"

 placeholder
 =
 "Enter an address"
>
< /
 div
>
< div

 class
 =
 "inputgroup"
>
< label

 for
 =
 "origin"
> End
< /
 label
>
< input

 type
 =
 "text"

 id
 =
 "destination"

 name
 =
 "destination"

 class
 =
 "input-location"

 placeholder
 =
 "Enter an address"
>
< /
 div
>
< /div
>
Import and enable Autocomplete
google.maps.places.Autocomplete
class is a widget that provides Place predictions based on a user's text input. It attaches to an input element of type text, and listens for text entry in that field. The list of predictions is presented as a drop-down list, and is updated as text is entered.
In the app.js, add following code after the map initialization:
  let

 placeIds

 =

 [];
 async

 function

 initPlace
 ()

 {

 const

 {

 Autocomplete

 }

 =

 await

 google
 .
 maps
 .
 importLibrary
 (
 'places'
 );

 let

 autocomplete

 =

 [];

 let

 locationFields

 =

 Array
 .
 from
 (
 document
 .
 getElementsByClassName
 (
 'input-location'
 ));

 //Enable autocomplete for input fields

 locationFields
 .
 forEach
 ((
 elem
 ,
 i
 )

 =
>
 {

 autocomplete
 [
 i
 ]

 =

 new

 Autocomplete
 (
 elem
 );

 google
 .
 maps
 .
 event
 .
 addListener
 (
 autocomplete
 [
 i
 ],
 "place_changed"
 ,

 ()

 =
>
 {

 let

 place

 =

 autocomplete
 [
 i
 ].
 getPlace
 ();

 if
 (
 Object
 .
 keys
 (
 place
 ).
 length
 >
 0
 ){

 if

 (
 place
 .
 place_id
 ){

 placeIds
 [
 i
 ]

 =

 place
 .
 place_id
 ;

 //We use Place Id in this example

 }

 else

 {

 placeIds
 .
 splice
 (
 i
 ,
 1
 );

 //If no place is selected or no place is found, remove the previous value from the placeIds.

 window
 .
 alert
 (
 `No details available for input:
 ${
 place
 .
 name
 }
 `
 );

 return
 ;

 }

 }

 });

 });
 }
 initPlace
 ();
Once a user selects a place from the autocomplete prediction list, a place result detail can be retrieved by using getPlace()
method. The place result contains a lot of information about a Place
. In this lab, we are going to use place_id to identify the selected place. Place IDs uniquely identify a place in the Google Places database and on Google Maps. Find more details about Place IDs
.
Add relevant styles
In the style.css, add following code:
  .
 aside

 {
 width
 :
 30
 %
 ;

 padding
 :
 20
 px
 ;}
 .
 inputgroup

 {
 margin
 -
 bottom
 :
 30
 px
 ;}
 .
 aside

 label

 {
 display
 :
 block
 ;

 padding
 :
 0

 10
 px
 ;

 margin
 -
 bottom
 :
 10
 px
 ;

 font
 -
 size
 :
 18
 px
 ;

 color
 :
 #
 666565
 ;}
 .
 aside

 input
 [
 type
 =
 text
 ]

 {
 width
 :
 90
 %
 ;
 padding
 :
 10
 px
 ;

 font
 -
 size
 :
 16
 px
 ;

 border
 :
 1
 px

 solid

 #e6e8e6
 ;

 border
 -
 radius
 :
 10
 px
 ;}
Full sample code
The full code up to this point is available on GitHub:step2_inputAddress
6. Request the route
- Add a ‘Get a route' button to index.html to initiate the route request
- This button triggers sending origin and destination data to Node.js service
- The Node.js service sends a request to the Routes API
- The API response is returned to the client side for display
With the origin and destination set and a dynamic map ready it's time to get the route. The Routes API , the next generation, performance optimized version of the directions and distance matrix service comes to the rescue. In this lab, we will use Node.js to collect the origin and destination from the web and request the route through the Routes API.
In the index.html, add a ‘Get a route' button before the closing tag of div
with class of aside
:
 < div

 class
 =
 "inputgroup"
>
< button

 id
 =
 "btn-getroute"
> Get

 a

 route
< /
 button
>
< /div
>
In the style.css, add following line:
  .
 aside

 button

 {
 padding
 :
 20
 px

 30
 px
 ;

 font
 -
 size
 :
 16
 px
 ;

 border
 :
 none
 ;

 border
 -
 radius
 :
 50
 px
 ;

 background
 -
 color
 :
 #
 1
 a73e8
 ;

 color
 :
 #fff
 ;}
In the app.js, add the code below to send origin and destination data to the Node.js service:
  function

 requestRoute
 (){

 let

 btn

 =

 document
 .
 getElementById
 (
 'btn-getroute'
 );

 btn
 .
 addEventListener
 (
 'click'
 ,

 ()

 =
>
 {

 //In this example, we will extract the Place IDs from the Autocomplete response

 //and use the Place ID for origin and destination

 if
 (
 placeIds
 .
 length

 ==

 2
 ){

 let

 reqBody

 =

 {

 "origin"
 :

 {

 "placeId"
 :

 placeIds
 [
 0
 ]

 },

 "destination"
 :

 {

 "placeId"
 :

 placeIds
 [
 1
 ]

 }

 }

 fetch
 (
 "/request-route"
 ,

 {

 method
 :

 'POST'
 ,

 body
 :

 JSON
 .
 stringify
 (
 reqBody
 ),

 headers
 :

 {

 "Content-Type"
 :

 "application/json"

 }

 }).
 then
 ((
 response
 )

 =
>
 {

 return

 response
 .
 json
 ();

 }).
 then
 ((
 data
 )

 =
>
 {

 //Draw the route on the map

 //Details will be covered in next step

 renderRoutes
 (
 data
 );

 }).
 catch
 ((
 error
 )

 =
>
 {

 console
 .
 log
 (
 error
 );

 });

 }

 else

 {

 window
 .
 alert
 (
 'Location must be set'
 );

 return
 ;

 }

 });
 }
 requestRoute
 ();
renderRoutes()
is the function that we will use to draw the route on the map. We will cover the details in the next step.
Creating the server
In the project directory(ac_routes in this case), create a new folder named function. Inside this folder, create a file called server.js. The file acts as the entry point of your project which is configured at setting up your Node.js project, handling three key functions:
- Collecting data from the web client
- Sending requests to Routes API
- Returning the API response to the client side
Copy the following code into the server.js. Replace ‘YOUR_API_KEY' with your own API key. To enhance API key security, we strongly advise using a distince key for backend. See Security guidance .
  const

 express

 =

 require
 (
 'express'
 );
 const

 app

 =

 express
 ();
 const

 bodyParser

 =

 require
 (
 'body-parser'
 );
 const

 port

 =

 8080
 ;
 const

 urlencodedParser

 =

 bodyParser
 .
 urlencoded
 ({
 extended
 :
 true
 });

 function

 main
 ()

 {

 app
 .
 use
 (
 '/'
 ,

 express
 .
 static
 (
 'public'
 ));

 app
 .
 use
 (
 urlencodedParser
 );

 app
 .
 use
 (
 express
 .
 json
 ());

 app
 .
 post
 (
 '/request-route'
 ,

 (
 req
 ,
 res
 )

 =
>
 {


 fetch
 (
 "https://routes.googleapis.com/directions/v2:computeRoutes"
 ,

 {

 method
 :

 "POST"
 ,

 headers
 :

 {

 "Content-Type"
 :

 "application/json"
 ,

 "X-Goog-Api-Key"
 :

 "YOUR_API_KEY"
 ,

 "X-Goog-FieldMask"
 :

 "*"

 },

 body
 :

 JSON
 .
 stringify
 (
 req
 .
 body
 )

 }).
 then
 ((
 response
 )

 =
>
 {

 return

 response
 .
 json
 ();

 }).
 then
 ((
 data
 )

 =
>
 {

 if
 (
 'error'

 in

 data
 ){

 console
 .
 log
 (
 data
 .
 error
 );

 }

 else

 if
 (
 !
 data
 .
 hasOwnProperty
 (
 "routes"
 )){

 console
 .
 log
 (
 "No route round"
 );

 }

 else

 {

 res
 .
 end
 (
 JSON
 .
 stringify
 (
 data
 ));

 }

 }).
 catch
 ((
 error
 )

 =
>
 {

 console
 .
 log
 (
 error
 )

 });

 });

 app
 .
 listen
 (
 port
 ,

 ()

 =
>
 {

 console
 .
 log
 (
 'App listening on port ${port}: '

 +

 port
 );

 console
 .
 log
 (
 'Press Ctrl+C to quit.'
 );

 });
 }
 main
 ();
Find more Routes API details about getting a route with the Routes API .
Run the code
Run the code below in command line:
  $

 node

 function
 /server.js
Open the browser and visit http://127.0.0.1:8080/index.html. You should see the application page. Up to this stage, the API response is returned to the web client. Let's see how to display the route on the map in the next step.
Full sample code
The full code up to this point is available on GitHub:step3_requestRoute
7. Display the route on the map
In the previous step, we refer to renderRoutes()
when we successfully receive the response from the Node.js service. Now let's add in the actual code to display the route on the map.
In the app.js, add code below:
  let

 paths

 =

 [];
 async

 function

 renderRoutes
 (
 data
 )

 {

 const

 {

 encoding

 }

 =

 await

 google
 .
 maps
 .
 importLibrary
 (
 "geometry"
 );

 let

 routes

 =

 data
 .
 routes
 ;

 let

 decodedPaths

 =

 [];

 ///Display routes and markers

 routes
 .
 forEach
 ((
 route
 ,
 i
 )

 =
>
 {

 if
 (
 route
 .
 hasOwnProperty
 (
 'polyline'
 )){

 //Decode the encoded polyline

 decodedPaths
 .
 push
 (
 encoding
 .
 decodePath
 (
 route
 .
 polyline
 .
 encodedPolyline
 ));

 //Draw polyline on the map

 for
 (
 let

 i

 =

 decodedPaths
 .
 length

 -

 1
 ;

 i

> =

 0
 ;

 i
 --
 ){

 let

 polyline

 =

 new

 google
 .
 maps
 .
 Polyline
 ({

 map
 :

 map
 ,

 path
 :

 decodedPaths
 [
 i
 ],

 strokeColor
 :

 "#4285f4"
 ,

 strokeOpacity
 :

 1
 ,

 strokeWeight
 :

 5

 });

 paths
 .
 push
 (
 polyline
 );

 }


 //Add markers for origin/destination

 addMarker
 (
 route
 .
 legs
 [
 0
 ].
 startLocation
 .
 latLng
 ,
 "A"
 );

 addMarker
 (
 route
 .
 legs
 [
 0
 ].
 endLocation
 .
 latLng
 ,
 "B"
 );

 //Set the viewport

 setViewport
 (
 route
 .
 viewport
 );

 }

 else

 {

 console
 .
 log
 (
 "Route cannot be found"
 );

 }

 });
 }
Routes API returns polyline either in the format of encodedPolyline(default) or geoJsonLinestring. In this lab, we use the encodedPolyline format and decode it by using Maps JavaScript geometry library .
We will use the addMarker()
to add advanced markers for origin and destination. In the app.js, add following code:
  let

 markers

 =

 [];
 async

 function

 addMarker
 (
 pos
 ,
 label
 ){

 const

 {

 AdvancedMarkerElement

 }

 =

 await

 google
 .
 maps
 .
 importLibrary
 (
 "marker"
 );

 const

 {

 PinElement

 }

 =

 await

 google
 .
 maps
 .
 importLibrary
 (
 "marker"
 );

 const

 {

 LatLng

 }

 =

 await

 google
 .
 maps
 .
 importLibrary
 (
 "core"
 );

 let

 pinGlyph

 =

 new

 PinElement
 ({

 glyphColor
 :

 "#fff"
 ,

 glyph
 :

 label

 });

 let

 marker

 =

 new

 AdvancedMarkerElement
 ({

 position
 :

 new

 LatLng
 ({
 lat
 :
 pos
 .
 latitude
 ,
 lng
 :
 pos
 .
 longitude
 }),

 gmpDraggable
 :

 false
 ,

 content
 :

 pinGlyph
 .
 element
 ,

 map
 :

 map

 });

 markers
 .
 push
 (
 marker
 );
 }
Here we create two advanced markers - A for origin and B for destination. Find more details about advanced markers .
Next, we will center the map viewport on the retrieved route, using the convenient viewport information provided by the Routes API. In the app.js, add following code:
  async

 function

 setViewport
 (
 viewPort
 )

 {

 const

 {

 LatLng

 }

 =

 await

 google
 .
 maps
 .
 importLibrary
 (
 "core"
 );

 const

 {

 LatLngBounds

 }

 =

 await

 google
 .
 maps
 .
 importLibrary
 (
 "core"
 );

 let

 sw

 =

 new

 LatLng
 ({
 lat
 :
 viewPort
 .
 low
 .
 latitude
 ,
 lng
 :
 viewPort
 .
 low
 .
 longitude
 });

 let

 ne

 =

 new

 LatLng
 ({
 lat
 :
 viewPort
 .
 high
 .
 latitude
 ,
 lng
 :
 viewPort
 .
 high
 .
 longitude
 });

 map
 .
 fitBounds
 (
 new

 LatLngBounds
 (
 sw
 ,
 ne
 ));
 }
Full sample code The full code up to this point is available on GitHub:step4_displayRoute
8. Remove elements from the map
Here we want to take a step further. Let's clear the map before drawing new markers and routes to avoid clutter.
In the app.js, let's add one more function:
  function

 clearUIElem
 (
 obj
 ,
 type
 )

 {

 if
 (
 obj
 .
 length
 >
 0
 ){

 if
 (
 type

 ==

 'advMarker'
 ){

 obj
 .
 forEach
 (
 function
 (
 item
 ){

 item
 .
 map

 =

 null
 ;

 });

 }

 else

 {

 obj
 .
 forEach
 (
 function
 (
 item
 ){

 item
 .
 setMap
 (
 null
 );

 });

 }

 }
 }
Add the following line at the beginning of renderRoutes()
:
  clearUIElem
 (
 paths
 ,
 'polyline'
 );
Add the following line at the beginning of addMarker()
:
  clearUIElem
 (
 markers
 ,
 'advMarker'
 );
Full sample code
The full code up to this point is available on GitHub:step5_removeElements
9. Congratulations
You've successfully built the thing.
What you learned
- Enable Google Maps Platform APIs
- Load Google Maps JavaScript API into the HTML page
- Import Places library, Maps JavaScript API
- Bind Place Autocomplete service to the text fields
- Request a route through the Routes API
- Display the route on a dynamic map
- Create a Map ID
- Create Advanced Markers
Learn more
- Explore more Google Maps Routes API
- Explore more Google Maps JavaScript API
- Explore more Google Maps Places API
What other codelabs would you like to see?
Is the codelab you want not listed above? Request it with a new issue here .