

While exploring, you can save your work by saving a Look. This saves all your choices for filters, visualizations, fields, sorting, and so on.
Both Looks and dashboards can be organized in folders (for example, you can have folders named Marketing, Q4 Sales Review, and so on) and later edited as needed.
This page explains how to save, edit, and make other changes to Looks and Look settings that affect what other users can see. For more information about the components on the Look page and interacting with a Look's data, visit the Viewing Looks in Looker documentation page.
Saving Looks from an Explore
To save a Look from an Explore:
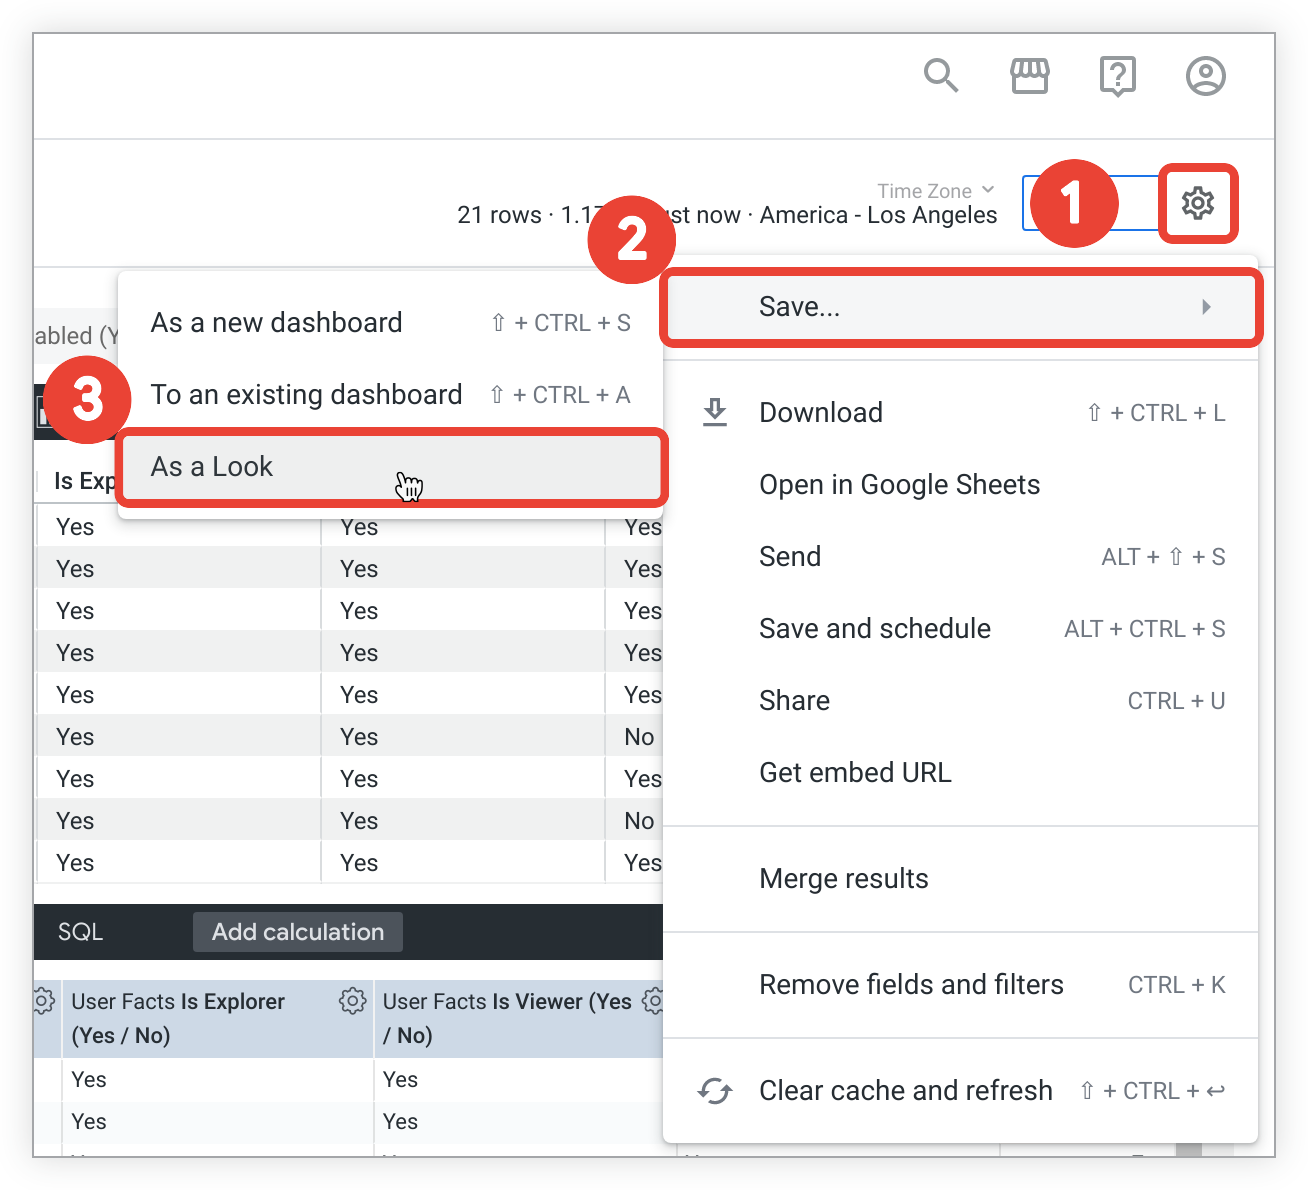
- In the upper right of the Explore, select the Explore actionsgear menu.
- Choose Save.
-
Select As a Lookto open the Save Lookmenu.
-
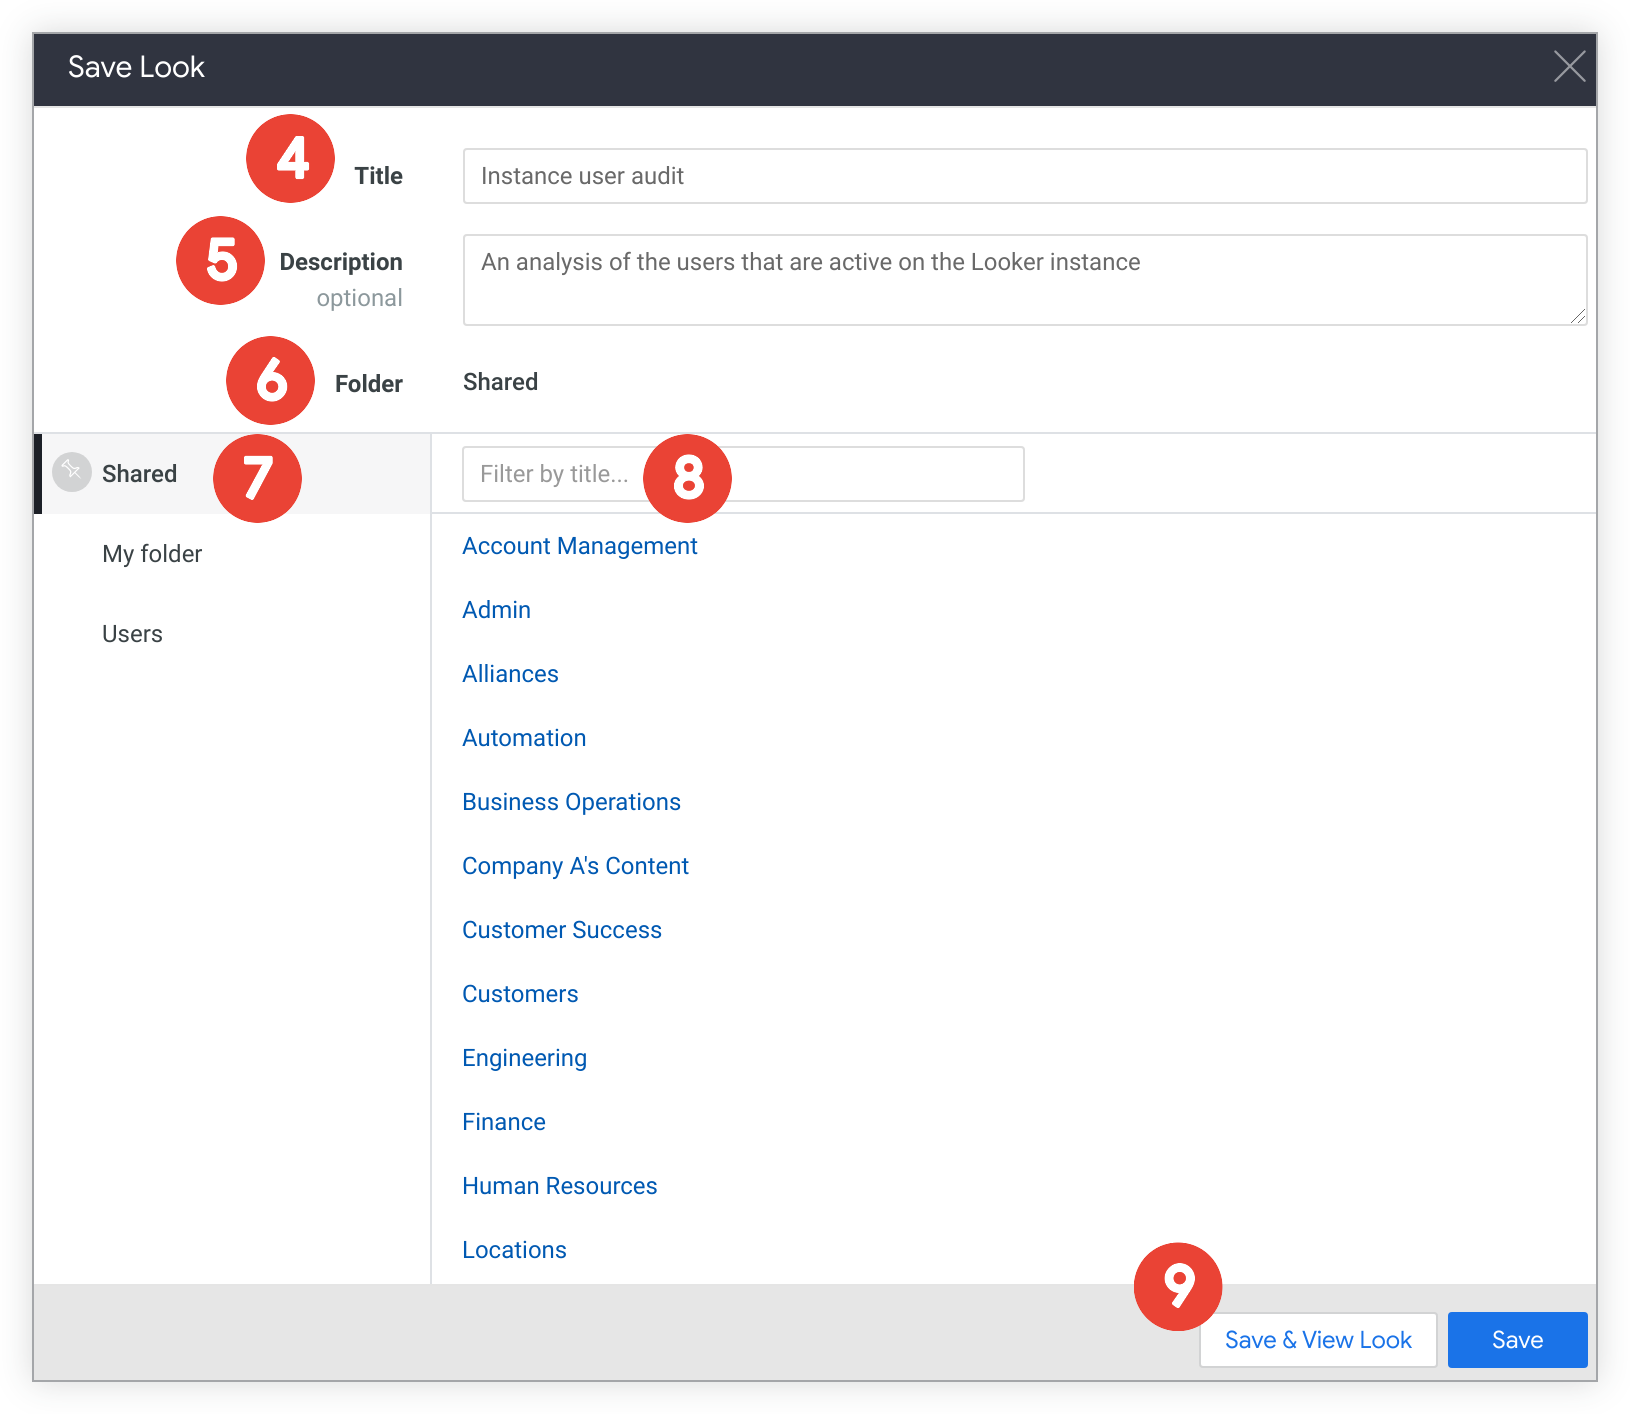
In the Titlefield, enter a new title.
-
In the Descriptionfield, you can enter a description of the Look.
-
In the Folderdrop-down menu, select a folder where you want to save the Look. You will not be able to select folders to which you do not have access.
-
You can locate subfolders where you want to save the Look by expanding top-level folders.
-
You can filter on subfolder titles in the filter field.
-
Save the Look.
- To save your Look and return to the Explore page, select Save.
- To save and view your Look, select Save & View Look.
- Alternatively, select the Xat the top right of the Save Lookmenu to close the menu and return to the Explore without saving the Look.
Navigating to folders to see your Looks
You can access your company's folders by expanding the list of folders in the Folderssection of the left navigation panel .
Moving and copying Looks
Once you create and save a Look to a folder, you can move and copy it to other folders to which you have access.
Continue reading for details regarding how to copy or move Looks to other locations within Looker.
Copying Looks
There are two ways to copy a Look:
Copying Looks from the Look page gear menu
To copy a Look from the Look page:
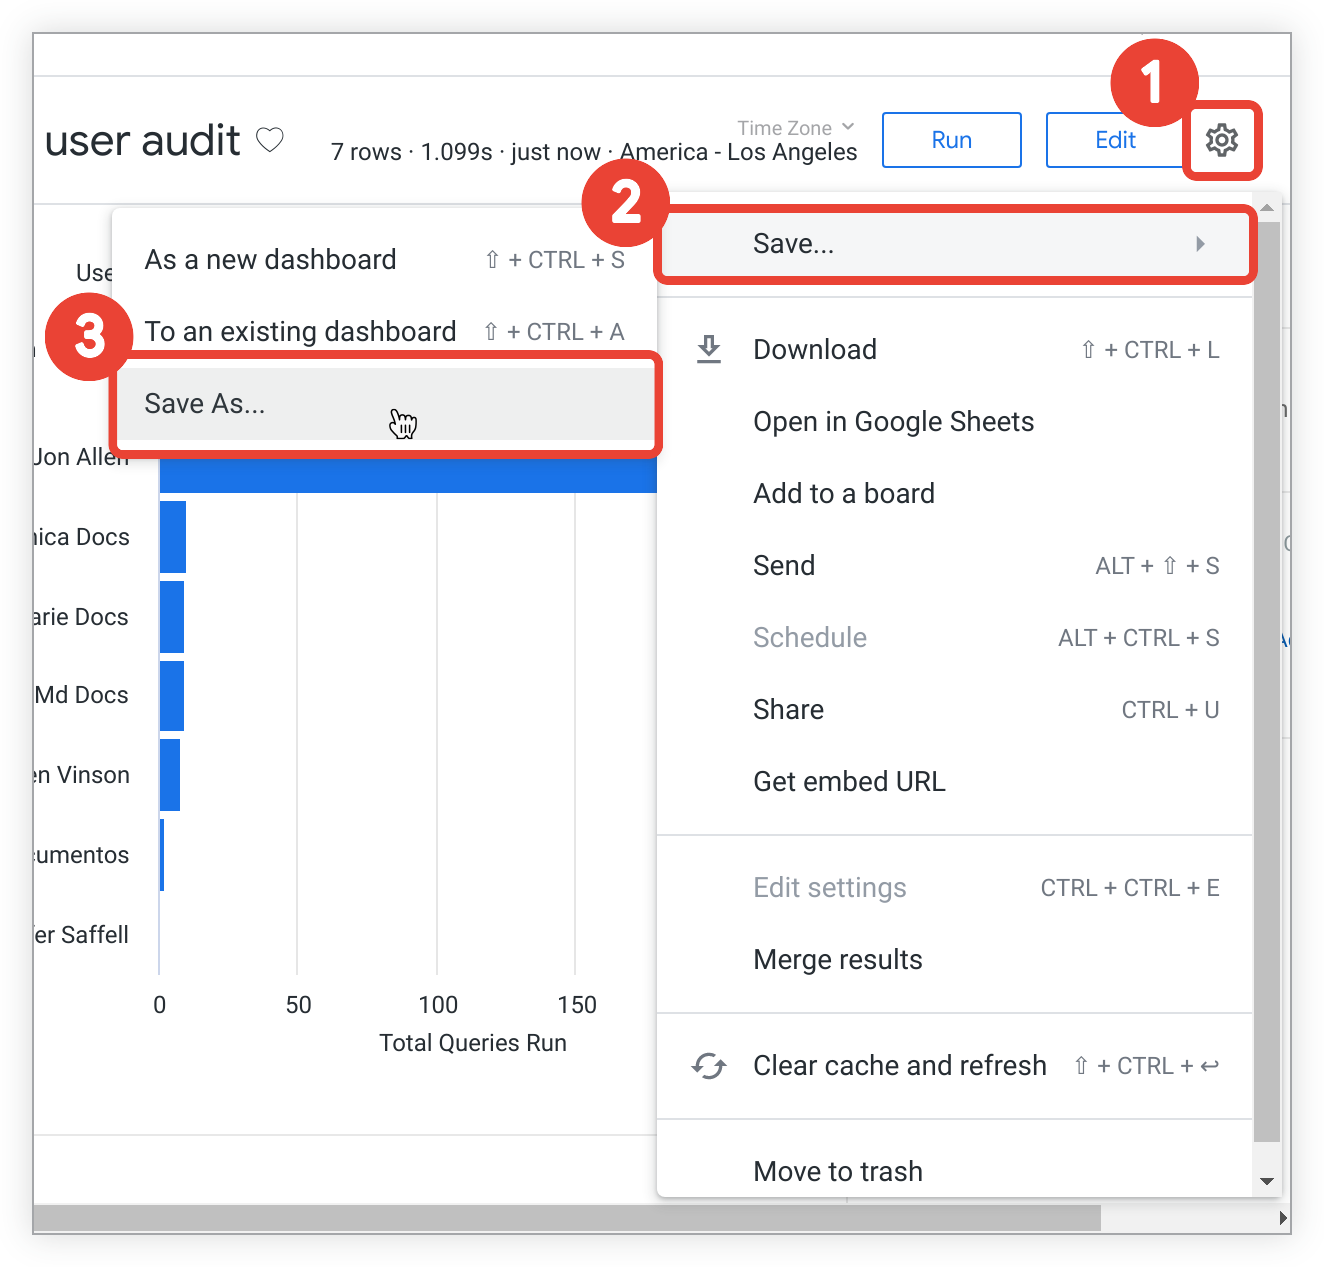
- In the upper right of the Look page, select the Explore actionsgear menu .
- Choose Save.
-
Select Save As...to open the Save Lookmenu.
-
In the Titlefield, enter a new title as desired.
-
In the Descriptionfield, you can change or enter a description of the Look.
-
In the Folderdrop-down menu, select a folder where you want to save the Look. You will not be able to select folders to which you do not have access.
-
You can locate subfolders where you want to save the Look by expanding top-level folders.
-
You can filter on subfolder titles in the filter field.
-
Save the Look.
- To save your Look and remain on the original Look page, select Save.
- To save and view the copied Look, select Save & View Look.
- Alternatively, select the Xat the top right of the Save Lookmenu to close the menu and return to the original Look without saving the copy.
Copying Looks from a folder
Once you create and save a Look or Looks to a folder, you can move and copy one individual Look or more than one Look in bulk to other folders to which you have access. You can view the detailed steps for moving and copying Looks on the Organizing and managing access to content documentation page.
Moving Looks
Currently, you can only move Looks from a folder. You can move Looks individually or in bulk to other folders to which you have access. You can view the detailed steps for moving Looks on the Organizing and managing access to content documentation page.
Editing Looks
After creating a Look, you can edit its underlying query, edit its name, and decide if it should automatically run when loaded. If you have permission to do so, you can also give access to the Look through publicly accessible URLs, described in more detail on the Public sharing, importing, and embedding of Looks documentation page.
Editing a Look's source query
You can edit a saved Look's fields, filters, visualizations, sorting, and so on by following these steps on the saved Look's page:
-
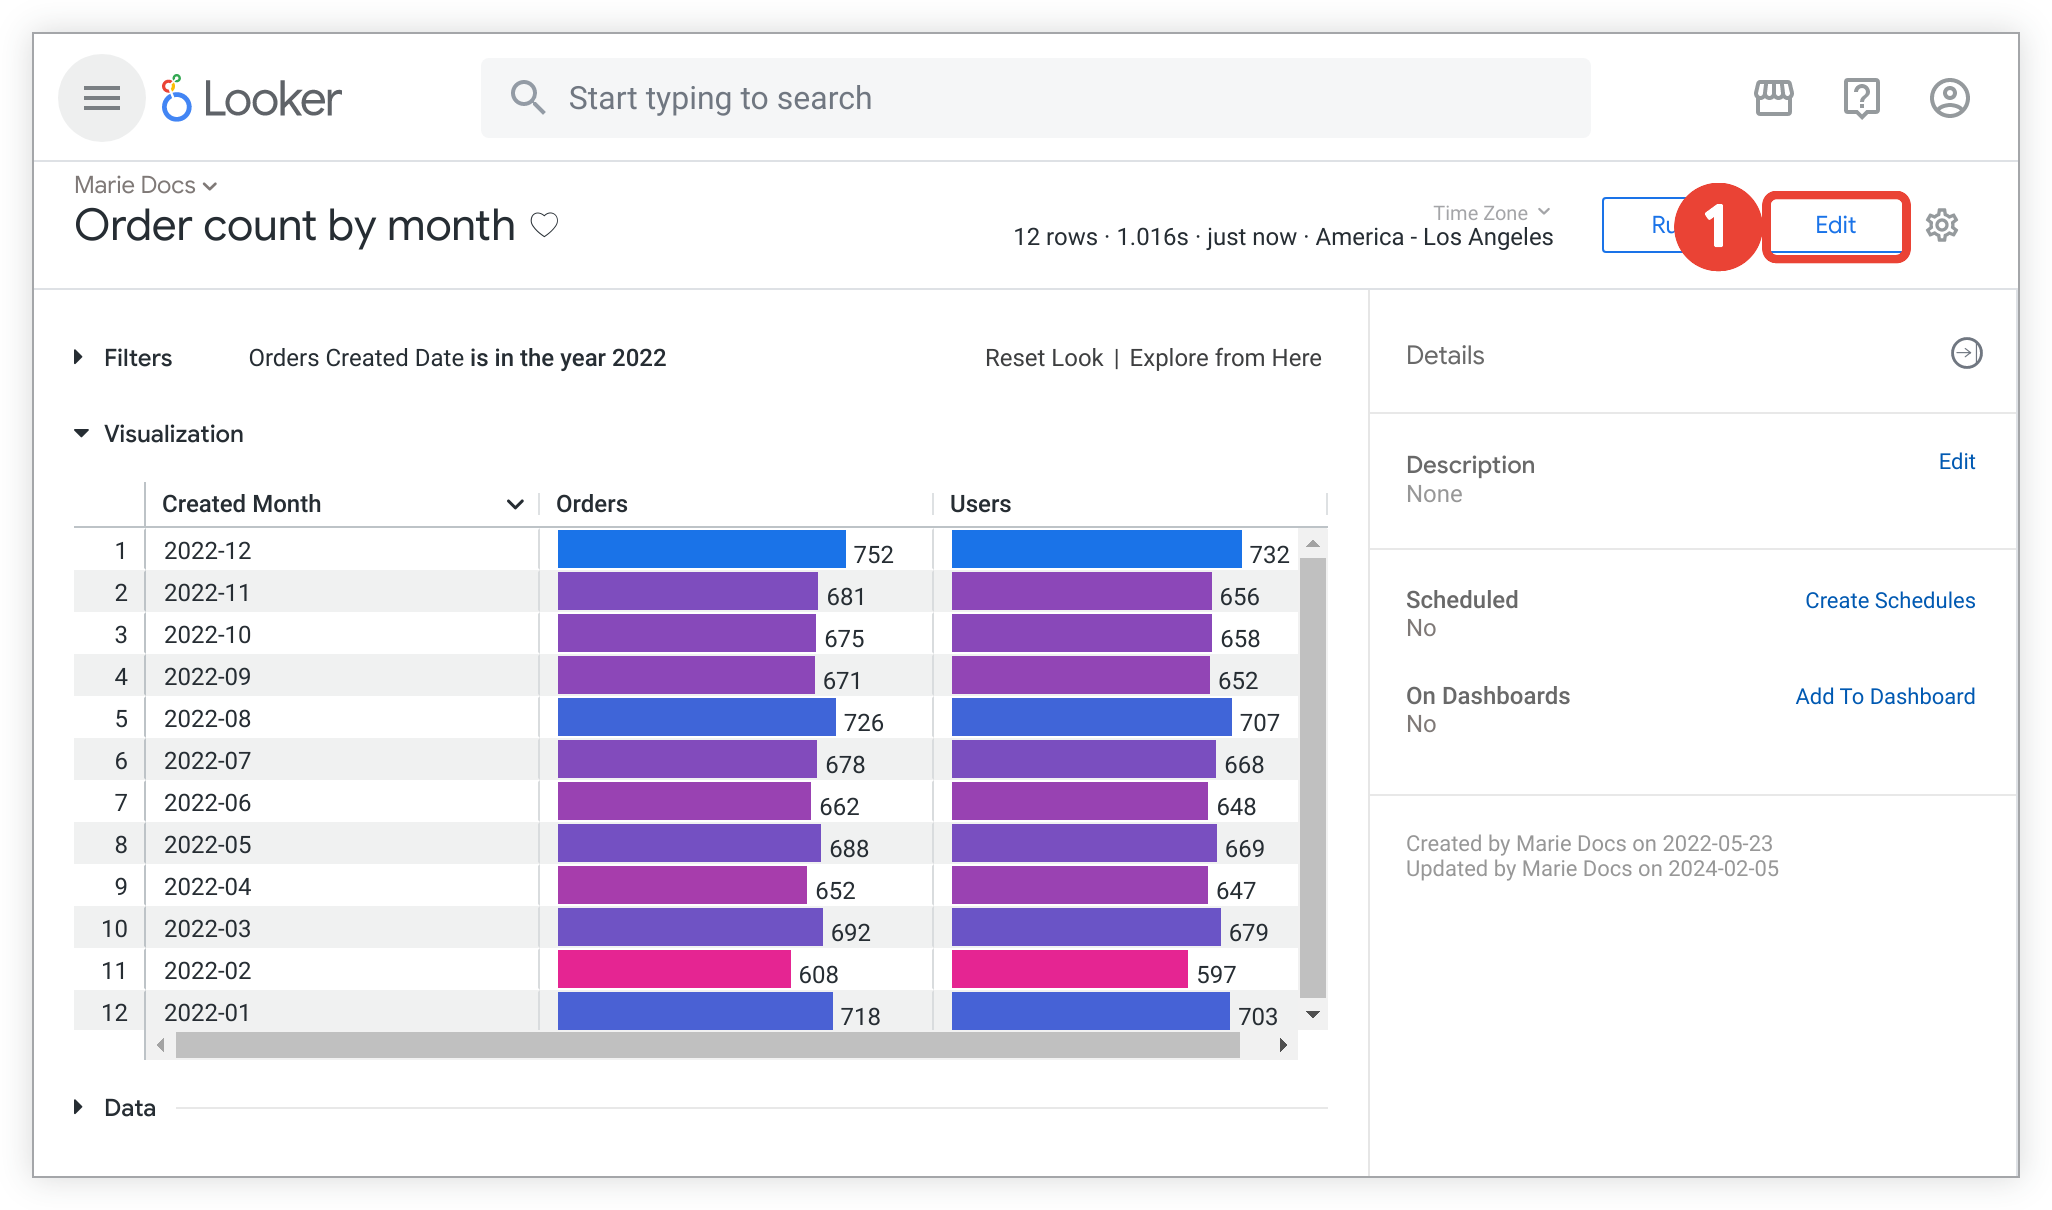
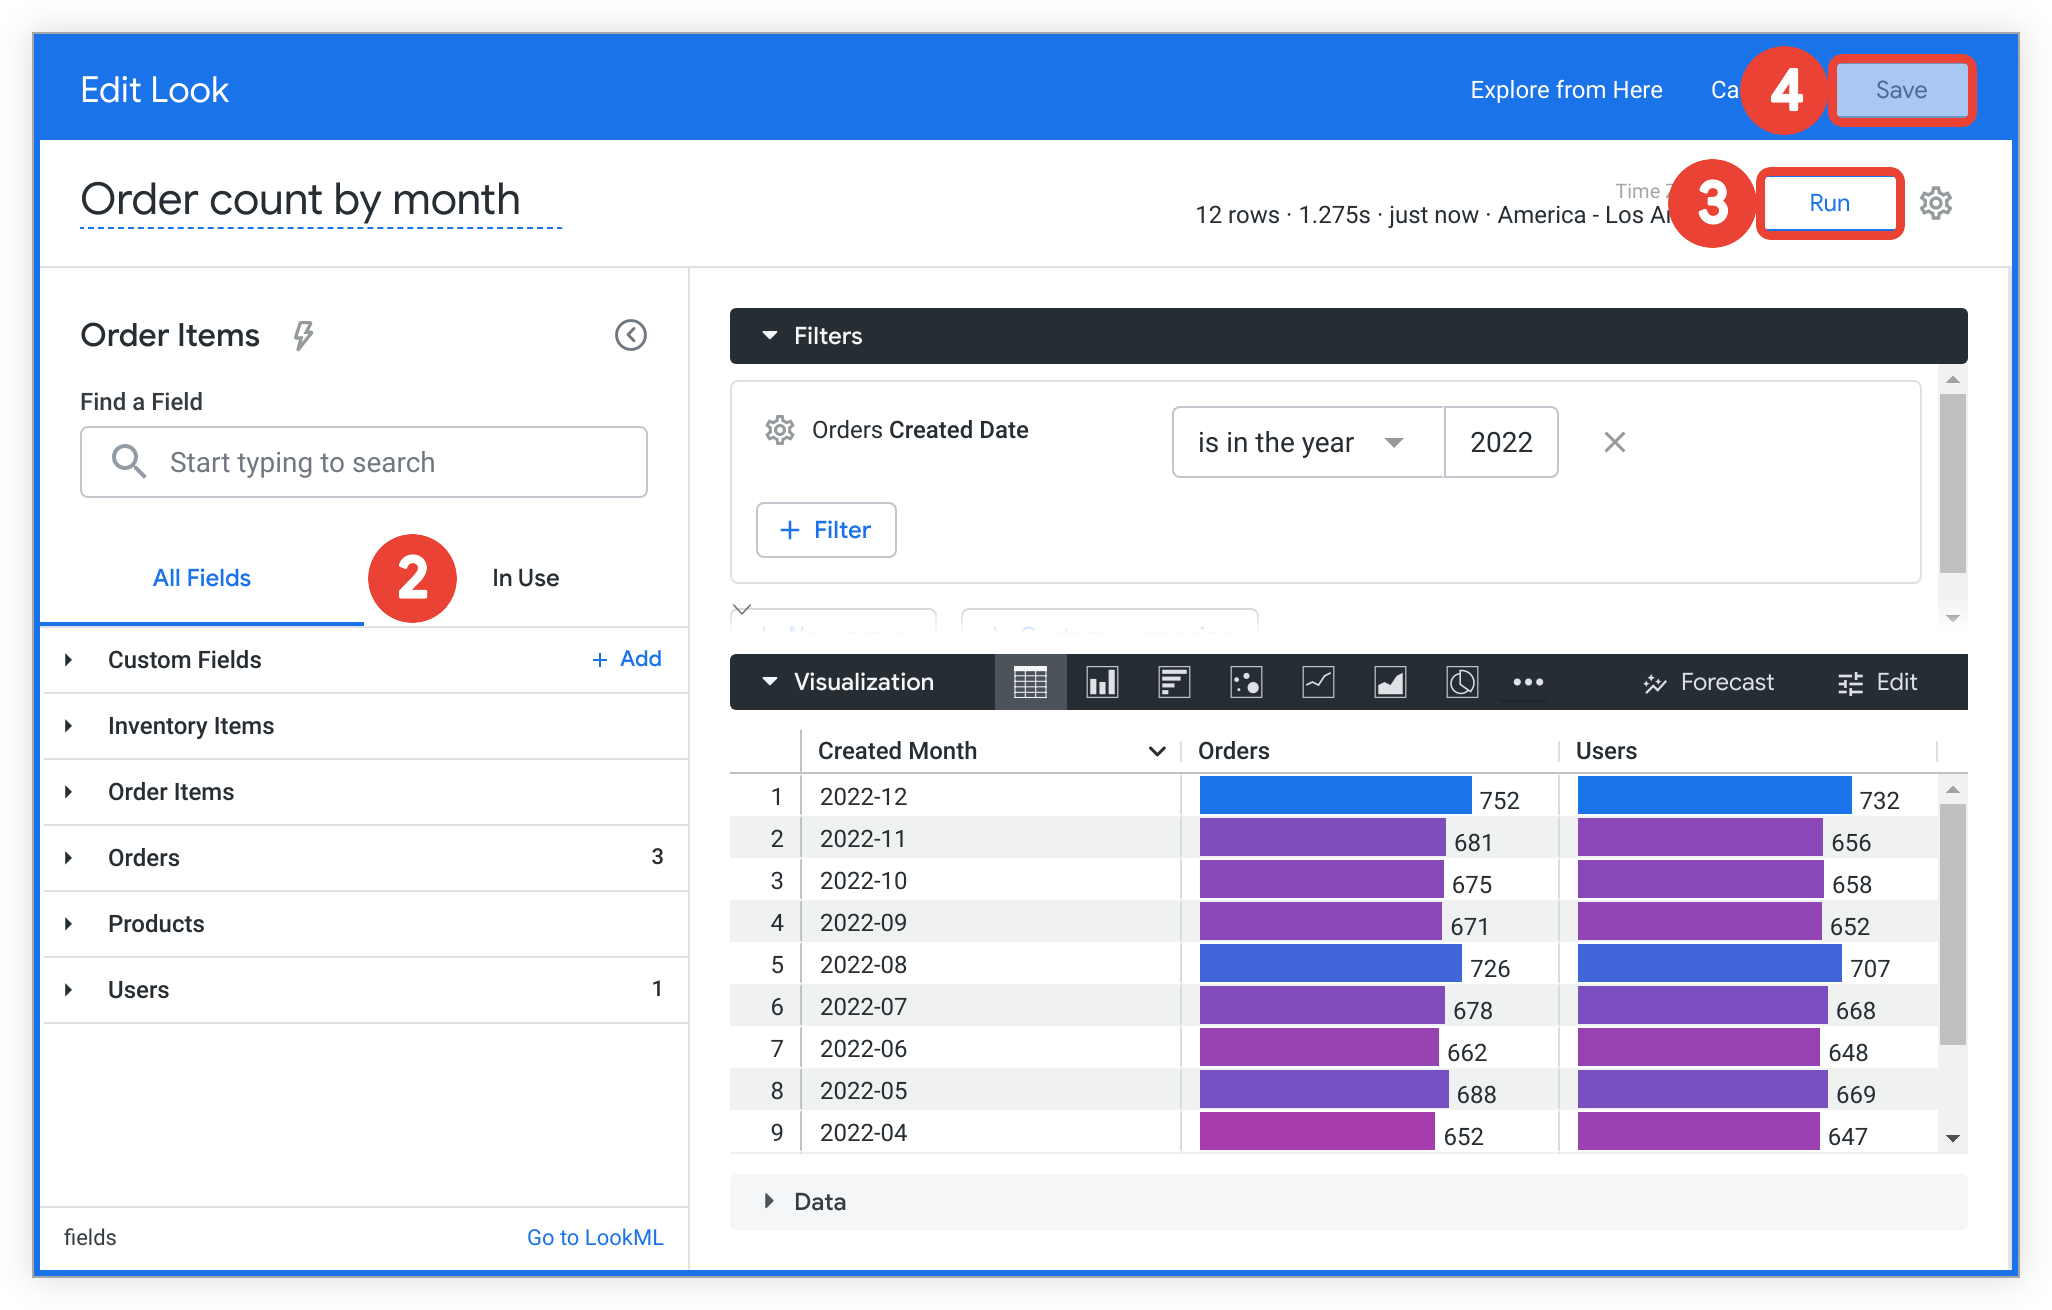
Select Editon the saved Look's page to open the Edit Lookmenu.
-
On the Edit Lookmenu, make any changes you want to the Look's fields, filters, visualization, and so on. You can make changes from both the field picker and the Filterspanel, as necessary. For example, Users, a count of users, was added to the query.
- For more information regarding making changes to an Explore query, see the Creating and editing Explores documentation page.
-
After you make the desired changes, select the Runbutton to update the data and preview the changes.
-
Select Saveto save the changes and navigate back to the Look page.
- Alternatively, select the Canceloption next to the Savebutton in the Edit Lookmenu header to navigate back to the Look page without saving the changes.
Renaming a Look
There are two ways to rename an existing Look, including:
Renaming a Look from a Look's page
-
Select Editon the saved Look's page to open the Edit Lookmenu.
-
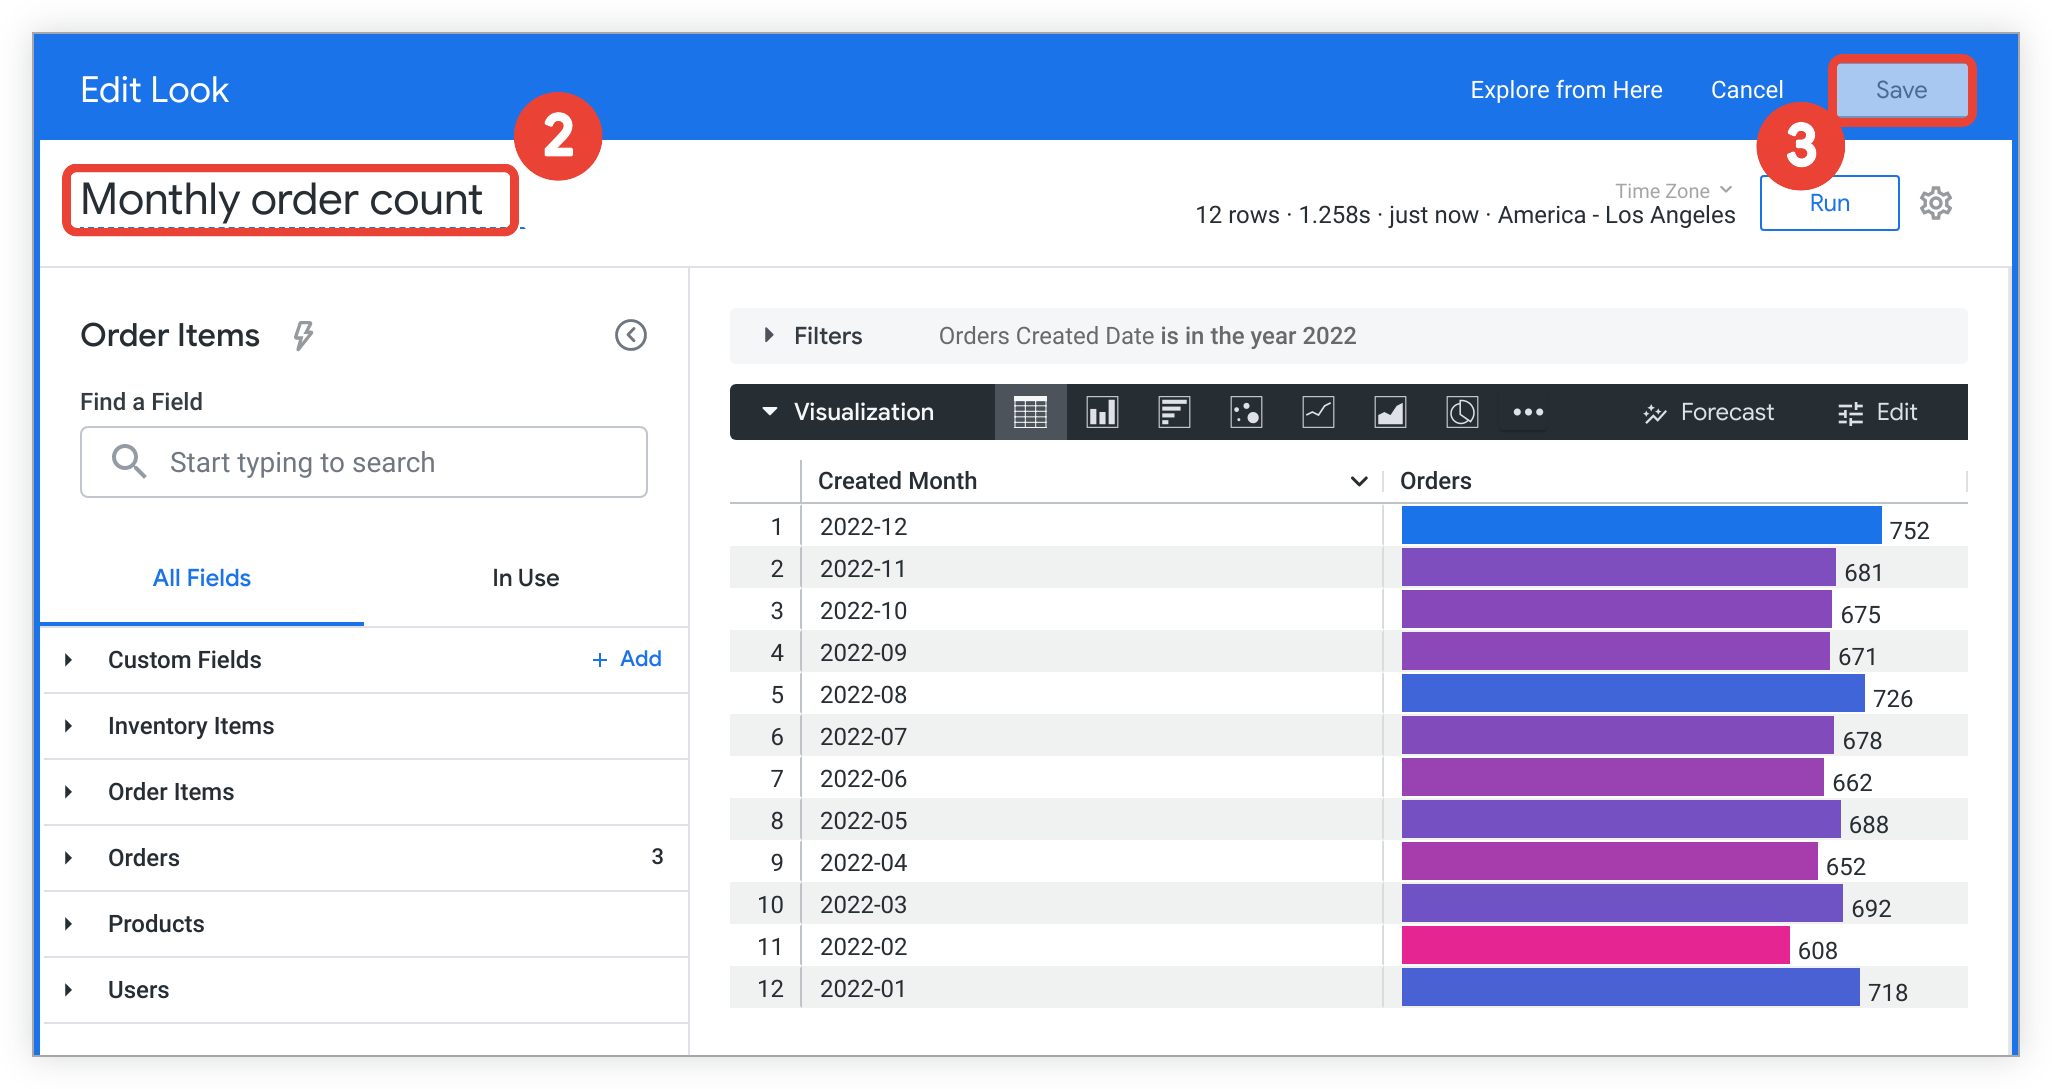
Input the desired name in the title field underneath the header on the Edit Lookmenu. In this example, the Look title "Order count by month" was changed to "Monthly order count".
-
Select Saveto save the changes.
Renaming a Look from a folder
Whether viewing Looks in a folder with list view or grid view , you can rename an existing Look from a folder in the following way:
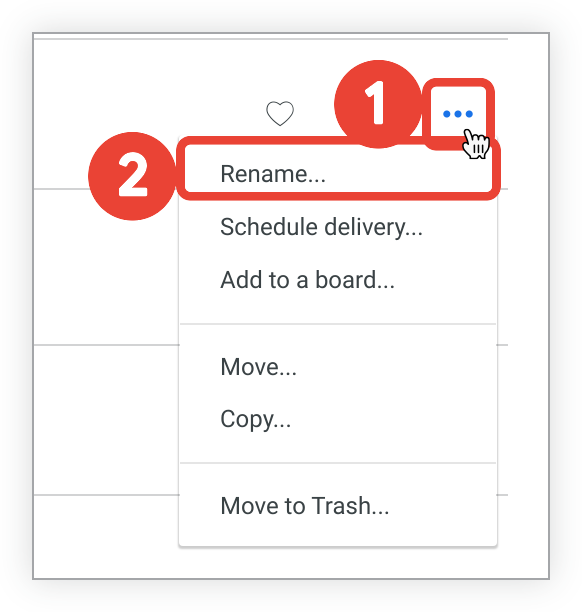
- Select the Look's three-dot menu icon.
-
Select Renameto open the Rename Lookpop-up.
-
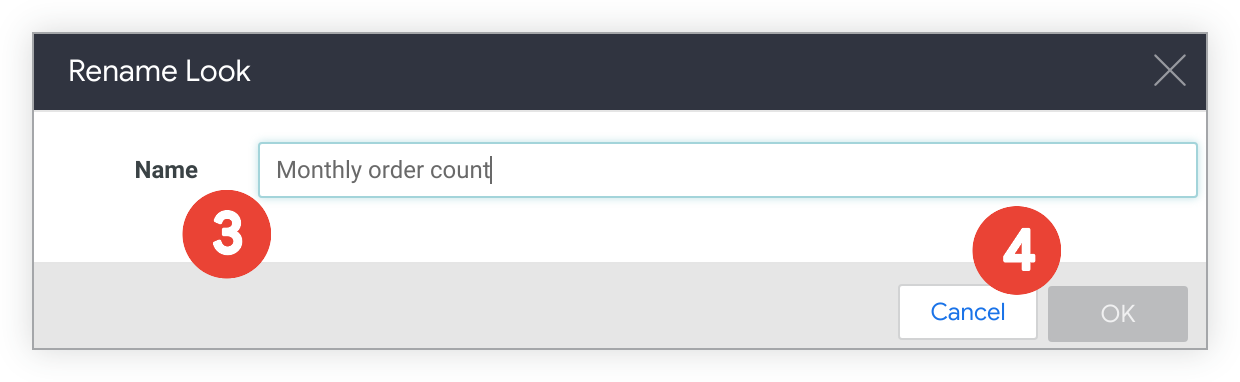
Change the Look title in the Namefield, as desired.
-
Select OK.
- Alternatively, select Cancelto close the Rename Lookpop-up without saving the changes.
Turning off automatic Run on Load
You can prevent a Look from automatically loading its data when a user opens it by disabling the Run on Loadoption, which is enabled by default. This can be useful if you want to give the user a chance to select their filters before a Look's query is run.
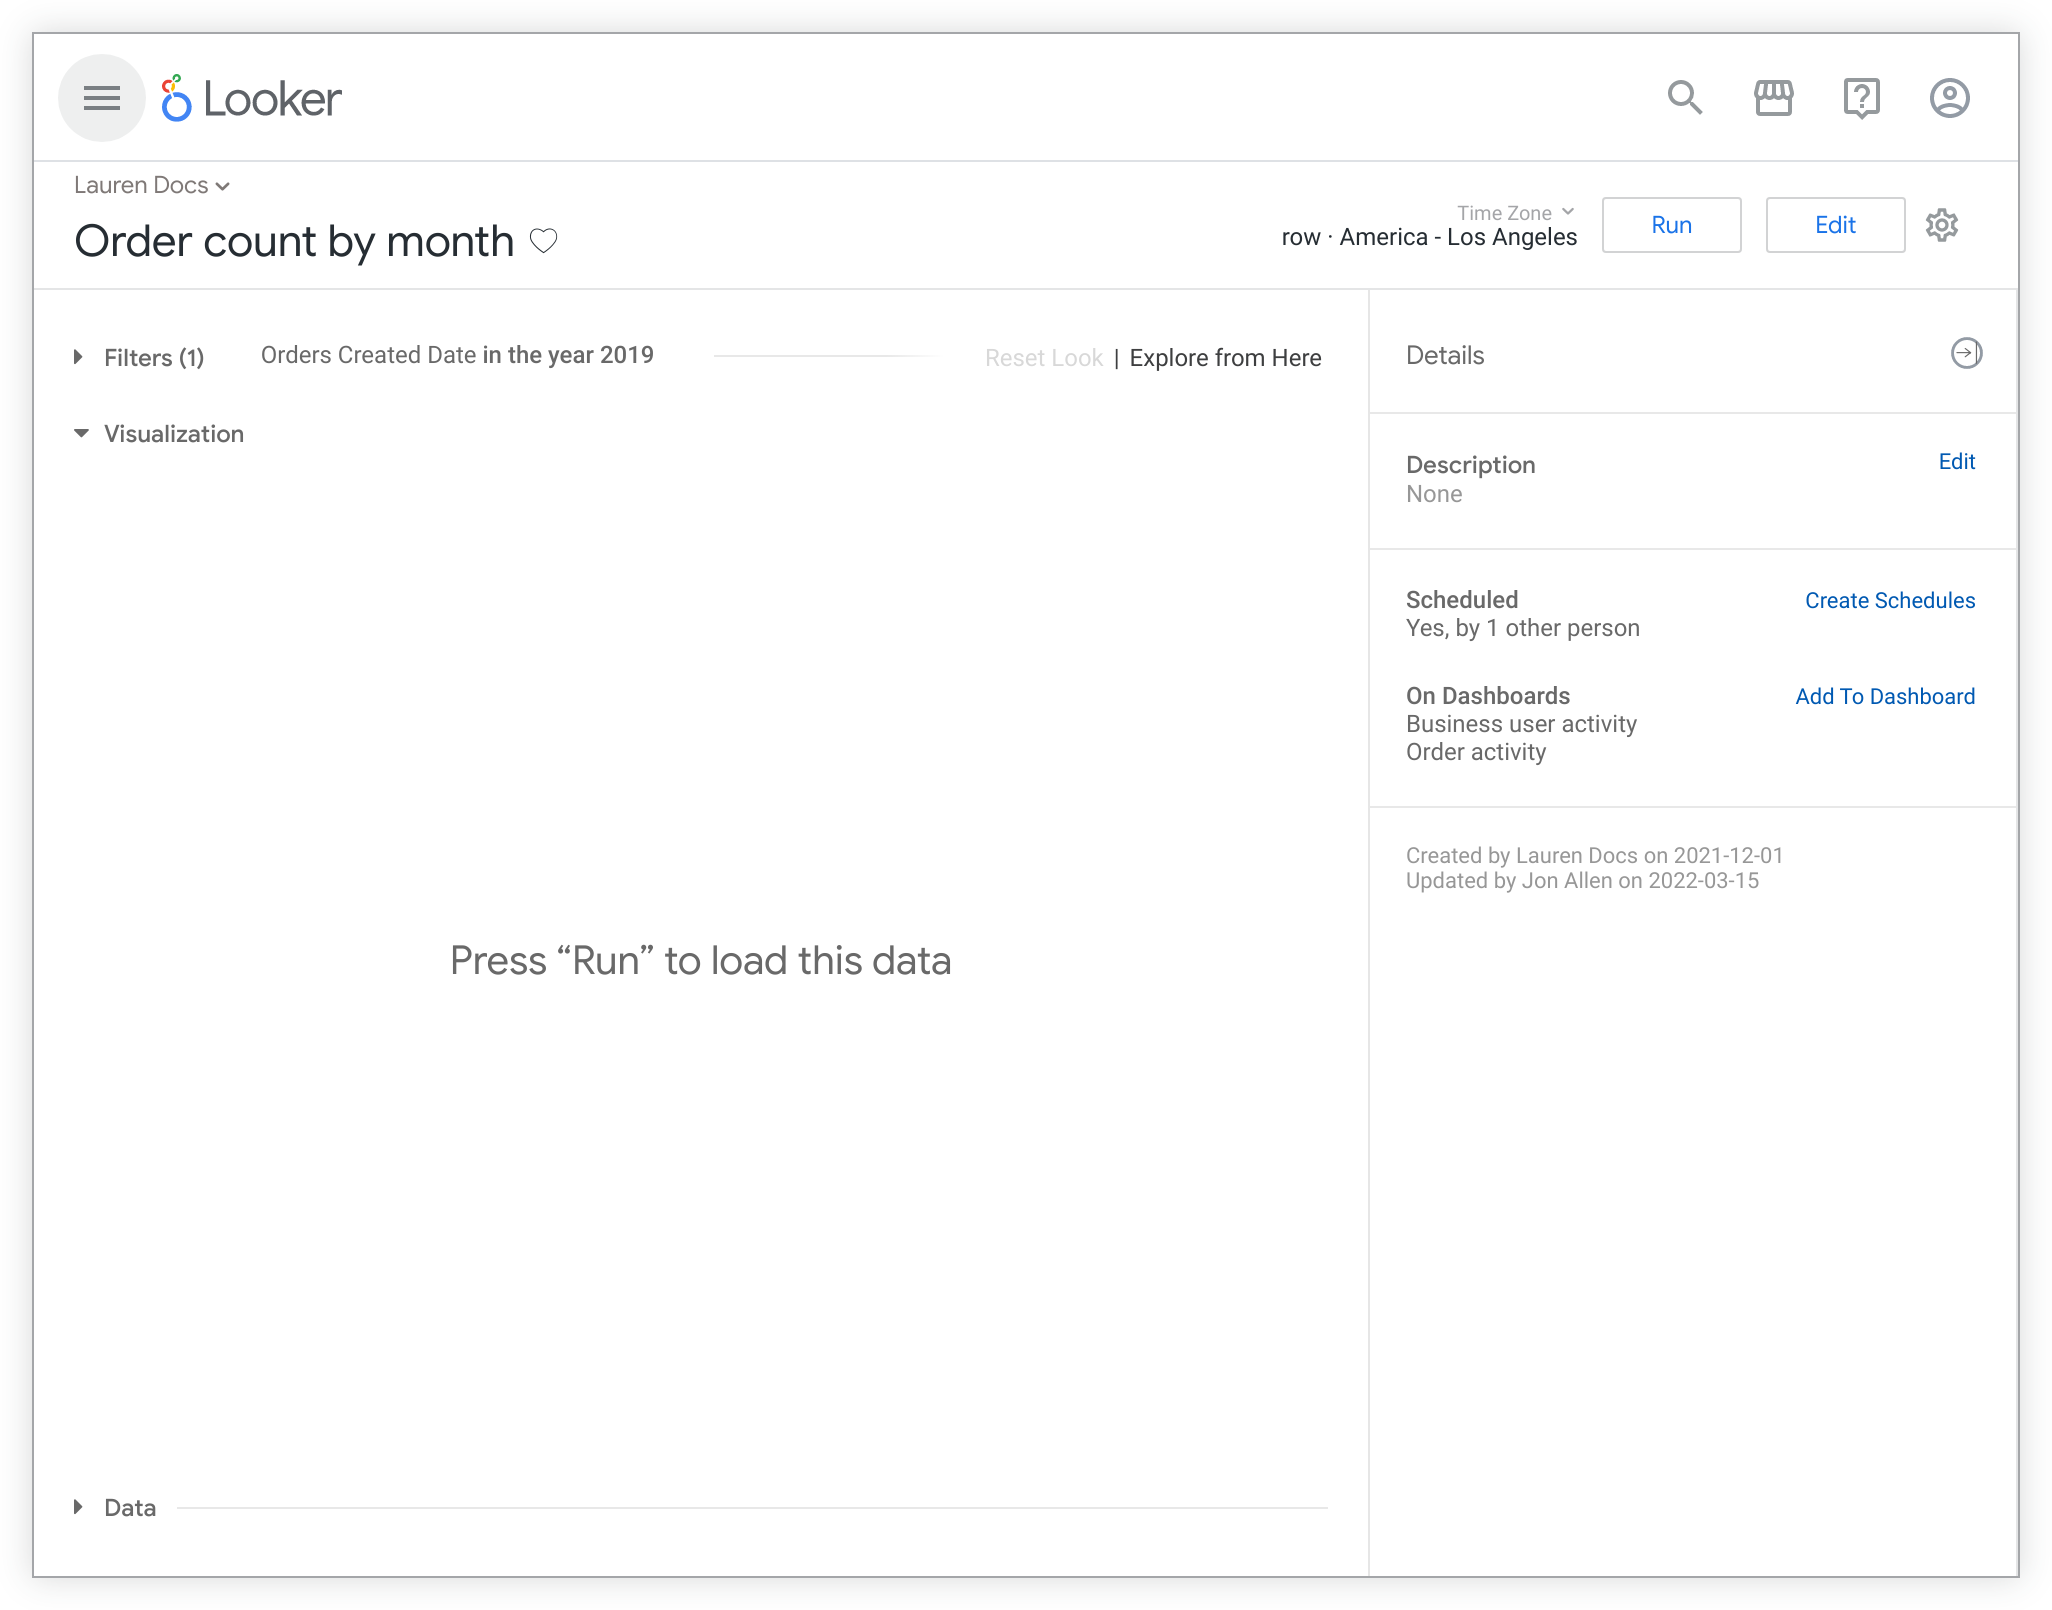
If you choose to prevent the Look from running automatically, users will see an empty visualization that displays the text Press "Run" to load this datawhen they initially view the Look.
There are two ways to adjust the Run on Loadoption:
Disabling automatic Run on Load from the Look page Explore actions gear menu
To disable automatic Run on Loadfrom the Look page Explore actionsgear menu , perform the following steps:
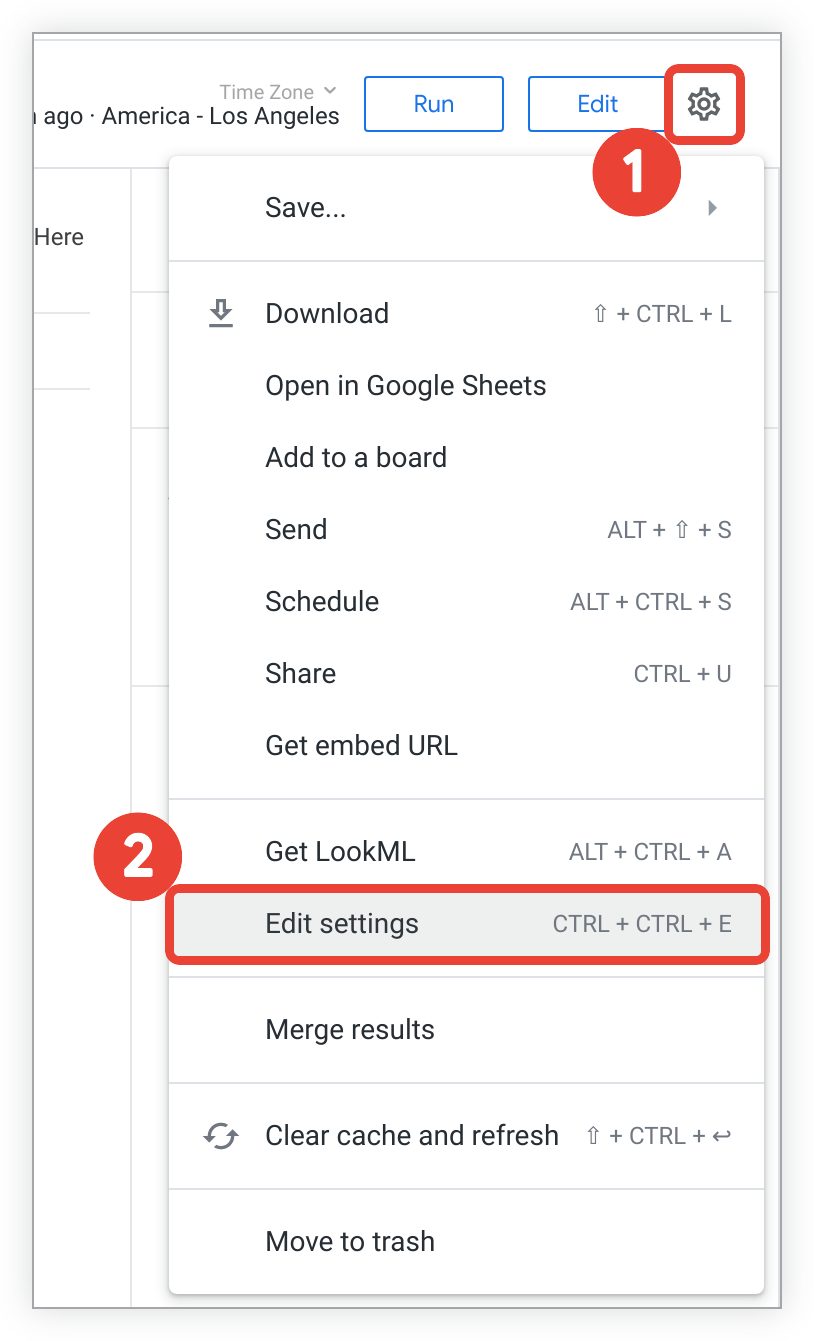
- Select the Explore actionsgear menu.
-
Select Edit Settingsto open the Look Settingspop-up.

-
Select the Run on Loadswitch to disable automatic Run on Load.
-
Select Save.
You can also follow the preceding instructions to enable automatic Run on Loadif it is disabled.
Disabling automatic Run on Load from a folder
Whether viewing Looks in a folder with list view or grid view , you can disable a Look's automatic Run on Loadsetting from a folder in the following way:
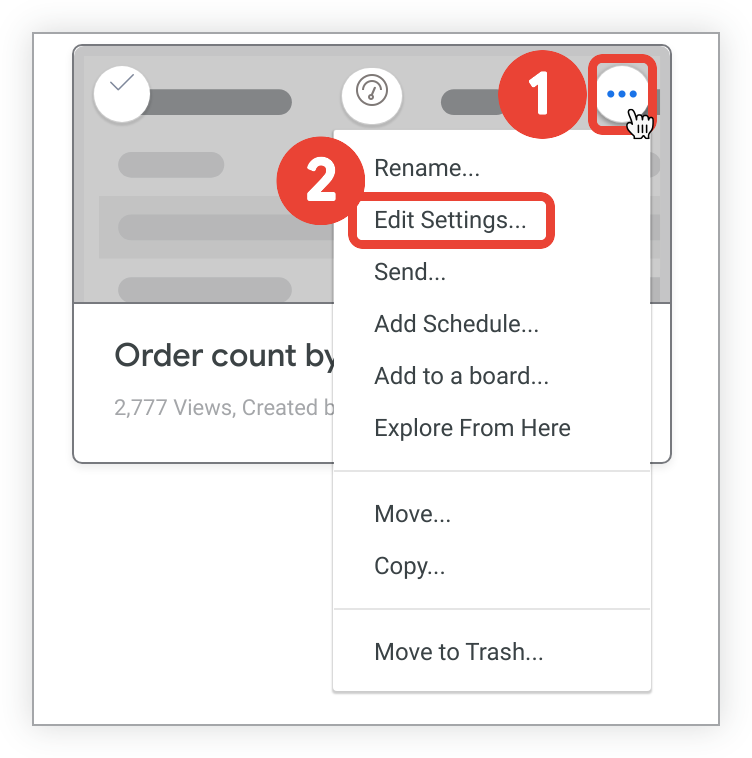
- Select the Look's three-dot menu icon.
-
Select Edit Settingsto open the Look Settingspop-up.
-
Select the Run on Loadswitch to disable automatic Run on Load.
-
Select Save.
You can also follow the preceding instructions to enable automatic Run on Loadif it is disabled.
Editing a Look's description
A Look's description appears under the Look's name in folders that are set to list view , or when you hold the pointer over the Look's thumbnail in a folder that is set to grid view .
If your admin has set your homepage to the pre-built Looker homepage , the description is also displayed when you hover over the Look's thumbnail on your homepage.
You can add or edit a Look's description directly from the Look page:

-
Open the Look page and select the Editlink in the Descriptionsection of the Detailspanel to expand the Descriptiontext box.

-
Add or edit the text for the description in the text box, as desired.
-
Select Saveto save the updated description, or select Cancelto close the Descriptiontext box without saving.
Deleting Looks
You can delete a Look or Looks in one of two ways:
- Individually or in bulk from folders, as described on the Organizing and managing access to content documentation page
- Individually from the Look page Explore actionsgear menu
To delete a Look using the Look page Explore actionsgear menu, perform the following steps:
- Select the Explore actionsgear icon to open the menu options.
- Select Move to trash.
- Select OKin the confirmation pop-up box to delete the Look.
If you delete a Look that is the source for a dashboard tile, the dashboard's Look-linked tile returns an Element not founderror.
If you accidentally delete a Look, your Looker admin might be able to recover it for you. Looker stores deleted content in the trash until your Looker admin team empties the trash as part of their maintenance process.