
Page Summary
-
Geospatial anchors place 3D content in the real world using geographical coordinates.
-
There are three types of Geospatial anchors: WGS84, Terrain, and Rooftop, each handling altitude differently.
-
Terrain and Rooftop anchors are generally preferred over WGS84 anchors as they use altitude values determined by Google Maps.
-
Latitude and longitude can be determined using Geospatial Creator, Google Maps, Google Earth (with a potential error margin), or by physically visiting the location.
-
Geospatial anchors can be created using dedicated APIs for each type or from a hit-test result.
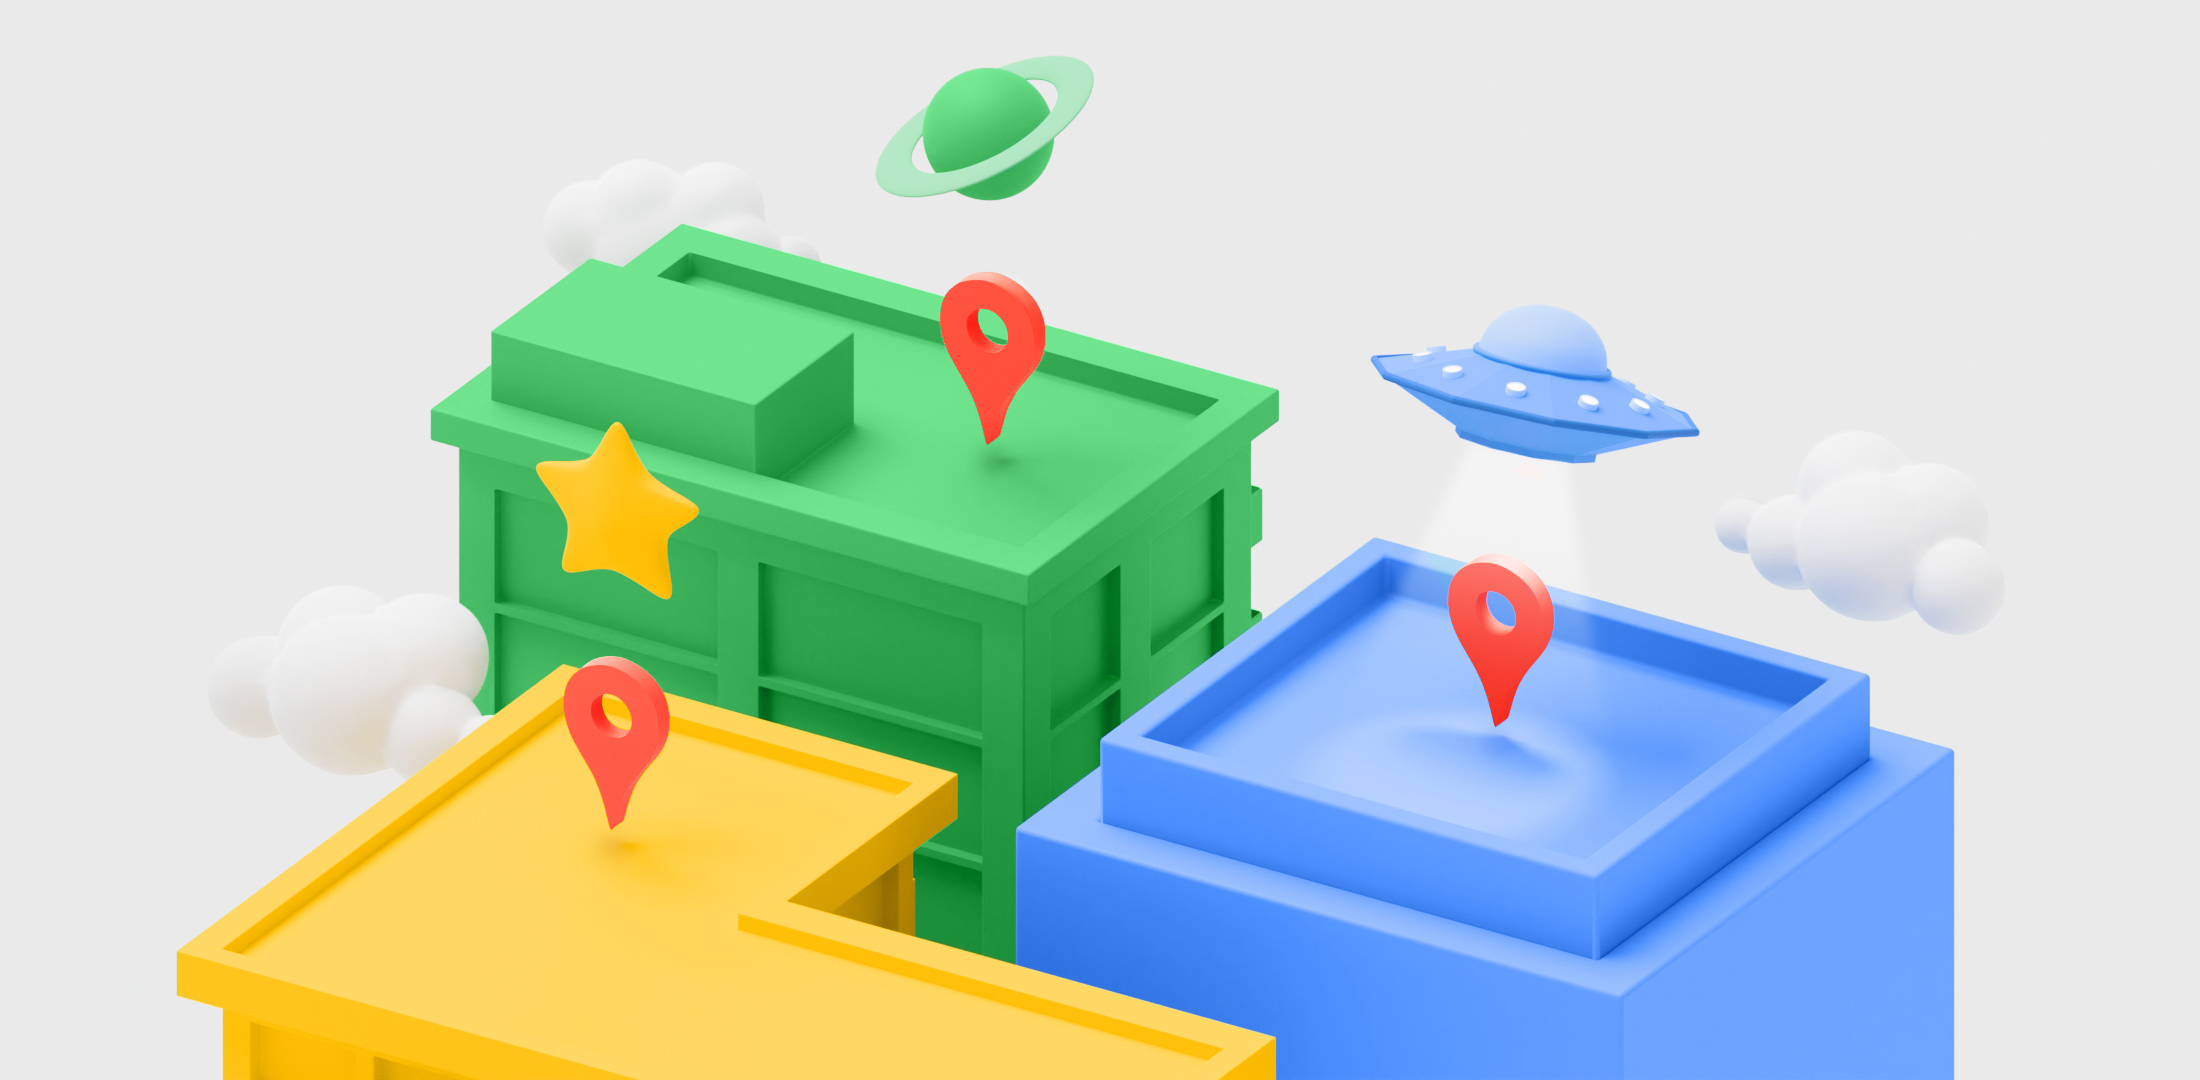
Geospatial anchors are a type of anchor that allow you to place 3D content in the real world.
Types of Geospatial anchors
There are three types of Geospatial anchors, which each handle altitude differently:
-
WGS84 anchors :
WGS84 anchors let you place 3D content at any given latitude, longitude, and altitude. -
Terrain anchors :
Terrain anchors let you place content using only latitude and longitude with a height relative to the terrain at that position. The altitude is determined relative to the ground or floor as known by VPS . -
Rooftop anchors :
Rooftop anchors let you place content using only latitude and longitude with a height relative to a building's rooftop at that position. The altitude is determined relative to the top of a building as known by Streetscape Geometry . This will default to terrain altitude when not placed on a building.
| WGS84 | Terrain | Rooftop | |
|---|---|---|---|
|
Horizontal Position
|
Latitude, Longitude | Latitude, Longitude | Latitude, Longitude |
|
Vertical Position
|
Relative to WGS84 altitude | Relative to terrain level determined by Google Maps | Relative to rooftop level determined by Google Maps |
|
Needs to be server-resolved?
|
No | Yes | Yes |
Prerequisites
Make sure that you enable the Geospatial API before proceeding.
Place Geospatial anchors
Each anchor type has dedicated APIs to create them; see Types of Geospatial anchors for more information.
Create an anchor from a hit-test
You can also create a Geospatial anchor from a hit-test result
.
Use the Transform from the hit-test and convert it to a GARGeospatialTransform
. Use it to place any of the 3 anchor types described.
Get a Geospatial Transform from an AR Transform
GARSession.geospatialTransformFromTransform:error:
provides an additional way to determine the latitude and longitude by converting an AR Transform to a Geospatial Transform.
Get an AR Transform from a Geospatial Transform
GARSession.transformFromGeospatialCoordinate:altitude:eastUpSouthQTarget:error:
converts an Earth-specified horizontal position, altitude, and quaternion rotation with respect to an east-up-south coordinate frame to an AR Transform with respect to the GL world coordinate.
Choose which method suits your use case
Each method of creating an anchor has associated tradeoffs to keep in mind:
- When using Streetscape Geometry , use a hit-test to attach content to a building.
- Prefer Terrain or Rooftop anchors over WGS84 anchors because they use altitude values determined by Google Maps.
Determine the latitude and longitude of a location
There are three ways you can calculate a location’s latitude and longitude:
- Use Geospatial Creator to view and augment the world with 3D content without having to physically go to a location. This allows you to place 3D immersive content visually using Google maps in the Unity Editor. The content’s latitude, longitude, rotation and altitude will be automatically calculated for you.
- Use Google Maps
- Use Google Earth. Note that obtaining these coordinates using Google Earth, as opposed to Google Maps, will give you an error margin of up to several meters.
- Go to the physical location
Use Google Maps
To get the latitude and longitude of a location using Google Maps:
-
Go to Google Maps on your desktop computer.
-
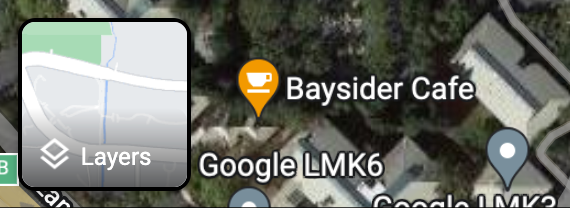
Navigate to Layers> More.

-
Change the Map Typeto Satelliteand clear the Globe Viewcheckbox at the bottom left corner of the screen.
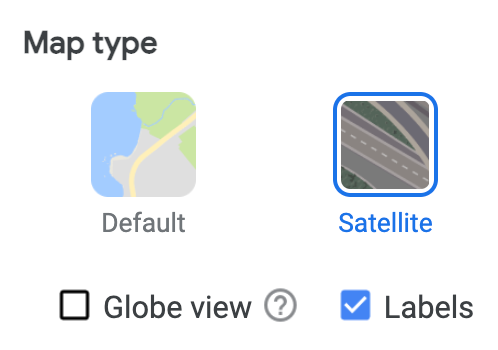
This will force a 2D perspective and eliminate possible errors that could come from an angled 3D view.
-
On the map, right-click on the location and select the longitude/latitude to copy it to your clipboard.
Use Google Earth
You can calculate a location’s latitude and longitude from Google Earth by clicking a location in the UI and reading the data from placemark details.
To get the latitude and longitude of a location using Google Earth:
-
Go to Google Earth on your desktop computer.
-
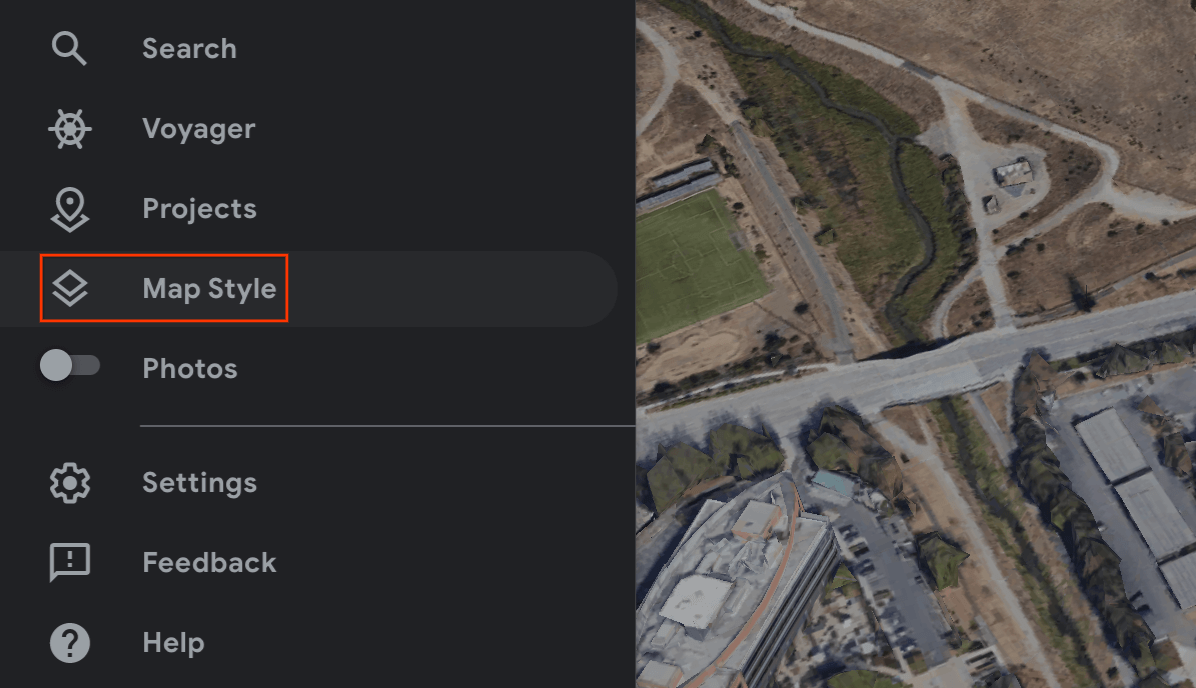
Navigate to the hamburger menu
 and select Map Style.
 -
Toggle off the 3D Buildingsswitch.

-
Once the 3D Buildingsswitch has been toggled off, click the pin icon
 to add a placemark at the selected location.
 -
Specify a project to contain your placemark and click Save.
-
In the Titlefield for the placemark, enter a name for the placemark.
-
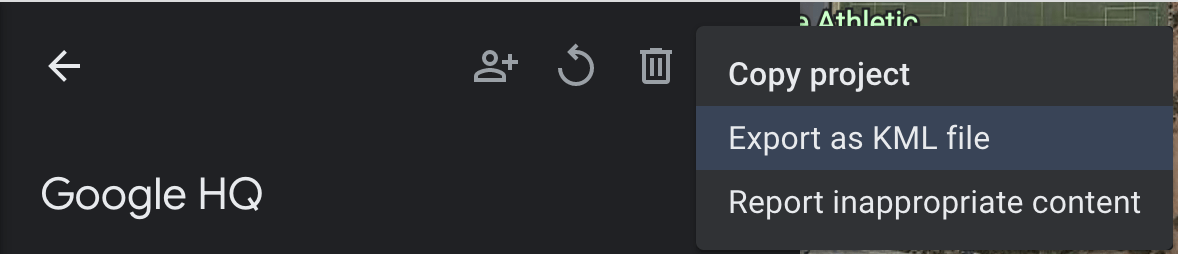
Click the back arrow
 in the project pane and select the
 More Actionsmenu.
 -
Choose Export as KML filefrom the menu.
The KLM file reports the latitude, longitude, and altitude for a placemark in the <coordinates>
tag separated by commas, as follows:
<coordinates>-122.0755182435043,37.41347299422944,7.420342565583832</coordinates>
Do notuse the latitude and longitude from the <LookAt>
tags, which specify the camera position, not the location.
Go to the physical location
You can calculate a location’s altitude by going there physically and doing a local observation.
Get the rotation quaternion
GARGeospatialTransform.eastUpSouthQTarget
extracts the orientation from a Geospatial Transform and outputs a quaternion that represents the rotation matrix transforming a vector from the target to the east-up-south (EUS) coordinate system. X+ points east, Y+ points up, and Z+ points south. Values are written in the order {x, y, z, w}
.
WGS84 Anchors
A WGS84 Anchor is a type of anchor that allows you to place 3D content at any given latitude, longitude, and altitude. It relies on a Transform, and orientation, to be placed in the real world. The position consists of a latitude, longitude, and altitude, which are specified in the WGS84 coordinate system . The orientation consists of a quaternion rotation.
Altitude is reported in meters above the reference WGS84 ellipsoid such that ground level is notat zero. Your app is responsible for providing these coordinates for each created anchor.
Place a WGS84 anchor in the real world
Determine the altitude of a location
There are a few ways to determine a location’s altitude for placing anchors:
- If the anchor's location is physically near the user, you can use an altitude that's similar to the altitude of the user’s device.
- Once you have the latitude and longitude, use the Elevation API
to get an elevation based on the EGM96
specification. You must convert the Maps API EGM96 elevation to WGS84 for comparison against the
GARGeospatialTransformaltitude. See the GeoidEval that has both a command line and an HTML interface. The Maps API reports latitude and longitude according to the WGS84 specification out of the box. - You can obtain a location’s latitude, longitude, and altitude from Google Earth
. This will give you an error margin of up to several meters.Use the latitude, longitude, and altitude from the
<coordinates>tags, notthe<LookAt>tags, in the KML file. - If an existing anchor is close by andif you are not on a steep incline, you may be able to use the altitude from the camera’s
GARGeospatialTransformwithout using another source, such as the Maps API.
Create the anchor
Once you have the latitude, longitude, altitude, and rotation quaternion, use createAnchorWithCoordinate:altitude:eastUpSouthQAnchor:error:
to anchor content to geographical coordinates that you specify.
 NSError

 *
 error

 =

 nil
 ;

 GARAnchor

 *
 anchor

 =

 [
 self
 .
 garSession

 createAnchorWithCoordinate
 :
 coordinate

 altitude
 :
 altitude

 eastUpSouthQAnchor
 :
 eastUpSouthQAnchor

 error
 :
& error
 ];
Terrain Anchors
A Terrain anchor is a type of anchor that allows you to place AR objects using only latitude and longitude, leveraging information from VPS to find the precise altitude above ground.
Rather than inputting the desired altitude, you provide the altitude above the terrain. When this is zero the anchor will be level with the terrain.
Set the plane-finding mode
Plane finding is optional and not required to utilize anchors. Note that only horizontal planes are used. Horizontal planes will help the dynamic alignment of terrain anchors on ground.
Use ARWorldTrackingConfiguration.PlaneDetection
to select how your app detects planes.
Create a Terrain anchor using the new Async API
To create and place a Terrain anchor, call GARSession.createAnchorWithCoordinate:altitudeAboveTerrain:eastUpSouthQAnchor:completionHandler:error:
.
The anchor will not be ready right away and needs to resolve. Once it has resolved it will be available in the GARCreateAnchorOnTerrainFuture
.
  GARCreateAnchorOnTerrainFuture

 *
 future

 =

 [
 self
 .
 garSession

 createAnchorWithCoordinate
 :
 coordinate

 altitudeAboveTerrain
 :
 altitude

 eastUpSouthQAnchor
 :
 eastUpSouthQTarget

 completionHandler
 :
 ^
 (
 GARAnchor

 *
 anchor
 ,

 GARTerrainAnchorState

 state
 )

 {

 // handle completion

 }

 error
 :
& error
 ];
Check the State of the Future
The Future will have an associated GARFutureState
.
| State | Description |
|---|---|
GARFutureStatePending
|
The operation is still pending. |
GARFutureStateDone
|
The operation is complete and the result is available. |
GARFutureStateCancelled
|
The operation has been cancelled. |
Check the Terrain anchor state of the Future result
The GARTerrainAnchorState
belongs to the asynchronous operation and is part of the final Future result.
  switch

 (
 future
 .
 resultTerrainAnchorState
 )

 {

 case

 GARTerrainAnchorStateSuccess
 :

 // Terrain anchor finished resolving.

 break
 ;

 case

 GARTerrainAnchorStateErrorUnsupportedLocation
 :

 // The requested anchor is in a location that isn't supported by the Geospatial API.

 break
 ;

 case

 GARTerrainAnchorStateErrorNotAuthorized
 :

 // An error occurred while authorizing your app with the ARCore API. See

 // https://developers.google.com/ar/reference/ios/group/GARTerrainAnchorState#garterrainanchorstateerrornotauthorized

 // for troubleshooting steps.

 break
 ;

 case

 GARTerrainAnchorStateErrorInternal
 :

 // The Terrain anchor could not be resolved due to an internal error.

 break
 ;

 default
 :

 break
 ;
 }
Rooftop Anchors
Rooftop anchors are a type of anchor and are very similar to Terrain anchors above. The difference is that you will provide the altitude above the rooftop rather than the altitude above the terrain.
Create a Rooftop anchor using the new Async API
The anchor will not be ready right away and needs to resolve.
To create and place a Rooftop anchor, call GARSession.createAnchorWithCoordinate:altitudeAboveRooftop:eastUpSouthQAnchor:completionHandler:error:
. Similarly to Terrain anchors, you will also access the GARFutureState
of the Future. Then you can check the Future result to access the GARRooftopAnchorState
.
  GARCreateAnchorOnRooftopFuture

 *
 future

 =

 [
 self
 .
 garSession

 createAnchorWithCoordinate
 :
 coordinate

 altitudeAboveRooftop
 :
 altitude

 eastUpSouthQAnchor
 :
 eastUpSouthQTarget

 completionHandler
 :
 ^
 (
 GARAnchor

 *
 anchor
 ,

 GARRooftopAnchorState

 state
 )

 {

 // handle completion

 }

 error
 :
& error
 ];
Check the State of the Future
The Future will have an associated GARFutureState
, see the table
above.
Check the Rooftop anchor state of the Future result
The GARRooftopAnchorState
belongs to the asynchronous operation and is part of the final Future result.
  switch

 (
 future
 .
 resultRooftopAnchorState
 )

 {

 case

 GARRooftopAnchorStateSuccess
 :

 // Rooftop anchor finished resolving.

 break
 ;

 case

 GARRooftopAnchorStateErrorUnsupportedLocation
 :

 // The requested anchor is in a location that isn't supported by the Geospatial API.

 break
 ;

 case

 GARRooftopAnchorStateErrorNotAuthorized
 :

 // An error occurred while authorizing your app with the ARCore API. See

 // https://developers.google.com/ar/reference/ios/group/GARRooftopAnchorState#garrooftopanchorstateerrornotauthorized

 // for troubleshooting steps.

 break
 ;

 case

 GARRooftopAnchorStateErrorInternal
 :

 // The Rooftop anchor could not be resolved due to an internal error.

 break
 ;

 default
 :

 break
 ;
 }
What's next
- Make sure you understand the Geospatial API usage quota .