

1. Introduction
Abstract
Imagine you have many places to put on a map and you want users to be able to see where these places are and identify which place they want to visit. Common examples of this include:
- a store locator on a retailer's website
- a map of polling locations for an upcoming election
- a directory of specialty locations such as battery recycling receptacles
What you'll build
In this codelab, you will create a locator that draws from a live data feed of specialized locations and helps the user find the location nearest their starting point. This full-stack locator can handle much larger numbers of places than the simple store locator , which is limited to 25 or fewer store locations.

What you'll learn
This codelab uses an open data set to simulate pre-populated metadata about a large number of store locations so that you can focus on learning the key technical concepts.
- Maps JavaScript API: display a large number of locations on a customized web map
- GeoJSON: a format that stores metadata about locations
- Place Autocomplete: help users provide starting locations faster and more accurately
- Go: The programming language used to develop the application back-end. The backend will interact with the database and send query results back to the front-end in formatted JSON.
- App Engine: for hosting the web app
Prerequisites
- Basic knowledge of HTML and JavaScript
- A Google account
2. Get set up
In Step 3 of the following section, enable Maps JavaScript API, Places API, and Distance Matrix APIfor this codelab.
Get started with Google Maps Platform
If you haven't used Google Maps Platform before, follow the Get Started with Google Maps Platform guide or watch the Getting Started with Google Maps Platform playlist to complete the following steps:
- Create a billing account.
- Create a project.
- Enable Google Maps Platform APIs and SDKs (listed in the previous section).
- Generate an API key.
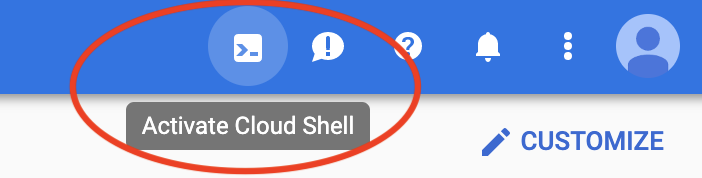
Activate Cloud Shell
In this codelab you use Cloud Shell , a command-line environment running in Google Cloud that provides access to products and resources running on Google Cloud, so that you can host and run your project completely from your web browser.
To activate Cloud Shell from Cloud Console, click Activate Cloud Shell (it should only take a few moments to provision and connect to the environment).
This opens a new shell in the lower part of your browser after possibly showing an introductory interstitial.
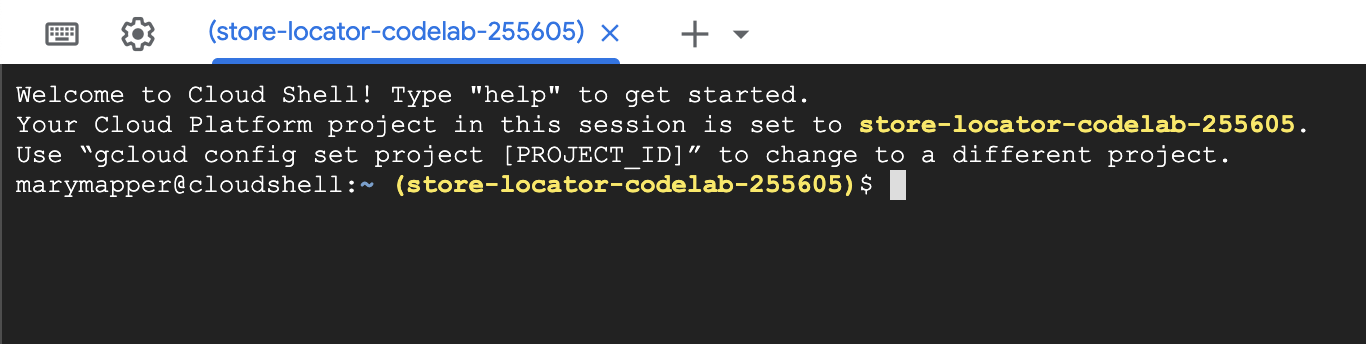
Confirm your project
Once connected to Cloud Shell, you should see that you are already authenticated and that the project is already set to the project ID you selected during setup.
$ gcloud auth list
Credentialed Accounts:
ACTIVE  ACCOUNT
  *     <myaccount>@<mydomain>.com
$ gcloud config list project
[core]
project = <YOUR_PROJECT_ID>
If for some reason the project is not set, run the following command:
gcloud config set project <YOUR_PROJECT_ID>
Enable AppEngine Flex API
The AppEngine Flex API needs to be manually enabled from Cloud console. Doing so will not only enable the API but also create the AppEngine Flexible Environment Service Account , the authenticated account that will interact with Google services (like SQL databases) on the user's behalf.
3. Hello, World
Backend: Hello World in Go
In your Cloud Shell instance, you'll start by creating a Go App Engine Flex app that will serve as the basis for the rest of the codelab.
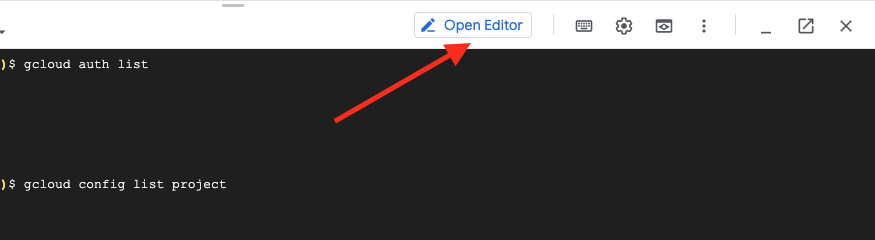
In the toolbar of the Cloud Shell, click on the Open editorbutton to open a code editor in a new tab. This web based code editor allows you to easily edit files in the Cloud Shell instance.
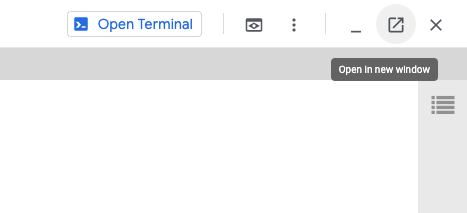
Next, click on the Open in new windowicon to move the editor and terminal to a new tab.
In the terminal at the bottom of the new tab, create a new austin-recycling
directory.
mkdir -p austin-recycling && cd $_
Next you'll create a small Go App Engine app to make sure everything's working. Hello World!
The austin-recycling
directory should also appear in the Editor's folder list on the left. In the austin-recycling
directory, create a file named app.yaml
. Put the following content in the app.yaml
file:
app.yaml
  runtime
 :

 go
 env
 :

 flex
 manual_scaling
 :

 instances
 :

 1
 resources
 :

 cpu
 :

 1

 memory_gb
 :

 0.5

 disk_size_gb
 :

 10
This configuration file configures your App Engine app to use the Go Flex runtime. For background information on the meaning of the configuration items in this file, see the Google App Engine Go Standard Environment Documentation .
Next, create a main.go
file alongside the app.yaml
file:
main.go
  package
 main
 import

 (
 "fmt"
 "log"
 "net/http"
 "os"
 )
 func
 main
 ()
 {
 http
 .
 HandleFunc
 (
 "/"
 ,
 handle
 )
 port
 :=
 os
 .
 Getenv
 (
 "PORT"
 )
 if
 port
 ==
 ""
 {
 port
 =
 "8080"
 }
 log
 .
 Printf
 (
 "Listening on port
 %s
 "
 ,
 port
 )
 if
 err
 :=
 http
 .
 ListenAndServe
 (
 ":"
 +
 port
 ,
 nil
 );
 err
 !=
 nil
 {
 log
 .
 Fatal
 (
 err
 )
 }
 }
 func
 handle
 (
 w
 http
 .
 ResponseWriter
 ,
 r
 *
 http
 .
 Request
 )
 {
 if
 r
 .
 URL
 .
 Path
 !=
 "/"
 {
 http
 .
 NotFound
 (
 w
 ,
 r
 )
 return
 }
 fmt
 .
 Fprint
 (
 w
 ,
 "Hello world!"
 )
 }
It is worth pausing a moment here to understand what this code does, at least at a high level. You have defined a package main
that starts up an http server listening on port 8080, and registers a handler function for HTTP requests matching the path "/"
.
The handler function, handily called handler
, writes out the text string "Hello, world!"
. This text will be relayed back to your browser, where you'll be able to read it. In future steps you'll make handlers that respond with GeoJSON data instead of simple hard coded strings.
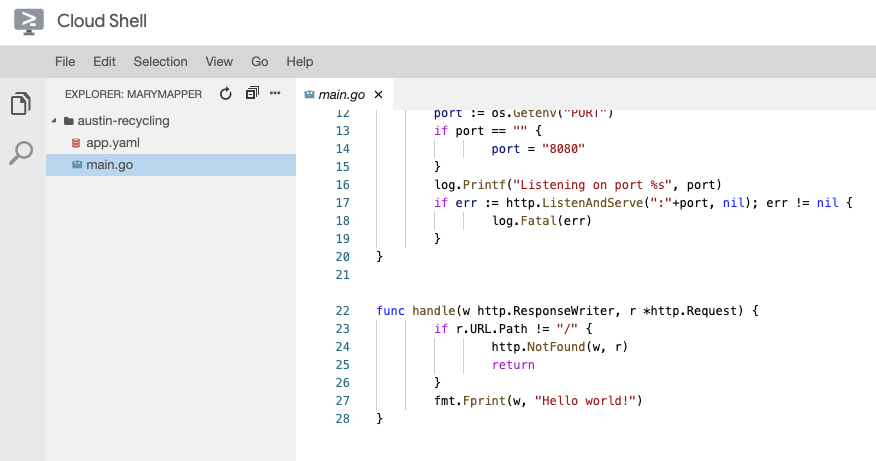
After carrying out these steps, you should now have an editor that looks like this:
Test it out
To test this application, you can run the App Engine development server inside the Cloud Shell instance. Go back to the Cloud Shell command line, and type the following:
go run *.go
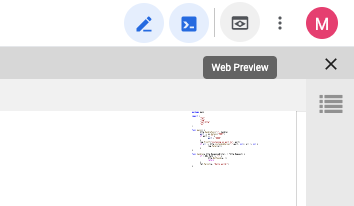
You will see some lines of log output showing you that you are indeed running the development server on the Cloud Shell instance, with the hello world web app listening on localhost port 8080. You can open a web browser tab on this app by pressing the Web Previewbutton and selecting the Preview on port 8080menu item in the Cloud Shell toolbar.
Clicking on this menu item will open a new tab in your web browser with the words "Hello, world!" served from the App Engine development server.
In the next step you'll add the City of Austin recycling data to this app, and start visualizing it.
4. Get current data
GeoJSON, the lingua franca of the GIS world
The previous step mentioned that you'll make handlers in your Go code that render GeoJSON data to the web browser. But what is GeoJSON?
In the Geographic Information System (GIS) world, we need to be able to communicate knowledge about geographic entities between computer systems. Maps are great for humans to read, but computers typically prefer their data in more easily digested formats.
GeoJSON is a format for encoding geographic data structures, like the coordinates of recycling drop-off locations in Austin, Texas. GeoJSON has been standardized in an Internet Engineering Task Force standard called RFC7946 . GeoJSON is defined in terms of JSON , JavaScript Object Notation, which itself was standardised in ECMA-404 , by the same organization that standardized JavaScript, Ecma International .
The important thing is that GeoJSON is a widely supported wire format for communicating geographic knowledge. This codelab uses GeoJSON in the following ways:
- Use Go packages to parse the Austin data into an internal GIS specific data structure that you'll use to filter requested data.
- Serialize the requested data for transit between the web server and web browser.
- Use a JavaScript library to convert the response into markers on a map.
This will save you a significant amount of typing in code, because you don't need to write parsers and generators to convert the on-the-wire datastream into in-memory representations.
Retrieve the data
The City of Austin, Texas Open Data Portal makes geospatial information about public resources available for public use. In this codelab, you'll visualize the recycling drop-off locations data set.
You'll visualize the data with markers on the map, rendered using the Data layer of the Maps JavaScript API.
Start by downloading the GeoJSON data from the City of Austin website into your app.
- In your Cloud Shell instance's command line window, shut down the server by typing [CTRL] + [C].
- Make a
datadirectory inside theaustin-recyclingdirectory, and change to that directory:
mkdir -p data && cd data
Now use curl to retrieve the recycling locations:
curl "https://data.austintexas.gov/resource/qzi7-nx8g.geojson" -o recycling-locations.geojson
Finally, change back up to the parent directory.
cd ..
5. Map the locations
First, update the app.yaml
file to reflect the more robust, "not just a hello world app anymore" application you're about to build.
app.yaml
  runtime
 :

 go
 env
 :

 flex
 handlers
 :
 -

 url
 :

 /

 static_files
 :

 static
 /
 index
 .
 html

 upload
 :

 static
 /
 index
 .
 html
 -

 url
 :

 /
 (
 .*
\ .
 (
 js
 |
 html
 |
 css
 ))
 $

 static_files
 :

 static
 /
\ 1

 upload
 :

 static
 /.*
\ .
 (
 js
 |
 html
 |
 css
 )
 $
 -

 url
 :

 /.*

 script
 :

 auto
 manual_scaling
 :

 instances
 :

 1
 resources
 :

 cpu
 :

 1

 memory_gb
 :

 0.5

 disk_size_gb
 :

 10
This app.yaml
configuration directs requests for /
, /*.js
, /*.css
and /*.html
to a set of static files. This means that the static HTML component of your app will be served directly by App Engine file serving infrastructure, and not your Go app. This reduces server load, and increases serving speed.
Now it's time to build your application's backend in Go!
Build the back end
You may have noticed, one interesting thing your app.yaml
file does notdo is expose the GeoJSON file. That's because the GeoJSON is going to be be processed and sent by our Go backend, letting us build in some fancy features in later steps. Change your main.go
file to read as follows:
main.go
  package
 main
 import

 (
 "fmt"
 "log"
 "net/http"
 "os"
 "path/filepath"
 )
 var
 GeoJSON
 =
 make
 (
 map
 [
 string
 ][]
 byte
 )
 //
 cacheGeoJSON
 loads
 files
 under
 data
 into
 `
 GeoJSON
 `
 .
 func
 cacheGeoJSON
 ()
 {
 filenames
 ,
 err
 :=
 filepath
 .
 Glob
 (
 "data/*"
 )
 if
 err
 !=
 nil
 {
 log
 .
 Fatal
 (
 err
 )
 }
 for
 _
 ,
 f
 :=
 range
 filenames
 {
 name
 :=
 filepath
 .
 Base
 (
 f
 )
 dat
 ,
 err
 :=
 os
 .
 ReadFile
 (
 f
 )
 if
 err
 !=
 nil
 {
 log
 .
 Fatal
 (
 err
 )
 }
 GeoJSON
 [
 name
 ]
 =
 dat
 }
 }
 func
 main
 ()
 {
 //
 Cache
 the
 JSON
 so
 it
 doesn
 't have to be reloaded every time a request is made.
 cacheGeoJSON
 ()
 //
 Request
 for
 data
 should
 be
 handled
 by
 Go
 .
 Everything
 else
 should
 be
 directed
 //
 to
 the
 folder
 of
 static
 files
 .
 http
 .
 HandleFunc
 (
 "/data/dropoffs"
 ,
 dropoffsHandler
 )
 http
 .
 Handle
 (
 "/"
 ,
 http
 .
 FileServer
 (
 http
 .
 Dir
 (
 "./static/"
 )))
 //
 Open
 up
 a
 port
 for
 the
 webserver
 .
 port
 :=
 os
 .
 Getenv
 (
 "PORT"
 )
 if
 port
 ==
 ""
 {
 port
 =
 "8080"
 }
 log
 .
 Printf
 (
 "Listening on port
 %s
 "
 ,
 port
 )
 if
 err
 :=
 http
 .
 ListenAndServe
 (
 ":"
 +
 port
 ,
 nil
 );
 err
 !=
 nil
 {
 log
 .
 Fatal
 (
 err
 )
 }
 }
 func
 helloHandler
 (
 w
 http
 .
 ResponseWriter
 ,
 r
 *
 http
 .
 Request
 )
 {
 //
 Writes
 Hello
 ,
 World
 !
 to
 the
 user
 's web browser via `w`
 fmt
 .
 Fprint
 (
 w
 ,
 "Hello, world!"
 )
 }
 func
 dropoffsHandler
 (
 w
 http
 .
 ResponseWriter
 ,
 r
 *
 http
 .
 Request
 )
 {
 w
 .
 Header
 ()
 .
 Set
 (
 "Content-type"
 ,
 "application/json"
 )
 w
 .
 Write
 (
 GeoJSON
 [
 "recycling-locations.geojson"
 ])
 }
Already the Go backend is giving us a valuable feature: The AppEngine instance is caching all those locations as soon as it starts up. This saves time since the backend won't have to read the file from disk on every refresh from every user!
Build the front end
The first thing we need to do is create a folder to hold all our static assets. From the parent folder of your project, create a static
folder.
mkdir -p static && cd static
We're going to create 3 files in this folder.
-
index.htmlwill contain all the HTML for your one-page store locator app. -
style.css, as you would expect, will contain the styling -
app.jswill be responsible for retrieving the GeoJSON, making calls to the Maps API, and placing markers on your custom map.
Create these 3 files, making sure to put them in static/
.
style.css
  html
 ,
 body

 {

 height
 :

 100
 %
 ;

 margin
 :

 0
 ;

 padding
 :

 0
 ;
 }
 body

 {

 display
 :

 flex
 ;
 }
 #
 map

 {

 height
 :

 100
 %
 ;

 flex-grow
 :

 4
 ;

 flex-basis
 :

 auto
 ;
 }
index.html
 < html
>
< head
>
< title>Austin

 recycling

 drop
 -
 off

 locations
< /
 title
>
< link

 rel
 =
 "stylesheet"

 type
 =
 "text/css"

 href
 =
 "style.css"

 /
>
< script

 src
 =
 "app.js"
>< /
 script
>
< script

 defer

 src
 =
 "https://maps.googleapis.com/maps/api/js?key=YOUR_API_KEY&v=weekly&libraries=places&callback=initialize&solution_channel=GMP_codelabs_fullstackstorelocator_v1_a"

>< /
 script
>
< /
 head
>
< body
>
< div

 id
 =
 "map"
>< /
 div
>
< !
 --

 Autocomplete

 div

 goes

 here

 --
>
< /
 body
>
< /
 html
>
Pay special attention to the src
URL in the script tag of the head
element.
- Replace the placeholder text "
YOUR_API_KEY" with the API key you generated during the setup step. You can visit the APIs & Services -> Credentials page in Cloud Console to retrieve your API key or generate a new one. - Note that the URL contains the parameter
callback=initialize.We're now going to create the javascript file containing that callback function. This is where your app will load the locations from the backend, send them to the Maps API, and use the result to mark custom locations on the map, all beautifully rendered to your web page. - The parameter
libraries=placesloads the Places Library, which is necessary for features such as address autocomplete that will be added later.
app.js
  let

 distanceMatrixService
 ;
 let

 map
 ;
 let

 originMarker
 ;
 let

 infowindow
 ;
 let

 circles

 =

 [];
 let

 stores

 =

 [];
 //

 The

 location

 of

 Austin
 ,

 TX
 const

 AUSTIN

 =

 {

 lat
 :

 30.262129
 ,

 lng
 :

 -
 97.7468

 };
 async

 function

 initialize
 ()

 {

 initMap
 ();

 //

 TODO
 :

 Initialize

 an

 infoWindow

 //

 Fetch

 and

 render

 stores

 as

 circles

 on

 map

 fetchAndRenderStores
 (
 AUSTIN
 );

 //

 TODO
 :

 Initialize

 the

 Autocomplete

 widget
 }
 const

 initMap

 =

 ()

 =
>
 {

 //

 TODO
 :

 Start

 Distance

 Matrix

 service

 //

 The

 map
 ,

 centered

 on

 Austin
 ,

 TX

 map

 =

 new

 google
 .
 maps
 .
 Map
 (
 document
 .
 querySelector
 (
 "#map"
 ),

 {

 center
 :

 AUSTIN
 ,

 zoom
 :

 14
 ,

 //

 mapId
 :

 'YOUR_MAP_ID_HERE'
 ,

 clickableIcons
 :

 false
 ,

 fullscreenControl
 :

 false
 ,

 mapTypeControl
 :

 false
 ,

 rotateControl
 :

 true
 ,

 scaleControl
 :

 false
 ,

 streetViewControl
 :

 true
 ,

 zoomControl
 :

 true
 ,

 });
 };
 const

 fetchAndRenderStores

 =

 async

 (
 center
 )

 =
>
 {

 //

 Fetch

 the

 stores

 from

 the

 data

 source

 stores

 =

 (
 await

 fetchStores
 (
 center
 ))
 .
 features
 ;

 //

 Create

 circular

 markers

 based

 on

 the

 stores

 circles

 =

 stores
 .
 map
 ((
 store
 )

 =
>
 storeToCircle
 (
 store
 ,

 map
 ));
 };
 const

 fetchStores

 =

 async

 (
 center
 )

 =
>
 {

 const

 url

 =

 `
 /
 data
 /
 dropoffs
 `
 ;

 const

 response

 =

 await

 fetch
 (
 url
 );

 return

 response
 .
 json
 ();
 };
 const

 storeToCircle

 =

 (
 store
 ,

 map
 )

 =
>
 {

 const

 [
 lng
 ,

 lat
 ]

 =

 store
 .
 geometry
 .
 coordinates
 ;

 const

 circle

 =

 new

 google
 .
 maps
 .
 Circle
 ({

 radius
 :

 50
 ,

 strokeColor
 :

 "#579d42"
 ,

 strokeOpacity
 :

 0.8
 ,

 strokeWeight
 :

 5
 ,

 center
 :

 {

 lat
 ,

 lng

 },

 map
 ,

 });

 return

 circle
 ;
 };
This code renders store locations on a map. To test what we have so far, from the command line return to the parent directory:
cd ..
Now, run your app in development mode again using:
go run *.go
Preview it as you did before. You should see a map with small green circles like this.
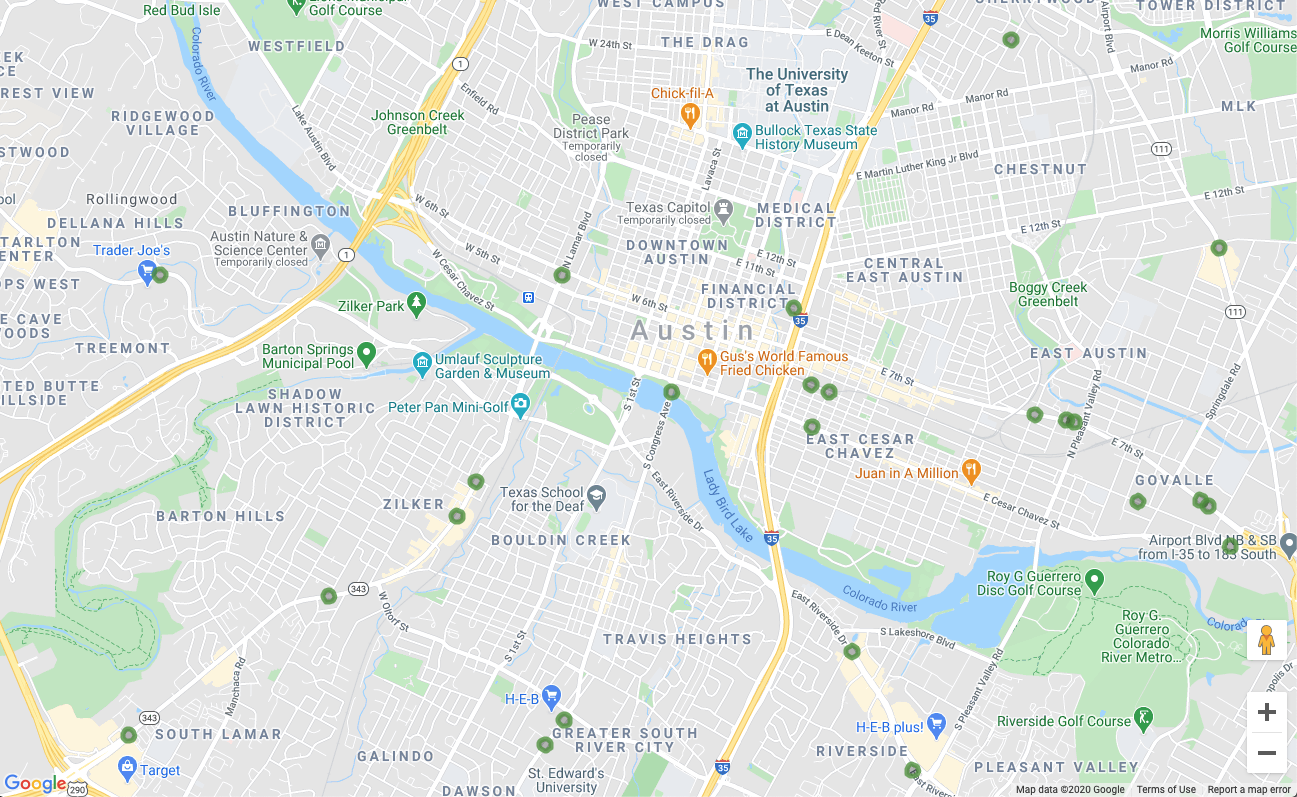
You're already rendering map locations, and we're only halfway through the codelab! Amazing. Now let's add some interactivity.
6. Show details on demand
Respond to click events on map markers
Displaying a bunch of markers on the map is a great start, but we really need a visitor to be able to click on one of those markers and see information about that location (like the name of the business, the address, etc). The name of the little information window that usually pops up when you click on a Google Maps marker is an Info Window .
Create an infoWindow object. Add the following to the initialize
function, replacing the commented line that reads " // TODO: Initialize an info window
".
app.js - initialize
 // Add an info window that pops up when user clicks on an individual

 // location. Content of info window is entirely up to us.

 infowindow

 =

 new

 google
 .
 maps
 .
 InfoWindow
 ();
Replace the fetchAndRenderStores
function definition with this slightly different version, which changes the final line to call storeToCircle
with an additional argument, infowindow
:
app.js - fetchAndRenderStores
  const

 fetchAndRenderStores

 =

 async

 (
 center
 )

 =
>
 {

 //

 Fetch

 the

 stores

 from

 the

 data

 source

 stores

 =

 (
 await

 fetchStores
 (
 center
 ))
 .
 features
 ;

 //

 Create

 circular

 markers

 based

 on

 the

 stores

 circles

 =

 stores
 .
 map
 ((
 store
 )

 =
>
 storeToCircle
 (
 store
 ,

 map
 ,

 infowindow
 ));
 };
Replace the storeToCircle
definition with this slightly longer version, which now takes an Info Window as a third argument:
app.js - storeToCircle
  const

 storeToCircle

 =

 (
 store
 ,

 map
 ,

 infowindow
 )

 =
>
 {

 const

 [
 lng
 ,

 lat
 ]

 =

 store
 .
 geometry
 .
 coordinates
 ;

 const

 circle

 =

 new

 google
 .
 maps
 .
 Circle
 ({

 radius
 :

 50
 ,

 strokeColor
 :

 "#579d42"
 ,

 strokeOpacity
 :

 0.8
 ,

 strokeWeight
 :

 5
 ,

 center
 :

 {

 lat
 ,

 lng

 },

 map
 ,

 });

 circle
 .
 addListener
 (
 "click"
 ,

 ()

 =
>
 {

 infowindow
 .
 setContent
 (
 `
 $
 {
 store
 .
 properties
 .
 business_name
 }
< br

 /
>
 $
 {
 store
 .
 properties
 .
 address_address
 }
< br

 /
>
 Austin
 ,

 TX

 $
 {
 store
 .
 properties
 .
 zip_code
 }
 `
 );

 infowindow
 .
 setPosition
 ({

 lat
 ,

 lng

 });

 infowindow
 .
 setOptions
 ({

 pixelOffset
 :

 new

 google
 .
 maps
 .
 Size
 (
 0
 ,

 -
 30
 )

 });

 infowindow
 .
 open
 (
 map
 );

 });

 return

 circle
 ;
 };
The new code above displays an infoWindow
with the selected store's information whenever a store marker on the map is clicked.
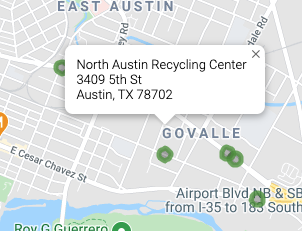
If your server is still running, stop it and restart it. Refresh your map page and try clicking on a map marker. A little info window should pop up with the business's name and address, looking something like this:
7. Get the user's starting location
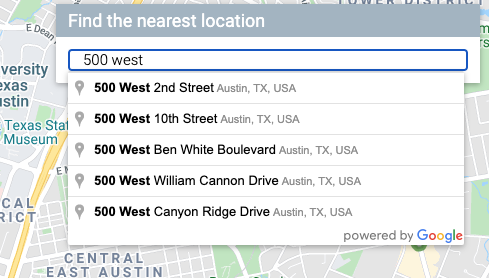
Users of store locators typically want to know which store is closest to them or an address where they plan to start their journey. Add a Place Autocomplete search bar to allow the user to easily enter a starting address. Place Autocomplete provides typeahead functionality similar to the way Autocomplete works in other Google search bars, except the predictions are all Places in Google Maps Platform.
Create a user input field
Go back to edit style.css
to add styling for the Autocomplete search bar and the associated side panel of results. While we are updating the CSS styles, we'll also add styles for a future sidebar that displays store information as a list to accompany the map.
Add this code to the end of the file.
style.css
  #
 panel

 {

 height
 :

 100
 %
 ;

 flex-basis
 :

 0
 ;

 flex-grow
 :

 0
 ;

 overflow
 :

 auto
 ;

 transition
 :

 all

 0.2
 s

 ease-out
 ;
 }
 #
 panel
 .
 open

 {

 flex-basis
 :

 auto
 ;
 }
 #
 panel

 .
 place

 {

 font-family
 :

 "open sans"
 ,

 arial
 ,

 sans-serif
 ;

 font-size
 :

 1.2
 em
 ;

 font-weight
 :

 500
 ;

 margin-block-end
 :

 0
 px
 ;

 padding-left
 :

 18
 px
 ;

 padding-right
 :

 18
 px
 ;
 }
 #
 panel

 .
 distanceText

 {

 color
 :

 silver
 ;

 font-family
 :

 "open sans"
 ,

 arial
 ,

 sans-serif
 ;

 font-size
 :

 1
 em
 ;

 font-weight
 :

 400
 ;

 margin-block-start
 :

 0.25
 em
 ;

 padding-left
 :

 18
 px
 ;

 padding-right
 :

 18
 px
 ;
 }
 /* Styling for Autocomplete search bar */
 #
 pac-card

 {

 background-color
 :

 #fff
 ;

 border-radius
 :

 2
 px

 0

 0

 2
 px
 ;

 box-shadow
 :

 0

 2
 px

 6
 px

 rgba
 (
 0
 ,

 0
 ,

 0
 ,

 0.3
 );

 box-sizing
 :

 border-box
 ;

 font-family
 :

 Roboto
 ;

 margin
 :

 10
 px

 10
 px

 0

 0
 ;

 -moz-
 box-sizing
 :

 border-box
 ;

 outline
 :

 none
 ;
 }
 #
 pac-container

 {

 padding-top
 :

 12
 px
 ;

 padding-bottom
 :

 12
 px
 ;

 margin-right
 :

 12
 px
 ;
 }
 #
 pac-input

 {

 background-color
 :

 #fff
 ;

 font-family
 :

 Roboto
 ;

 font-size
 :

 15
 px
 ;

 font-weight
 :

 300
 ;

 margin-left
 :

 12
 px
 ;

 padding
 :

 0

 11
 px

 0

 13
 px
 ;

 text-overflow
 :

 ellipsis
 ;

 width
 :

 400
 px
 ;
 }
 #
 pac-input
 :
 focus

 {

 border-color
 :

 #4d90fe
 ;
 }
 #
 pac-title

 {

 color
 :

 #fff
 ;

 background-color
 :

 #acbcc9
 ;

 font-size
 :

 18
 px
 ;

 font-weight
 :

 400
 ;

 padding
 :

 6
 px

 12
 px
 ;
 }
 .
 hidden

 {

 display
 :

 none
 ;
 }
Both the Autocomplete search bar and the slideout panel are initially hidden until they are needed.
Prepare a div for the Autocomplete widget by replacing the comment in index.html that reads "<!-- Autocomplete div goes here -->
" with the following code. While making this edit, we'll also add the div for the slide out panel.
index.html
< div

 id
 =
 "panel"

 class
 =
 "closed"
>< /
 div
>
< div

 class
 =
 "hidden"
>
< div

 id
 =
 "pac-card"
>
< div

 id
 =
 "pac-title"
> Find

 the

 nearest

 location
< /
 div
>
< div

 id
 =
 "pac-container"
>
< input

 id
 =
 "pac-input"

 type
 =
 "text"

 placeholder
 =
 "Enter an address"

 class
 =
 "pac-target-input"

 autocomplete
 =
 "off"

 /
>
< /
 div
>
< /
 div
>
< /
 div
>
Now, define a function to add the Autocomplete widget to the map by adding the following code to the end of app.js
.
app.js
  const

 initAutocompleteWidget

 =

 ()

 =
>
 {

 // Add search bar for auto-complete

 // Build and add the search bar

 const

 placesAutoCompleteCardElement

 =

 document
 .
 getElementById
 (
 "pac-card"
 );

 const

 placesAutoCompleteInputElement

 =

 placesAutoCompleteCardElement
 .
 querySelector
 (

 "input"

 );

 const

 options

 =

 {

 types
 :

 [
 "address"
 ],

 componentRestrictions
 :

 {

 country
 :

 "us"

 },

 map
 ,

 };

 map
 .
 controls
 [
 google
 .
 maps
 .
 ControlPosition
 .
 TOP_RIGHT
 ].
 push
 (

 placesAutoCompleteCardElement

 );

 // Make the search bar into a Places Autocomplete search bar and select

 // which detail fields should be returned about the place that

 // the user selects from the suggestions.

 const

 autocomplete

 =

 new

 google
 .
 maps
 .
 places
 .
 Autocomplete
 (

 placesAutoCompleteInputElement
 ,

 options

 );

 autocomplete
 .
 setFields
 ([
 "address_components"
 ,

 "geometry"
 ,

 "name"
 ]);

 map
 .
 addListener
 (
 "bounds_changed"
 ,

 ()

 =
>
 {

 autocomplete
 .
 setBounds
 (
 map
 .
 getBounds
 ());

 });

 // TODO: Respond when a user selects an address
 };
The code restricts the Autocomplete suggestions to only return addresses (because Place Autocomplete can also match for establishment names and administrative locations) and limits the addresses returned to only those in the USA. Adding these optional specifications will reduce the number of characters the user needs to enter in order to narrow down the predictions to show the address they are looking for.
Then, it moves the Autocomplete div
you created into the top-right corner of the map and specifies which fields should be returned about each Place in the response.
Finally, call the initAutocompleteWidget
function at the end of the initialize
function, replacing the comment that reads " // TODO: Initialize the Autocomplete widget
".
app.js - initialize
 // Initialize the Places Autocomplete Widget

 initAutocompleteWidget
 ();
Restart your server by running the following command, then refresh your preview.
go run *.go
You should see an Autocomplete widget in the top-right corner of your map now, which shows you US addresses matching what you type, biased toward the visible area of the map.
Update the Map When User Selects a Starting Address
Now, you need to handle when the user selects a prediction from the Autocomplete widget and use that location as the basis for calculating the distances to your stores.
Add the following code to the end of initAutocompleteWidget
in app.js
, replacing the comment " // TODO: Respond when a user selects an address
".
app.js - initAutocompleteWidget
 //

 Respond

 when

 a

 user

 selects

 an

 address

 //

 Set

 the

 origin

 point

 when

 the

 user

 selects

 an

 address

 originMarker

 =

 new

 google
 .
 maps
 .
 Marker
 ({

 map
 :

 map

 });

 originMarker
 .
 setVisible
 (
 false
 );

 let

 originLocation

 =

 map
 .
 getCenter
 ();

 autocomplete
 .
 addListener
 (
 "place_changed"
 ,

 async

 ()

 =
>
 {

 //

 circles
 .
 forEach
 ((
 c
 )

 =
>
 c
 .
 setMap
 (
 null
 ));

 //

 clear

 existing

 stores

 originMarker
 .
 setVisible
 (
 false
 );

 originLocation

 =

 map
 .
 getCenter
 ();

 const

 place

 =

 autocomplete
 .
 getPlace
 ();

 if

 (
 !
 place
 .
 geometry
 )

 {

 //

 User

 entered

 the

 name

 of

 a

 Place

 that

 was

 not

 suggested

 and

 //

 pressed

 the

 Enter

 key
 ,

 or

 the

 Place

 Details

 request

 failed
 .

 window
 .
 alert
 (
 "No address available for input: '"

 +

 place
 .
 name

 +

 "'"
 );

 return
 ;

 }

 //

 Recenter

 the

 map

 to

 the

 selected

 address

 originLocation

 =

 place
 .
 geometry
 .
 location
 ;

 map
 .
 setCenter
 (
 originLocation
 );

 map
 .
 setZoom
 (
 15
 );

 originMarker
 .
 setPosition
 (
 originLocation
 );

 originMarker
 .
 setVisible
 (
 true
 );

 //

 await

 fetchAndRenderStores
 (
 originLocation
 .
 toJSON
 ());

 //

 TODO
 :

 Calculate

 the

 closest

 stores

 });
The code adds a listener so that when the user clicks on one of the suggestions, the map recenters on the selected address and sets the origin as the basis for your distance calculations. You implement the distance calculations in a future step.
Stop and restart your server and refresh your preview to observe the map re-centering after you input an address into the autocomplete search bar.
8. Scale with Cloud SQL
So far, we have a pretty great store locator. It takes advantage of the fact there's only around a hundred locations the app will ever use, by loading them into memory on the backend (instead of reading from the file repeatedly.). But what if your locator needs to operate on a different scale? If you have hundreds of locations scattered around a large geographic area (or thousands all over the world), keeping all those locations in memory isn't the best idea anymore, and breaking zones down into individual files is going to introduce its own problems.
It's time to load your locations from a database. For this step we're going to migrate all the locations in your GeoJSON file into a Cloud SQL database, and update the Go backend to pull results from that database instead of from its local cache whenever a request comes in.
Create a Cloud SQL Instance with PostGres Database
You can create a Cloud SQL instance through the Google Cloud Console, but it's even easier to use the gcloud
utility to create one from the command line. In cloud shell, create a Cloud SQL instance with the following command:
gcloud sql instances create locations \
--database-version=POSTGRES_12 \
--tier=db-custom-1-3840 --region=us-central1
- The argument
locationsis the name we choose to give this instance of Cloud SQL. - The
tierflag is a way to select from some conveniently pre-defined machines . - The value
db-custom-1-3840indicates the instance being created should have one vCPU and about 3.75GB of memory.
The Cloud SQL instance will be created and initialized with a PostGresSQL database, with the default user postgres
. What's this user's password? Great question! They don't have one. You need to configure one before you can log in.
Set the password with the following command:
gcloud sql users set-password postgres \
    --instance=locations --prompt-for-password
Then enter your chosen password when prompted to do so.
Enable PostGIS Extension
PostGIS is an extension for PostGresSQL which makes it easier to store standardized types of geospatial data. Under normal circumstances we'd have to go through a full installation process to add PostGIS to our database. Fortunately, it's one of Cloud SQL's supported extensions for PostGresSQL .
Connect to the database instance by logging in as the user postgres
with the following command in the cloud shell terminal.
gcloud sql connect locations --user=postgres --quiet
Enter the password you just created. Now add the PostGIS extension at the postgres=>
command prompt.
CREATE EXTENSION postgis;
If successful, the output should read CREATE EXTENSION, as shown below.
Example command output
CREATE EXTENSION
Finally, quit the database connection by entering the quit command at the postgres=>
command prompt.
\q
Import Geographic Data into Database
Now we need to import all that location data from the GeoJSON files into our new database.
Fortunately, this is a well-travelled problem and several tools can be found on the internet to automate this for you. We're going to use a tool called ogr2ogr which converts between multiple common formats for storing geospatial data. Among those options is, yup, you guessed it, converting form GeoJSON to a SQL dump file. The SQL dump file can then be used to create your tables & columns for the database, and load it with all the data that existed in your GeoJSON files.
Create SQL dump file
First, install ogr2ogr.
sudo apt-get install gdal-bin
Next, use ogr2ogr to create the SQL dump file. This file will create a table called austinrecycling
.
ogr2ogr --config PG_USE_COPY YES -f PGDump datadump.sql \
data/recycling-locations.geojson -nln austinrecycling
The command above is based on running from the austin-recycling
folder. If you need to run it from another directory, replace data
with the path to the directory where recycling-locations.geojson
is stored.
Populate your database with recycling locations
Upon completion of that last command, you should now have a file, datadump.sql,
in the same directory where you ran the command. If you open it you'll see a little over a hundred lines of SQL, creating a table austinrecycling
and populating it with locations.
Now, open a connection to the database and run that script with the following command.
gcloud sql connect locations --user=postgres --quiet < datadump.sql
If the script runs successfully, this is what the last few lines of output will look like this:
Sample command output
ALTER TABLE
ALTER TABLE
ATLER TABLE
ALTER TABLE
COPY 103
COMMIT
WARNING: there is no transaction in progress
COMMIT
Update the Go back end to use Cloud SQL
Now that we have all this data in our database, it's time to update our code.
Update front end to send location information
Let's start with one very small update to the front-end: Because we're now writing this app for a scale where we don't want every single locationdelivered to the front-end every single time the query is run, we need to pass some basic information from the front-end about the location the user cares about.
Open up app.js
and replace the fetchStores
function definition with this version to include the latitude and longitude of interest in the URL.
app.js - fetchStores
  const

 fetchStores

 =

 async

 (
 center
 )

 =
>
 {

 const

 url

 =

 `
 /
 data
 /
 dropoffs
 ?
 centerLat
 =$
 {
 center
 .
 lat
 }
& centerLng
 =$
 {
 center
 .
 lng
 }
 `
 ;

 const

 response

 =

 await

 fetch
 (
 url
 );

 return

 response
 .
 json
 ();
 };
After completing this step of the codelab, the response will only return the stores closest to the map coordinates provided in the center
parameter. For the initial fetch in the initialize
function, the sample code provided in this lab uses the central coordinates for Austin, Texas.
Since fetchStores
will now only return a subset of the store locations, we will need to re-fetch the stores whenever the user changes their starting location.
Update the initAutocompleteWidget
function to refresh the locations whenever a new origin is set. This requires two edits:
- Within initAutocompleteWidget, find the callback for the
place_changedlistener. Un-comment the line that clears existing circles, so that line will now run each time the user selects an address from the Place Autocomplete search abr.
app.js - initAutocompleteWidget
 autocomplete.addListener("place_changed", async () => {
    circles.forEach((c) => c.setMap(null)); // clear existing stores
    // ...
- Whenever the selected origin is changed, the variable originLocation is updated. At the end of the "
place_changed" callback, un-comment the line above the "// TODO: Calculate the closest stores" line to pass this new origin to a fresh call to thefetchAndRenderStoresfunction.
app.js - initAutocompleteWidget
 await fetchAndRenderStores(originLocation.toJSON());
    // TODO: Calculate the closest stores
Update the back end to use CloudSQL instead of a flat JSON file
Remove flat-file GeoJSON reading and caching
First, change main.go
to remove the code that loads and caches the flat GeoJSON file. We can also get rid of the dropoffsHandler
function, as we'll be writing one powered by Cloud SQL in a different file.
Your new main.go
will be a lot shorter.
main.go
  package
 main
 import

 (
 "log"
 "net/http"
 "os"
 )
 func
 main
 ()
 {
 initConnectionPool
 ()
 //
 Request
 for
 data
 should
 be
 handled
 by
 Go
 .
 Everything
 else
 should
 be
 directed
 //
 to
 the
 folder
 of
 static
 files
 .
 http
 .
 HandleFunc
 (
 "/data/dropoffs"
 ,
 dropoffsHandler
 )
 http
 .
 Handle
 (
 "/"
 ,
 http
 .
 FileServer
 (
 http
 .
 Dir
 (
 "./static/"
 )))
 //
 Open
 up
 a
 port
 for
 the
 webserver
 .
 port
 :=
 os
 .
 Getenv
 (
 "PORT"
 )
 if
 port
 ==
 ""
 {
 port
 =
 "8080"
 }
 log
 .
 Printf
 (
 "Listening on port
 %s
 "
 ,
 port
 )
 if
 err
 :=
 http
 .
 ListenAndServe
 (
 ":"
 +
 port
 ,
 nil
 );
 err
 !=
 nil
 {
 log
 .
 Fatal
 (
 err
 )
 }
 }
Create a new handler for Location Requests
Now let's create another file, locations.go
, also in the austin-recycling directory. Start with re-implementing the handler for location requests.
locations.go
  package
 main
 import

 (
 "database/sql"
 "fmt"
 "log"
 "net/http"
 "os"
 _
 "github.com/jackc/pgx/stdlib"
 )
 //
 queryBasic
 demonstrates
 issuing
 a
 query
 and
 reading
 results
 .
 func
 dropoffsHandler
 (
 w
 http
 .
 ResponseWriter
 ,
 r
 *
 http
 .
 Request
 )
 {
 w
 .
 Header
 ()
 .
 Set
 (
 "Content-type"
 ,
 "application/json"
 )
 centerLat
 :=
 r
 .
 FormValue
 (
 "centerLat"
 )
 centerLng
 :=
 r
 .
 FormValue
 (
 "centerLng"
 )
 geoJSON
 ,
 err
 :=
 getGeoJSONFromDatabase
 (
 centerLat
 ,
 centerLng
 )
 if
 err
 !=
 nil
 {
 str
 :=
 fmt
 .
 Sprintf
 (
 "Couldn't encode results:
 %s
 "
 ,
 err
 )
 http
 .
 Error
 (
 w
 ,
 str
 ,
 500
 )
 return
 }
 fmt
 .
 Fprintf
 (
 w
 ,
 geoJSON
 )
 }
The handler performs the following significant tasks:
- It pulls latitude and longitude from the request object (Remember how we added those to the URL? )
- It fires off the
getGeoJsonFromDatabasecall, which returns a GeoJSON string (We will write this later.) - It uses the
ResponseWriterto print that GeoJSON string to the response.
Next we're going to create a connection pool to help database usage scale well with simultaneous users.
Create a Connection Pool
A connection pool
is a collection of active database connections the server can reuse to service user requests. It removes a lot of overhead as your number of active users scales, since the server doesn't have to spend time creating and destroying connections for every active user. You may have noticed in the previous section we imported the library github.com/jackc/pgx/stdlib.
This is a popular library for working with connection pools in Go.
At the end of locations.go
, create a function initConnectionPool
(called from main.go
) that initializes a connection pool. For clarity, a few helper methods are used in this snippet. configureConnectionPool
provides a handy place to adjust pool settings like number of connections and lifetime per connection. mustGetEnv
wraps calls to get required environment variables, so useful errors messages can be thrown if the instance is missing critical information (like the IP or name of the database to connect to).
locations.go
  //

 The

 connection

 pool
 var

 db

 *
 sql
 .
 DB
 //

 Each

 struct

 instance

 contains

 a

 single

 row

 from

 the

 query

 result
 .
 type

 result

 struct

 {

 featureCollection

 string
 }
 func

 initConnectionPool
 ()

 {

 //

 If

 the

 optional

 DB_TCP_HOST

 environment

 variable

 is

 set
 ,

 it

 contains

 //

 the

 IP

 address

 and

 port

 number

 of

 a

 TCP

 connection

 pool

 to

 be

 created
 ,

 //

 such

 as

 "127.0.0.1:5432"
 .

 If

 DB_TCP_HOST

 is

 not

 set
 ,

 a

 Unix

 socket

 //

 connection

 pool

 will

 be

 created

 instead
 .

 if

 os
 .
 Getenv
 (
 "DB_TCP_HOST"
 )

 !=

 ""

 {

 var

 (

 dbUser

 =

 mustGetenv
 (
 "DB_USER"
 )

 dbPwd

 =

 mustGetenv
 (
 "DB_PASS"
 )

 dbTCPHost

 =

 mustGetenv
 (
 "DB_TCP_HOST"
 )

 dbPort

 =

 mustGetenv
 (
 "DB_PORT"
 )

 dbName

 =

 mustGetenv
 (
 "DB_NAME"
 )

 )

 var

 dbURI

 string

 dbURI

 =

 fmt
 .
 Sprintf
 (
 "host=
 %s
 user=
 %s
 password=
 %s
 port=
 %s
 database=
 %s
 "
 ,

 dbTCPHost
 ,

 dbUser
 ,

 dbPwd
 ,

 dbPort
 ,

 dbName
 )

 //

 dbPool

 is

 the

 pool

 of

 database

 connections
 .

 dbPool
 ,

 err

 :
 =

 sql
 .
 Open
 (
 "pgx"
 ,

 dbURI
 )

 if

 err

 !=

 nil

 {

 dbPool

 =

 nil

 log
 .
 Fatalf
 (
 "sql.Open: %v"
 ,

 err
 )

 }

 configureConnectionPool
 (
 dbPool
 )

 if

 err

 !=

 nil

 {

 log
 .
 Fatalf
 (
 "initConnectionPool: unable to connect:
 %s
 "
 ,

 err
 )

 }

 db

 =

 dbPool

 }
 }
 //

 configureConnectionPool

 sets

 database

 connection

 pool

 properties
 .
 //

 For

 more

 information
 ,

 see

 https
 :
 //
 golang
 .
 org
 /
 pkg
 /
 database
 /
 sql
 func

 configureConnectionPool
 (
 dbPool

 *
 sql
 .
 DB
 )

 {

 //

 Set

 maximum

 number

 of

 connections

 in

 idle

 connection

 pool
 .

 dbPool
 .
 SetMaxIdleConns
 (
 5
 )

 //

 Set

 maximum

 number

 of

 open

 connections

 to

 the

 database
 .

 dbPool
 .
 SetMaxOpenConns
 (
 7
 )

 //

 Set

 Maximum

 time

 (
 in

 seconds
 )

 that

 a

 connection

 can

 remain

 open
 .

 dbPool
 .
 SetConnMaxLifetime
 (
 1800
 )
 }
 //

 mustGetEnv

 is

 a

 helper

 function

 for

 getting

 environment

 variables
 .
 //

 Displays

 a

 warning

 if

 the

 environment

 variable

 is

 not

 set
 .
 func

 mustGetenv
 (
 k

 string
 )

 string

 {

 v

 :
 =

 os
 .
 Getenv
 (
 k
 )

 if

 v

 ==

 ""

 {

 log
 .
 Fatalf
 (
 "Warning:
 %s
 environment variable not set.
 \n
 "
 ,

 k
 )

 }

 return

 v
 }
Query the Database for locations, get JSON in return.
Now we're going to write a database query which takes map coordinates and returns the closest 25 locations. Not only that, but thanks to some fancy modern database functionality it'll return that data as GeoJSON. The end result of all this is that as far as the front-end code can tell, nothing has changed. Before it fired off a request to a URL and got a bunch of GeoJSON. Now it fires off a request to a URL and... gets back a bunch of GeoJSON.
Here's the function to perform that magic. Add the following function after the handler and connection pooling code you just wrote at the bottom of locations.go
.
locations.go
  func

 getGeoJSONFromDatabase
 (
 centerLat

 string
 ,

 centerLng

 string
 )

 (
 string
 ,

 error
 )

 {

 //

 Obviously

 you

 can

 one
 -
 line

 this
 ,

 but

 for

 testing

 purposes

 let
 's make it easy to modify on the fly.

 const

 milesRadius

 =

 10

 const

 milesToMeters

 =

 1609

 const

 radiusInMeters

 =

 milesRadius

 *

 milesToMeters

 const

 tableName

 =

 "austinrecycling"

 var

 queryStr

 =

 fmt
 .
 Sprintf
 (

 `
 SELECT

 jsonb_build_object
 (

 'type'
 ,

 'FeatureCollection'
 ,

 'features'
 ,

 jsonb_agg
 (
 feature
 )

 )

 FROM

 (

 SELECT

 jsonb_build_object
 (

 'type'
 ,

 'Feature'
 ,

 'id'
 ,

 ogc_fid
 ,

 'geometry'
 ,

 ST_AsGeoJSON
 (
 wkb_geometry
 )::
 jsonb
 ,

 'properties'
 ,

 to_jsonb
 (
 row
 )

 -

 'ogc_fid'

 -

 'wkb_geometry'

 )

 AS

 feature

 FROM

 (

 SELECT

 *
 ,

 ST_Distance
 (

 ST_GEOGFromWKB
 (
 wkb_geometry
 ),

 --

 Los

 Angeles

 (
 LAX
 )

 ST_GEOGFromWKB
 (
 st_makepoint
 (
 %
 v
 ,

 %
 v
 ))

 )

 as

 distance

 from

 %
 v

 order

 by

 distance

 limit

 25

 )

 row

 where

 distance
 <
 %
 v

 )

 features

 `
 ,

 centerLng
 ,

 centerLat
 ,

 tableName
 ,

 radiusInMeters
 )

 log
 .
 Println
 (
 queryStr
 )

 rows
 ,

 err

 :
 =

 db
 .
 Query
 (
 queryStr
 )

 defer

 rows
 .
 Close
 ()

 rows
 .
 Next
 ()

 queryResult

 :
 =

 result
 {}

 err

 =

 rows
 .
 Scan
 (
& queryResult
 .
 featureCollection
 )

 return

 queryResult
 .
 featureCollection
 ,

 err
 }
This function is mostly just setup, teardown, and error handling for firing off a request to the database. Let's look at the actual SQL, which is doing a lot of really interesting things at the database layer, so you don't have to worry about implementing any of them in code.
The raw query that gets fired off, once the string has been parsed and all the string literals inserted in their proper places, looks like this:
parsed.sql
  SELECT

 jsonb_build_object
 (

 '
 type
 '
 ,

 '
 FeatureCollection
 '
 ,

 '
 features
 '
 ,

 jsonb_agg
 (
 feature
 )

 )
 FROM

 (

 SELECT

 jsonb_build_object
 (

 '
 type
 '
 ,

 '
 Feature
 '
 ,

 '
 id
 '
 ,

 ogc_fid
 ,

 '
 geometry
 '
 ,

 ST_AsGeoJSON
 (
 wkb_geometry
 )
 ::
 jsonb
 ,

 '
 properties
 '
 ,

 to_jsonb
 (
 row
 )

 -

 '
 ogc_fid
 '

 -

 '
 wkb_geometry
 '

 )

 AS

 feature

 FROM

 (

 SELECT

 *
 ,

 ST_Distance
 (

 ST_GEOGFromWKB
 (
 wkb_geometry
 ),

 --

 Los

 Angeles

 (
 LAX
 )

 ST_GEOGFromWKB
 (
 st_makepoint
 (
 -
 97.7624043
 ,

 30.523725
 ))

 )

 as

 distance

 from

 austinrecycling

 order

 by

 distance

 limit

 25

 )

 row

 where

 distance
 <
 16090

 )

 features
This query can be viewed as one primary query and some JSON wrapping functions.
SELECT * ... LIMIT 25
selects all the fields for each location. It then uses the ST_DISTANCE
function (part of PostGIS's suite of geography measurement functions
) to determine the distance between each location in the database and the lat/long pair of the location the user provided in the front-end. Remember that unlike Distance Matrix, which can give you driving distance, these are GeoSpatial distances. For efficiency it then uses that distance to sort and returns the 25 closest locations to the user's specified location.
** SELECT json_build_object(‘type', ‘F
**eature') wraps the previous query, taking the results and using them to build out a GeoJSON Feature object
. Unexpectedly, this query is also where the max radius is applied "16090" is the number of meters in 10 miles, the hard limit specified by the Go backend. If you're wondering why this WHERE clause wasn't added to the inner query (where the distance of each location is determined) instead, it's because the way SQL executes behind the scenes, that field may not have been calculated when the WHERE clause was examined. In fact if you try to move this WHERE clause to the inner query, it'll throw an error.
** SELECT json_build_object(‘type', ‘FeatureColl
**ection') This query wraps all the resulting rows from the JSON-generating query in a GeoJSON FeatureCollection object
.
Add PGX library to your project
We need to add one dependency to your project: The PostGres Driver & Toolkit , which enables connection pooling. The easiest way to do this is with Go Modules . Initialize a module with this command in the cloud shell:
go mod init my_locator
Next, run this command to scan the code for dependencies, add a list of dependencies to the mod file, and download them.
go mod tidy
Finally, run this command to pull dependencies directly into your project directory so the container can be built easily for AppEngine Flex.
go mod vendor
Okay, you're ready to test it out!
Test it out
Okay, we just got a LOT done. Let's watch it work!
In order for your development machine (yes, even cloud shell) to connect to the database, we're going to have to use the Cloud SQL Proxy to manage the database connection. To set up Cloud SQL Proxy:
- Go here to enable Cloud SQL Admin API
- If you're on a local development machine, install the cloud SQL proxy tool. If you're using cloud shell, you can skip this step, it's already installed! Note that the instructions will refer to a service account. One has already been created for you, and we'll cover adding necessary permissions to that account in the following section.
- Create a new tab (in cloud shell or your own terminal) to start the proxy.

- Visit
https://console.cloud.google.com/sql/instances/locations/overviewand scroll down to find the Connection namefield. Copy that name to use in the next command. - In that tab, run the Cloud SQL proxy with this command, replacing
CONNECTION_NAMEwith the connection name shown in the previous step.
cloud_sql_proxy -instances=CONNECTION_NAME=tcp:5432
Return to the first tab of your cloud shell and define the environment variables Go will need in order to communicate with the database backend, and then run the server the same way you did before:
Navigate to the project's root directory if you're not already there.
cd YOUR_PROJECT_ROOT
Create the following five environment variables (replace YOUR_PASSWORD_HERE
with the password you created above).
export DB_USER=postgres
export DB_PASS=YOUR_PASSWORD_HERE
export DB_TCP_HOST=127.0.0.1 # Proxy
export DB_PORT=5432 #Default for PostGres
export DB_NAME=postgres
Run your local instance.
go run *.go
Open the preview window, and it should operate as though nothing has changed: You can enter a starting address, zoom around the map, and click on recycling locations. But now it's backed by a database, and prepared for scale!
9. List the closest stores
The Directions API works much like the experience of requesting directions in the Google Maps app—entering a single origin and a single destination to receive a route between the two. The Distance Matrix API takes this concept further for identifying the optimal pairings between multiple possible origins and multiple possible destinations based on travel times and distances. In this case, to help the user find the nearest store to the address selected, you provide one origin and an array of store locations as the destinations.
Add the distance-from-origin to each store
At the beginning of the initMap
function definition, replace the comment " // TODO: Start Distance Matrix service
" with the following code:
app.js - initMap
distanceMatrixService = new google.maps.DistanceMatrixService();
Add a new function to the end of app.js
called calculateDistances
.
app.js
  async

 function

 calculateDistances
 (
 origin
 ,

 stores
 )

 {

 //

 Retrieve

 the

 distances

 of

 each

 store

 from

 the

 origin

 //

 The

 returned

 list

 will

 be

 in

 the

 same

 order

 as

 the

 destinations

 list

 const

 response

 =

 await

 getDistanceMatrix
 (
 {

 origins
 :

 [
 origin
 ]
 ,

 destinations
 :

 stores
 .
 map
 ((
 store
 )

 =
>
 {

 const

 [
 lng, lat
 ]

 =

 store
 .
 geometry
 .
 coordinates
 ;

 return

 {

 lat
 ,

 lng

 }
 ;

 }
 ),

 travelMode
 :

 google
 .
 maps
 .
 TravelMode
 .
 DRIVING
 ,

 unitSystem
 :

 google
 .
 maps
 .
 UnitSystem
 .
 METRIC
 ,

 }
 );

 response
 .
 rows
 [
 0
 ]
 .
 elements
 .
 forEach
 ((
 element
 ,

 index
 )

 =
>
 {

 stores
 [
 index
 ]
 .
 properties
 .
 distanceText

 =

 element
 .
 distance
 .
 text
 ;

 stores
 [
 index
 ]
 .
 properties
 .
 distanceValue

 =

 element
 .
 distance
 .
 value
 ;

 }
 );
 }
 const

 getDistanceMatrix

 =

 (
 request
 )

 =
>
 {

 return

 new

 Promise
 ((
 resolve
 ,

 reject
 )

 =
>
 {

 const

 callback

 =

 (
 response
 ,

 status
 )

 =
>
 {

 if

 (
 status

 ===

 google
 .
 maps
 .
 DistanceMatrixStatus
 .
 OK
 )

 {

 resolve
 (
 response
 );

 }

 else

 {

 reject
 (
 response
 );

 }

 }
 ;

 distanceMatrixService
 .
 getDistanceMatrix
 (
 request
 ,

 callback
 );

 }
 );
 }
 ;
The function calls the Distance Matrix API using the origin passed to it as a single origin and the store locations as an array of destinations. Then, it builds an array of objects storing the store's ID, distance expressed in a human-readable string, distance in meters as a numerical value, and sorts the array.
Update the initAutocompleteWidget
function to calculate the store distances whenever a new origin is selected from the Place Autocomplete search bar. At the bottom of the initAutocompleteWidget
function, replace the comment " // TODO: Calculate the closest stores
" with the following code:
app.js - initAutocompleteWidget
 // Use the selected address as the origin to calculate distances

 // to each of the store locations

 await

 calculateDistances
 (
 originLocation
 ,

 stores
 );

 renderStoresPanel
 ();
Display a list view of stores sorted by distance
The user expects to see a list of the stores ordered from nearest to farthest. Populate a side-panel listing for each store using the list that was modified by the calculateDistances
function to inform the display order of the stores.
Add a two new functions to the end of app.js
called renderStoresPanel()
and storeToPanelRow()
.
app.js
  function

 renderStoresPanel
 ()

 {

 const

 panel

 =

 document
 .
 getElementById
 (
 "panel"
 );

 if

 (
 stores
 .
 length

 ==

 0
 )

 {

 panel
 .
 classList
 .
 remove
 (
 "open"
 );

 return
 ;

 }

 //

 Clear

 the

 previous

 panel

 rows

 while

 (
 panel
 .
 lastChild
 )

 {

 panel
 .
 removeChild
 (
 panel
 .
 lastChild
 );

 }

 stores

 .
 sort
 ((
 a
 ,

 b
 )

 =
>
 a
 .
 properties
 .
 distanceValue

 -

 b
 .
 properties
 .
 distanceValue
 )

 .
 forEach
 ((
 store
 )

 =
>
 {

 panel
 .
 appendChild
 (
 storeToPanelRow
 (
 store
 ));

 });

 //

 Open

 the

 panel

 panel
 .
 classList
 .
 add
 (
 "open"
 );

 return
 ;
 }
 const

 storeToPanelRow

 =

 (
 store
 )

 =
>
 {

 //

 Add

 store

 details

 with

 text

 formatting

 const

 rowElement

 =

 document
 .
 createElement
 (
 "div"
 );

 const

 nameElement

 =

 document
 .
 createElement
 (
 "p"
 );

 nameElement
 .
 classList
 .
 add
 (
 "place"
 );

 nameElement
 .
 textContent

 =

 store
 .
 properties
 .
 business_name
 ;

 rowElement
 .
 appendChild
 (
 nameElement
 );

 const

 distanceTextElement

 =

 document
 .
 createElement
 (
 "p"
 );

 distanceTextElement
 .
 classList
 .
 add
 (
 "distanceText"
 );

 distanceTextElement
 .
 textContent

 =

 store
 .
 properties
 .
 distanceText
 ;

 rowElement
 .
 appendChild
 (
 distanceTextElement
 );

 return

 rowElement
 ;
 };
Restart your server and refresh your preview by running the following command.
go run *.go
Finally, enter an Austin, TX address into the Autocomplete search bar and click on one of the suggestions.
The map should center on that address and a sidebar should appear listing the store locations in order of distance from the selected address. One example is pictured as follows:
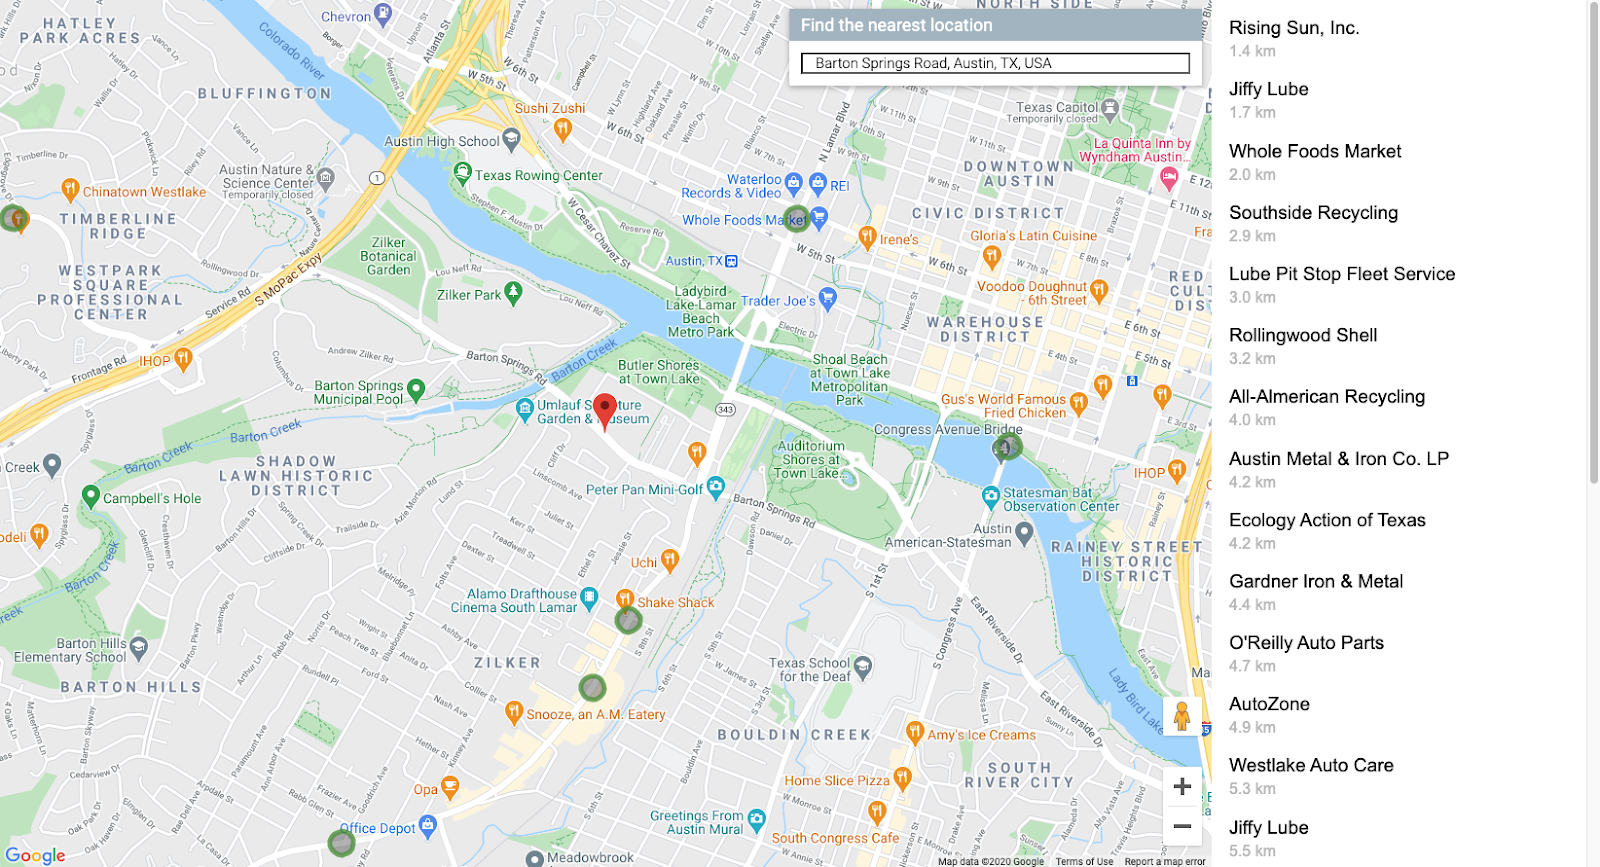
10. Style the map
One high-impact way to set your map apart visually is to add styling to it. With cloud-based map styling, the customization of your maps is controlled from the Cloud Console using Cloud-based Map Styling (beta). If you'd rather style your map with a non-beta feature, you can use the map styling documentation to help you generate json for programmatically styling the map. The instructions below guide you through Cloud-based Map Styling (beta).
Create a Map ID
First, open up Cloud Console and in the search box, and type in "Map Management" . Click the result that says "Map Management
(Google Maps)".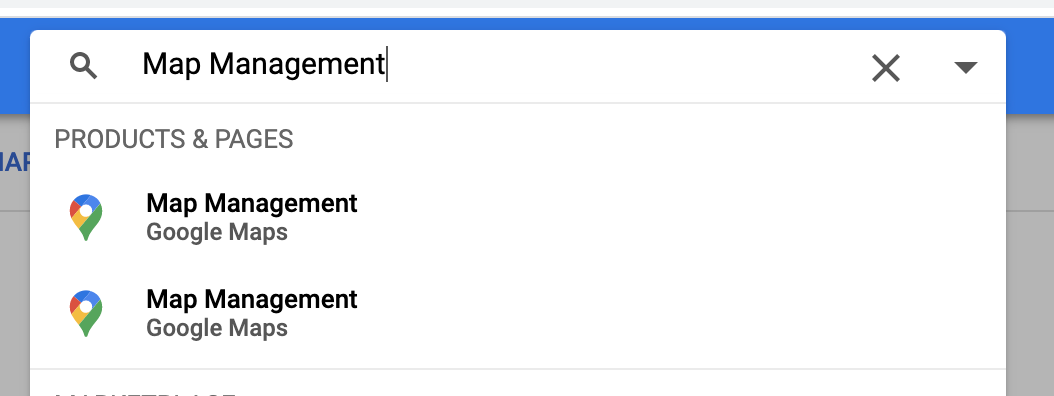
You'll see a button near the top (right under the Search box) that says Create New Map ID. Click that, and fill in whatever name you want. For Map Type, be sure to select JavaScript, and when further options show up, select Vectorfrom the list. The end result should look something like the image below.
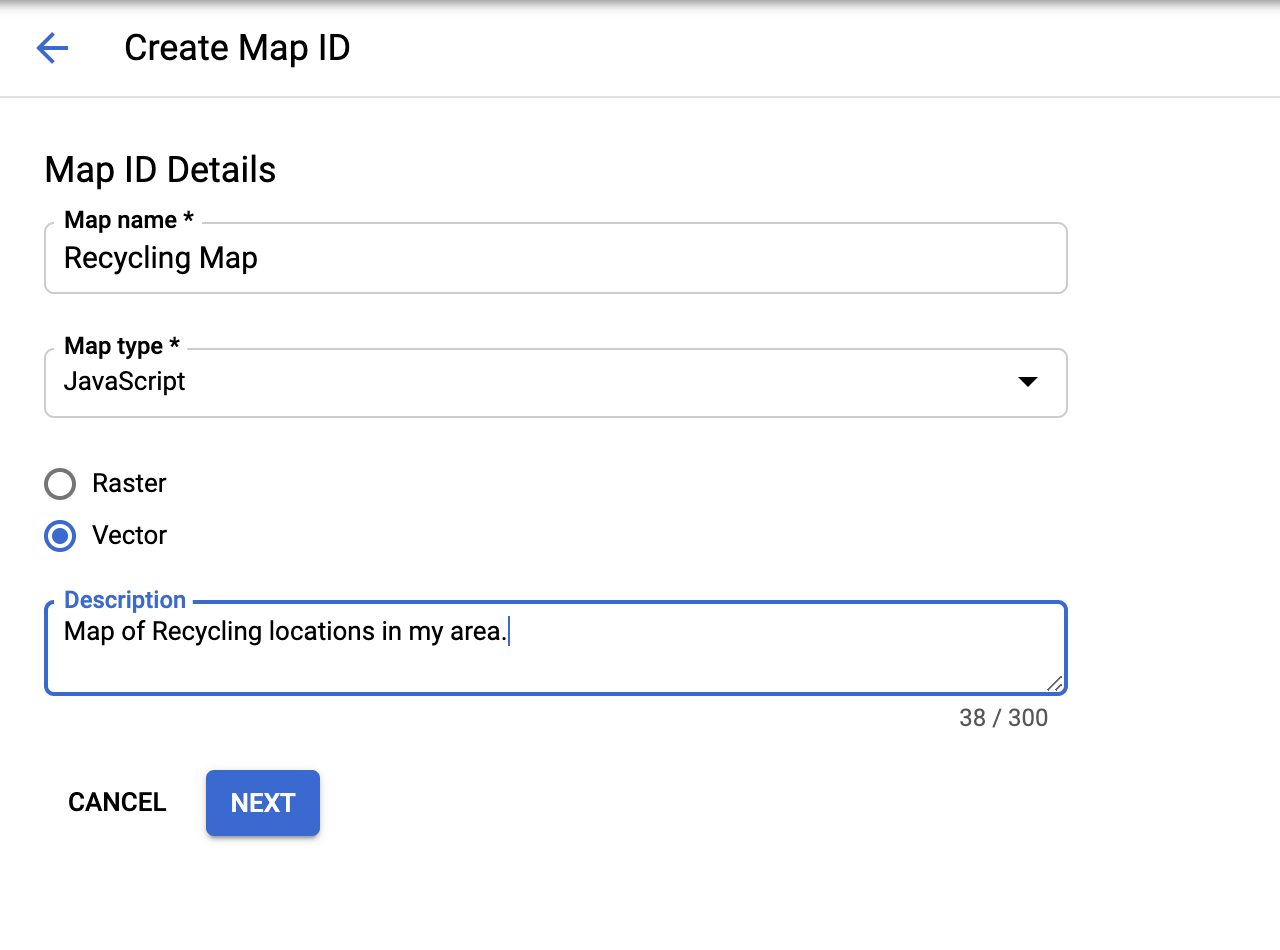
Click "Next" and you'll be graced with a brand new Map ID. You can copy it now if you want, but don't worry, it's easy to look up later.
Next we're going to create a style to apply to that map.
Create a Map Style
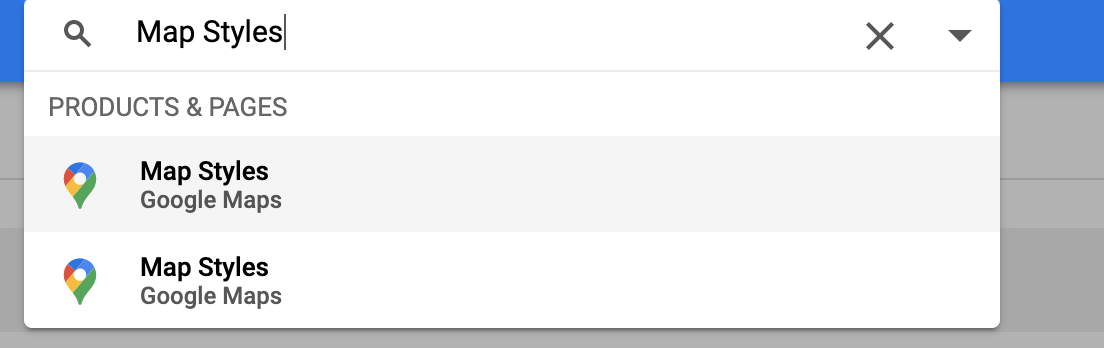
If you're still in the Maps section of the Cloud Console, click "Map Styles at the bottom of the navigation menu on the left. Otherwise, just like creating a Map ID, you can find the right page by typing "Map Styles" in the search box and selecting " Map Styles (Google Maps)" from the results, like in the picture below.
Next click on the button near the top that says " + Create New Map Style"
- If you want to match the styling in the map shown in this lab, click the " IMPORT JSON" tab and paste the JSON blob below. Otherwise if you want to create your own, select the Map Style you want to start with. Then click Next.
- Select the Map ID you just created to associate that Map ID with this style, and click Nextagain.
- At this point you're given the option of further customizing the styling of your map. If this is something you want to explore, click Customize in Style Editorand play around with the colors & options until you have a map style you like. Otherwise click Skip.
- On the next step, enter your style's name and description, and then click Save And Publish.
Here is an optional JSON blob to import in the first step.
 [
  {
    "elementType": "geometry",
    "stylers": [
      {
        "color": "#d6d2c4"
      }
    ]
  },
  {
    "elementType": "labels.icon",
    "stylers": [
      {
        "visibility": "off"
      }
    ]
  },
  {
    "elementType": "labels.text.fill",
    "stylers": [
      {
        "color": "#616161"
      }
    ]
  },
  {
    "elementType": "labels.text.stroke",
    "stylers": [
      {
        "color": "#f5f5f5"
      }
    ]
  },
  {
    "featureType": "administrative.land_parcel",
    "elementType": "labels.text.fill",
    "stylers": [
      {
        "color": "#bdbdbd"
      }
    ]
  },
  {
    "featureType": "landscape.man_made",
    "elementType": "geometry.fill",
    "stylers": [
      {
        "color": "#c0baa5"
      },
      {
        "visibility": "on"
      }
    ]
  },
  {
    "featureType": "landscape.man_made",
    "elementType": "geometry.stroke",
    "stylers": [
      {
        "color": "#9cadb7"
      },
      {
        "visibility": "on"
      }
    ]
  },
  {
    "featureType": "poi",
    "elementType": "labels.text.fill",
    "stylers": [
      {
        "color": "#757575"
      }
    ]
  },
  {
    "featureType": "poi.park",
    "elementType": "labels.text.fill",
    "stylers": [
      {
        "color": "#9e9e9e"
      }
    ]
  },
  {
    "featureType": "road",
    "elementType": "geometry",
    "stylers": [
      {
        "color": "#ffffff"
      }
    ]
  },
  {
    "featureType": "road.arterial",
    "elementType": "geometry",
    "stylers": [
      {
        "weight": 1
      }
    ]
  },
  {
    "featureType": "road.arterial",
    "elementType": "labels.text.fill",
    "stylers": [
      {
        "color": "#757575"
      }
    ]
  },
  {
    "featureType": "road.highway",
    "elementType": "geometry",
    "stylers": [
      {
        "color": "#bf5700"
      }
    ]
  },
  {
    "featureType": "road.highway",
    "elementType": "geometry.stroke",
    "stylers": [
      {
        "visibility": "off"
      }
    ]
  },
  {
    "featureType": "road.highway",
    "elementType": "labels.text.fill",
    "stylers": [
      {
        "color": "#616161"
      }
    ]
  },
  {
    "featureType": "road.local",
    "elementType": "geometry",
    "stylers": [
      {
        "weight": 0.5
      }
    ]
  },
  {
    "featureType": "road.local",
    "elementType": "labels.text.fill",
    "stylers": [
      {
        "color": "#9e9e9e"
      }
    ]
  },
  {
    "featureType": "transit.line",
    "elementType": "geometry",
    "stylers": [
      {
        "color": "#e5e5e5"
      }
    ]
  },
  {
    "featureType": "transit.station",
    "elementType": "geometry",
    "stylers": [
      {
        "color": "#eeeeee"
      }
    ]
  },
  {
    "featureType": "water",
    "elementType": "geometry",
    "stylers": [
      {
        "color": "#333f48"
      }
    ]
  },
  {
    "featureType": "water",
    "elementType": "labels.text.fill",
    "stylers": [
      {
        "color": "#9e9e9e"
      }
    ]
  }
]
Add Map ID to your code
Now that you've gone through the trouble of creating this map style, how do you actually USE this map style in your own map? You need to make two small changes:
- Add the Map ID as a url parameter to the script tag in
index.html -
Addthe Map ID as a constructor argument when you create the map in yourinitMap()method.
Replace the script tag that loads the Maps JavaScript API in the HTML file with the loader URL below, replacing the placeholders for " YOUR_API_KEY
" and " YOUR_MAP_ID
":
index.html
 ...
<script async defer src="https://maps.googleapis.com/maps/api/js?key=YOUR_API_KEY&v=weekly&libraries=places&callback=initialize&map_ids=YOUR_MAP_ID&solution_channel=GMP_codelabs_fullstackstorelocator_v1_a">
  </script>
...
In the initMap
method of app.js
where the constant map
is defined, uncomment the line for the mapId
property and replace " YOUR_MAP_ID_HERE
" with the Map ID you just created:
app.js - initMap
  ...
 //

 The

 map
 ,

 centered

 on

 Austin
 ,

 TX

 const

 map

 =

 new

 google
 .
 maps
 .
 Map
 (
 document
 .
 querySelector
 (
 '#map'
 ),

 {

 center
 :

 austin
 ,

 zoom
 :

 14
 ,

 mapId
 :

 'YOUR_MAP_ID_HERE'
 ,
 //

 ...
 });
 ...
Restart your server.
go run *.go
Upon refreshing your preview, the map should look styled according to your preferences. Here is an example using the JSON styling above.
11. Deploy to production
If you want to see your app running from AppEngine Flex (and not just a local webserver on your development machine / Cloud Shell, which is what you've been doing), it's very easy. We just need to add a couple things in order for database access to work in the production environment. This is all outlined in the documentation page on Connecting from App Engine Flex to Cloud SQL .
Add Environment Variables to App.yaml
First, all those environment variables you were using to test locally need to be added to the bottom of your application's app.yaml
file.
- Visit https://console.cloud.google.com/sql/instances/locations/overview to look up the instance connection name.
- Paste the following code at the end of
app.yaml. - Replace
YOUR_DB_PASSWORD_HEREwith the password you created for thepostgresusername earlier. - Replace
YOUR_CONNECTION_NAME_HEREwith the value from step 1.
app.yaml
  # ...
 # Set environment variables
 env_variables
 :

 DB_USER
 :

 postgres

 DB_PASS
 :

 YOUR_DB_PASSWORD_HERE

 DB_NAME
 :

 postgres

 DB_TCP_HOST
 :

 172.17
 .
 0.1

 DB_PORT
 :

 5432
 #Enable TCP Port
 # You can look up your instance connection name by going to the page for
 # your instance in the Cloud Console here : https://console.cloud.google.com/sql/instances/
 beta_settings
 :

 cloud_sql_instances
 :

 YOUR_CONNECTION_NAME_HERE
 =
 tcp
 :
 5432
Note that the DB_TCP_HOST
should have the value 172.17.0.1since this app connects via AppEngine Flex**.** This is because it will be communicating with Cloud SQL via a proxy, similar to the way you were.
Add SQL Client permissions to the AppEngine Flex service account
Go to the IAM-Admin page
in Cloud Console and look for a service account whose name matches the format service-PROJECT_NUMBER@gae-api-prod.google.com.iam.gserviceaccount.com
. This is the service account App Engine Flex will use to connect to the database. Click the Editbutton at the end of the row and add the role " Cloud SQL Client".
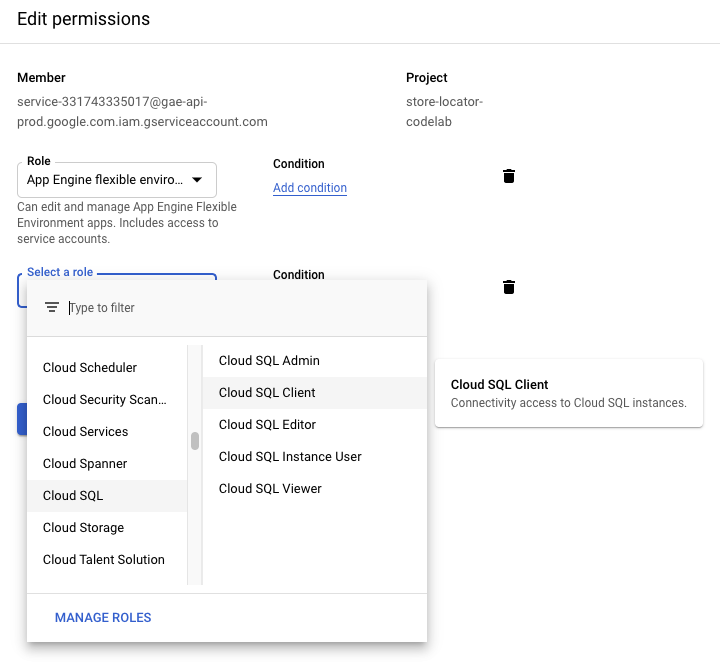
Copy your project code to the Go path
In order for AppEngine to run your code, it needs to be able to find relevant files in the Go path. Make sure you are in your project root directory.
cd YOUR_PROJECT_ROOT
Copy the directory to the go path.
mkdir -p ~/gopath/src/austin-recycling
cp -r ./ ~/gopath/src/austin-recycling
Change into that directory.
cd ~/gopath/src/austin-recycling
Deploy Your App
Use the gcloud
CLI to deploy your app. It will take some time to deploy.
gcloud app deploy
Use the browse
command to get a link that you can click on to see your fully deployed, enterprise-grade, aesthetically stunning store locator in action.
gcloud app browse
If you were running gcloud
outside the cloud shell, then running gcloud app browse
would open a new browser tab.
12. (Recommended) Clean up
Performing this codelab will stay within free tier limits for BigQuery processing and Maps Platform API calls, but if you performed this solely as an educational exercise and want to avoid incurring any future charges, the easiest way to delete the resources associated with this project is to delete the project itself.
Delete the Project
In the GCP Console, go to the Cloud Resource Managerpage:
In the project list, select the project we've been working in and click Delete. You'll be prompted to type in the project ID. Enter it and click Shut Down.
Alternatively, you can delete the entire project directly from Cloud Shell with gcloud
by running the following command and replacing the placeholder GOOGLE_CLOUD_PROJECT
with your project ID:
gcloud projects delete GOOGLE_CLOUD_PROJECT
13. Congratulations
Congratulations! You have successfully completed the codelab!
Or you skimmed to the last page. Congratulations! You have skimmed to the last page!
Over the course of this codelab, you have worked with the following technologies:
- Maps JavaScript API
- Distance Matrix Service, Maps JavaScript API (there is also the Distance Matrix API )
- Places Library, Maps JavaScript API (also Places API )
- App Engine Flexible Environment (Go)
- Cloud SQL API
Further Reading
There's still lots to learn about all of these technologies. Below are some helpful links for topics we didn't have time to cover in this codelab, but could certainly be useful to you in building out a store locator solution that fits your specific needs.