
1. Overview
In this codelab, you'll integrate Firebase Data Connect with a Cloud SQL database to build a movie review Android app. You will learn how to:
- Write a GraphQL schema for Firebase Data Connect
- Write queries and mutations
- Implement user authentication to secure your data
Prerequisites
- Latest version of Android Studio
- Android emulator with API Level 23 or higher
What you'll learn
- How to set up Firebase Data Connect with local emulators.
- How to design a data schema using Data Connect and GraphQL.
- How to write queries and mutations for a movie review app.
- How to generate the Kotlin SDK and use it in an Android app.
- (Optionally) How to deploy a Data Connect service to production.
2. Set up the sample project
Create a Firebase project
- Sign into the Firebase console using your Google Account.
- Click the button to create a new project, and then enter a project name (for example,
Movie Review).
- Click Continue.
- If prompted, review and accept the Firebase terms , and then click Continue.
- (Optional) Enable AI assistance in the Firebase console (called "Gemini in Firebase").
- For this codelab, you do not need Google Analytics, so toggle off the Google Analytics option.
- Click Create project, wait for your project to provision, and then click Continue.
Download the code
Run the following command to clone the sample code for this codelab. This will create a directory called codelab-dataconnect-android
on your machine:
git clone https://github.com/firebaseextended/codelab-dataconnect-android.git
If you don't have git on your machine, you can also download the code directly from GitHub.
Add Firebase configuration
- In the Firebase console
, select Project Overview in the left nav. Click the Android button to select the platform. When prompted for a package name use
com.google.firebase.example.dataconnect - Click Register App and follow the instructions to download the
google-services.jsonfile, and move it into theapp/directory of the code you just downloaded. Then click Next.
3. Set up Data Connect
Installation
Auto installation
Run the following command in the codelab-dataconnect-android
directory:
  curl

 -
 sL

 https
 :
 //
 firebase
 .
 tools
 /
 dataconnect

 |

 bash
This script tries to set up the development environment for you and launch a browser-based IDE. This IDE provides toolings, including a pre-bundled VS Code extension, to help you manage your schema and define queries and mutations to be used in your application, and generate strongly-typed SDKs.
After running the script, VS Code should open automatically.
Note: If you already have the desktop version of VS Code installed, the script should open it automatically. If the script fails, use the manual installation steps below.
Manual installation
- Install Visual Studio Code
- Install Node.js
- In VS Code, open the
codelab-dataconnect-androiddirectory. - Install the Firebase Data Connect extension from the Visual Studio Code Marketplace .
Initialize Data Connect in the project
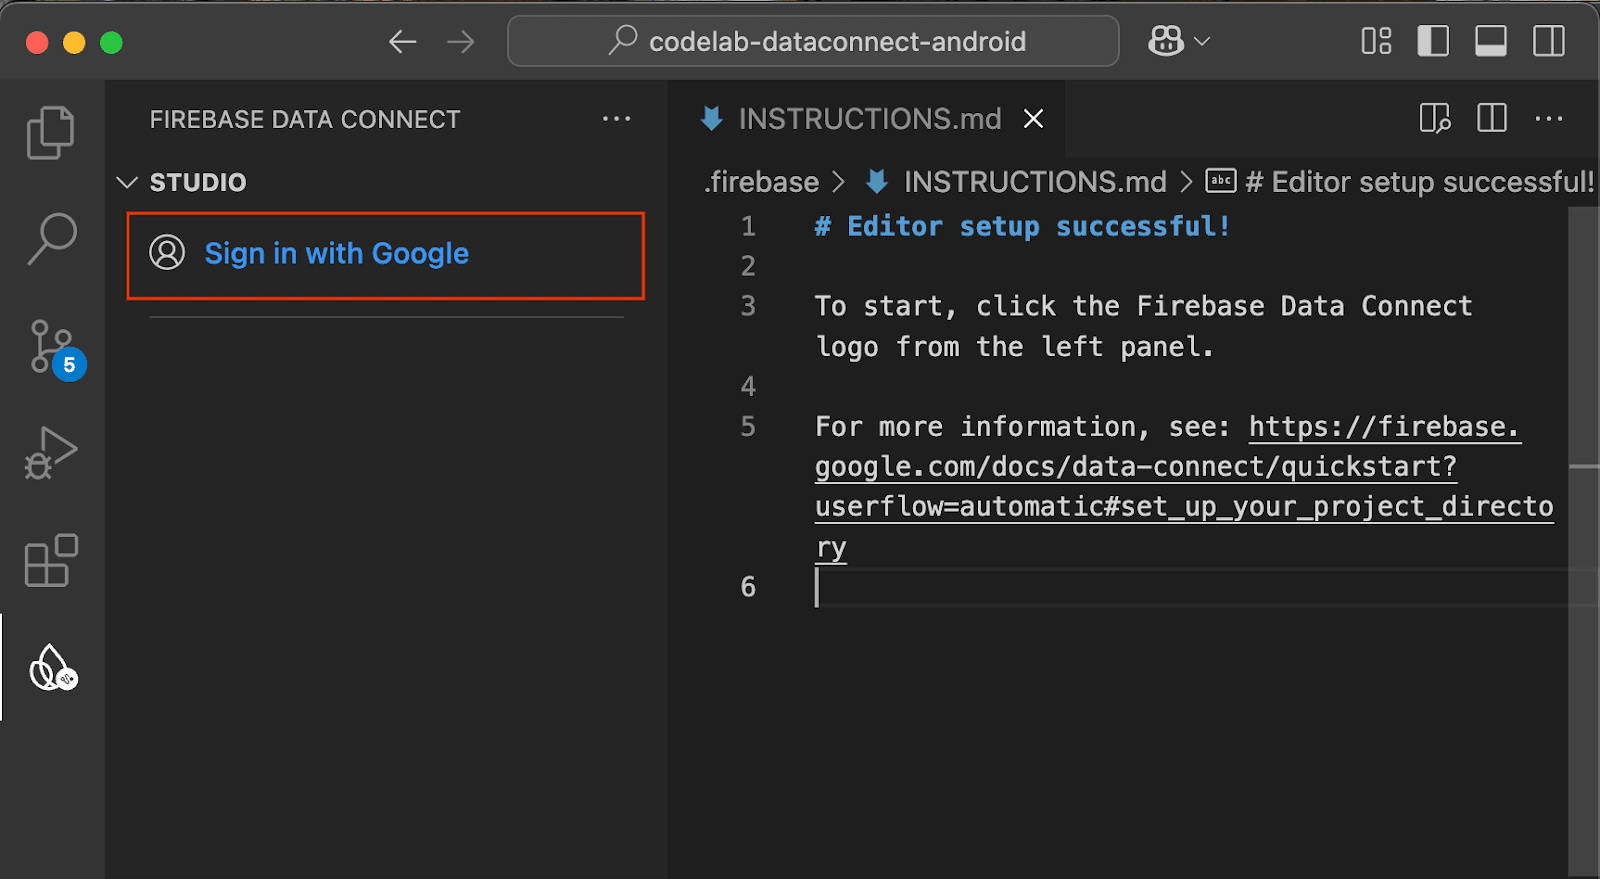
In the left-hand panel, click the Firebase icon to open the Data Connect VS Code extension UI:
- Click the Sign in with Googlebutton. A browser window will open; follow the instructions to sign in to the extension with your Google account.
- Click the Connect a Firebase projectbutton and select the project you created earlier in the console.
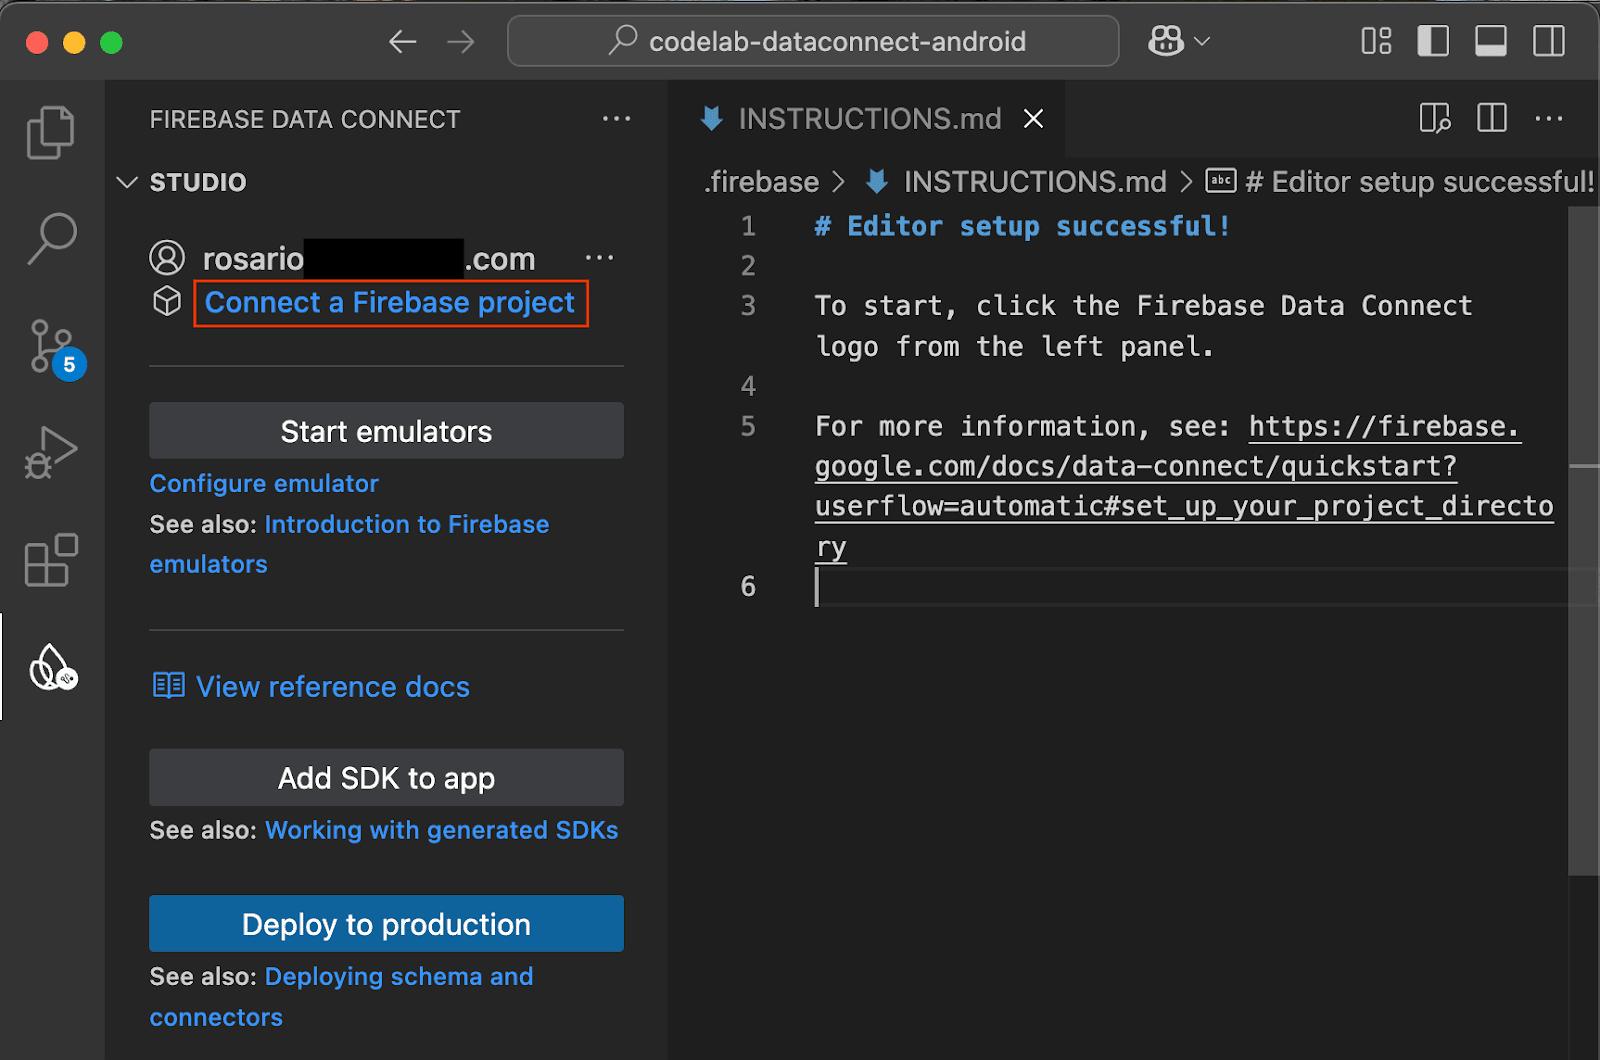
Click the Run firebase initbutton and follow the steps in the integrated terminal.
Configure SDK generation
Once you click on the Run firebase init button, the Firebase Data Connect extension should initialize a dataconnect/
directory for you.
In VS Code, open the dataconnect/connector/connector.yaml
file and you will find the default configuration. To make it easier to visualize the code generation in this codelab, change the connectorId to movies
and the package to com.google.firebase.example.dataconnect.generated
:
  connectorId
 :

 movies
 generate
 :

 kotlinSdk
 :

 outputDir
 :

 ..
 /
 ..
 /
 app
 /
 src
 /
 main
 /
 java

 package
 :

 com
 .
 google
 .
 firebase
 .
 example
 .
 dataconnect
 .
 generated
To understand what each of these mean:
- connectorId - a unique name for this connector.
- outputDir - path where the generated Data Connect SDK will be stored. This path is relative to the directory containing the connector.yaml file.
- package - the package name to be used in the generated SDK.
Start the Firebase emulators
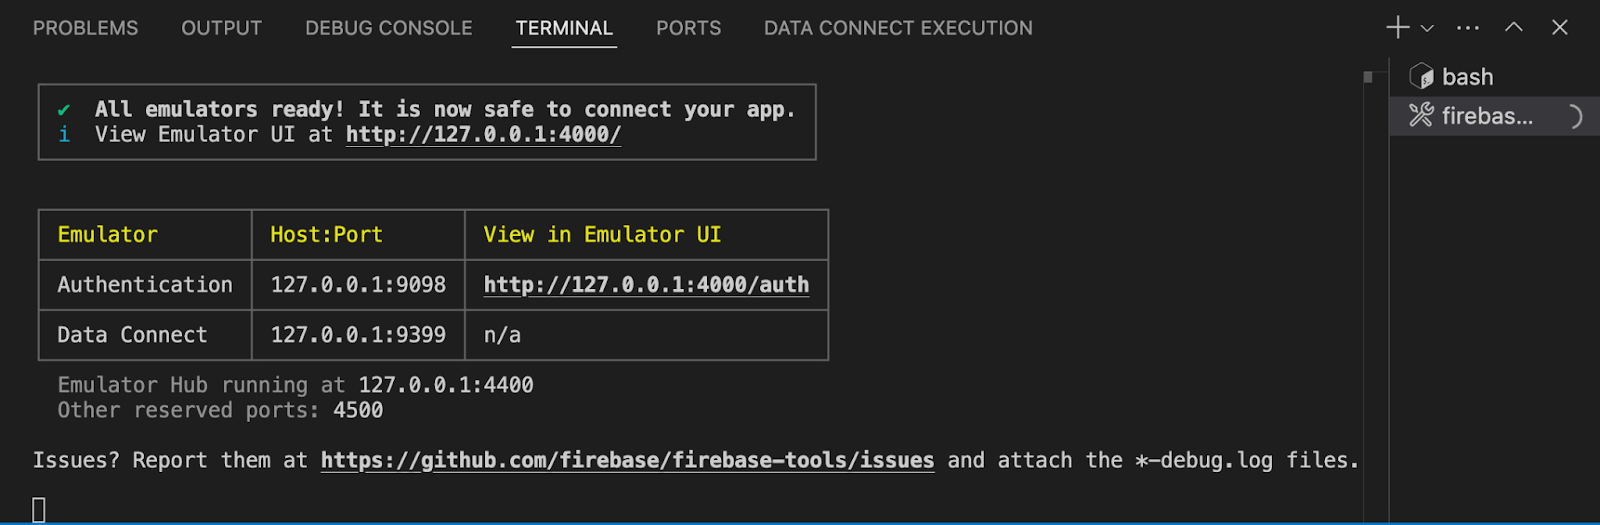
In VS Code, click the Start emulatorsbutton.

You should see the emulator starting in the integrated terminal. If it starts correctly, you should see an output that looks like this:
Configure the Android app to use the local emulator
- Open Android Studio.
- In Android Studio's welcome screen, click on the Open button and select the
codelab-dataconnect-androiddirectory. Wait for Gradle to sync. - Once the Gradle sync completes, open the
app/src/main/java/com/google/firebase/example/dataconnect/MainActivity.ktfile and calluseEmulator():
  import

 com.google.firebase.example.dataconnect.generated.MoviesConnector
 import

 com.google.firebase.example.dataconnect.generated.instance
 class

 MainActivity
 :
 ComponentActivity
 ()
 {
 ...
 //
 Initialize
 Firebase
 Data
 Connect
 MoviesConnector
 .
 instance
 .
 dataConnect
 .
 useEmulator
 (
 "10.0.2.2"
 ,
 9399
 )
 ...
 }
4. Define the schema and pre-populate the database
In this section, you'll define the structure and relationships between the key entities in the movie application in a schema. Entities such as Movie
, User
, and Review
are mapped to database tables, with relationships established using Firebase Data Connect and GraphQL schema directives.
Core Entities and Relationships
The Movie
type holds key details like title, genre, and tags, which the app uses for searches and movie profiles. The User
type tracks user interactions, like reviews and favorites. Review
connects users to movies, letting the app show user-generated ratings and feedback.
User Table
The User type defines a user entity who interacts with movies by leaving reviews or favoriting movies.
In VS Code, open the dataconnect/schema/schema.gql
file and uncomment (or add) the User
table definition:
  # Users
 # Suppose a user can leave reviews for movies
 # user  -> reviews is a one to many relationship,
 # movie -> reviews is a one to many relationship
 # movie <-> user is a many to many relationship
 type

 User

 @
 table

 {

 id
 :

 String
 !

 @
 col
 (
 name
 :

 "user_auth"
 )

 username
 :

 String
 !

 @
 col
 (
 name
 :

 "username"
 ,

 dataType
 :

 "varchar(50)"
 )

 # The following are generated by the user: User! field in the Review table

 # reviews_on_user

 # movies_via_Review
 }
Movie Table
The Movie type defines the main structure for a movie entity, including fields like title, genre, releaseYear, and rating.
In VS Code, open the dataconnect/schema/schema.gql
file and uncomment (or add) the Movie
table definition:
  #

 Movies
 type

 Movie

 @
 table

 {

 #

 The

 below

 parameter

 values

 are

 generated

 by

 default

 with

 @
 table
 ,

 and

 can

 be

 edited

 manually
 .

 #

 implies

 directive

 `@
 col
 (
 name
 :

 "movie_id"
 )
 `
 ,

 generating

 a

 column

 name

 id
 :

 UUID
 !

 @
 default
 (
 expr
 :

 "uuidV4()"
 )

 title
 :

 String
 !

 imageUrl
 :

 String
 !

 genre
 :

 String
 }
MovieMetadata Table
The MovieMetadata type establishes a one-to-one relationship with the Movie type. It includes additional data such as the movie's director.
In VS Code, open the dataconnect/schema/schema.gql
file and uncomment (or add) the MovieMetadata
table definition:
  #

 Movie

 -

 MovieMetadata

 is

 a

 one
 -
 to
 -
 one

 relationship
 type

 MovieMetadata

 @
 table

 {

 #

 @
 unique

 indicates

 a

 1
 -
 1

 relationship

 movie
 :

 Movie
 !

 @
 unique


 #

 movieId
 :

 UUID

< -

 this

 is

 created

 by

 the

 above

 reference

 rating
 :

 Float

 releaseYear
 :

 Int

 description
 :

 String
 }
Review Table
The Review type represents the review entity and links the User and Movie types in a many-to-many relationship (one user can leave many reviews, and each movie can have many reviews).
In VS Code, open the dataconnect/schema/schema.gql
file and uncomment (or add) the Review
table definition:
  #

 Reviews
 type

 Review

 @
 table
 (
 name
 :

 "Reviews"
 ,

 key
 :

 [
 "movie"
 ,

 "user"
 ])

 {

 id
 :

 UUID
 !

 @
 default
 (
 expr
 :

 "uuidV4()"
 )

 user
 :

 User
 !

 movie
 :

 Movie
 !

 rating
 :

 Int

 reviewText
 :

 String

 reviewDate
 :

 Date
 !

 @
 default
 (
 expr
 :

 "request.time"
 )
 }
Auto-Generated Fields and Defaults
The schema uses expressions like @default(expr: "uuidV4()")
to automatically generate unique IDs and timestamps. For instance, the id field in the Movie and Review types is automatically populated with a UUID when a new record is created.
Insert mock data
With the schema defined, you can now pre-populate the database with mock data for testing.
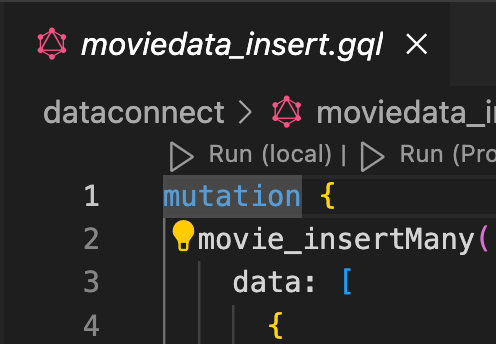
- In VS Code, open
dataconnect/moviedata_insert.gql. Ensure the emulators in the Firebase Data Connect extension are running. - You should see a Run (local) button at the top of the file. Click this to insert the mock movie data into your database.
- Check the Data Connect Execution terminal to confirm that the data was added successfully.
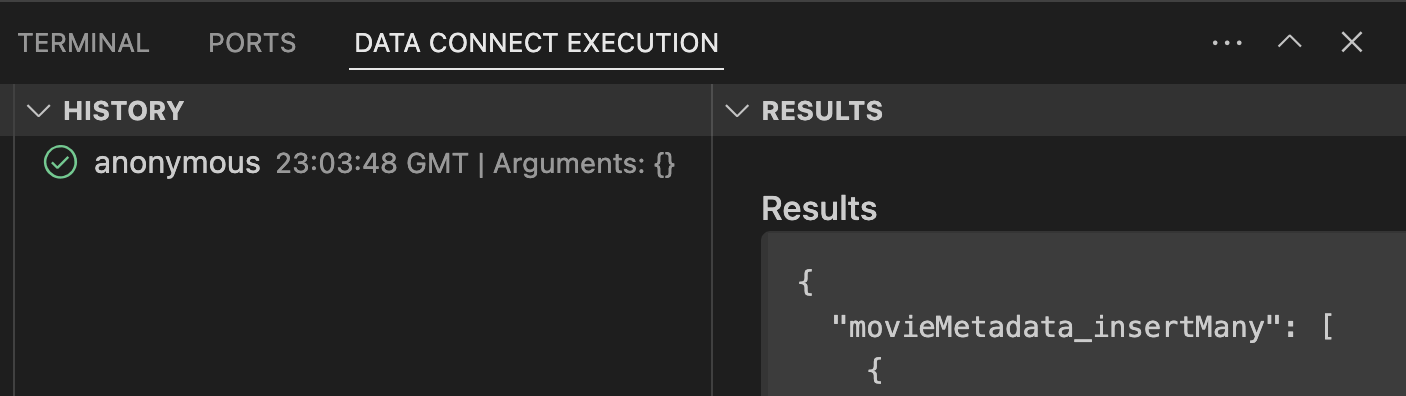
With the data in place, proceed to the next step to learn how to create queries in Data Connect.
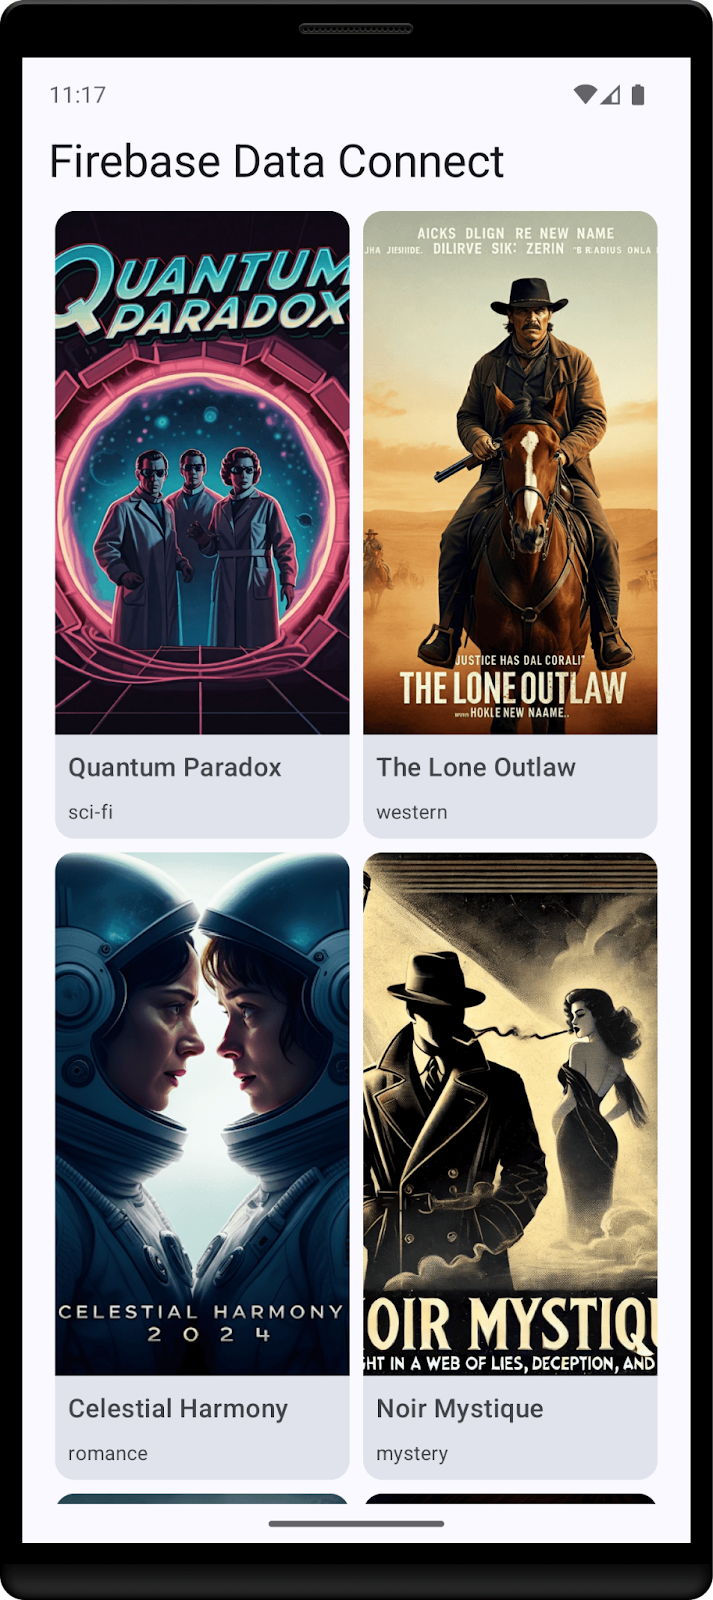
5. Create a query to list movies
Start by creating a query to list movies. For each movie, you will fetch the id, title, imageUrl and genre.
Define the query
In VS Code, open the dataconnect/connector/queries.gql
file and uncomment (or add) the ListMovies
query:
  query

 ListMovies

 @auth
 (
 level
 :

 PUBLIC
 )

 {

 movies

 {

 id

 title

 imageUrl

 genre

 }
 }
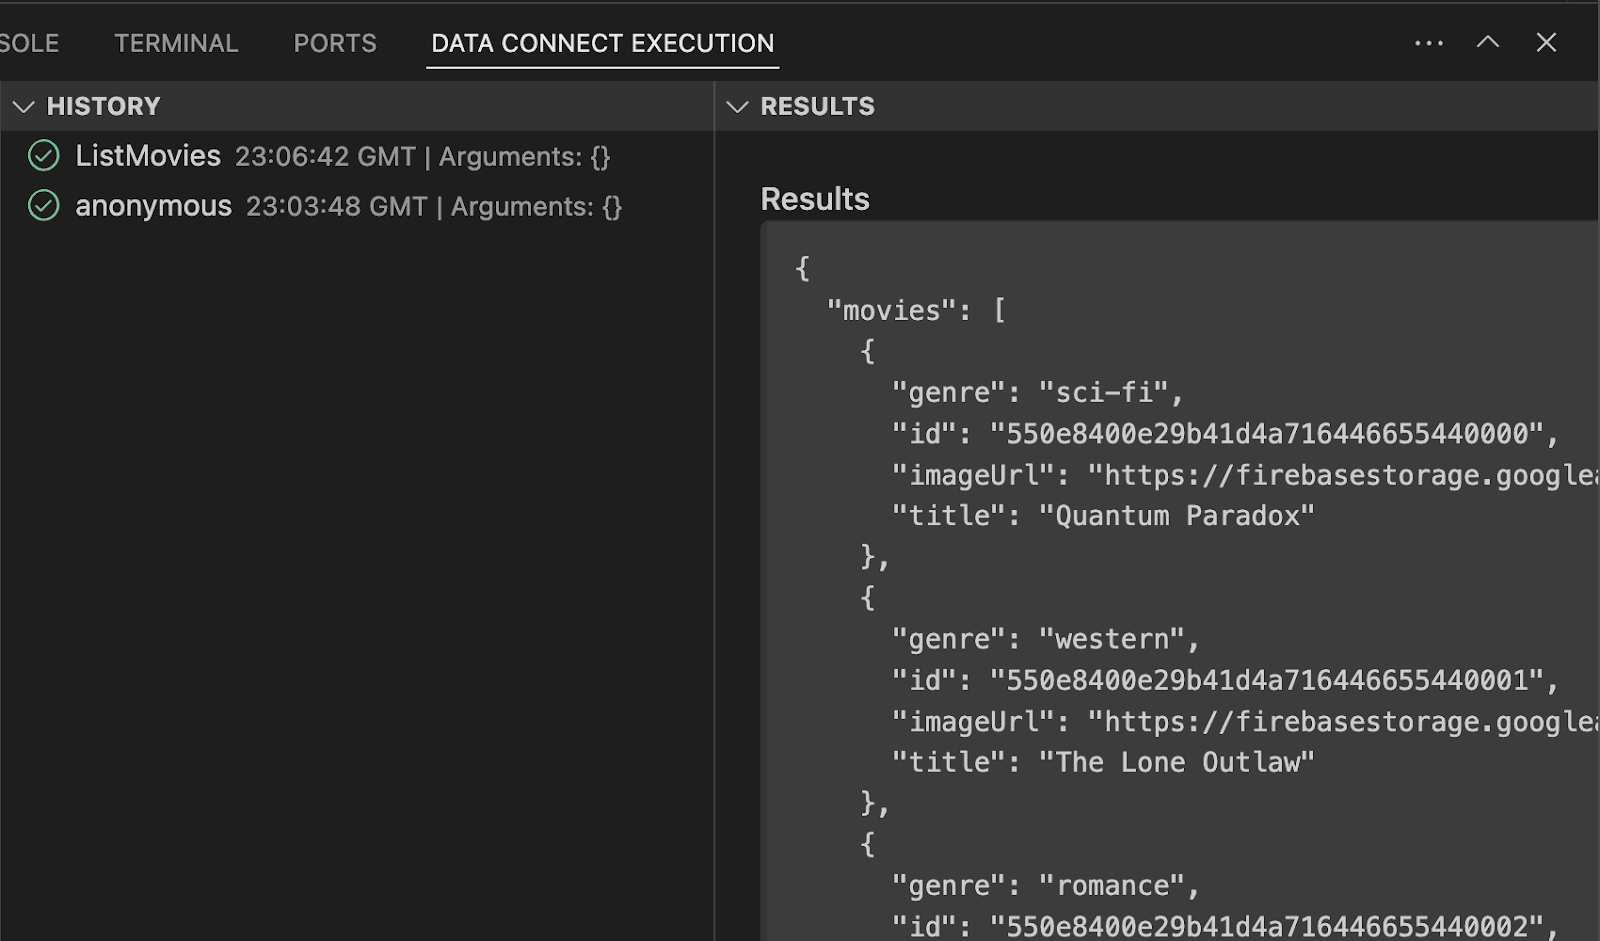
To test the new query, click the Run (local) button to execute the query against your local database. The list of movies from the database should be displayed under the "result" section of the Data Connect Execution terminal.
Call it from the Android app
Now that you've tested the query in the Data Connect Emulator, it's time to add it to the app.
In Android Studio, open the app/src/main/java/com/google/firebase/example/dataconnect/MoviesScreen.kt
file and add the following code to display the list of movies in a grid format:
  import

 com.google.firebase.example.dataconnect.generated.ListMoviesQuery
 import

 com.google.firebase.example.dataconnect.generated.MoviesConnector
 import

 com.google.firebase.example.dataconnect.generated.execute
 import

 com.google.firebase.example.dataconnect.generated.instance
 @Composable
 fun
 MoviesScreen
 (
 onMovieClicked
 :
 (
 id
 :
 String
 )
 -
> Unit
 )
 {
 var
 movies
 by
 remember
 {
 mutableStateOf
 (
 emptyList<ListMoviesQuery
 .
 Data
 .
 MoviesItem
> ())
 }
 LaunchedEffect
 (
 Unit
 )
 {
 //
 Queries
 need
 to
 be
 executed
 in
 a
 coroutine
 context
 try
 {
 movies
 =
 MoviesConnector
 .
 instance
 .
 listMovies
 .
 execute
 ()
 .
 data
 .
 movies
 }
 catch
 (
 e
 :
 Exception
 )
 {
 //
 Will
 be
 done
 at
 a
 later
 step
 }
 }
 LazyVerticalGrid
 (
 GridCells
 .
 Adaptive
 (
 150.
 dp
 ))
 {
 items
 (
 movies
 )
 {
 movie
 -
> MovieCard
 (
 movieId
 =
 movie
 .
 id
 .
 toString
 (),
 movieTitle
 =
 movie
 .
 title
 ,
 movieImageUrl
 =
 movie
 .
 imageUrl
 ,
 movieGenre
 =
 movie
 .
 genre
 ,
 onMovieClicked
 =
 {
 onMovieClicked
 (
 movie
 .
 id
 .
 toString
 ())
 }
 )
 }
 }
 }
Run the app
In Android Studio, click on the Run button to launch the app in the Android emulator.
Once the app launches, you should see a screen that looks like this:
6. Create the movie details query
Now that the app can list movies, let's create a query to show the details for each movie.
Define the query
In VS Code, open the dataconnect/connector/queries.gql
file and uncomment (or add) the GetMovieById
query:
  #

 Get

 movie

 by

 id
 query

 GetMovieById
 (
 $
 id
 :

 UUID
 !
 )

 @auth
 (
 level
 :

 PUBLIC
 )

 {

 movie
 (
 id
 :

 $
 id
 )

 {

 id

 title

 imageUrl

 genre

 metadata
 :

 movieMetadata_on_movie

 {

 rating

 releaseYear

 description

 }

 reviews
 :

 reviews_on_movie

 {

 id

 reviewText

 reviewDate

 rating

 user

 {

 id

 username

 }

 }

 }
 }
Call it from the Android app
In Android Studio, open the app/src/main/java/com/google/firebase/example/dataconnect/MovieDetailScreen.kt
file and add the following code:
  importcom
 .
 google
 .
 firebase
 .
 example
 .
 dataconnect
 .
 generated
 .
 GetMovieByIdQuery
 importcom
 .
 google
 .
 firebase
 .
 example
 .
 dataconnect
 .
 generated
 .
 MoviesConnector
 importcom
 .
 google
 .
 firebase
 .
 example
 .
 dataconnect
 .
 generated
 .
 execute
 importcom
 .
 google
 .
 firebase
 .
 example
 .
 dataconnect
 .
 generated
 .
 instance
 @
 Composable
 fun

 MovieDetailScreen
 (

 movieId
 :

 String
 )

 {

 var

 movie

 by

 remember

 {

 mutableStateOf<GetMovieByIdQuery
 .
 Data
 .
 Movie
 ?
> (
 null
 )

 }

 LaunchedEffect
 (
 Unit
 )

 {

 movie

 =

 MoviesConnector
 .
 instance
 .
 getMovieById
 .
 execute
 (

 UUID
 .
 fromString
 (
 movieId
 )

 )
 .
 data
 .
 movie

 }

 if

 (
 movie

 ==

 null
 )

 {

 LoadingScreen
 ()

 }

 else

 {

 MovieDetails
 (

 movieTitle

 =

 movie
 !!.
 title
 ,

 movieImageUrl

 =

 movie
 !!.
 imageUrl
 ,

 movieGenre

 =

 movie
 !!.
 genre
 ,

 movieRating

 =

 movie
 !!.
 metadata
 ?
 .
 rating
 ,

 movieReleaseYear

 =

 movie
 !!.
 metadata
 ?
 .
 releaseYear
 ,

 movieDescription

 =

 movie
 !!.
 metadata
 ?
 .
 description
 ,

 )

 }
 }
Run the app
In Android Studio, click on the Run button to launch the app in the Android emulator.
7. Create a mutation to insert users
Now that the app is able to display data, it's time to add new data from the app. In order to do that securely, you should use Firebase Authentication.
For the purpose of this codelab, the app uses Anonymous Authentication to sign users in, but for a more secure app, consider using a different authentication method such as email/password auth or a federated identity provider.
Define the mutation
In VS Code, open the dataconnect/connector/mutations.gql
file and uncomment (or add) the UpsertUser
query:
  #

 Upsert

 (
 update

 or

 insert
 )

 a

 user
 '
 s

 username

 based

 on

 their

 auth
 .
 uid
 mutation

 UpsertUser
 (
 $
 username
 :

 String
 !
 )

 @auth
 (
 level
 :

 USER
 )

 {

 user_upsert
 (

 data
 :

 {

 id_expr
 :

 "auth.uid"

 username
 :

 $
 username

 }

 )
 }
Call it from the Android app
In Android Studio, open the app/src/main/java/com/google/firebase/example/dataconnect/MainActivity.kt
file and call the mutation:
  import

 com.google.firebase.example.dataconnect.generated.execute
 LaunchedEffect
 (
 Unit
 )
 {
 //
 If
 there
 's no user signed in, sign in an anonymous user
 if
 (
 firebaseAuth
 .
 currentUser
 ==
 null
 )
 {
 firebaseAuth
 .
 signInAnonymously
 ()
 .
 await
 ()
 val
 newUsername
 =
 getRandomUsername
 ()
 MoviesConnector
 .
 instance
 .
 upsertUser
 .
 execute
 (
 newUsername
 )
 }
 }
Run the app
In Android Studio, click on the Run button to launch the app in the Android emulator.
8. Congratulations
Congratulations, you have successfully added Firebase Data Connect to an Android app!
Now you know the key steps required to set up Data Connect, create queries and mutations, and handle user authentication.
What's Next
- Learn more about pricing
- Learn more about securing operations
- Deploy to production (next section)
- Learn how to perform vector similarity search
Optional: deploy to production
So far this app has only used the Firebase Emulators. If you want to learn how to deploy this app to a real Firebase project, continue on to the next step.
9. (Optional) Deploy your app
So far this app has been entirely local, all of the data is contained in the Firebase Emulator Suite. In this section you will learn how to configure your Firebase project so that this app will work in production.
Enable Firebase Authentication
In the Firebase console, go to the Authentication section and click Get started. Navigate to the Sign-in method tab and select the Anonymous Sign-in option from providers.
Enable the Anonymous sign-in method and click Save.
Deploy the Firebase Data Connect schema
Important: If this is your first time deploying a schema in your project, this process will create a Cloud SQL PostgreSQL instance, which can take around 15 minutes. You won't be able to deploy until the Cloud SQL instance is ready and integrated with Firebase Data Connect.
- In the Firebase Data Connect VS Code extension UI, click Deploy to production.
- You may need to review schema changes and approve potentially destructive modifications. You'll be prompted to:
- Review schema changes using
firebase dataconnect:sql:diff - When you are satisfied with changes, apply them using the flow started by
firebase dataconnect:sql:migrate
- Review schema changes using
Your Cloud SQL for PostgreSQL instance will be updated with the final deployed schema and data. You can monitor the status in the Firebase Console.
Now you can click Run (Production) in the Firebase Data Connect panel, just as you did with the local emulators, to add data to the production environment.