

韓国ドラマ 0
[車] カテゴリの記事
全15件 (15件中 1-15件目)
1
-
バースト
仕事帰りにコンビニに寄ろうとして、駐車場の手前の縁石のないところから右折して入ろうとしたら、車が出てきた。このまま右折したら衝突して事故ってしまう。事故るわけにはいかないので、奥の縁石の間の狭いところから入るしかなくなってしまい、ちょっと無理にハンドルをきって駐車場へ。入る前にちょっと車が入るには角度的に嫌な予感がしたやはり、「ガリッ」とタイヤとアルミホイールを擦ってしまったかなりの音がしたので駐車場に車を止めてタイヤを見たら、運転席前の前輪タイヤの側面を裂いてバースト状態やっちまいました後輪も側面を擦っていたが、パンクはしてなかった。しかし、見た感じ後輪もかなり擦れて削れているので、街乗りは出来ても、高速走行は出来ない状態ですコンビニで買い物をしてから、近くにイエローハットがあるので、タイヤ交換のため、裏道をゆっくり走行して行きました。タイヤ1本交換しようとしたら、215/50R17のサイズがない。すぐに取り寄せますよと言われたので、その前に見積りを聞きました。ヨコハマのエコス ES300が1本23500円+工賃高すぎです相場が13000円~16000円程度なのに、工賃入れても1本当たり2万円以下です。1本25000円以上も払う気はありませんので、注文を断り、1050円でスペアタイヤに交換してもらいましたヤフオクで購入すれば1本11000円以下で、修理工場などへタイヤ持ち込みで工賃入れても1本13000円以下で納まりますからね。2~3日、スペアタイヤで我慢すれば、安く済みます。スペアタイヤへの交換作業も終わり、19時に帰宅しました。部屋に行って、すぐにPCを起動ヤフオクで送料込みで1本10600円のヨコハマのエコス ES300を2本落札しました2~3日すれば商品代引きでタイヤが届きますから、それまで格好悪いがスペアタイヤで我慢です昔から思っていましたが、改めてイエローハットは、何でも値段が高すぎですまた予定外の出費になってしまいました
2009.07.15
コメント(186)
-
ATシフトパネルLED基盤へ交換
仕事が終わり、帰宅後車いじりです。先日、某オクで落札したATシフトパネルLED基盤が届いているので交換です付属の取付説明書を見ながら、18時半頃から作業に掛かりました。シフト部分のパネルがなかなか外れませんので、取り外すのに時間が掛かってしまいました取り外したあとは、簡単でしたので、LED基盤を取り付けて、元に戻すだけです。終了したのが19時半。約1時間掛かってしまいましたエアコンパネルとATシフトパネルが両方ともLEDを変えましたので、見た目がなかなか綺麗になりました(写真はアップしません。)
2009.06.24
コメント(0)
-
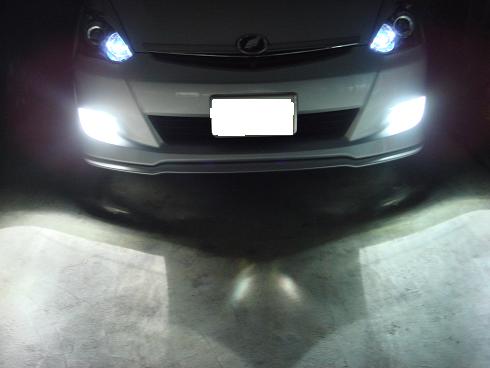
フォグランプのHID6000Kの明るさは・・・
夜になったので、昼間にHID 6000Kに交換したフォグランプの明るさをチェックポジション&フォグこれだけでもかなり明るいです。運転席からだと、手前しか照らしてないので夕方までですね。ポジション&ロービーム&フォグランプかなり明るくなりました。ロービームもHID 6000Kが入っています。正面に立つと、目が痛いぐらい眩しかったです。運転するには、明るくて見やすいです悪天候時の夜は、まだ不明ですけどしかし、夜の走行は、対向車にとって迷惑車になってしまいましたような気がします
2009.04.16
コメント(0)
-
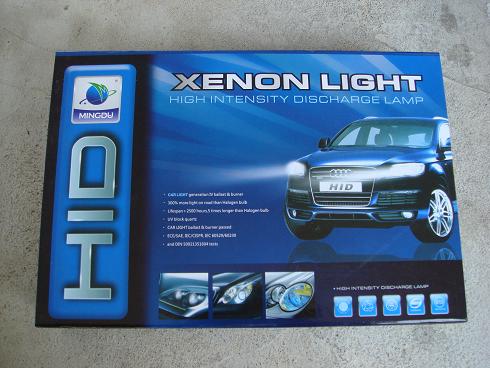
フォクランプのバルブ交換(LED36連からHID6000Kへ)
今日は忙しくなかったので、午後から早退しました帰宅して13時過ぎ昨日、ヤフオクで落札した「HIDキット35W 6000K HB4」が届きましたので、天気も良いので自分で取り付けです。フォグランプをHID化するため、ジャッキ、工具など必要なものを準備をしました。さて、交換作業を始める前に、バンパーを外すか外さないかで迷いました。以前、ネットで検索し、フォグランプをHID化した人のブログを参考にしましたが、基本的にバンパーを外して作業している方がほとんどでした。自分もバンパーを外して取り付けしようと思いましたが、外さずにチャレンジしました。作業開始時間13時50分作業を始めたら、風が吹いてきました今まで取り付けていたものが、LED36連(白)です。夜は、白く光ってカッコイイのでドレスアップには良かったですけど、明るくありませんでした。取り外したので、LED36連バルブの写真撮りましたジャッキアップし、ジャッキスタンドで固定し、もぐれるようにしました。車の取説にもあるように、通常のフォルバルブ交換手順で、フェンダーライナーのネジを3本外して、フェンダーライナーをずらしての作業です。ここからが、問題です。バラストをどこに取り付けるか下回りを見ていると、取り付けられそうな場所がありましたので、無理矢理手を入れて苦労しましたけど、取り付けしました。ステーも付いていたものなので貧弱ですけど、買いに行くのが面倒なのでそのまま利用。助手席側(分かりずらいけど)運転席側運転席側は、助手席側と反対の同じ位置ですが、ウォッシャータンクが邪魔でしたので、取り付けにくかったです。この後、配線して、HIDバルブの空焼き使用と思ったら、HIDが光りません。配線を確認すると、コネクターのプラスとマイナスが逆です。さすが、海外製のものです。参考にした人のブログで、逆の場合があると書いてあったのを思い出し、配線を切り、ギボシで配線のプラスとマイナスを逆にしました。この後、絶縁テープでギボシの回りを巻いておきました。これで、無駄に時間を使ってしまいましたが、やっと空焼きできます。エンジンをかけて、スイッチオン10分程度、空焼きしてから、バルブを取り付けました。配線が遊んでしまっているので、ケーブルバンドで束ねました。フェンダーライナーをネジで止めて、ジャッキを降ろして、作業終了です。作業終了時間16時でしたので、2時間ちょっと掛かりました。点灯してみました。ロービームも以前HID6000Kに交換しているので、フォグと色が同じような感じです。昼間だから、分かりにくいですけどね。写真はナンバーが見えないように、片側だけですけど、両側とも同じ感じです。
2009.04.16
コメント(1)
-
車いじり(ハイマウントストップランプのポジション化)
仕事が終わり、18時前から会社の駐車場で愛車をいじりました。ハイマウントストップランプ(左右のストップランプではなく、上部にある横長のストップランプと言った方がいいでしょうか?)のポジション化です。ライトを点けると左右のストップランプが光るように、ハイマウント部も同じ状態に光る装置です。ブレーキを踏めば、通常通り更に明るくストップランプ光ります。この装置は、先日ヤフオクで落札したものです。装置から3本の配線が出ていて、2本がハイマウントの配線を切断して繋ぎ、もう1本の配線はイルミネーションの配線に繋ぎます。切断する配線の色が2本同じものがあるので、どちらかがハイマウントストップランプに繋がっています。検電テスターで同僚に手伝ってもらい簡単に調べられると思いました。しかし、数パターン調べましたが、どちらも同じ状態で分かりません。こうなったら、配線を切って装置を繋ぐので、2分の1で配線を切って調べました。1本目ハズレ最近のスロ同様に引きが弱いです切った線をギボシで繋いで、もう1本の線を切りました。こちらが装置を繋ぐ線でした。装置を繋ぎ、テスト。接触不良があり直して、再テスト。うまくいきましたライトを点けて、明るさを調節するボリュームがあるので、左右のストップランプと同じぐらいの明るさに調節して、完成です。20分で終わると思っていたら、倍の40分程度掛かってしまいましたブレーキを踏めば、きちんとストップランプとして明るく光るので、問題なしなのでOKです後ろから見ると、かなり目立つようになってしまいました自己満足ですけどね
2009.04.07
コメント(0)
-
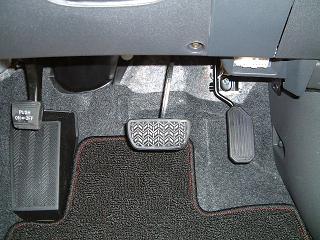
車いじり(LEDウインカーリレー交換、LEDフォグランプ交換、ドアミラー自動格納装置取付)
今日は昨日出来なかった車いじり。今朝は9時に起きました。午前中は、カー用品店へ必要なスイッチやヒューズ類を買いに行きました。自分が欲しいスイッチが売ってません。ヒューズだけ買って、以前売っているのを見かけたホームセンターへ。カー用品売り場へ行き、欲しかったスイッチがありました平型コネクタは持ってますが、サイズが合うか分からないのでスイッチに合うものも買いました。家に帰って、工具を用意しお昼頃から、作業開始です。まずは、昨日出来なかった、LED対応のウインカーリレーを交換。やはり取るのに苦労しましたが、30分程度で交換終了。これで、ウインカー球をLEDに変えても大丈夫ですが、まだ届いてません。ドアロック時とドアロック解除時のウインカーランプが一瞬しか光らなくなりました通常時のウインカーは、問題なく点灯しますので、まあいいかという感じです少し休んでから、次はフォグランプのバルブ交換。ヤフオクで購入したHB4のLED36連の白色のバルブに交換しました。もう何回もフォグランプの交換しているので、左右で10分程度で終わりました。白さを求めていたので、なかなか満足の一品です。夜に近所を走ってきましたが、見た目は白くなりいいですが、明るさはありませんね。やっぱり明るさも求めるならHIDバルブにしないとダメですけど、高価&自分での取付はかなり面倒ですからそのうち購入を考えたいです15時前から、今日のメイン作業。ドアミラー自動格納装置の取り付け。ドアロックでミラーを格納し、ACCキーONで展開する装置です。ディーラーで購入して取り付けてもらうと、15000円位掛かってしまいますこれも、少し前にヤフオクで約2000円で購入したものです。配線8本接続するタイプです。取説によると、2つのコネクタに配線するのですけど、1つはドアミラーのスイッチのコネクタですので、パネルを外してコネクタを確認。スイッチパネルを外すのに手間取ってしまいました。もう1つのコネクタがどこにあるか分からないし、見つけても見当たりません。とりあえず、装置の配線色別にギボシやエレクトロタップを付けて、取り付けやすいように準備。また来週にしようと思い、片付けました。部屋に戻りネットで、同様なドラミラー自動格納装置を交換している人のブログを検索し、確認しました。もう1つのコネクタは、アクセルペダルの右側のカバーの中にあるということが分かりました。無駄に時間が過ぎてしまったので、先に交換している人のブログ検索して確認しておけば良かったです既に2時間以上経過し、17時半。取り付ける場所が分かったので、暗くなる前に、再度取付を始めました装置の機能を停止させるため、午前中買ってきた中間スイッチとヒューズを別に取り付けました。作業をしてると暗くなってしまい、懐中電灯で照らし、配線を間違えないように気をつけて取り付けましたよ19時過ぎにやっと取り付け完了しました。動作確認ドアロックでミラーが自動格納ACCキーONでミラー展開追加した中間スイッチがOFF状態だと、ドアロック時でも格納しません。これなら冬にスノボに行った時など、機能OFFにしておけばミラーが凍ってしまっても大丈夫です問題なく動作しましたので、パネルを元に戻し作業終了です取り付け作業は1時間半程度でしたが、無駄に2時間以上掛かってしまい、結局約4時間も掛かってしまいました結局、午後半日、車いじって1日が終わってしまいました
2009.04.05
コメント(0)
-
愛車のLED打ち変え
今日は午前中から、工作作業。愛車のパワーウィンドウスイッチとエアコンパネルの色を変えました。それぞれの基盤を取り出し、基板上のLEDをハンダを使い、付け替える作業です。使用したLEDは、以前ヤフオクで青と白のチップLEDを購入しておきました。練習としてパワーウインドウスイッチからやりましたが、チップLEDが2ミリでとても小さいので、慣れるまで苦労しました。ハンダ付けも学生の時以来ですからね色は青のLEDに変更。取り付けてチェックしたら、問題なし。こちらは1.5時間程度で完成。午後1時半過ぎから、エアコンパネルのLEDを変更。文字の所を白、それ以外は青のLEDに変更しました。エアコンパネルは、LEDの数が多いので、かなり面倒でした。約2時間で付け替え完成。取り付けてチェックしたら、点灯しません。あれ~やっちまいましたプラスとマイナスを逆に付けてしまい、全部付け直し。また約2時間掛けて、LEDを付け直して再度取り付けてチェック2箇所点灯しなかったので、ハンダがよく付いてないものと思い、その2箇所を付け直したらOKでしたエアコンパネルなど純正だと薄緑の冴えない光でしたが、LEDの付け替えで綺麗になりました。写真は撮ってないので掲載しませんが、見た目も良くなり、かなり自己満足です
2009.03.22
コメント(0)
-
HIDバルブ交換
先日、某オークションでHIDバルブをかなり安く落札できました送料の方が高かったですからねHIDバルブは35W、形状がD2C(D2S,D2Rも使用可能)で車検対応する明るさの6000Kです。午後から愛車のロービームのHIDバルブを自分で交換しようとしました。しかし、運転席前が狭くてやっと手が入る程度でやりにくい自分では面倒なのでショップでやってもらおうとイ○ロー○ットに行きました。以前、ディーラーでHIDバルブ交換料金を聞いたら、3000円と聞いてましたので、それより安いと2000円程度かと思いました。通常のバルブ交換は400円弱。持ち込みは5割増と書いてあったので、そんなに高くないなと思いました。交換料金を聞いたら、ビックリHIDバルブは、別だからと4200円だと言うバンパーを外すわけでもないし、バルブ交換程度で4000円以上はボッタクリもいいとことです料金がディーラーより高いので、断りましたイ○ロー○ットの帰りに、会社で使っている一番仕事が丁寧で信頼できる修理工場へ寄ってみました。社長がいたので、バルブ交換してもらえるか聞いてみたら、すぐにやってくれました。それとついでに、ナンバー灯もLEDの球にするので、後ろの内張りを外してもらい交換しました。料金を聞くと「無料でいいよ」と言ってくれましたが、交換作業をしてもらって、お金を払わないわけにはいきませんよ。「じゃあ1000円で」と言いましたが、2箇所やってもらったのでそれでも悪いと思い、ディーラーとの間をとって、2000円払って交渉成立これでやっと愛車のロービーム、ハイビーム、フォグランプのバルブ交換が終わりました。夜になって、近所のコンビニまで走ってきましたが、ノーマルバルブよりかなり明るくなりました。雨の夜がどうかは、まだ分かりませんけどね。
2009.02.28
コメント(0)
-
タイヤ交換
来週末にスノボへ行くので、ラジアルからスタッドレスタイヤに履き替えました。今日は雨降ってますが、車庫には屋根があるので、午後から自分でタイヤ交換をしました。準備から、片付けまでして1時間程度で終了。タイヤ交換自体は4本で20~25分程度ですね。その後、履き替えたスタッドレスタイヤの空気がやや甘いので、ガソリンスタンドへ行きました。ガソリンを満タンに入れている時に、借りて自分でエアチェック&空気充填。これで雪が降っても安心です。先日、職場の方(58歳)が病気でお亡くなりになりましたので、18時からの通夜に行ってきます。明日も朝から告別式の手伝いに行かなくてはなりません。ご冥福をお祈りします。
2008.01.12
コメント(0)
-
タイヤ交換
今日はお昼前から自分で愛車のタイヤをスタッドレスタイヤに履き替えました。私が住んでいるところは、雪が降りそうもないので、ラジアルタイヤのままでいいのですけどね。しかし、来月当たりスノボに行くかもしれませんから、準備だけはしておきました。工具も油圧ジャッキ、インパクトレンチ、トルクレンチと一式持っていますから、タイヤ交換の時間は、20分ぐらいで出来ます。車をジャッキアップして、インパクトレンチでナットを外し、タイヤを交換して、ナットを締め直す。これだけの繰り返しですからね。最後に、トルクレンチでナットがきちんと締まっているか締めなおして確認するだけですカー用品店などタイヤ交換作業代が1本500円位で4本ですから約2000円掛かりますから、時間がある時に自分で出来ればお得です。タイヤ交換の時間より、外したラジアルタイヤのアルミホイルを洗う時間の方が時間が掛かりましたよ汚れているまま、閉まっておくとアルミホイルも痛みますからね。天気は良いのですが風が少し吹いていたので、日向は暖かいのですが、日陰だと寒かったです。
2007.01.14
コメント(4)
-
5時間待ち!
昨夜も飲みに誘われ、午前4時前まで飲んでました。毎日、飲みすぎてダルイし、疲れが抜けません。今朝も10時に起きて、すごく眠い。しかし今日は愛車のウィッシュに冬の準備でスタッドレスタイヤを履かなくてはならない。11時半ごろ近くのカー用品店へ行き、履き替えの申し込みをしたら、なんと、5時間待ち!とりあえず、順番待ちで申し込みをして、夕方また行くことで、一度家に帰りました。2~3時間待ちだと予想していたら、それ以上だったので、みんな考えることは一緒だなと思いました。-----タイヤの話-----スタッドレスタイヤは、ブリジストンのブリザックREVO1(215/50R17)。17インチのタイヤなので、カー用品店の安いショップで1本当たり28,000円前後(工賃別)が4本だと12万円位になってしまう。こんなに予算はないので、他のメーカーのタイヤにグレードを落とすか悩みましたが、やはり品質の一番いいものが・・・。楽天フリマで新品が激安で出ていたので、前もって買っておいた。出品者(yayaxさん)はこちら↓(送料も全て込みで、各サイズ大量に取り扱っています)yayaxさんの出品一覧(ブリジストン ブリザックREVO1)1本当たり6千円近く安いし、ショップへ持込みで取付工賃を支払っても、かなり安い!純正アルミ履き替えで、ショップへ持込みして工賃が1万円弱。もう少し工賃が安いところもあるけど、アルミホイールを傷だらけにされそうな店なのでパス。タイヤ+工賃で10万円で間に合うので、ショップで購入するより2万円位はお得です。スタッドレスのアルミホイール付セットのホイールは、中国製のかなり安物で、本当に冬用の間に合わせの物なのでデザインもイマイチだし何より品質が悪い。こだわらない人ならいいんでしょうけど、こだわりがあるので、アルミ付セットでは買えません。現在履いているラジアルタイヤは、外しっぱなしには出来ないので、社外品のアルミホイールチームスパルコType-0317X7JJ 48 5H 100【4本セット】を前もって別に購入してある。こちらに、ラジアルタイヤを履き替えてもらって、4本で工賃はプラス1万円弱になるけど、見た目にこだわりもあるので、自己満足。
2005.12.11
コメント(4)
-
スタッドレスタイヤ高~い
愛車のウィッシュは17インチなので、タイヤの値段は店によってかなり価格差がある。15インチも履けるけど、安くなるのはいいが、インチダウンは見た目が格好悪~。そろそろ車の冬支度で、スタッドレスタイヤを観にタイヤ館に行った。スタッドレスは、ブリジストンのREVO1(レボ1)が高いだけあり、性能と品質が信頼性が一番いいので、他社のものは履きたくない。見積り出してもらったら、高いし、交渉してみても、この店は全然安くならない。行く前から分かってましたけどね。ネットで相場よりかなり安く出ているものを買ってもいいのだが、リスクがありますね。 ・本当に今年作られたものなのか不明だし、去年の在庫で安く出しているかも知れないという点 ・タイヤの履き替えや交換に車屋やショップ等に持ち込みしなくてはならない点それに最近は、持ち込みでのタイヤ交換は受け付けない所もあるので、そういうことを考えると近くの一番安い店で買うのがいいのかもしれない。既にタイヤを買う店は決めてあるので、あとはコミコミの価格交渉だけですけどね。
2005.11.20
コメント(0)
-
車いじり
今日は仕事が休みなので、朝から愛車のウィッシュの車内をカスタマイズ。まず、アクセルとブレーキのペダルをマグネシウム・アルミ合金のペダル(RAZO製マグペダルセットRM33)を装着。下記写真(上:ノーマル、下:装着後)15~20分で取り付くと考えていたら、ちょっと手間どってしまい40分も掛かってしまった。取り付けしている時、ドアを開けて外から手を伸ばして作業していたので、外は風が吹いきて、とても寒かったです。次にルームランプ(センター)の交換をしました。ルクサーワン LED ルームランプ RM-T002Wを使用下記写真ノーマルの明るさ交換前交換後交換後の明るさ作業時間3分交換して車内がかなり明るくなりました。まだ他にも手を加えるところがありますが、少しずつやっていますので今日はここまでです。
2005.11.19
コメント(2)
-
クレーム
今日は仕事の昼休みに職場の人と昨日納車された愛車のウィッシュを見せていたら、クレーム箇所を発見しました。それは納車時にオプションで装着したパーツで2箇所もあった。一つは、バンパーの下に装着するフロントリップスポイラーの右側が隙間があり、よく取り付けられていない。もう一つは、純正テールランプからクリアテールランプに交換したもので、右側の内側が濡れてもいないのに、結露していて曇っていました。職場の人から、新車なんだから車屋の人に早く言って直してもらった方がいいと言われました。言われなくても自分ではそうするつもりでした。仕事帰りに車屋に直行し説明しました。明日の出勤前に朝一で車を持って行き、仕事が終わる夕方までには、直してもらうことになりました。まぁ気付いたことは、新車のうちに何でも言って直してもらわないと・・・。すぐに買い替えできるほど、安いものではありませんからね。
2005.11.16
コメント(0)
-
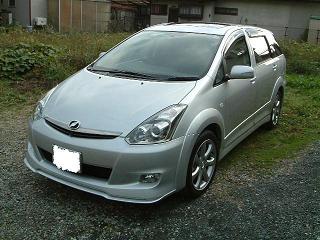
新車がキタ━(゚∀゚)━!!
本日やっと新車がきました。注文してから1ヶ月は待ってないけど、長かった~。今日から愛車のトヨタ ”ウィッシュ”です。もちろんグレードは一番上のZです。このグレードZは車幅が1700mm以上あるためウィッシュの中で唯一の3ナンバー車になり、この下のグレードからは全て5ナンバーなんですよ。新車の香りがいいですね~!色々いじりたいけど、まだ新車なので、しばらくノーマルのまま乗ってから、徐々に手を加えていきたいと考えています。といっても、既にヤフオクで購入しておいたサイドマーカー(ウインカー)の周りにメッキのリムを早速取り付けてしまいました。装着は、とっても簡単です。メッキウインカーリムの裏側に両面テープが貼ってありますので、剥がしてウインカーの周りに貼り付けるだけです。これを付けだだけで、更に高級感が出ますからね。下の写真(上:装着前、下:装着後)次に、これも車がくる前から先に楽天で購入しておいた【コムテック(COMTEC)GPSレーダー探知機】(送料無料)カード決済OK!をフロントガラスに付けてネズミ捕り対策です。GPSレーダーなので、時計機能、車速表示機能もあり、かなり優れたレーダーです。その他、いろいろ小物を用意してありますから、こまめに手を加えていきたいですね。車いじるのは好きですからね。
2005.11.15
コメント(8)
全15件 (15件中 1-15件目)
1
-
-

- アニメあれこれ
- ハピネスチャージプリキュア! 第22…
- (2024-09-30 00:00:23)
-
-
-

- 映画作品レビュー(楽天エンタメナビ)
- 「スオミの話をしよう」観ちゃいまし…
- (2024-09-23 17:13:06)
-


