
It’s fun to work with polymer clay. Not only do you get to revisit the warm fuzzies from your kindergarten play-doh days but you get to make amazing things that you can bake and keep for ever. It’s a win-win situation. Right?
But if you’ve never worked with it before,
I don’t know about you but nothing ends a great time at my craft table faster than getting frustrated because I don’t understand the materials that I’m working with.
That’s why today I’m going to share with you a few tips and tricks that will help. We’ll call it polymer clay for beginners.
Grab a ball of clay to work in your hands like a stress ball and let’s get started.
This post contains affiliate links.
Tips for Using Polymer Clay
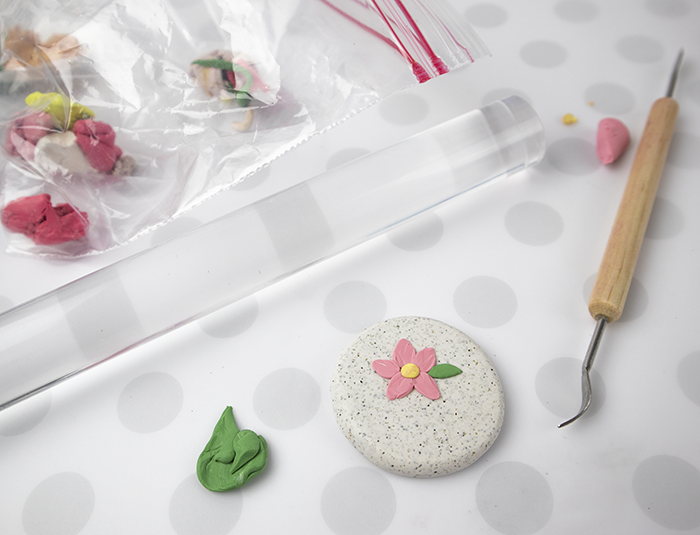
Tip 1 – Start with Great Tools

If you’ve followed this blog for any amount of time, you know that I’m a huge fan of bootstrapping it. My husband calls it cheap, I call it really cheap. I love to use what I already have or make other things work. But when it came to polymer clay, I was getting really frustrated with my DIY tools.
Some people chose to use rollers they already have or a glass jar to roll out the polymer clay or use kitchen knives to cut the clay.
While polymer clay is non-toxic, it’s not food safe meaning that you should not use tools that you would reuse in your kitchen.
Also some rollers have tiny lines that will transfer to your clay. Wood rollers especially have this issue and the clay can seep into the wood, making it stain or hard to work with.
The best thing I did for myself when it comes to polymer clay is that I watched for a sale on the tools I wanted and stocked up.
Tools I recommend just to start:
A word on clay cutters –Be very careful when buying cutters and don’t buy the cheapest ones you can find. I grabbed some from a big box craft store that has rough edges. When you cut a soft medium such as polymer clay, any bump or rough part will come across in your design. If you want to make jewelry or anything that needs straight edges, read reviews and investigate the cutters you want to use.
As you work with
Tip 2 – How to Store Polymer Clay

When I started working with clay, storing it was one of my biggest fears. You would think I would be scared of something bigger – like my kids making clay snakes and hiding them in my desk drawers . I was worried that if I didn’t store clay properly it would dry out and I would have wasted money on all of the fun colors of clay I was stockpiling.
As I started researching how to store polymer clay, I found a ton of pictures on Pinterest of clay stored in divided plastic storage containers, such as the type that you would use for storing embroidery floss.
Can you use plastic storage containers that aren’t air tight? Yup but there’s one caveat – they need to be slightly translucent (not totally clear) and have the recycling numbers of 2, 4, or 5 on the bottom.
However for me I found something that just works better – plastic baggies.
This might make some of you twitchy but I don’t care if the colors are separated. (I know, I know… I also don’t match my socks.) I’m also working with very limited space so a baggie is easier to tuck into a small space.
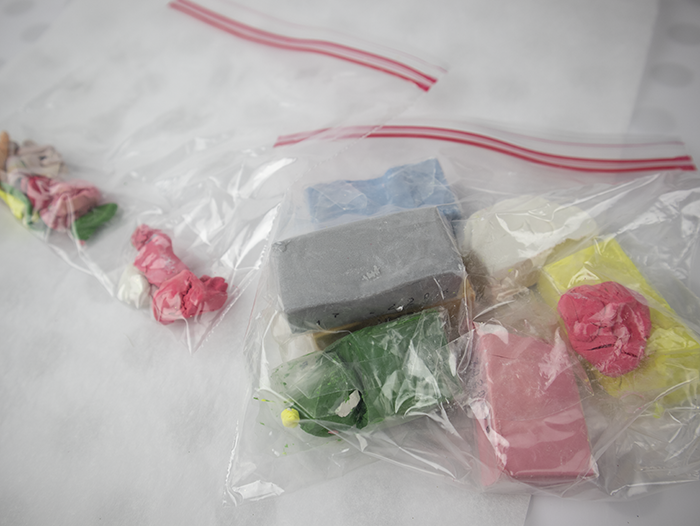
So yes, plastic baggies are a great solution to storing your clay. Just keep them out of direct light and away from heat and you’ll be fine.
Tip 3 – Knead Your Clay
One question that gets asked a lot is, “do you have to knead polymer clay before using it?” Yes. You do not have to knead the polymer clay to a pulp or to the level of bread baking but you do need to warm the clay with your hands and mix it well.
Kneading the clay activates the clay, which is necessary if you want it to harden when you bake it.
If you have problems with your joints in your hands, soften the clay before you start working with it. One way to do this is by putting the wrapped clay in your pocket (or bra – we don’t judge) for a few minutes before you want to use it. You can also wrap it in a slightly warm towel (if you’re bra free that day – again… no judgement) for a bit before using it. You don’t want to get it too warm, or it will start to set.
You also do not have to knead the entire block of clay for a small piece, just tear off the amount you need and knead away.
Tip 4 – Use Glazes / Sealants Made for Clay
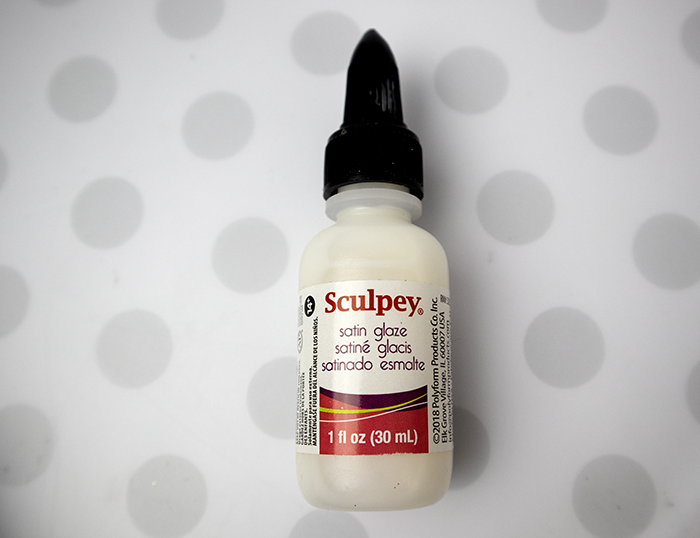
Polymer clay does not have to be sealed or glazed. Once it’s baked and hardened, it’s good to go. But I like shiny things. (Example – this glitter necklace tutorial .)
However since polymer clay involves chemical reactions, some products won’t work with it such as nail polish.
I know a lot of us crafty people like to seal things, such as paper beads , with clear nail polish. Nail polish on polymer clay will not fully set and can make it sticky. Spray on sealants not made for clay can do the same thing.
The worst thing you can do is spend time making something wonderful and then use a sealant or glaze not made for polymer clay and wind up with a sticky mess.
Can you use Mod Podge on Polymer Clay?Sigh. People have before, I have before in a pinch. If it’s something you really care about – no, don’t do it. If you’re making jewelry or something that you want to cherish, don’t do it.
Can you use Resin on Polymer Clay?Yes. I love resin, a little too much, but if you have never worked with it – it’s messy.
If you really want to seal a product, buy a sealant or gloss made for polymer clay. It’s just the safe way to go.
Tip 5 – Watch Out for Lint

You will never know how much lint or dust bunnies are in your crafting space until you open up a package of clay.
You will use curse words you never knew existed the first time you pull a finished project out of the oven and see a piece of lint baked into the finish.
How do you defeat the lint and dust bunnies?
- Wipe down your work surface before beginning
- Try not to wipe your hands on your pants or other fabrics while working (this is my kryptonite)
- Keep a lint free rag near by for wiping hands
- Use baby wipes to clean your hands or wipe down areas
- Keep pets away from your work area while working
Look at your pieces extra hard before baking. I lightly rub my finger over any lint or objects in the clay to pull them out without harming the finish.
Now that you’ve read through these tips for working with polymer clay, it’s time to get started. Here’s a great beginner level tutorial for you – How to make marbled polymer clay pendants.
You can make this! Have fun my friends.
If you loved this tutorial and got some great ideas from it, please take a second to share it with your friends on Pinterest or Facebook .

The post Tips for Working with Polymer Clay appeared first on Clumsy Crafter .
I don’t but I have found higher quality cutters help.