
Boardsin Looker provide a way for teams to find curated dashboards and Looks . Dashboards and Looks, which are stored in folders , can be added to multiple boards. Boards provide a way for users to perform the following tasks:
- Add Looks and dashboards to boards to make it easier for users to find the information that is most relevant to them
- Add links and descriptions to provide context and to guide users to resources
Users will only see boards that they have access to view . A user must have the Viewaccess level to see a board. Users with the Manage Access, Editaccess level can add dashboards and Looks to the board and provide context for that content to help guide other users.
Viewing and managing access to a board
Access to boards and the content that is added to them, like Looks or dashboards, depends on a user's or group's board access , their access to the folder in which that content is stored , and the model that the Look or dashboard is based on .
If a user doesn't have folder access for viewing a dashboard or Look, that dashboard or Look will not be displayed to that user on the board. If the user has folder access but not model access, they will see a thumbnail but will not be able to view the underlying Look or dashboard.
Board access levels
There are two access levels that can be assigned to a user or group for a board: Viewand Manage Access, Edit.
With the Viewaccess level, a user can see that the board exists, add the board to their list , and view any board content that they have access to view .
With the Manage Access, Editaccess level, a user can do everything that the Viewaccess level allows and can also make the following changes to the board:
- Manage access to the board
- Organize and manage content on the board
- Add and remove Looks, dashboards, and links
- Delete the board
Viewing the access levels for a board
You must have the Manage Access, Editaccess level for a board to view the access levels that other users and groups have for it. To see who can access a board:
-
Navigate to the board and select the share icon.

-
Looker displays the Manage accesswindow for the board.
-
The Who can access this boardsection of the window lists users and groups who have access to the board as well as their access levels.

Managing the access levels for a board
To manage access to a board, you need the Manage Access, Editaccess level for that board. To make changes to the access level that a group or user has for a board:
- Navigate to the board and view its access levels by selecting the share icon.
-
To change the access level for a user or group that is already listed, select their current access level and choose the access level that you want from the menu. You cannot change the ability of Looker admins to manage the board.

-
Remove user or group access by clicking the Xto the right of the name.
-
Add one or more groups by selecting the Add group or userfield and choosing any groups or users that you want to change.
-
For any users or groups whose access you want to change, select the existing access level and choose the desired access level from the drop-down menu.

-
Save your changes by selecting Save.
Creating a board
By default, when a board is created, admins and the creator have the Manage Access, Edit access level . All other users can interact with the board at the Viewaccess level.
You can create a new board from the Createbutton or the Boardsoption in the left navigation panel .
Creating a board from the Createbutton
To create a board from the Createbutton, follow these steps:
- Click the Createbutton in the left navigation panel.
- Select the Boardmenu item. This opens a Create boardwindow.
- Enter a name for your new board in the Namefield.
- Select Create board.
Creating a board from the Boardsoption
To create a board from the Boardsoption, follow these steps:
-
Select the Create or find a boardplus icon next to the Boards option in the left navigation panel, and then select Create a new board.

-
In the Namesection of the Create boardwindow, enter a name for your board and select Create Board.
After board creation
After a board is created, Looker adds the new board to your list in the left sidebar in Boards. As the creator of the board, you will also be listed as a contributor in the Contributorssection of the About this boardinformation panel.
You can now manage the content on the board in a number of ways, including:
Adding a board to your list
You can create a shortcut to a board that was created by another user by adding the board to a personal list of boards, similar to a "Favorites" section. When you add a board to your list, it will be listed on the left sidebar under Boardswhen you browse content in Looker.
To add a board to your list, select Add to my listbeneath the title of the board.

To remove a board from your list, select the board's three-dot Board optionsmenu and choose Remove from my list.

You can also remove a board from your list by selecting the three-dot menu that appears when you hover over a board in the left navigation panel and choosing Remove from sidebar.
The number of users who have added a board to their list is reflected in the About this boardsection of the board's information section.

Arranging content on a board
To arrange the content on a board, you must have the Manage Access, Edit access level . In addition to adding content to a board, contributors to a board can arrange the content on a board in the following ways:
- Add sections
- Reorder sections
- Remove sections
- Move content within sections
- Drag and drop content between sections
If you make changes to a board, you will be listed as a contributor in the Contributorssection of the About this boardinformation panel.

Adding sections to a board
When you create a board, there is a default section named Untitled section. To edit the title of the section, choose the Edit Titlepencil icon to the right of Untitled section, and enter a new title.

To add a new section to a board, select New sectionat the bottom of your board. Enter a name for your new section, and press Enter (Windows) or return (Mac) to save the name.

You can now begin to add content to the new section.
Reordering sections on a board
To change the order of the sections on a board:
-
Hover your cursor over the section you want to move and select the vertical six-dot icon to the left of the section title.

-
Holding the vertical six-dot icon, drag the section to reposition it.
Removing sections from a board
If you have the Manage Access, Editaccess level for a board, you can also delete its sections. To remove a section from a board:
-
Select the trash icon for the section you want to delete:

-
Looker displays a pop-up menu to confirm that you want to delete the section. Select Deleteto delete the section.
Removing a section from a board also removes any Looks, dashboards, or links that have been added to the board in that section. However, the Looks and dashboards still exist in their folders .
Moving content within sections on a board
To change the order of content within a section of a board:
- Click on the content that you want to move.
- Holding the added content, drag and drop it to move it to the desired position within the same section.
Moving content between the sections of a board
You can move content from one section to another by dragging and dropping the content you want to move. To move content from one section to another:
-
Select the content that you want to move.

-
Holding the content, drag it until it is positioned within the desired section of the board. If you hold the pointer over the new section while holding the content you are moving, Looker displays a message informing you that the content will be placed at the end of the section.

-
Drop the content into the desired section.
Adding descriptions to a board
For boards that you have created or for which you have the Manage Access, Editaccess level, you can add a description that will appear in the board's information panel and in the window that Looker displays when you view all boards . You can also add a description to each section of a board .
Adding a description for the entire board
In the About this boardinformation panel of a board, you can add a text description that will appear in the Descriptionsection. This description can be seen by anyone who can view the board and is a great way to give people context around the data added to the board. Your description can be up to 250 characters and can include URLs and Markdown links.
To add or edit a board's description:
-
Select the Board Informationicon at the top of the board to open the board's information panel.

-
Under Descriptionin the information panel, select the Add a descriptiontext to add a new description.
-
To edit an existing description, hover over the description and select the Edit Descriptionpencil icon.

-
Add a description in the Descriptionsection and select Doneto save the description.
Adding descriptions to the sections of a board
You can add or edit descriptions for each of the sections of a board that you have created or for which you have the Manage Access, Editaccess level. To add or edit a description to one of a board's sections:
-
Select the Add descriptiontext beneath the section title.

-
Type in a description of up to 1,300 characters for the section, and press Enter (Windows) or return (Mac) to save the description.
-
The description you have added will appear beneath the title of the section.

Users with Manage Access, Editaccess to a board can modify an existing section description by selecting the existing text and performing the previous steps.
Adding content to a board
You can add content to a board that you created or have access to edit . You can also remove content from a board once it has been added.
Other users will be able to see and interact with added content if they have access to it . Because content is stored in folders rather than on boards, adding and removing content from boards does not actually affect the underlying content.
If you add content to a board, you will be listed as a contributor in the Contributorssection of the About this boardinformation panel.
Adding Looks and dashboards to a board
You can add a dashboard to one or more boards by selecting the Add to boardsicon on a dashboard .
You can also add Looks and user-defined dashboards to a board in the following ways:
- By adding from the board
- By adding from a Look or dashboard's thumbnail in a folder
- By adding from a Look's Explore actionsgear menu or a dashboard's three-dot Dashboard actionsmenu
You can also add a LookML dashboard to a board from the thumbnail in the LookML dashboardsfolder or from the three-dot Dashboard actionsmenu of the LookML dashboard that you are viewing.
Adding from a board
To add a Look or user-defined dashboard to a board while you are viewing or editing the board:
-
If the section already has content, hover over the section and select the +(plus) icon.

If the section doesn't have any content, select the Add contenttile.

-
Select Saved contentfrom the pop-up.
-
In the Add saved contentwindow, select the Look or dashboard that you want to add to the board. The Look or dashboard you have selected will now appear in the section that you have chosen.
Adding from a folder
To add a Look, user-defined dashboard, or LookML dashboard to a board from a folder :
-
In a folder, select the three-dot menu on the thumbnail for the dashboard or Look that you want to add to a board, and choose Add to a boardfrom the drop-down menu.

-
Choose an existing board and section from the Select a boardand Select a section in the boarddrop-down menus, and select Add.
Adding from a Look or dashboard
To add a Look that you are viewing to a board:
- Select the Look's Explore actionsgear menu and choose Add to a board.
- Choose an existing board and section from the Select a boardand Select a section in the boarddrop-down menus, and select Add.
To add a user-defined dashboard or a LookML dashboard to a board:
- Select the Dashboard actions three-dot menu , and choose Add to a board. This opens the Add to Boardswindow, where you can choose one or more boards to which you want to add the dashboard.
- In the Add to Boardswindow, select the checkboxes for any boards to which you want to add the dashboard. See the Adding with the Add to boardsicon section of this page for more information on the actions you can take with the Add to Boardswindow.
Adding with the Add to boardsicon
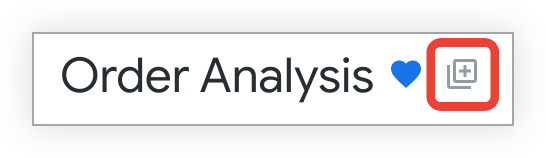
You can add a dashboard to a board by selecting the Add to boardsicon on the dashboard, which is located to the right of the dashboard title and the heart-shaped favorites indicator:
Selecting the Add to boardsicon opens the Add to Boardswindow, where you can choose one or more boards to which you want to add the dashboard.
Select the checkboxes for any boards to which you want to add the dashboard:

You can also add dashboards to specific sections on one or more boards. Select the arrow beside the name of the board to expand the list of sections on that board. Then select the sections to which you want to add the dashboard:

Any boards that you have selected appear in the right-hand pane of the Add to Boardswindow.
Adding dashboards to boards with custom filter values applied
If you have made any temporary changes to the filters on a dashboard that you are saving to one or more boards, you can choose whether the dashboard will be saved to those boards with its default filter values or with the current filter values applied.
To save a dashboard to one or more boards with its default filter values applied, disable the Include custom filter valuestoggle. The Include custom filter valuestoggle is disabled by default.
To save a dashboard to one or more boards with custom filter values applied, enable the Include custom filter valuestoggle.
For example, suppose you have an Order Analysisdashboard with a filter on the field Created Date. In this example, the default value for the filter on the Created Datefield is Last 7 Days:

If you temporarily change the value of the filter on the Created Dateto Last 14 Days, the dashboard will display values for the last 14 days, but this will not affect anyone else's filter results. However, if you enable the Include custom filter valuestoggle when you save the Order Analysisdashboard to one or more boards, the Order Analysisdashboard will be saved to those boards with the custom filter on Last 14 Days, rather than on its default value of Last 7 Days.
Adding links to a board
You can add URLs to boards by using the following method:
-
If the section already has added content, hover over the section and select the Add contentplus icon.
If the section doesn't have any content, select the Add contenttile.
-
Select URL Linkfrom the pop-up.
-
In the Linkfield, paste or enter the URL that you want to add to your board.
- If the URL you used is to a Look or dashboard, the Titleand Descriptionfields will be filled in automatically.
- Otherwise, add a Titlefor the link, and, if desired, add a Descriptionof up to 255 characters.
-
If you added a Looker dashboard URL with custom filters applied , the option to Include custom filter values in URLwill appear. When this option is enabled, the dashboard link uses the custom filter values. When this option is disabled, the link excludes any custom filter values and uses the default filter values.
It is possible to include multiple tiles on a board that reference the same dashboard, but with different filter values set for each tile. However, each of these tiles will use the same title and description, which could make it confusing for users to navigate a board.
-
Click Addto include the link.
Removing content from a board
To remove content from a board:

- Select the three-dot Optionsmenu at the top right of the content.
- Choose Remove from board.
If you remove a section from a board , any Looks, dashboards, and links in that section will also be removed.
Sharing a board
You can share boards for which you have the Manage Access, Editaccess level by sharing a link to the board or by sending an email notification . Users must have at least the View access level for a board in order to view it.
Sharing a link to a board
To obtain a link to a board that you can share with others:
-
Navigate to the board and select the share icon.

-
In the Manage accesswindow, under Share this board with someone, select and copy the URL field, or click Copy URL.
Sending an email notification
When you grant a user access to a board , you are given the option of sending that user an email notification. If you add a user group to a board, however, email notifications will not be sent to the members of the group unless you also add the group members as individual users. To send an email notification:
- In the Manage accesswindow for the board, grant access to the user .
- Select the Email the people you have just addedcheckbox in the Manage accesswindow.
- Select Save.
Individual users you have added to the board will receive an email notifying them that they have been granted Viewor Manage Access, Editaccess to the board. The email also invites users to view the board and encourages them to add it to their lists .
Deleting a board
When you delete a board, you will not be able to recover it.
To delete a board, you must have the Manage Access, Edit access level . Deleting a board will not delete the Looks and dashboards that are added to the board, as they are stored in folders . To delete a board:
-
Select the board's three-dot Board optionsmenu, and choose Delete board.

-
Confirm that you want to delete the board in the window that Looker displays.