

AI-generated Key Takeaways
-
Actions can use push notifications to alert users about relevant information, such as upcoming deadlines.
-
Push notifications for Actions are supported on Android and iOS devices with the Assistant app installed but not on other surfaces like smart displays or voice-activated speakers.
-
Setting up push notifications involves creating a global intent that triggers when a user taps a notification and configuring the Notifications system scene.
-
The setup process requires configuring opt-in and opt-out scenarios within the Notifications scene.
-
Sending push notifications utilizes the Actions API, which requires obtaining a service account key and using it to get an access token to authenticate requests.
Your Action can push notifications to users whenever relevant, such as sending a reminder when the due date for a task is near.
This guide describes how to set up push notifications for your Action.
Supported surfaces
Push notifications are available on Android and iOS devices (iOS devices must have the Assistant app installed to receive push notifications). They are not currently supported on voice-activated speakers, smart displays, or other surfaces.
Prerequisites
Your project must contain at least one global intent , which is invoked when the user taps a push notification received from Assistant.
Get started
The following sections describe how to set up push notifications in your Action.
Create an intent for triggering
The intent you create in this section triggers the notifications flow. To create this intent, follow these steps:
- Go to the Actions console and click Developin the top menu.
- Click Intentsin the left menu to expand the section.
- Click the at the bottom of the list and enter a name for the new intent.
- Press
Enter/Returnto create the new intent. -
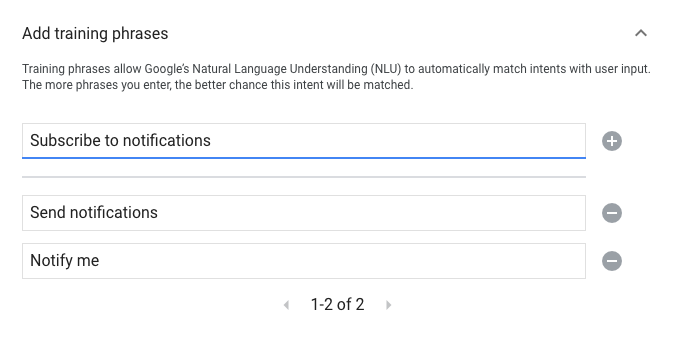
Add training phrases for triggering the notifications flow. Some examples are:
-
Notify me -
Send notifications -
Subscribe to notifications
-
-
Click Save.
Transition to system intent
To set up the transition to the Notifications
system scene, follow these steps:
- Under Scenesin the left menu, click the scene you want to add the notifications subscription flow to.
- Under the User intent handlingsection of the scene, click +to add a new intent handler.
- Under Intent, select the intent you created in the previous section.
-
Under Transition, select the Notificationssystem scene.
-
Click Save.
![]()
Configure system scene
To configures the Notifications
system scene, follow these steps:
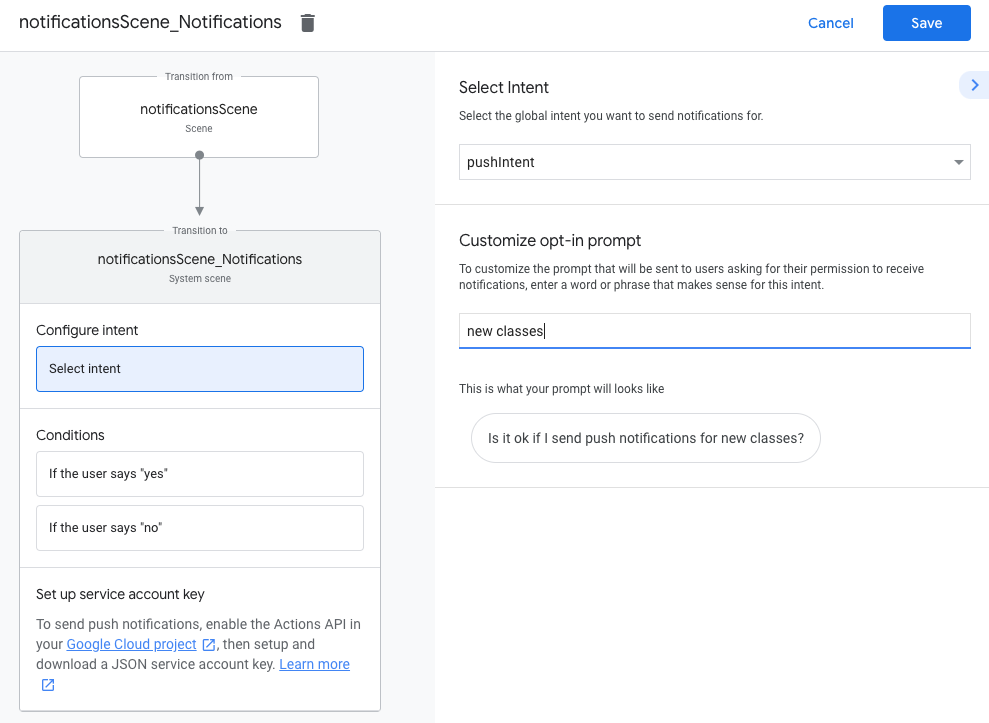
- Under Scenesin the left menu, select the new Notificationssystem scene.
- Under the Configure intentsection, click Select intent.
-
Under the Select intentsection, select the intent you want to be matched when a user taps a push notification.
-
For Customize opt-in prompt, enter a prompt that is displayed to users when they're asked to subscribe to push notifications. The prompt is in the form of "Is it ok if I send push notifications for $prompt".
-
Click Save.
Configure opt-in
To configure opting in to push notifications, follow these steps:
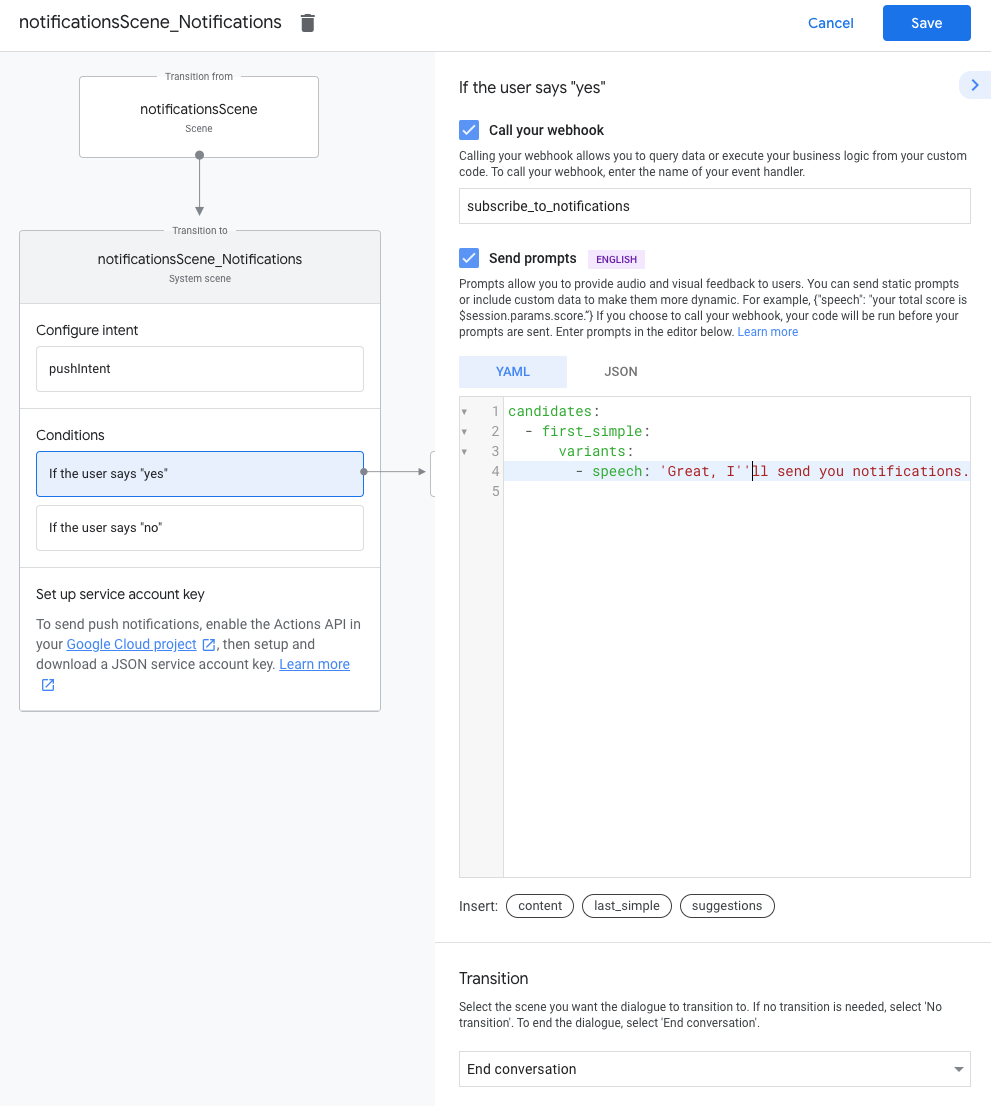
- Under Scenes, select the Notificationssystem scene.
- Under Conditions, select If the user says "yes".
- Enable Call your webhookand provide an event handler name, such as
subscribe_to_notifications. -
Enable Send promptsand provide a simple prompt to let the user know they'll be sent notifications:
candidates : - first simple : variants : - speech : 'Great, I' ll send you notifications . ' -
Under Transition, select End conversationto end the conversation after a user subscribes to notifications.
Configure opt-out
To configure opting out of push notifications, follow these steps:
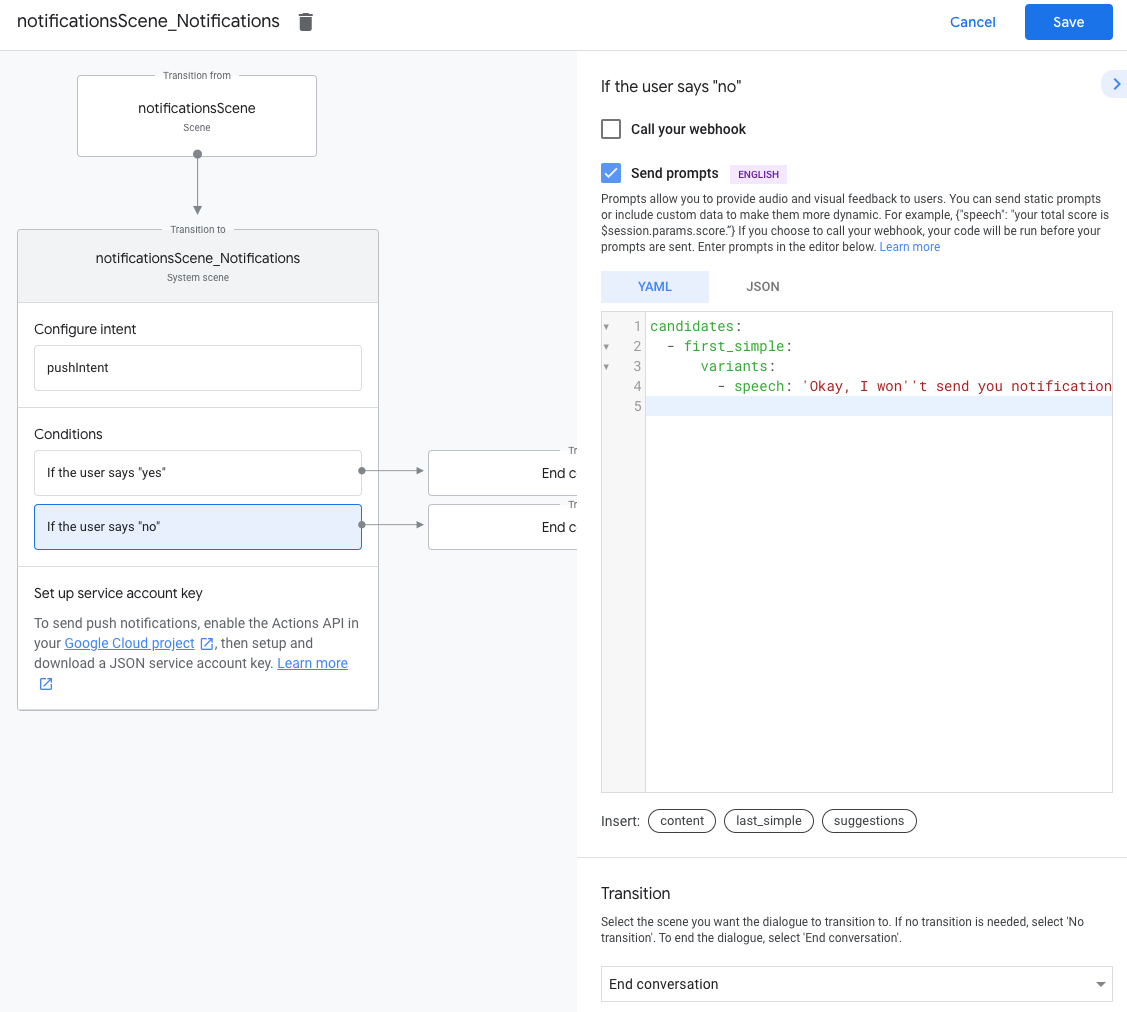
- Under Conditions, select If the user says "no".
-
Enable Send promptsand provide a simple prompt to let the user know they won't be sent notifications:
candidates : - first simple : variants : - speech : Okay , I won 't send you notifications. -
Under Transition, select End conversationto end the conversation after a user opts out of notifications.
Configure webhook
To configure your webhook, follow these steps:
-
In your webhook, add an intent handler for storing the
updatesUserId:app . handle ( 'subscribe_to_notifications' , conv = > { const intentName = '<name_of_intent_to_trigger>' ; const notificationsSlot = conv . session . params [ 'NotificationSlot_${intentName}' ]; if ( notificationsSlot . permissionStatus == 'PERMISSION_GRANTED' ) { const updateUserId = notificationsSlot . additionalUserData . updateUserId ; // Store the user ID and the notification 's target intent for later use. // ( Use a database , like Firestore , for best practice . ) } });
Send notifications
Push notifications are sent to users using the Actions API. To use this API, you need to activate the API in your Google Cloud project and set up and download a JSON service account key.
You can then use the Google OAuth2 client library to exchange the service account key for an access token and use the token to authenticate your requests to the Actions API.
Get a service account key
- Go to the Google API console and select your project from the Select a projectdropdown.
- Click Enableto enable the Actions API for your project.
- Go to the Google Cloud console credentials page and select your project from the Select a projectdropdown.
- Click Create credentials > Service account.
- Enter a service account name and click Create.
- From the Select a roledropdown, select Project > Owner.
- Click Continue.
- Click Create keyto download the service account JSON file.
Exchange the key for an access token and send a notification
To send push notifications through the Actions API, you need to exchange the service account key for an access token. We recommend using a Google API client library for this. In the series of code snippets that follow, we use the Google API Node.js client library.
-
Install the Google API client library and request:
npm install googleapis request --save -
Use the following code to get an access token from the service account key and send a push notification:
 //
Use
the
Actions
API
to
send
a
Google
Assistant
push
notification.
let
client
=
auth.fromJSON(require('./service-account.json'));
client.scopes
=
['https://www.googleapis.com/auth/actions.fulfillment.conversation'];
let
notification
=
{
userNotification:
{
title:
'Example
notification
title',
},
target:
{
userId:
'<UPDATES_USER_ID>',
intent:
'Notifications
Intent',
},
};
client.authorize((err,
tokens)
=>
{
if
(err)
{
throw
new
Error('Auth
error:
 ${
 err
 }
');
}
request.post('https://actions.googleapis.com/v2/conversations:send',
{
'auth':
{
'bearer':
tokens.access_token,
},
'json':
true,
'body':
{'customPushMessage':
notification,
'isInSandbox':
true},
},
(err,
httpResponse,
body)
=>
{
if
(err)
{
throw
new
Error('API
request
error:
 ${
 err
 }
');
}
console.log(' ${
 httpResponse
 .
 statusCode
 }
:
'
+
' ${
 httpResponse
 .
 statusMessage
 }
');
console.log(JSON.stringify(body));
});
});