You can use the Google Publisher Console to inspect ad delivery on pages that use the Google Publisher Tag (GPT) library . You can use this feature to troubleshoot ad loading issues and optimize the performance of your page.
This guide explains how to access and use the Publisher Console. For details on specific messages, see the full list of Publisher Console messages .
If you need more help with GPT, see the support options .
Access the console
You can access the Publisher Console from your browser on any page that uses GPT. There are three ways to access the Publisher Console:
- JavaScript console
- From the JavaScript console in your browser’s developer tools, run:
js googletag.openConsole() - JavaScript bookmark
-
Create a new bookmark for the Publisher Console by dragging the following button to your bookmarks bar:
-
You can then click the bookmark from any page that includes GPT to load the Publisher Console.
- URL query parameters
-
Add
?google_console=1to the end of the URL of any page that includes GPT. For example,http://www.example.com?google_console=1
After accessing the Publisher Console on a page, you can use the keyboard shortcut Ctrl+F10(or fn+control+F10on a Mac) to show or hide it.
Use the console
The Publisher Console has two tabs: Ad Slotsand Page Request. Buttons to audit the page with Publisher Ads Audits for Lighthouse and troubleshoot delivery issues with Ad Manager Delivery Tools are also provided.
Ad overlays
The publisher console adds an overlay to every ad slot registered with GPT. Each overlay contains information about the ad currently loaded in that slot, and a link to view detailed delivery data in Ad Manager Delivery Tools .

- Direct Sold : Reserved Inventory.
- Dynamic Allocation Sold : Non-reserved inventory.
- Empty : The ad slot has not been filled by GPT.
<div>
element the ad has been rendered into.Ad Slots tab
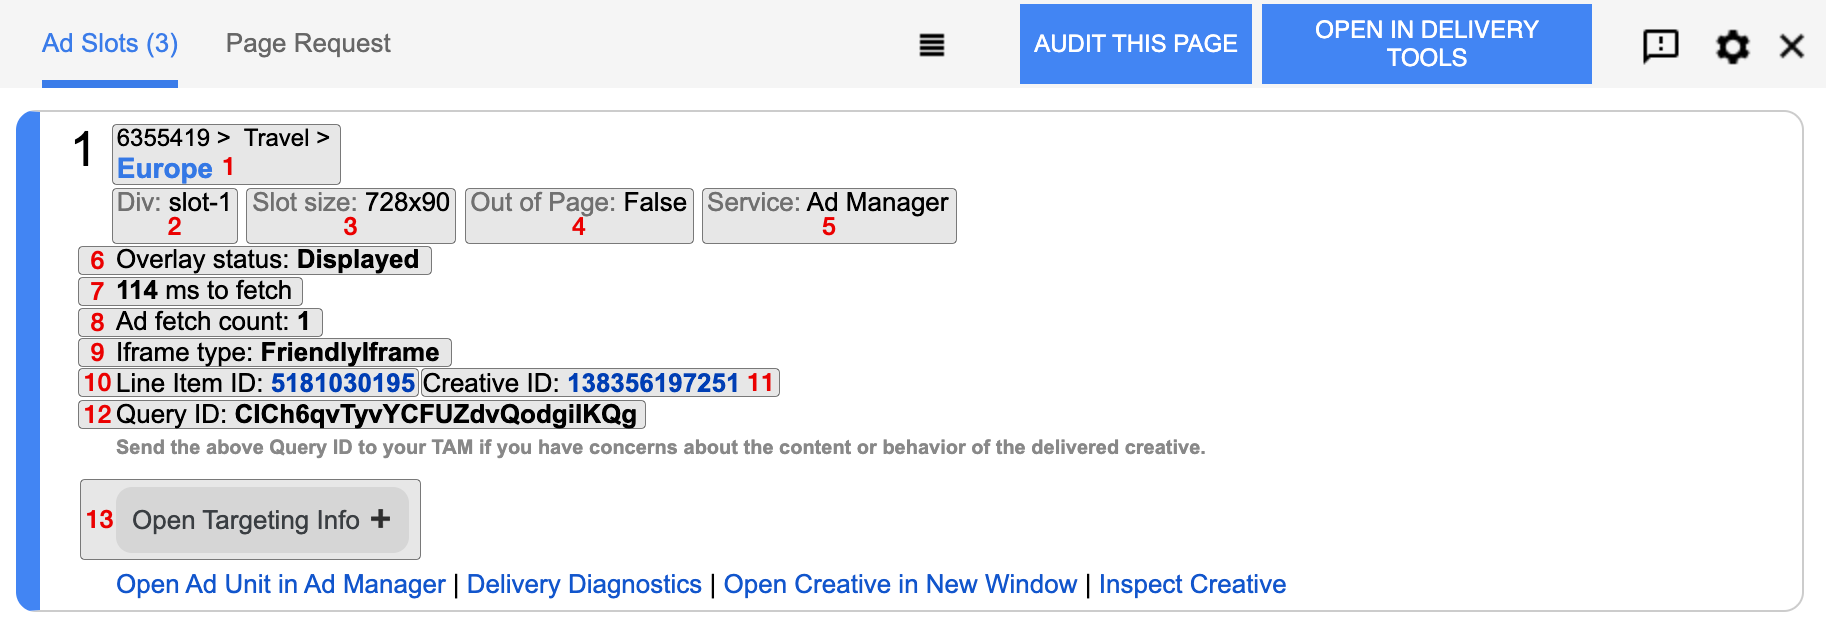
The ad slots tab contains detailed information about every ad slot currently registered with GPT. Information is organized into cards, with one card displayed per ad slot. Links to view the ad unit, creative, and delivery diagnostics for the returned ad in Ad Manager are also provided.

<div>
element the ad has been rendered into.- True
- False
- Displayed
- Not Displayed
- FriendlyIframe
- SafeFrame
Page Request tab
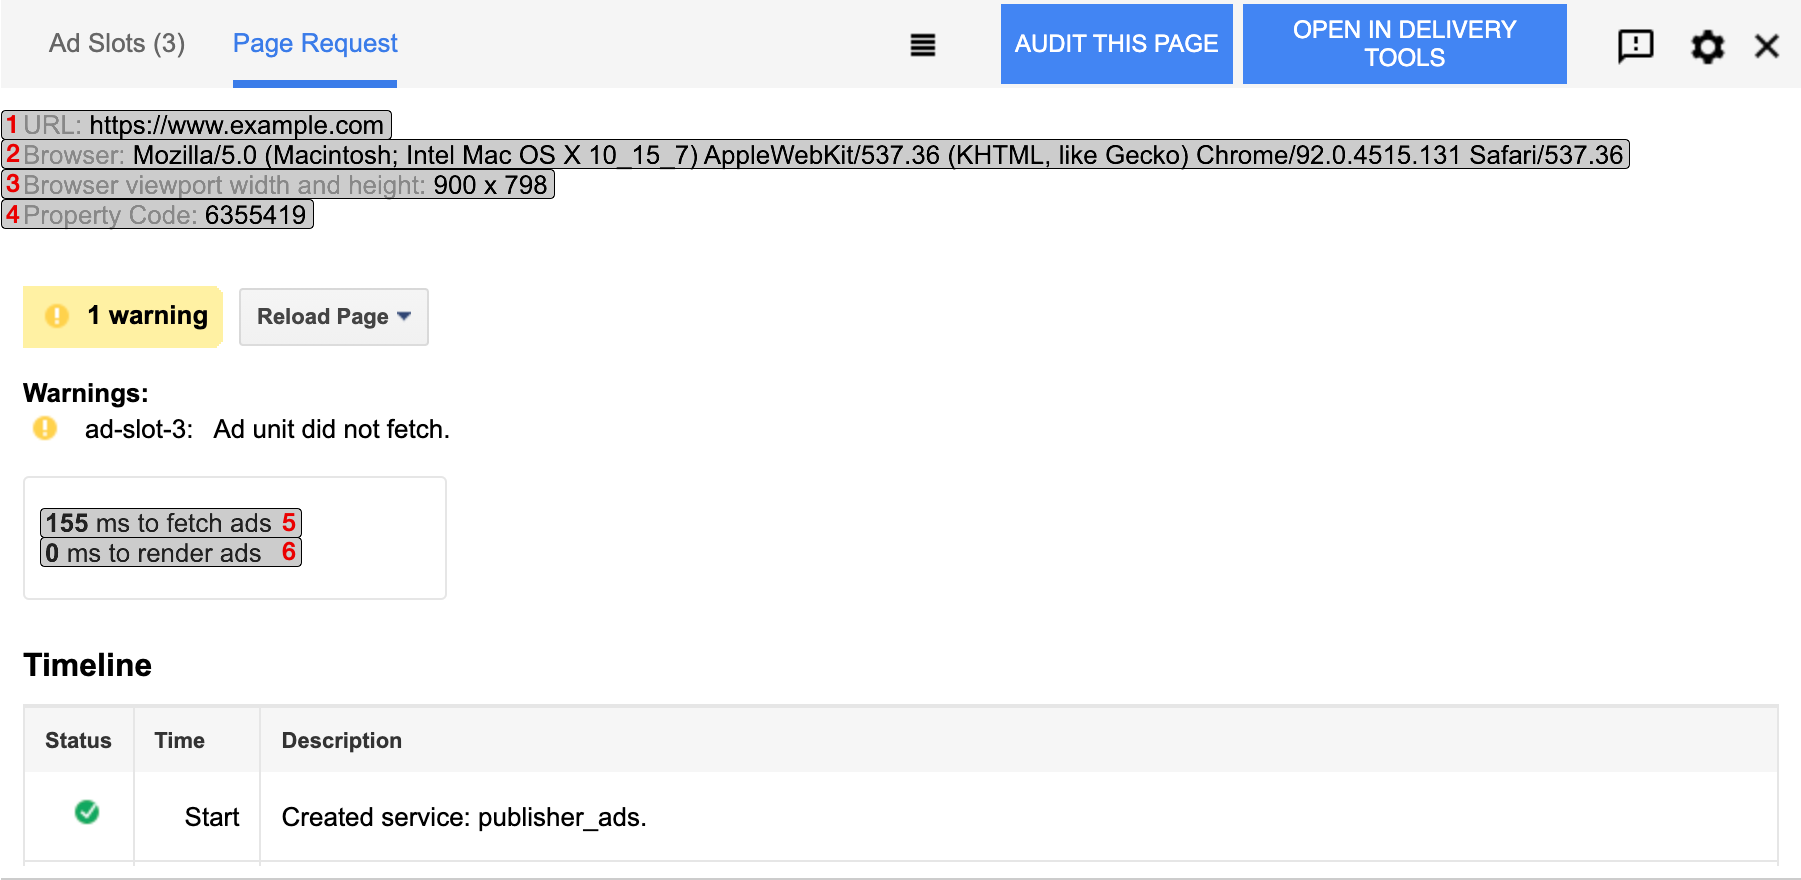
The page request tab provides general information about the page and the environment in which it is rendered, warnings encountered, and a timeline of ad events.

| # | Field | Description |
|---|---|---|
|
1
|
URL | The URL of the current page. |
|
2
|
Browser | The user agent string of the browser used to load the page. |
|
3
|
Browser viewport width and height | The current browser viewport dimensions (pixel width x pixel height). |
|
4
|
Property Code | The network code, which is a unique, numeric identifier for the Ad Manager network that the ad unit belongs to. For more information, see Find Ad Manager account information . |
|
5
|
ms to fetch ads | The amount of time, in milliseconds, that it took to fetch all of the GPT ads on the page from Ad Manager. |
|
6
|
ms to render ads | The amount of time, in milliseconds, that it took to render all of the GPT ads on the page, after the creatives were returned from Ad Manager. |
Timeline
The Timelinesection of the Page Requesttab lists a chronological sequence of events for each GPT ad displayed on the page, from creating the ad slot to rendering the ad. The timeline also includes any warnings or errors returned while requesting or displaying the ad.

