

This page describes how to read multiple tables from a Microsoft SQL Server database, using the Multi Table source . Use the Multi Table source when you want your pipeline to read from multiple tables. If you want your pipeline to read from a single table, see Reading from a SQL Server table .
The Multi Table source outputs data with multiple schemas and includes a table name field that indicates the table from which the data came. When using the Multi Table source, use one of the multi table sinks , BigQuery Multi Tableor GCS Multi File.
Before you begin
- Sign in to your Google Cloud account. If you're new to Google Cloud, create an account to evaluate how our products perform in real-world scenarios. New customers also get $300 in free credits to run, test, and deploy workloads.
-
In the Google Cloud console, on the project selector page, select or create a Google Cloud project.
Roles required to select or create a project
- Select a project : Selecting a project doesn't require a specific IAM role—you can select any project that you've been granted a role on.
- Create a project
: To create a project, you need the Project Creator role
(
roles/resourcemanager.projectCreator), which contains theresourcemanager.projects.createpermission. Learn how to grant roles .
-
Verify that billing is enabled for your Google Cloud project .
-
Enable the Cloud Data Fusion, Cloud Storage, BigQuery, and Dataproc APIs.
Roles required to enable APIs
To enable APIs, you need the Service Usage Admin IAM role (
roles/serviceusage.serviceUsageAdmin), which contains theserviceusage.services.enablepermission. Learn how to grant roles . - Create a Cloud Data Fusion instance .
- Ensure that your SQL Server database can accept connections from Cloud Data Fusion. To do this securely, we recommend that you create a private Cloud Data Fusion instance .
View your Cloud Data Fusion instance
When using Cloud Data Fusion, you use both the Google Cloud console and the separate Cloud Data Fusion UI. In the Google Cloud console, you can create a Google Cloud project, and create and delete Cloud Data Fusion instances. In the Cloud Data Fusion UI, you can use the various pages, such as Studioor Wrangler, to use Cloud Data Fusion features.
-
In the Google Cloud console, go to the Cloud Data Fusion page.
-
To open the instance in the Cloud Data Fusion Studio, click Instances, and then click View instance.
Store your SQL Server password as a secure key
Add your SQL Server password as a secure key to encrypt on your Cloud Data Fusion instance. Later in this guide, you will ensure that your password is retrieved using Cloud KMS .
-
In the top-right corner of any Cloud Data Fusion page, click System Admin.
-
Click the Configurationtab.
-
Click Make HTTP Calls.

-
In the dropdown menu, choose PUT.
-
In the path field, enter
namespaces/ NAMESPACE_ID
/securekeys/ PASSWORD
. -
In the Bodyfield, enter
{"data":" SQL_SERVER_PASSWORD
"}
. -
Click Send.
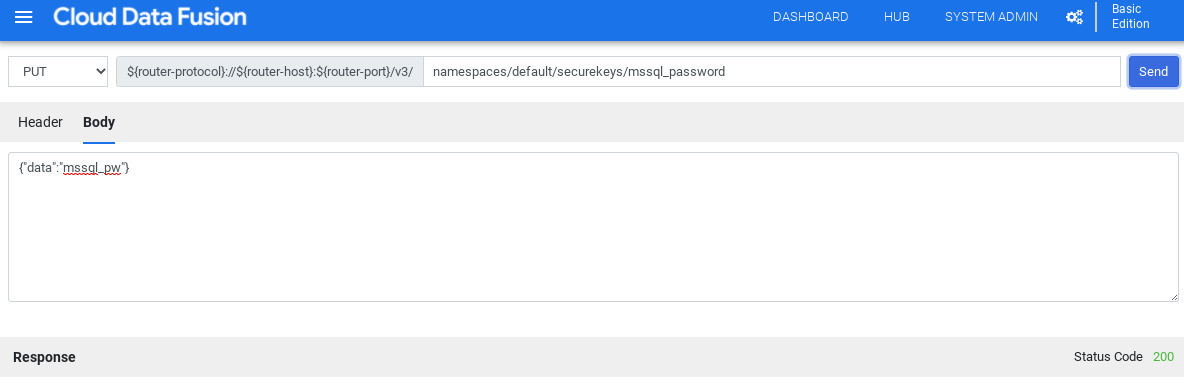
Ensure that the Responseyou get is status code 200
.
Get the JDBC driver for SQL Server
Using the Hub
-
In the Cloud Data Fusion UI, click Hub.
-
In the search bar, enter
Microsoft SQL Server JDBC Driver. -
Click Microsoft SQL Server JDBC Driver.
-
Click Download. Follow the download steps shown.
-
Click Deploy. Upload the JAR file from the previous step.
-
Click Finish.
Using Studio
-
Visit Microsoft.com .
-
Choose your download and click Download.
-
In the Cloud Data Fusion UI, click Menuand navigate to the Studiopage.
-
Click Add.
-
Under Driver, click Upload.
-
Upload the JAR file downloaded in step 2.
-
Click Next.
-
Configure the driver by entering a Name.
-
In the Class namefield, enter
com.microsoft.sqlserver.jdbc.SQLServerDriver. -
Click Finish.
Deploy the Multiple Table Plugins
-
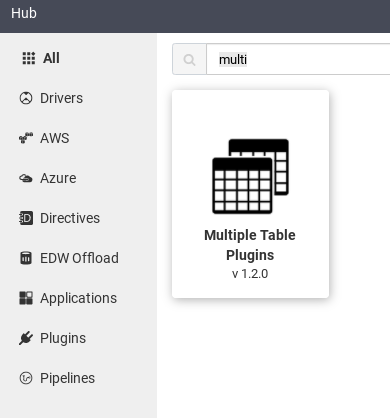
In the Cloud Data Fusion web UI, click Hub.
-
In the search bar, enter
Multiple table plugins. -
Click Multiple Table Plugins.
-
Click Deploy.
-
Click Finish.
-
Click Create a Pipeline.
Connect to SQL Server
-
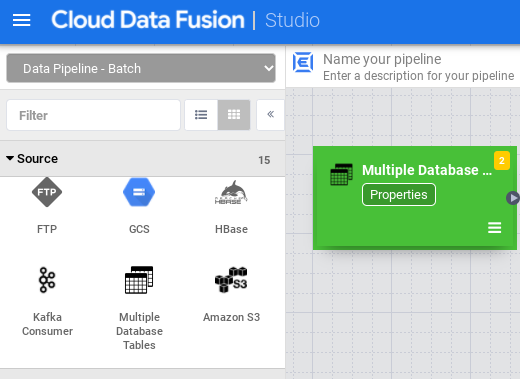
In the Cloud Data Fusion UI, click Menuand navigate to the Studiopage.
-
In Studio, expand the Sourcemenu.
-
Click Multiple Database Tables.
-
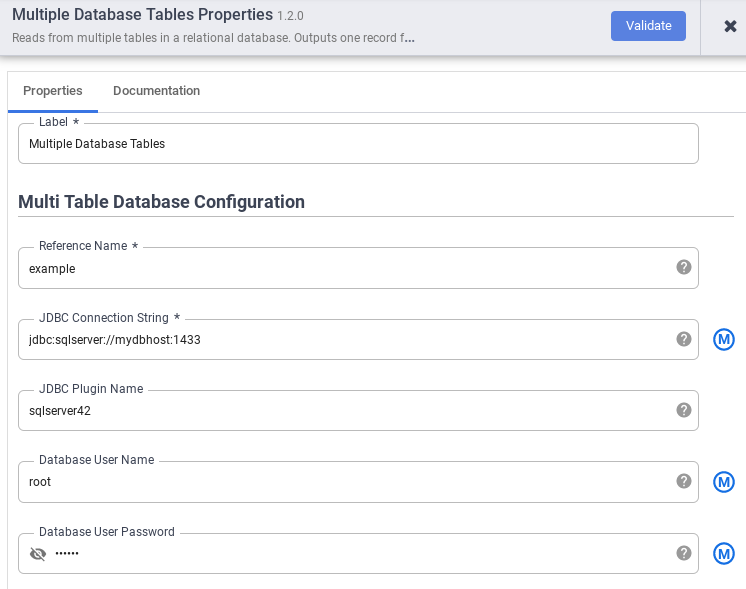
Hold the pointer over the Multiple Database Tablesnode and click Properties.
-
In the Reference namefield, specify a reference name that will be used to identify your SQL Server source.
-
In the JDBC Connection Stringfield, enter the JDBC connection string. For example,
jdbc:sqlserver://mydbhost:1433. For more information, see Building the connection URL . -
Enter the JDBC Plugin Name, Database User Name, and Database User Password.
-
Click Validate.
-
Click Close.
Connect to BigQuery or Cloud Storage
-
In the Cloud Data Fusion UI, click Menuand navigate to the Studiopage.
-
Expand Sink.
-
Click BigQuery Multi Tableor GCS Multi File.
-
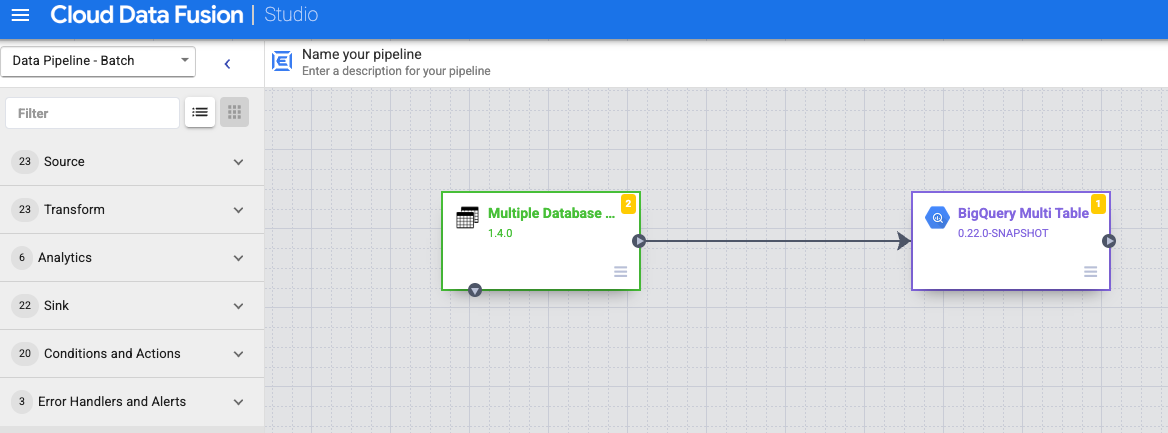
Connect the Multiple Database Tablesnode with BigQuery Multi Tableor GCS Multi File.
-
Hold the pointer over the BigQuery Multi Tableor GCS Multi Filenode, click Properties, and configure the sink.
For more information, see Google BigQuery Multi Table Sink and Google Cloud Storage Multi File Sink .
-
Click Validate.
-
Click Close.
Run preview of the pipeline
-
In the Cloud Data Fusion UI, click Menuand navigate to the Studiopage.
-
Click Preview.
-
Click Run. Wait for the preview to finish successfully.
Deploy the pipeline
-
In the Cloud Data Fusion UI, click Menuand navigate to the Studiopage.
-
Click Deploy.
Run the pipeline
-
In the Cloud Data Fusion UI, click Menu.
-
Click List.
-
Click the pipeline.
-
On the pipeline details page, click Run.
What's next
- Learn more about Cloud Data Fusion .
- Follow one of the tutorials .