

This tutorial shows how to set up the F5 BIG-IP when you integrate with Google Distributed Cloud using the manual load-balancing mode on Google Distributed Cloud .
The F5 BIG-IP platform provides various services to help you enhance the security, availability, and performance of your apps. These services include, L7 load balancing, network firewalling, web application firewalling (WAF) , DNS services, and more. For Google Distributed Cloud, BIG-IP provides external access and L3/4 load-balancing services.
Additional configuration
After the Setup utility completes, you need to Create an administrative partition for each user cluster you intend to expose and access.
Initially, you define a partition for the first user cluster. Don't use cluster partitions for anything else. Each of the clusters must have a partition that is for the sole use of that cluster.
Configuring the BIG-IP for Google Distributed Cloud external endpoints
If you didn't disable bundled ingress , you must configure the BIG-IP with the virtual servers (VIPs), corresponding to the following Google Distributed Cloud endpoints:
-
User partition
- VIP for user cluster ingress controller (port exposed:
443) - VIP for user cluster ingress controller (port exposed:
80)
- VIP for user cluster ingress controller (port exposed:
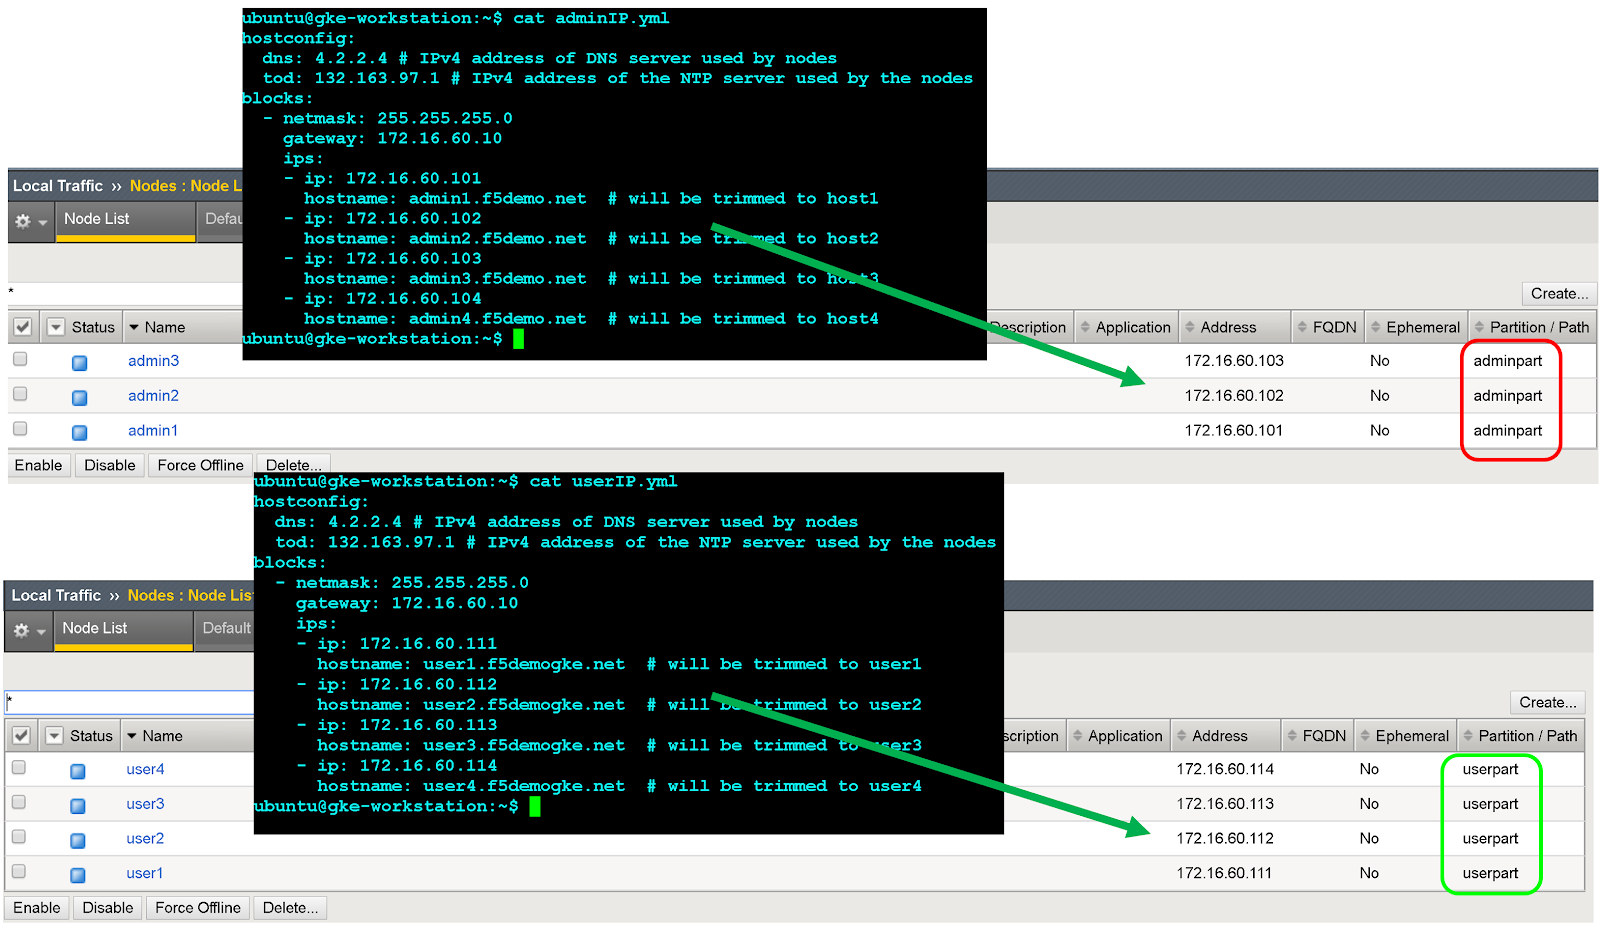
Create node object
The cluster node external IP addresses are in turn used to configure node objects on the BIG-IP system. You will create a node object for each Google Distributed Cloud cluster node. The nodes are added to backend pools that are then associated with virtual servers.
- To sign in to the BIG-IP management console, go to the IP address. The address is provided during the installation.
- Click the User partitionthat you previously created.
- Go to Local Traffic> Nodes> Node List.
- Click Create.
-
Enter a name and IP address for each cluster host and click Finished.
Create backend pools
You create a backend pool for each node Port.
- In the BIG-IP management console, click User partitionfor the user partition that you previously created.
- Go to Local Traffic> Pools> Pool List.
- Click Create.
- In the Configurationdrop-down list, click Advanced.
- In the Namefield, enter
Istio-80-pool. - To verify the pool member accessibility, under Health Monitor, click tcp. Optional: Because this is a manual configuration, you can also take advantage of more advanced monitors as appropriate for your deployment.
-
For Action on Service Down, click Reject.
-
For this tutorial, in the Load Balancing Methoddrop-down list, click Round Robin.
-
In the New Memberssection, click Node Listand then select the previously created node.
-
In the Service Portfield, enter the appropriate
nodePortfrom the configuration file orspec.ports[?].nodePortin the runtime istio ingress Kubernetes Service (name:istio-ingress, namespace:gke-system). -
Click Add.
-
Repeat steps 8-9 and add each cluster node instance.
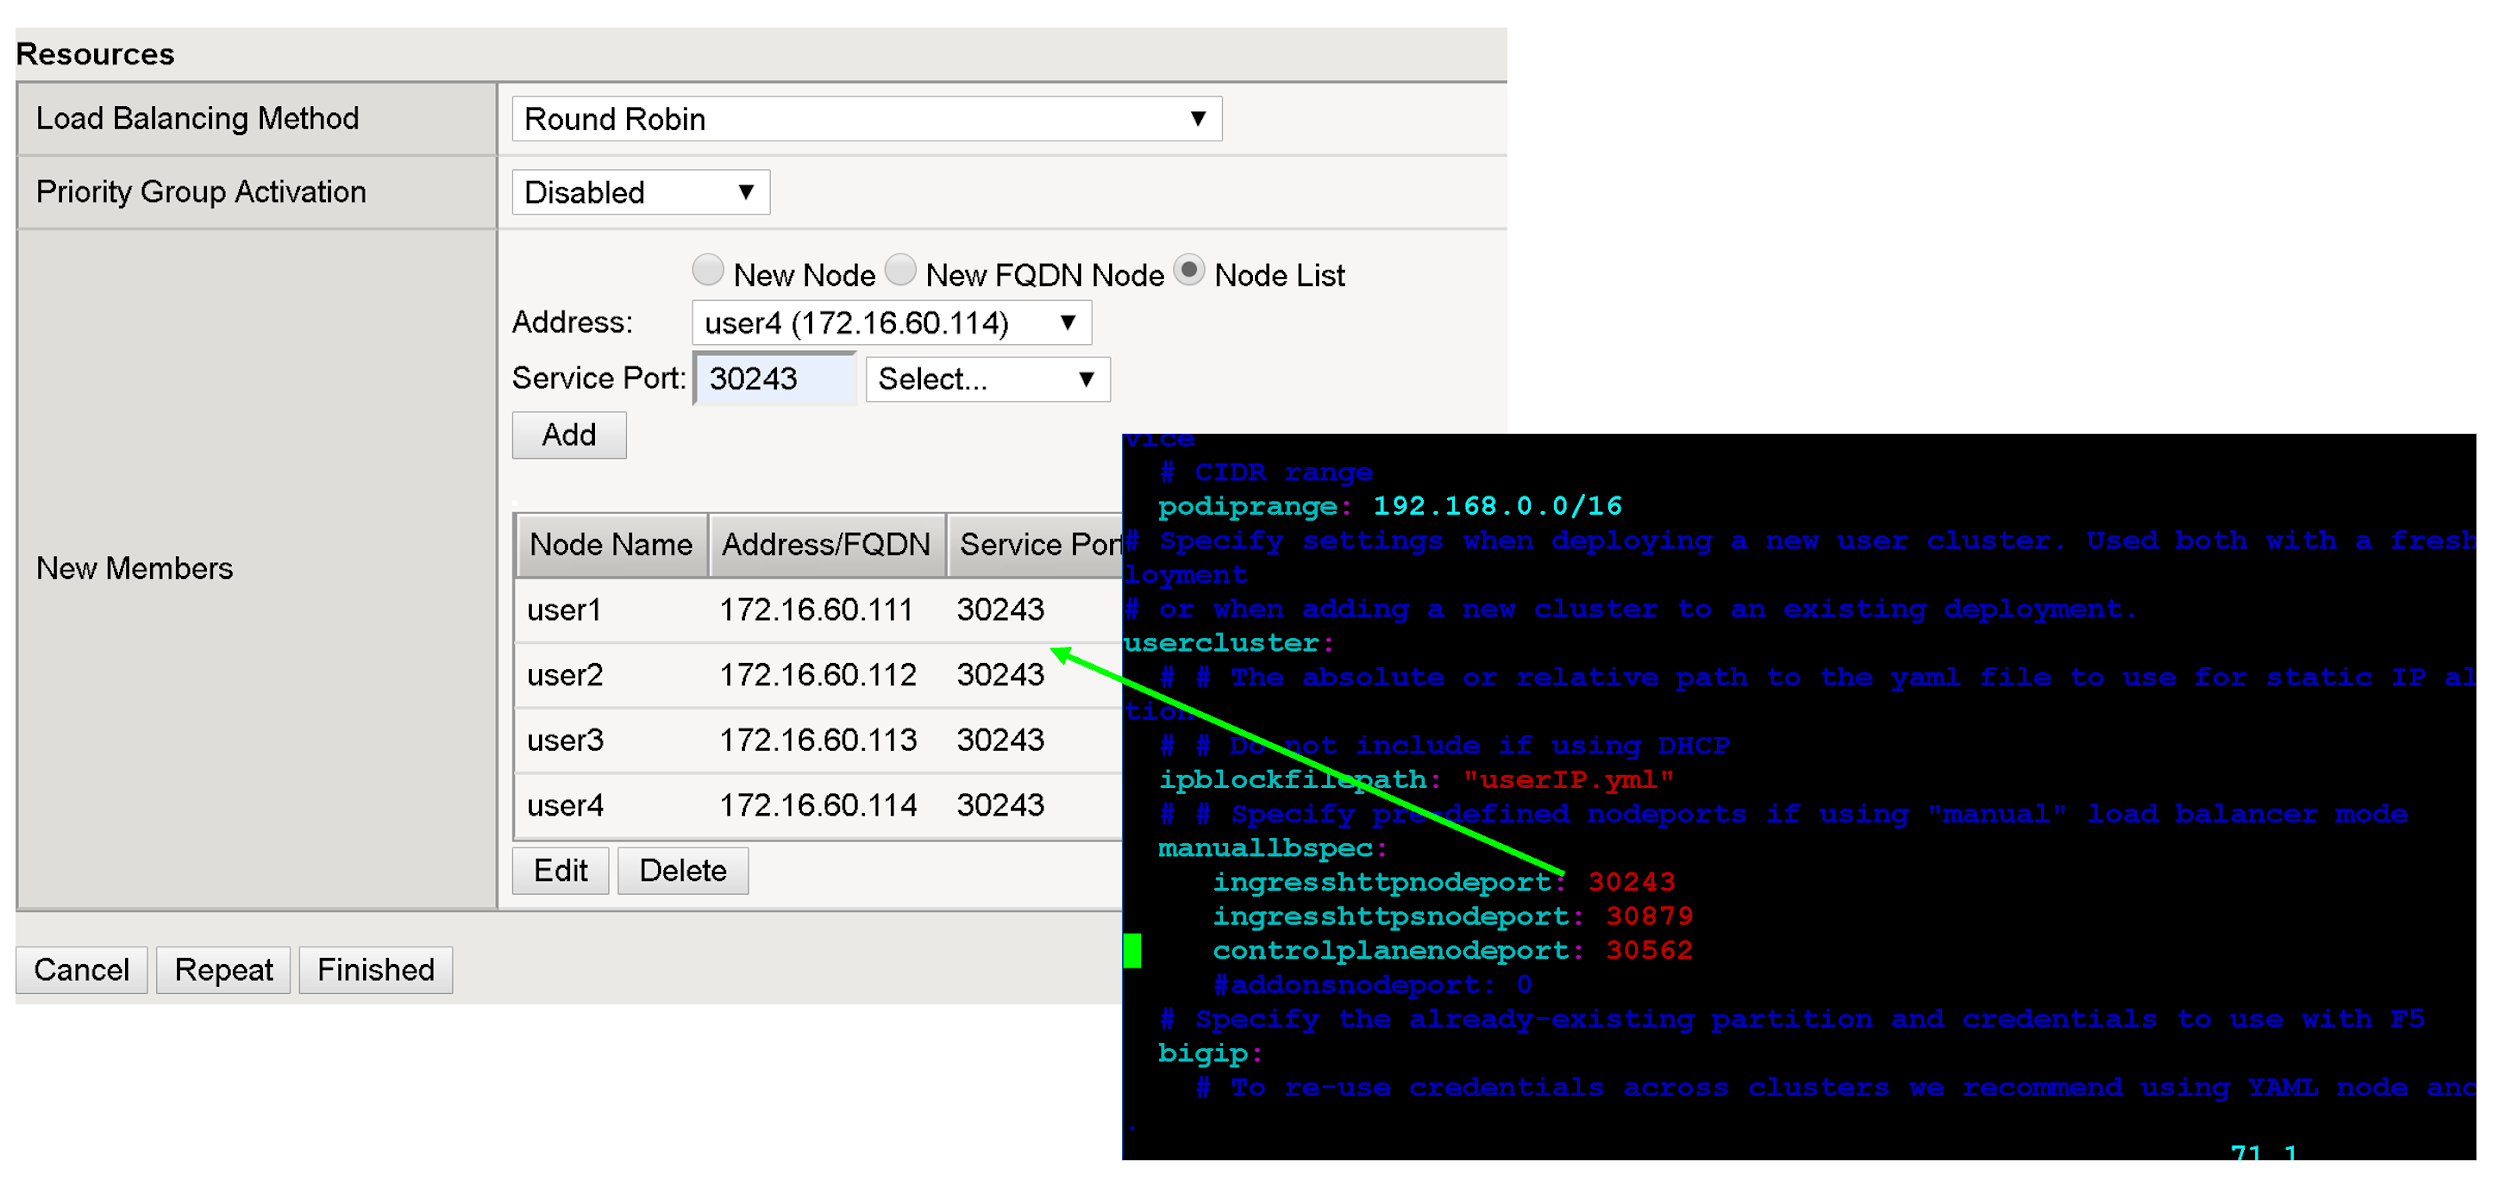
-
Click Finished.
-
Repeat all of these steps in this section for the remaining user cluster nodePorts .
Create virtual servers
You create a total of two virtual servers on the BIG-IP for the first user cluster. The virtual servers correspond to the "VIP + port" combinations.
- In the BIG-IP management console, click the User partitionthat you previously created.
- Go to Local Traffic> Virtual Servers> Virtual Server List.
- Click Create.
- In the Namefield, enter
istio-ingress-80. -
In the Destination Address/Maskfield, enter the IP address for the VIP. For this tutorial, use the HTTP ingress VIP in the
configuration fileorspec.loadBalancerIPin the runtime istio ingress Kubernetes Service (name:istio-ingress, namespace:gke-system). -
In the Service Portfield, enter the appropriate listener port for the VIP. For this tutorial, use port
80orspec.ports[?].portin the runtime istio ingress Kubernetes Service (name:istio-ingress, namespace:gke-system).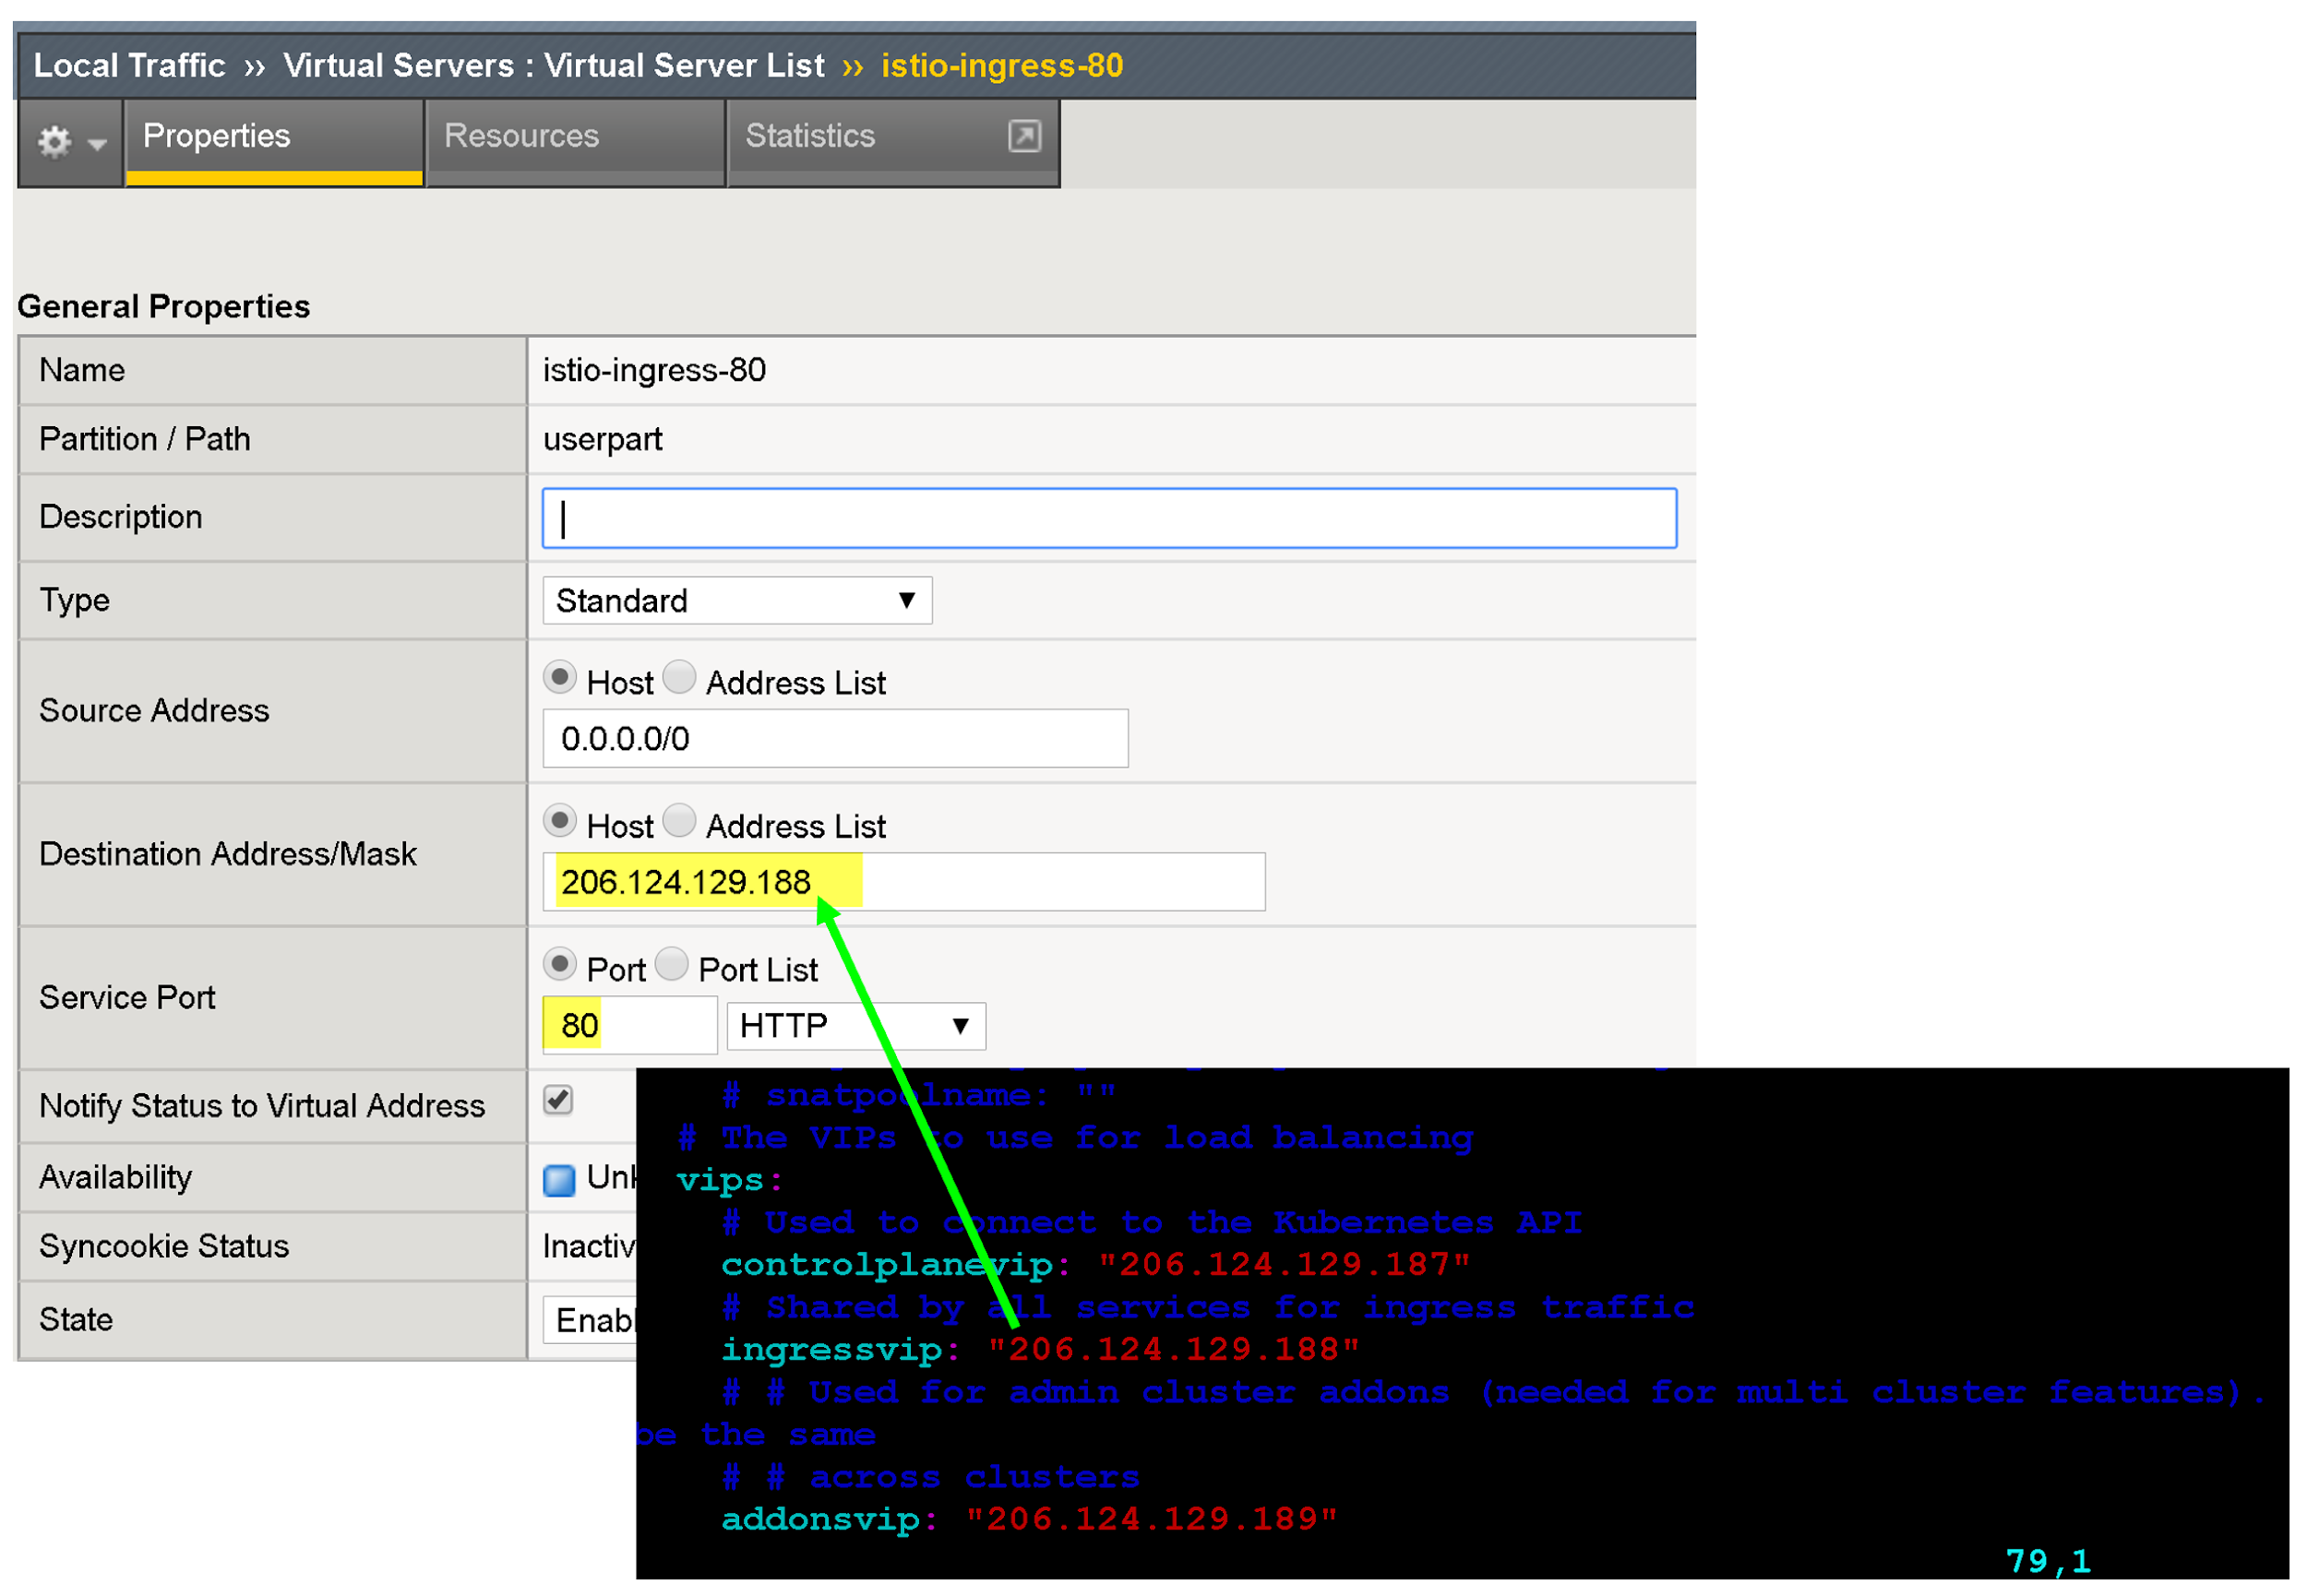
There are several configuration options for enhancing your app's endpoint, such as associating protocol-specific profiles, certificate profiles , and WAF policies .
-
For Source Address Translationclick Auto Map.
-
For Default Poolselect the appropriate pool that you previously created.
-
Click Finished.
-
Create and download an archive of the current configuration .
What's next
-
To further enhance the security and performance of the external-facing VIPs, consider the following:
-
Learn more about F5 BIG-IP Application Services .
-
Learn more about BIG-IP configurations and capabilities: