
You have several different options for mounting and installing your Google Nest Cam IQ Outdoor. You can run the power cable to an outdoor outlet or to an outlet inside your home through an existing vent or hole, or drill one yourself.
Watch a video overview
1. Getting started
- Set up your Nest Cam with the app .
- Review the Safety Guidelines for mounting your camera.
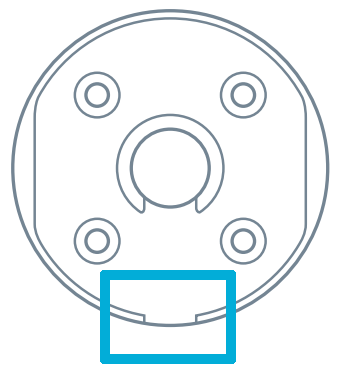
- Remove the black foam pad between the wall
plate and camera base. It’s only there for
protection during shipping. - You can leave the lens sticker on until you’re
finished installing your Nest Cam. This will help
to keep the lens protected from dust and smudges. But be sure to remove it when
you’re done with installation.
Important:Make sure that you comply with all local regulations, and that you know where all in-wall pipes and electrical wires are before drilling. If you don’t feel comfortable drilling through an exterior wall, contact a local professional to install your camera for you.
2. Tools you'll need
Everything you need to get started is in the box: the camera, wall plate, power cable, clips to secure the cable, screws, and wall anchors for hard surfaces like brick or stone.
Note: If you'd like to plug your camera into an outdoor power outlet, an adapter and cable rated for outdoor use may be available for purchase at the Nest Store in select countries.
 |
 |
 |
|---|---|---|
|
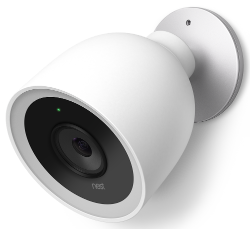
Camera
|
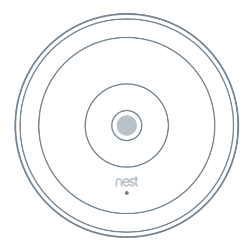
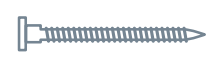
Wall plate | 12 Nest screws |
 |
 |
 |
|
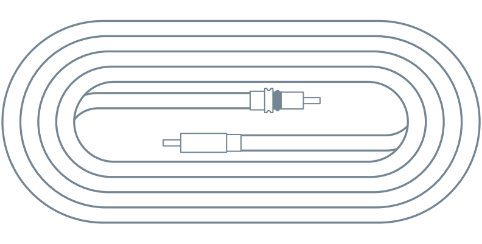
Outdoor power cable (25 feet)
|
8 cable clips | 12 wall anchors |
 |
 |
 |
|
Indoor power adapter
|
Hex key | Power cable strap |
Other items you may need
• A phillips head screwdriver or drill with phillips bit
• Caulk to seal the wall plate and cable hole
• Drill bits
-
3/32" or 2 mm for pilot holes
-
7/32" or 6 mm for wall anchors
-
1/2" or 13 mm for the cable hole
If you’re drilling into brick or stone, you'll need masonry bits.
3. Find a good location
You probably have a good idea of where you want to install your Nest Cam IQ Outdoor already. Here are some key things to think about:
Consider the view
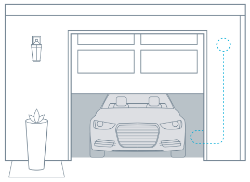
Nest Cam IQ Outdoor has Supersight close up tracking view, so it can automatically zoom in when it notices a person. Since it’s more versatile, you can install your camera where it can look over a large area of your property like the driveway or yard. You’re not limited to shorter distances, but you can also choose to install it near your front, back or side door.
Make sure that there’s nothing too close to where you’ll install the camera. You don’t want anything blocking the view. For instance, is a post, plant or porch light blocking the view? It might affect your Nest Cam’s exposure, focus or Night Vision.
It’s best to angle the camera down so the sun doesn’t shine into the lens. Usually this won’t happen until the sun is low in the sky early in the morning or at sunset. If you notice glare, adjust the camera so the horizon is out of the camera’s view.
Install it just above head height
You’ll want to install your camera just above head height in the location that you’ve chosen. 7 to 10 feet (2 to 3 meters) above the ground is high enough to let you see people’s faces, but close enough so you can talk to them with the camera’s speaker and microphone.
Shelter is good
Nest Cam IQ Outdoor is weatherproof, but raindrops or snowflakes might stick to the lens. Sun shining directly into the lens can also affect the video. If your home has eaves or a place that will provide shelter from the weather, see if that will work for the camera location.
Where to put your camera so you can keep an eye on what you want >
4. Test camera video streaming outside
Thick or insulated walls can greatly reduce Wi-Fi signal strength. Make sure your camera can stream video from the location you’ve chosen.
- Plug in your camera and hold it up to where you’d like to mount it. Check that it can stream video to the Nest app.
- If you can’t see the camera video, the Wi-Fi connection may not be strong enough there. Try moving your camera a bit. Sometimes a few inches can make a difference. You can also try moving your Wi-Fi router.
- Go to nest.com/wifihelp for more information and troubleshooting help.
5. Plan the cable path
Nest Cam IQ Outdoor is designed to be plugged into an indoor power outlet, so you’ll need to plan how you’ll run the cable through the wall to inside your home.
Note: If you’ve purchased the Google Nest Weatherproof Power Adapter (available at the Google Store in select countries), you don’t need to worry about plugging in the power cable inside your home. Plug your power cable into the closest outdoor power outlet. You might also want to install a lockable “while in use” cover over the outlet to prevent your camera from being unplugged. If you don’t have an outdoor outlet, you can follow the steps below.
-
You can put the power cable through an existing opening like an attic vent. This doesn’t require you to drill a hole for the cable, but you’ll have some exposed cable on the outside of your home.
If you don’t have an existing opening, you’ll need to
drill a hole to pass the cable inside. You have two
options for this method:
-
You can install your camera directly over the
cable hole. This will conceal the power cable on
the outside of your home, but the cable may be
exposed inside as you run it to a power outlet.
Keep in mind how you’ll conceal the cable once
it’s inside your home. -
To avoid having an exposed cable run inside your
home, you can route the cable along the outside
of your home to a hole that’s drilled closer to an
indoor outlet. This approach can reduce the
amount of cable that’s visible inside your home.
No matter which method you choose, remember that
you can paint the cable and the clips (but not the
camera!) to blend in.

6. Measure the cable
cable along the route where you’ll be installing
it.
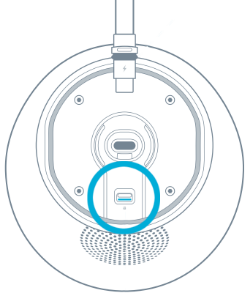
Disconnect your camera from the cable to
make it easier to measure. Push the latch on
the back of the camera to unlock the cable.
keep it protected.
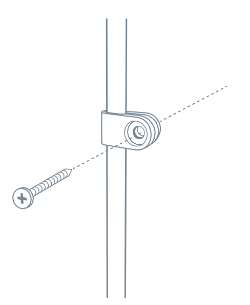
7. Install the wall plate
Once you’ve checked that your installationplan is good, you can mount the wall plate.
- Hold the wall plate up where you want
to mount your camera and mark the
holes with a pencil. - Use a 3/32" (2 mm) bit to drill pilot
holes for the screws.
like brick or stucco, you may need to use the
included wall anchors to hold the screws.
Use a 7/32" or 6 mm bit for the anchors.

If you're installing the camera over the cable hole
-
Use a ½” or 13 mm bit to drill the centerhole.
-
Run the cable through the hole in the
wall and pull it through the wall plate’s
center hole until you reach the end of
the cable. Make sure it’s the end of
the cable with a gray rubber ring.
Tip:Use the caps that came attached
to both ends of the cable to keep dust
and dirt from getting into the
connector. If you don’t have the caps,
you can cover the cable tip with some
masking tape. -
Spread caulk on the back of the wall
plate in the shape of a U. Leave an openspace that will point down when the
plate is mounted so water can drain out. -
Mount the wall plate with the includedscrews.
-
Plug the end of the power cable that
has the gray rubber ring into the base
of your camera.

If you're routing the cable on the outside of your home
-
Spread caulk on the back of the wall plate in the shape of a C. Leave an open space that will point down when the plate is mounted so water can drain out.
-
Mount the wall plate with the included screws.
Important:Make sure the wall plate’s cable notch points in the direction you’re going to run the cable.
8. Mount your camera
-
Plug the end of the power cable that has the gray rubber ring into the base of your camera. It will click into place.
- Tuck the excess cable back into the hole in the wall.
- If you’re running the cable along the wall before it goes inside, route the cable through the notch in the wall plate.
- Push the camera base into the wall plate until it clicks into place.
camera from the wall plate, insert the
included hex key into the hole in the base
and turn it counterclockwise.

9. Adjust the view
Make sure your camera is plugged in and connected to Wi-Fi.
Use the Nest app to check the view while you adjust the
camera angle. You can rotate both the hinge and the camera
lens 360 degrees. Make sure the Nest logo is at the bottom.
anything you don’t want.

10. Install the cable
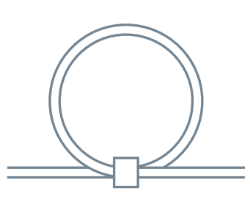
Secure the cable using the included cable clips.
You can install as many clips as you need
outside or inside of your home.
For a clean looking installation, try to route the cable along a ledge or corner.
If you routed the cable along the outside ofyour home and have an exposed hole to pass
the cable inside, be sure to seal the hole with
caulk.
11. Finish up
Remove the sticker on the lens if you haven’t already. Wipe off any dust or dirt with a soft lint-free cloth.
You can paint the cable and the clips to match your home. Do notpaint the camera. This can affect performance and void your warranty.12. Get started using your camera
Here are some key articles to help you learn to use your camera:
- How to share your camera’s video with other people >
- How to change your camera’s image quality >
- Learn about camera alerts and how to change settings >
- Learn about what you get with a Google Nest Aware subscription >
For more help and tips go to nest.com/camerabasics