Page Summary
-
This guide provides a step-by-step process for implementing Google Tag Manager in an iOS app built with Swift.
-
The implementation enables tracking of key user interactions, such as screen views and button presses, for analysis in Google Analytics.
-
Developers will need to create a new Xcode project, install Google Tag Manager dependencies via Cocoapods, and configure a bridging header for Objective-C libraries.
-
A Google Tag Manager container is linked to the app to manage and deploy tracking tags.
-
Events are pushed to the data layer using specific keys and values that correspond to defined variables and tags within the Google Tag Manager interface.
This guide describes how to create and implement an iOS app in Swift to track screen open and button pressed events with Google Tag Manager (GTM).
1. Create a new project
- Open Xcode.

- Click Create a new Xcode project .
- Select Single View Application
.
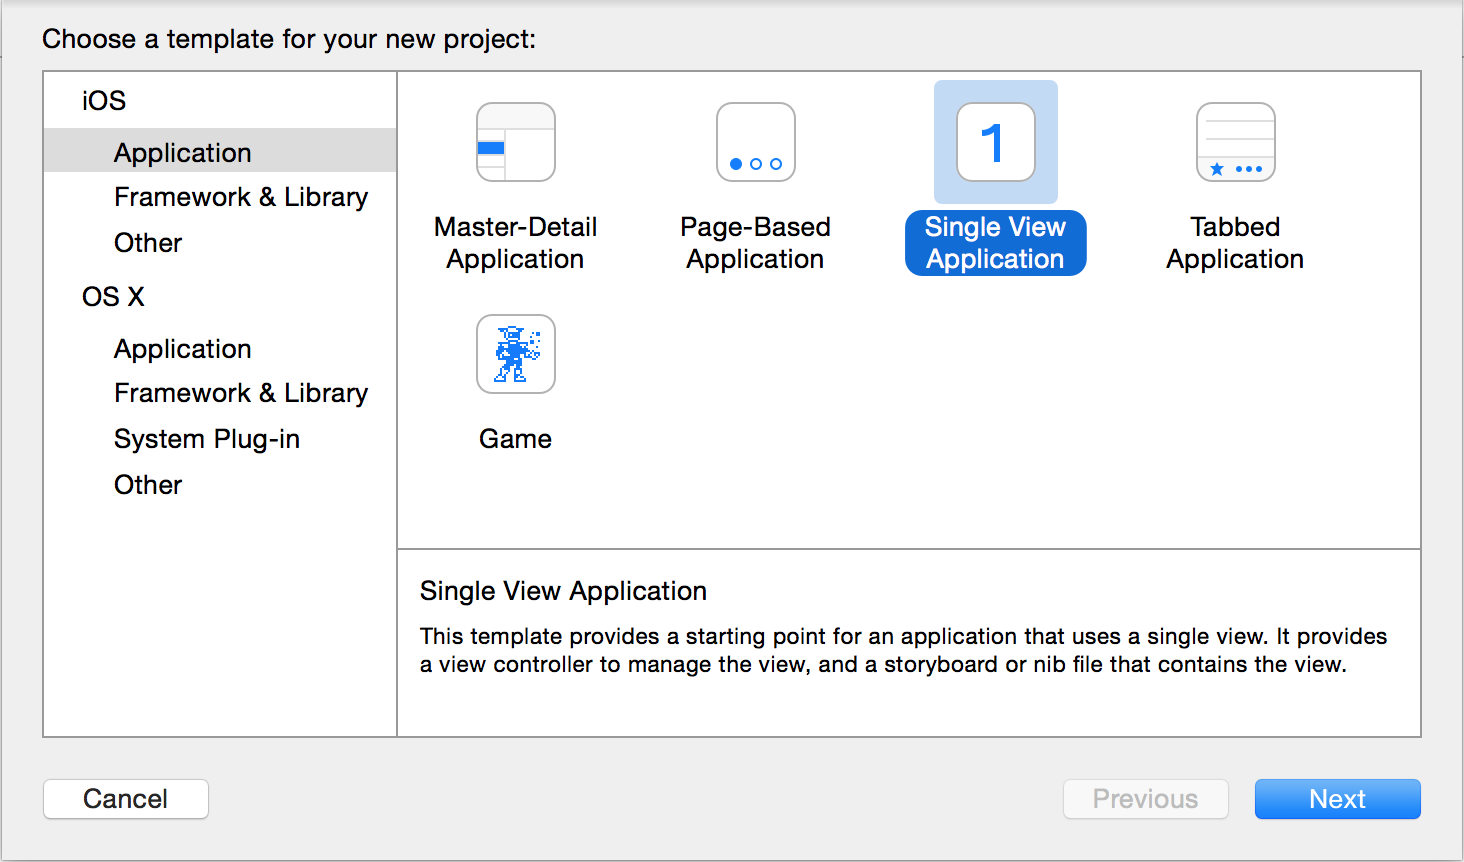
- Click Next .
- Name your project and choose additional options for it. Your project name and
app name will be the same as the product name.
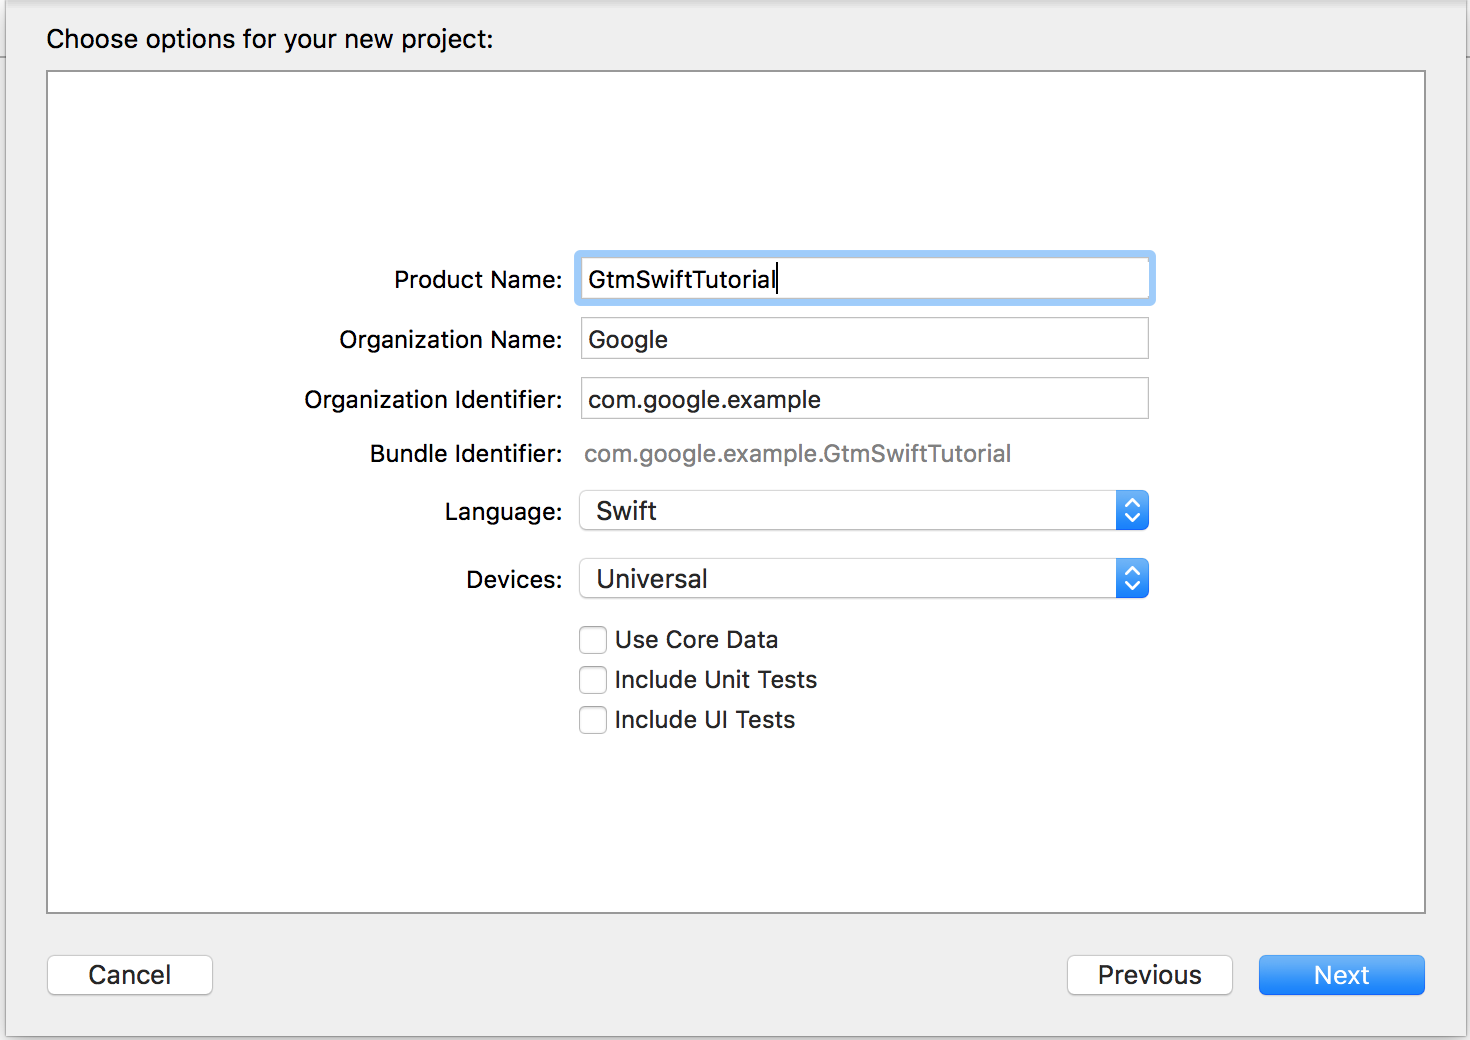
- Click Next .
- Select a project location (directory).
- Click Create .
2. Install Google Tag Manager dependencies
- Quit Xcode.
- In a terminal, run the following command to install Cocoapods
:
 $

 sudo

 gem

 install

 cocoapods
- Change to your project directory.
- Run the following command to create a file named
Podfile:$ pod init
- In
Podfile, uncommentuse_frameworks!and addpod 'GoogleTagManager'to the target: - Run the following command to download and install Google Tag Manager (GTM)
dependencies to your project:
$ pod install
This command also creates the work space
GtmSwiftTutorial.xcworkspace. From now on, use this work space to develop theGtmSwiftTutorialapp.
 #

 Uncomment

 this

 line

 if

 you
 '
 re

 using

 Swift
  use_frameworks
 !

 target

 '
 GtmSwiftTutorial
 '

 do

  pod

 '
 GoogleTagManager
 '

 end
3. Add a bridging header for Objective-C libraries
To create a bridging header file :
- Open Xcode.
- Click File > New > File .
- Under iOS > Source , select Header File .
- Click Next .
- Enter the header file name
BridgingHeader.h.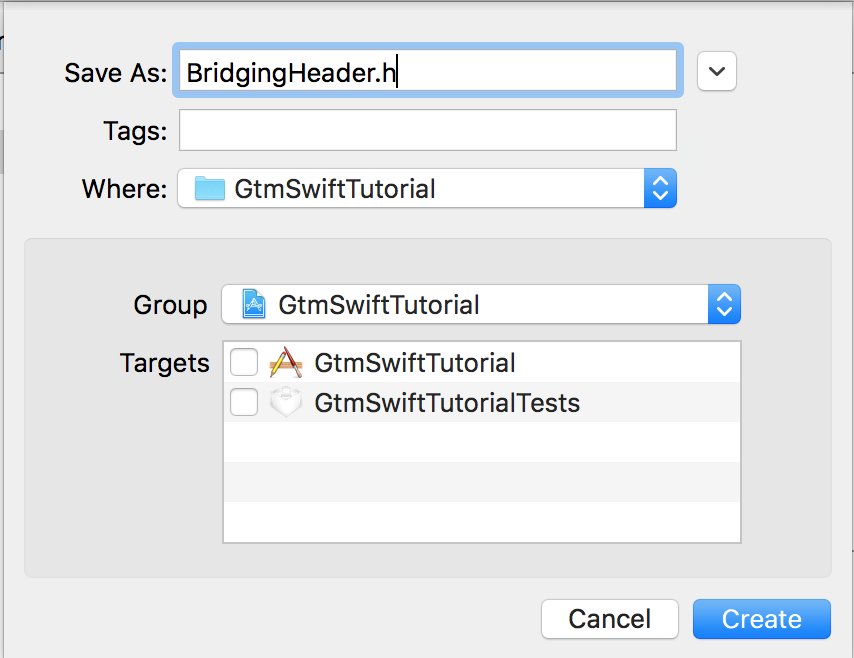
- Click Create .
- Add these
importstatements to the header file:# ifndef BridgingHeader_h # define BridgingHeader_h # import < GoogleTagManager / TAGManager . h > # import < GoogleTagManager / TAGContainer . h > # import < GoogleTagManager / TAGContainerOpener . h > # import < GoogleTagManager / TAGDataLayer . h > # import < GoogleTagManager / TAGLogger . h > #endif /* BridgingHeader_h */
To add Objective-C bridging header on build settings :
- In Xcode, click your project.
- Click Build Settings
in the editor area.

- Select All
and Combined
and search for bridging
.

- On the right column of the row containing Objective-C Bridging Header
,
enter
BridgingHeader.h.
4. Add a default container to your project
Before adding a default container to your project, download a mobile container binary:
- Sign in to your Google Tag Manager account.
- Select a mobile container.
- Click Versions at the menu bar.
- Click Actions > Download on the selected container version.
GTM-PT3L9Z
.To add a default container binary to your project:
- Open Xcode.
- Click the Finder icon on the Dock.
- Click the
Downoloadsfolder. - Drag the container binary file in the
Downloadsfolder and drop it to your Xcode project's root folder.
5. Link Google Tag Manager to your app
- In Xcode, open file
AppDelegate.swift. - Have the
AppDelegateclass extend theTAGContainerOpenerNotifierclass:import UIKit @UIApplicationMain class AppDelegate : UIResponder , UIApplicationDelegate , TAGContainerOpenerNotifier { // ... }
After you extend the class, you'll get the
Type 'AppDelegate' does not conform to protocol 'TAGContainerOpenerNotifier'error. The following step will fix this error. - Add the following function to the bottom of the
AppDelegateclass definition:func containerAvailable ( container : TAGContainer !) { container . refresh () }
- In the
applicationfunction, add the following code before thereturn truestatement:let GTM = TAGManager . instance () GTM . logger . setLogLevel ( kTAGLoggerLogLevelVerbose ) TAGContainerOpener . openContainerWithId ( "GTM-PT3L9Z" , // change the container ID "GTM-PT3L9Z" to yours tagManager : GTM , openType : kTAGOpenTypePreferFresh , timeout : nil , notifier : self )
6. Track screen open event
To track a screen open event:
- Create a variable to store the tracking ID.
- Create a data layer variable named screenName .
- Create a GTM tag titled Screen View .
- Add screen tracking code.
a. Create a variable to store the tracking ID
- Sign in to your Google Tag Manager account.
- Select a mobile container.
- On the left navigation bar, click Variables .
- Under User-Defined Variables , click New .
- Click Untitled Variable to enter the variable name Tracking ID .
- Choose Constant as the variable type.
- Enter the tracking ID (in the form of
UA-XXXXXXXX-X, whereXis a digit) as the value of the variable.UseUA-47605289-5(to be deleted). - Click Create Variable .
b. Create a data layer variable named screenName
- Sign in to your Google Tag Manager account.
- Select a mobile container.
- On the left navigation bar, click Variables .
- Under User-Defined Variables , click New .
- Click Untitled Variable to enter the title Screen Name .
- Choose Data Layer Variable as the variable type.
- Enter screenName as the Data Layer Variable Name .
- Click Set Default Value .
- Enter the default value unknown screen .
- Click Create Variable .
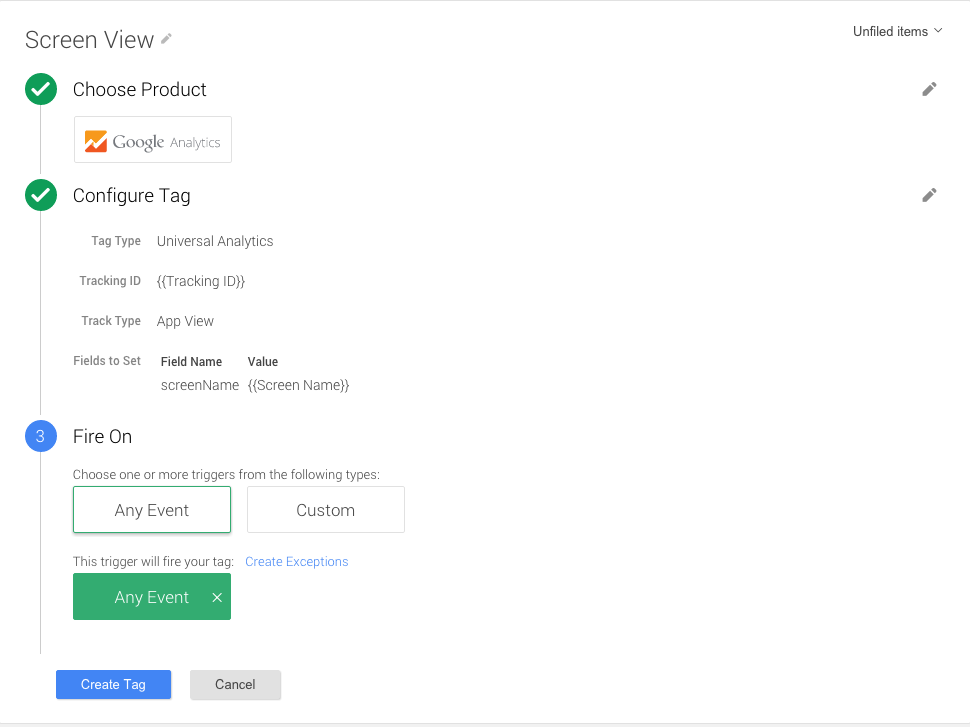
c. Create a GTM tag titled Screen View
- Sign in to your Google Tag Manager account.
- Select a mobile container.
- On the left navigation bar, click Tags .
- Click New .
- Click Untitled Tag to enter the tag name Screen View .
- Choose product Google Analytics .
- Select Tracking ID from the list.
- Select App View as the Track Type .
- Click More settings .
- Click Fields to Set .
- Click + Add Field .
- Select field name screenName and its value Screen Name .
- Click Continue .
- Under Fire On , select Any Event .
- Click Create Tag .
See the screenshot of creating the Screen View GTM tag.
d. Add screen tracking code
- Open file
ViewController.swiftin Xcode. - Define a variable named
dataLayerinside theViewControllerclass:var dataLayer : TAGDataLayer = TAGManager . instance (). dataLayer
- In the
viewDidLoad()function, push theOpenScreenevent to the data layer:dataLayer . push ([ "event" : "OpenScreen" , "screenName" : "Home Screen" ])
The definition of the ViewController
class looks like this:
 import

 UIKit
 class

 ViewController
 :

 UIViewController

 {

  var

 dataLayer
 :

 TAGDataLayer

 =

 TAGManager
 .
 instance
 ().
 dataLayer


 override

 func

 viewDidLoad
 ()

 {

 super
 .
 viewDidLoad
 ()

  dataLayer
 .
 push
 ([
 "event"
 :

 "OpenScreen"
 ,

 "screenName"
 :

 "Home Screen"
 ])


 }

 override

 func

 didReceiveMemoryWarning
 ()

 {

 super
 .
 didReceiveMemoryWarning
 ()

 // Dispose of any resources that cant be recreated

 }
 }
7. Track button pressed event
To track a button pressed event:
- Create a data layer variable named eventAction .
- Create a custom event variable named Event .
- Create a GTM tag titled Button Pressed .
- Create a button and add code to track that the button is pressed.
a. Create a data layer variable named eventAction
- Sign in to your Google Tag Manager account.
- Select a mobile container.
- On the left navigation bar, click Variables .
- Under User-Defined Variables , click New .
- Click Untitled Variable to enter the title Event Action .
- Choose Data Layer Variable as the variable type.
- Enter eventAction as the Data Layer Variable Name .
- Click Set Default Value .
- Enter the default value unknown event .
- Click Create Variable .
b. Create a custom event variable named Event
- Sign in to your Google Tag Manager account.
- Select a mobile container.
- On the left navigation bar, click Variables .
- Under User-Defined Variables , click New .
- Click Untitled Variable to enter the variable name Event .
- Choose Custom Event as the variable type.
- Click Create Variable .
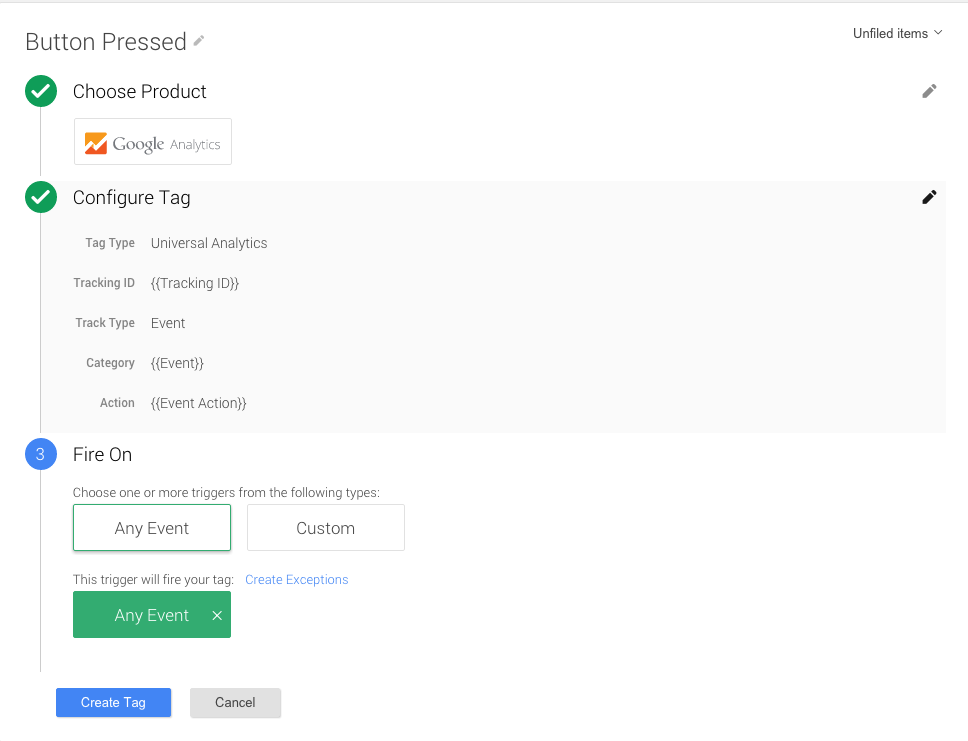
c. Create a GTM tag titled Button Pressed
- Sign in to your Google Tag Manager account.
- Select a mobile container.
- On the left navigation bar, click Tags .
- Click New .
- Click Untitled Tag to enter the tag name Button Pressed .
- Choose product Google Analytics .
- Select Tracking ID from the list.
- Select Event as the Track Type .
- Select Event category.
- Select Event Action .
- Click Continue .
- Under Fire On , select Any Event .
- Click Create Tag .
See the screenshot of creating the Button Pressed GTM tag.
d. Create a button and add code to track that the button is pressed
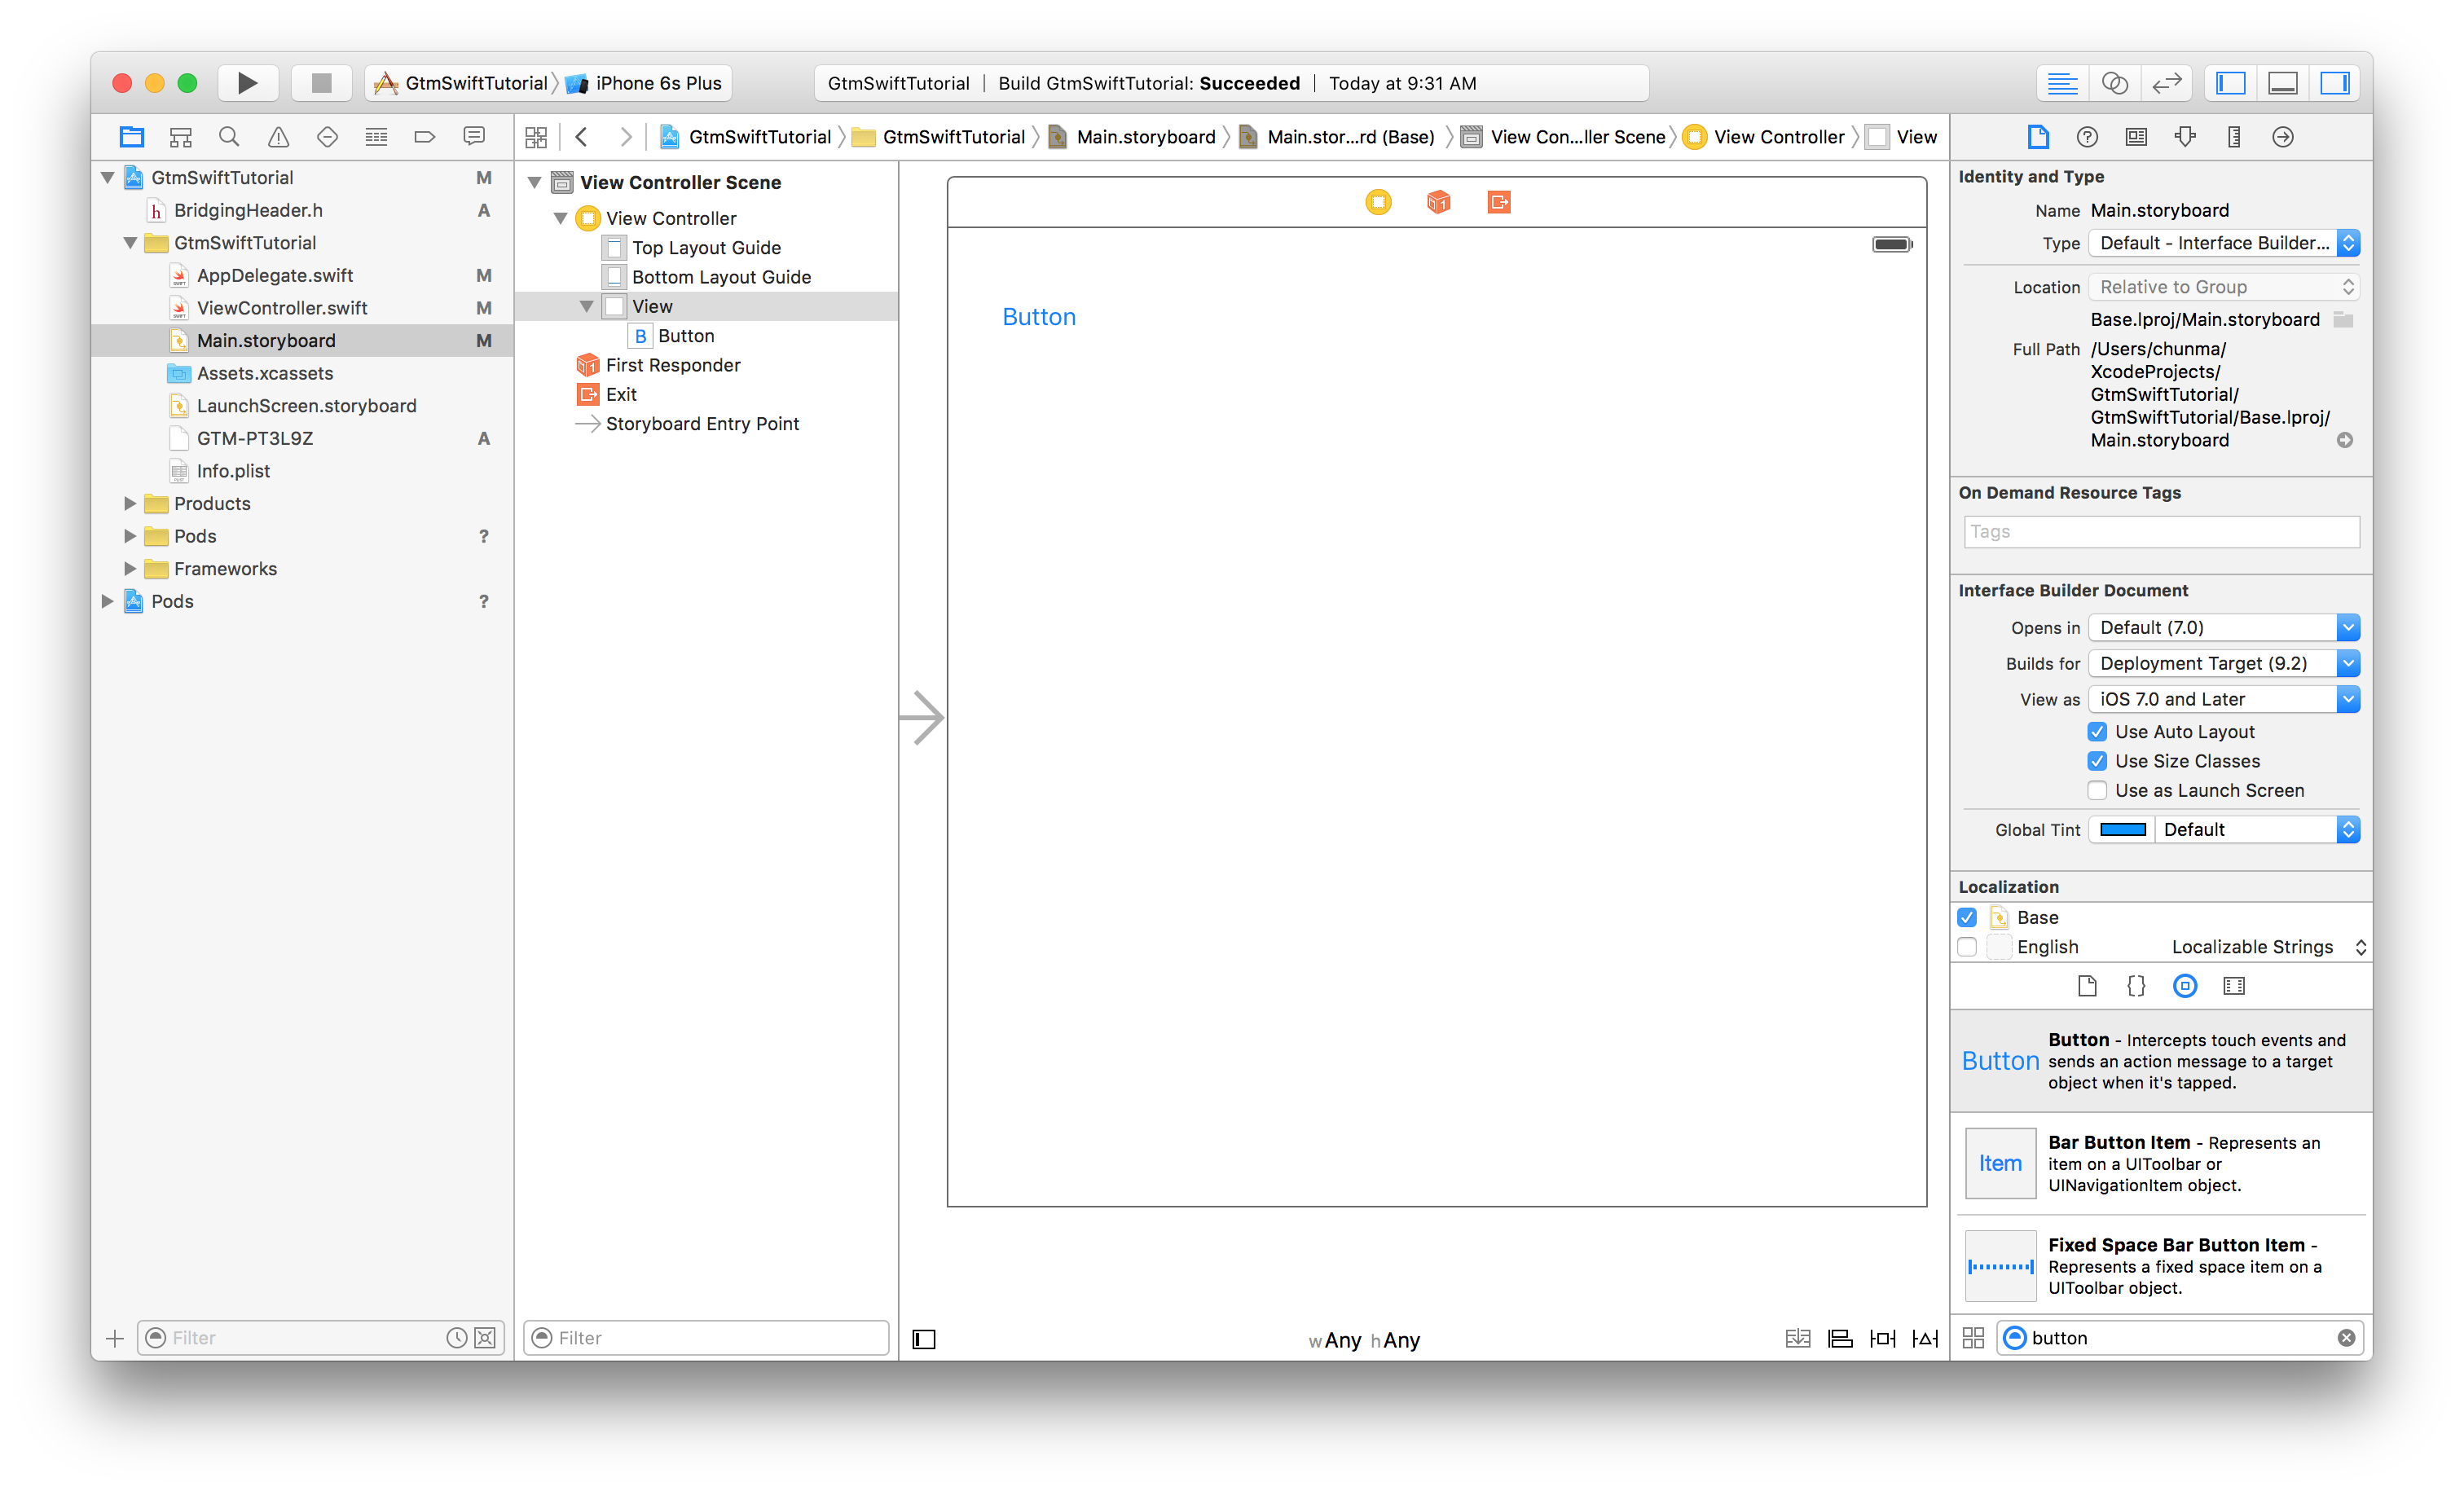
- Open your Xcode project.
- Open
Main.storyboard. - Click the top rightmost button in the Xcode toolbar to open
the utility area (right sidebar).
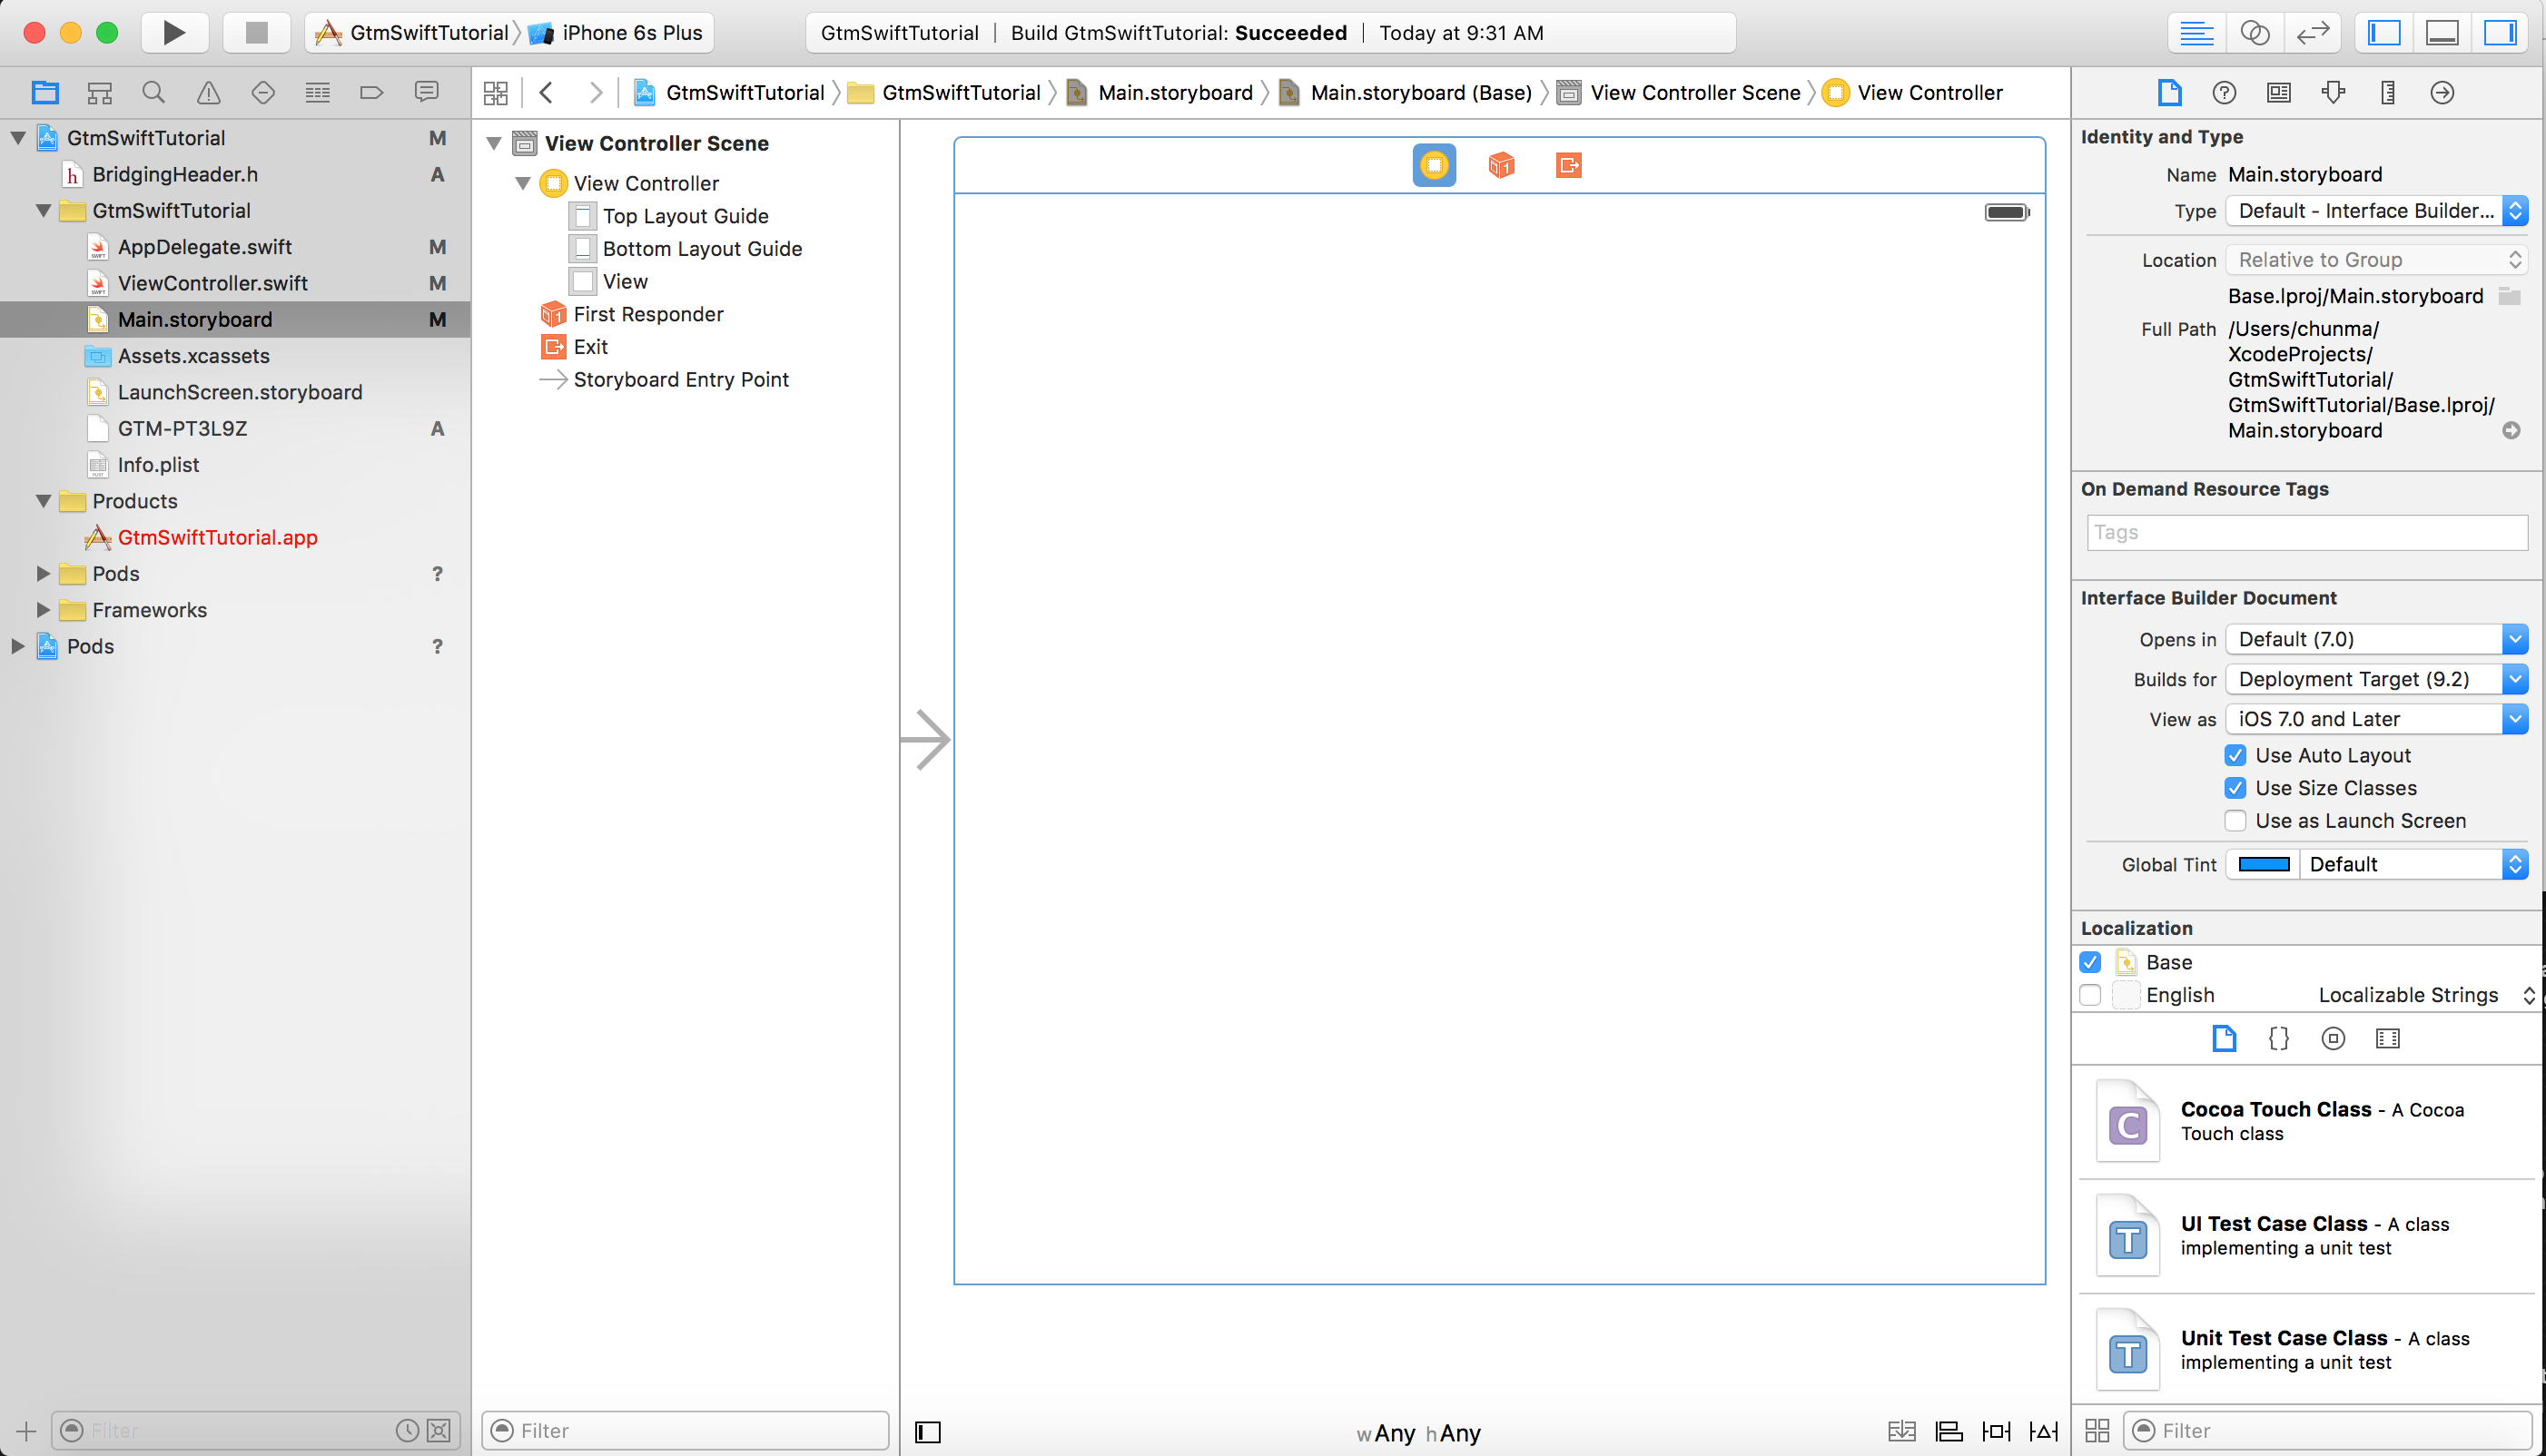
- At the bottom of the utility area,

click the Show the Object library button (the blue button):

- Enter button
at the search box.
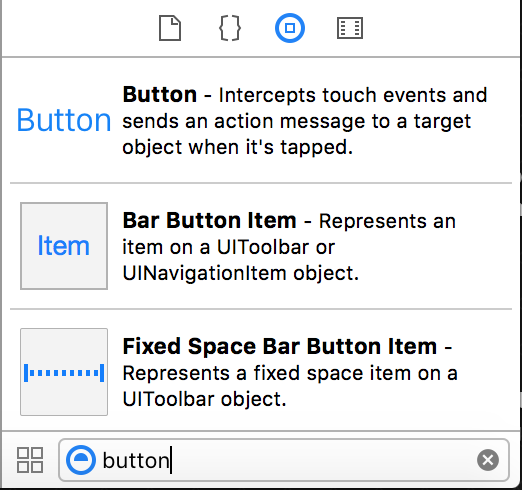
- Drag Button
to the storyboard and drop it in the top
left corner.
- Click the assistant editor button
 in the Xcode toolbar.
 - While holding down the Ctrl
key, drag the button and drop it
to the bottom of the
ViewControllerclass definition.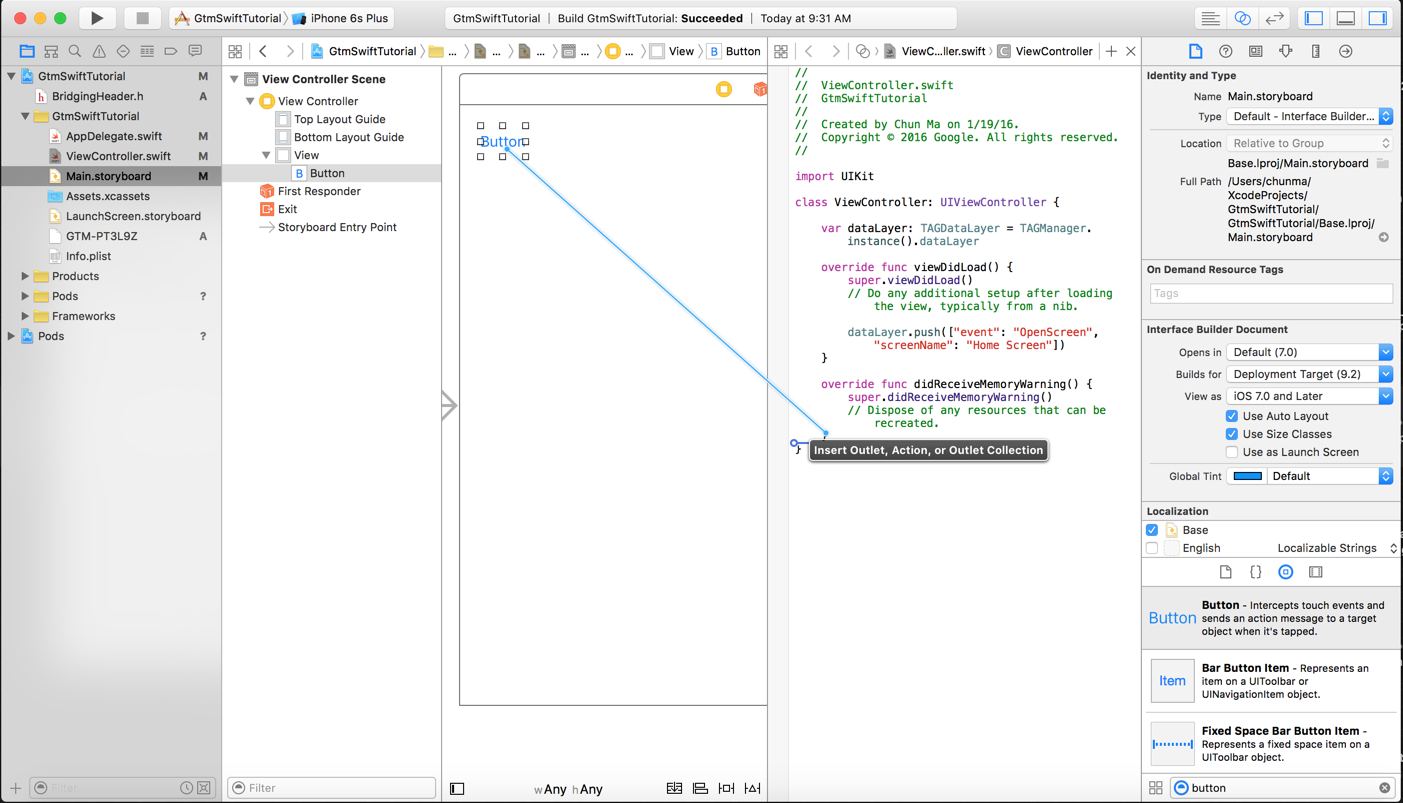
- In the dialog, select Action
connection, enter the function name buttonPressed
, and click Connect
.
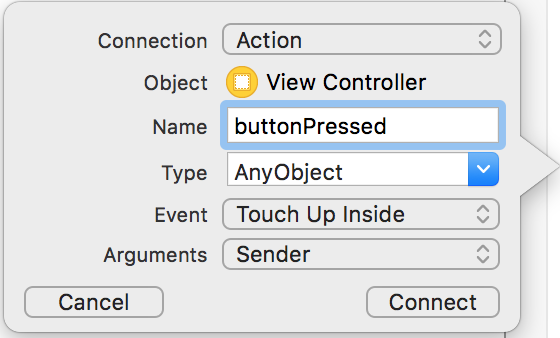
This adds the following function to the end of the
ViewControllerclass definition:@IBAction func buttonPressed ( sender : AnyObject ) { }
The function is executed every time the button is pressed.
- In the
buttonPressedfunction, add the following code to push theButtonPressedevent to the day layer:@IBAction func buttonPressed ( sender : AnyObject ) { dataLayer . push ([ "event" : "ButtonPressed" , "eventAction" : "Test Event" ]) }
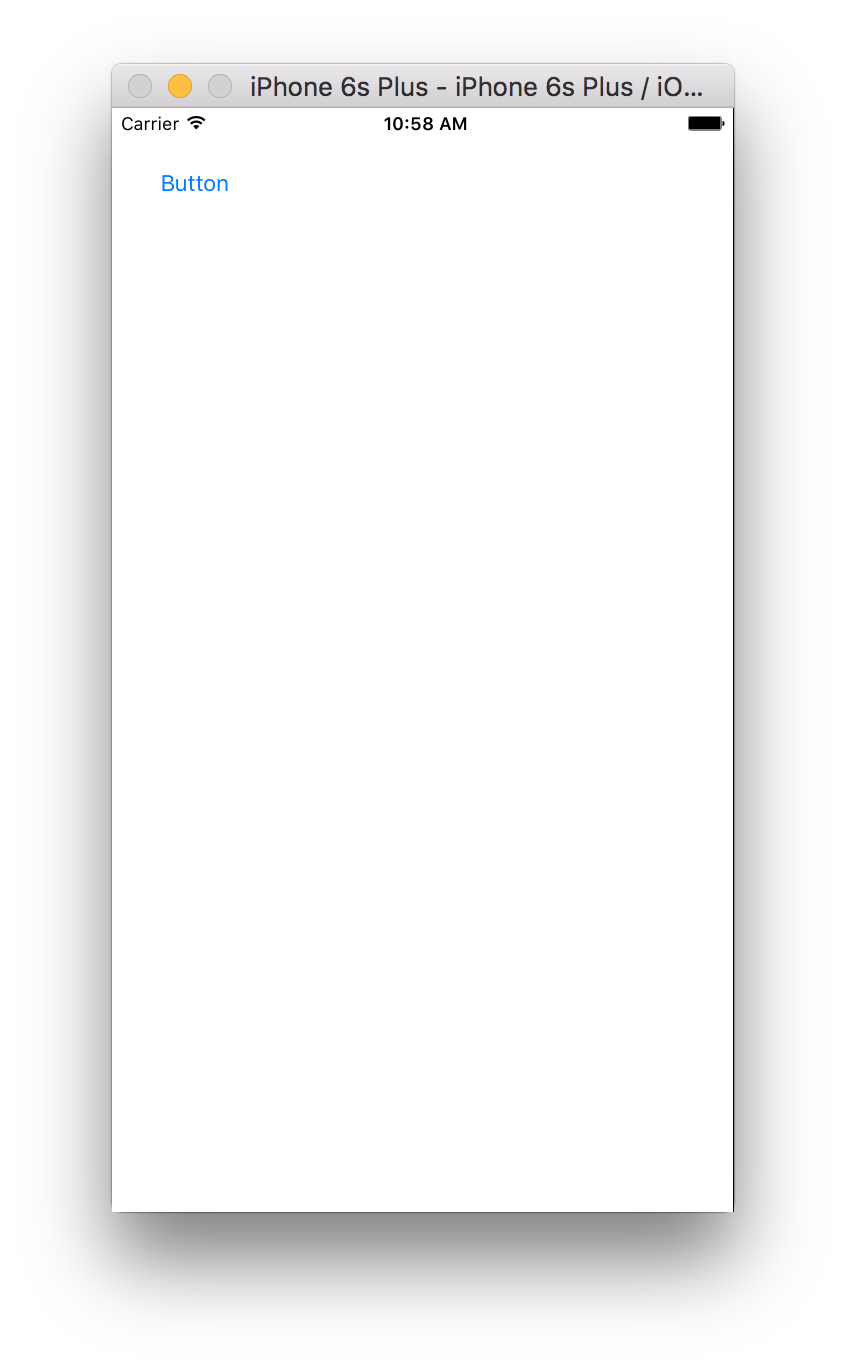
8. Build and run your app
In Xcode, click Product > Run . Xcode will build and run the app: