

The Google Picker API is a JavaScript API that you can use in your web apps to let users select or upload Google Drive files. Users can grant permission to your apps to access their Drive data, providing a secure and authorized way to interact with their files.
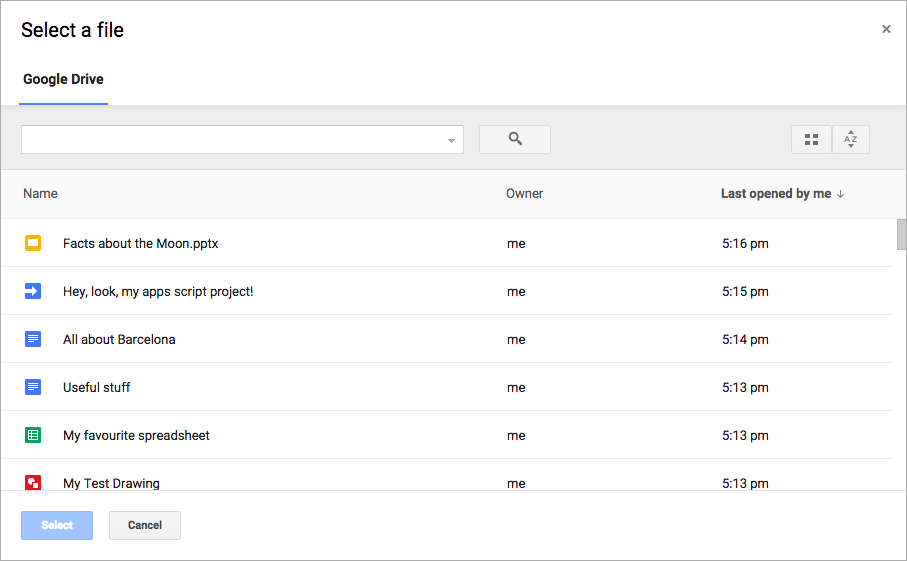
The Google Picker acts as a "File Open" dialog for information stored on Drive and has several features:
- A similar look and feel to the Google Drive UI .
- Several views showing previews and thumbnail images of Drive files.
- An inline, modal window, so users never leave the main app.
Note that the Google Picker doesn't allow users to organize, move, or copy files from one folder to another. To manage files, you must use either the Google Drive API or the Drive UI.
Prerequisites
Apps using the Google Picker must abide by all existing Terms of Service . Most importantly, you must correctly identify yourself in your requests.
You must also have a Google Cloud project .
Set up your environment
To start using the Google Picker API, you must set up your environment.
Enable the API
Before using Google APIs, you need to turn them on in a Google Cloud project. You can turn on one or more APIs in a single Google Cloud project.-
In the Google Cloud console, enable the Google Picker API.
Create an API key
An API key is a long string containing upper and lower case letters, numbers,
underscores, and hyphens, such as AIzaSyDaGmWKa4JsXZ-HjGw7ISLn_3namBGewQe
.
This authentication method is used to anonymously access publicly available
data, such as Google Workspace files shared using the "Anyone on the Internet
with this link" sharing setting. For more details, see Manage API
keys
.
To create an API key:
- In the Google Cloud console, go to Menu > APIs & Services > Credentials .
- Click Create credentials > API key .
- Your new API key is displayed.
- Click Copy to copy your API key for use in your app's code. The API key can also be found in the "API Keys" section of your project's credentials.
- To prevent unauthorized use, we recommend restricting where and for which APIs the API key can be used. For more details, see Add API restrictions .
Authorize credentials for a web app
To authenticate end users and access user data in your app, you need to create one or more OAuth 2.0 Client IDs. A client ID is used to identify a single app to Google's OAuth servers. If your app runs on multiple platforms, you must create a separate client ID for each platform.- Client-side apps (JavaScript) –Under Authorized JavaScript origins , click Add URI . Then, enter a URI to use for browser requests. This identifies the domains from which your application can send API requests to the OAuth 2.0 server.
- Server-side apps (Java, Python, and more) –Under Authorized redirect URIs , click Add URI . Then, enter an endpoint URI to which the OAuth 2.0 server can send responses.
The newly created credential appears under OAuth 2.0 Client IDs .
Note the Client ID. Client secrets aren't used for Web applications.
Important:Your app must send an OAuth 2.0 access token with views that
access private user data when creating a Picker
object. To request an access
token, see Using OAuth 2.0 to Access Google APIs
.
Manage the Google Picker
The remainder of this guide covers how to load and display the Google Picker from a web app, as well as implement the callback. To view the full example, see Code sample for web apps .
Load the Google Picker library
To load the Google Picker library, call gapi.load
with the library name and a callback function to invoke after a successful load:
< script
>
 let

 tokenClient
 ;

 let

 accessToken

 =

 null
 ;

 let

 pickerInited

 =

 false
 ;

 let

 gisInited

 =

 false
 ;

 // Use the API Loader script to load google.picker.

 function

 onApiLoad
 ()

 {

 gapi
 .
 load
 (
 'picker'
 ,

 onPickerApiLoad
 );

 }

 function

 onPickerApiLoad
 ()

 {

 pickerInited

 =

 true
 ;

 }

 function

 gisLoaded
 ()

 {

 // Replace with your client ID and required scopes.

 tokenClient

 =

 google
 .
 accounts
 .
 oauth2
 .
 initTokenClient
 ({

 client_id
 :

 ' CLIENT_ID
'
 ,

 scope
 :

 ' SCOPES
'
 ,

 callback
 :

 ''
 ,

 // defined later

 });

 gisInited

 =

 true
 ;

 }

< /
 script
>
< !--

 Load

 the

 Google

 API

 Loader

 script
 .

 --
>
< script

 async

 defer

 src
 =
 "https://apis.google.com/js/api.js"

 onload
 =
 "onApiLoad()"
>< /
 script
>
< script

 async

 defer

 src
 =
 "https://accounts.google.com/gsi/client"

 onload
 =
 "gisLoaded()"
>< /
 script
>
Replace the following:
-
CLIENT_ID: Your web app's client ID. -
SCOPES: One or more OAuth 2.0 scopes that you need to request to access Google APIs, depending on the level of access you need. For more information, see OAuth 2.0 Scopes for Google APIs .
The google.accounts.oauth2
JavaScript library helps you prompt for user
consent and obtain an access token to work with user data. The initTokenClient
method initializes a new token client with your web app's client ID. For more
information, see Using the token
model
.
The onApiLoad
function loads the Google Picker libraries. The onPickerApiLoad
callback function is called after the Google Picker
library successfully loads.
Note:If you're using TypeScript, you can install @types/google.picker
to
use window.google.picker
. To report an issue with these types, open a support
ticket
.
Display the Google Picker
The createPicker
function makes sure the Google Picker API finishes loading and
that an OAuth 2.0 token is created. Use the PickerBuilder.setAppId
method to set the
Drive App ID using the Cloud project number to allow the
app to access the user's files. This function then creates an instance of the
Google Picker and displays it:
 // Create and render a Google Picker object for selecting from Drive.

 function

 createPicker
 ()

 {

 const

 showPicker

 =

 ()

 =
>
 {

 // Replace with your API key and App ID.

 const

 picker

 =

 new

 google
 .
 picker
 .
 PickerBuilder
 ()

 .
 addView
 (
 google
 .
 picker
 .
 ViewId
 .
 DOCS
 )

 .
 setOAuthToken
 (
 accessToken
 )

 .
 setDeveloperKey
 (
 ' API_KEY
'
 )

 .
 setCallback
 (
 pickerCallback
 )

 .
 setAppId
 (
 ' APP_ID
'
 )

 .
 build
 ();

 picker
 .
 setVisible
 (
 true
 );

 }

 // Request an access token.

 tokenClient
 .
 callback

 =

 async

 (
 response
 )

 =
>
 {

 if

 (
 response
 .
 error

 !==

 undefined
 )

 {

 throw

 (
 response
 );

 }

 accessToken

 =

 response
 .
 access_token
 ;

 showPicker
 ();

 };

 if

 (
 accessToken

 ===

 null
 )

 {

 // Prompt the user to select a Google Account and ask for consent to share their data

 // when establishing a new session.

 tokenClient
 .
 requestAccessToken
 ({
 prompt
 :

 'consent'
 });

 }

 else

 {

 // Skip display of account chooser and consent dialog for an existing session.

 tokenClient
 .
 requestAccessToken
 ({
 prompt
 :

 ''
 });

 }

 }
Replace the following:
-
API_KEY: Your API key. -
APP_ID: Your Cloud project number.
To create a Google Picker instance, you must create a Picker
object using the PickerBuilder
. The PickerBuilder
takes a View
, an OAuth 2.0 token, a developer key, and a
callback function to call upon success ( pickerCallback
).
The Picker
object renders one View
at a time. Specify at least one view,
either by ViewId
( google.picker.ViewId.*
) or by creating an instance of a DocsView
for additional control over how the view is
rendered.
If more than one view is added to the Google Picker, users can switch from one
view to another by clicking a tab on the left. Tabs can be logically grouped
with ViewGroup
objects.
For a list of valid views, see ViewId
in
the Google Picker reference. To obtain the token for any of these views, use
the https://www.googleapis.com/auth/drive.file
scope.
Implement the Google Picker callback
A Google Picker callback can be used to react to user interactions in the
Google Picker, such as selecting a file or pressing Cancel. The ResponseObject
interface conveys
information about the user's selections.
 // A callback implementation.

 function

 pickerCallback
 (
 data
 )

 {

 let

 url

 =

 'nothing'
 ;

 if

 (
 data
 [
 google
 .
 picker
 .
 Response
 .
 ACTION
 ]

 ==

 google
 .
 picker
 .
 Action
 .
 PICKED
 )

 {

 const

 doc

 =

 data
 [
 google
 .
 picker
 .
 Response
 .
 DOCUMENTS
 ][
 0
 ];

 url

 =

 doc
 [
 google
 .
 picker
 .
 Document
 .
 URL
 ];

 }

 const

 message

 =

 `You picked:
 ${
 url
 }
 `
 ;

 document
 .
 getElementById
 (
 'result'
 ).
 textContent

 =

 message
 ;

 }
The callback receives a JSON-encoded data object. This object contains an Action
the user performs with the
Google Picker ( google.picker.Response.ACTION
). If the user selects an item,
the google.picker.Response.DOCUMENTS
array is also populated. In this example,
the google.picker.Document.URL
is shown on the main page. For details on data
fields, see the ResponseObject
interface.
Filter specific file types
Use a ViewGroup
as a way to filter
specific items. The following code sample shows how the "Drive"
subview shows only documents and presentations.
 const

 picker

 =

 new

 google
 .
 picker
 .
 PickerBuilder
 ()

 .
 addViewGroup
 (

 new

 google
 .
 picker
 .
 ViewGroup
 (
 google
 .
 picker
 .
 ViewId
 .
 DOCS
 )

 .
 addView
 (
 google
 .
 picker
 .
 ViewId
 .
 DOCUMENTS
 )

 .
 addView
 (
 google
 .
 picker
 .
 ViewId
 .
 PRESENTATIONS
 ))

 .
 setOAuthToken
 (
 oauthToken
 )

 .
 setDeveloperKey
 (
 developerKey
 )

 .
 setAppId
 (
 cloudProjectNumber
 )

 .
 setCallback
 (
 pickerCallback
 )

 .
 build
 ();
For a list of valid view types, see ViewId
.
Tune the Google Picker's appearance
You can use the Feature
object to turn on
or off features for various views. To fine-tune the appearance of the
Google Picker window, use the PickerBuilder.enableFeature
or PickerBuilder.disableFeature
method. For example, if you only have a single view, you might want to hide the
navigation pane ( Feature.NAV_HIDDEN
) to
give users more space to see items.
The following code sample shows an example of a spreadsheet's search picker using this feature:
 const

 picker

 =

 new

 google
 .
 picker
 .
 PickerBuilder
 ()

 .
 addView
 (
 google
 .
 picker
 .
 ViewId
 .
 SPREADSHEETS
 )

 .
 enableFeature
 (
 google
 .
 picker
 .
 Feature
 .
 NAV_HIDDEN
 )

 .
 setDeveloperKey
 (
 developerKey
 )

 .
 setCallback
 (
 pickerCallback
 )

 .
 build
 ();