
2024年02月の記事
全3件 (3件中 1-3件目)
1
-
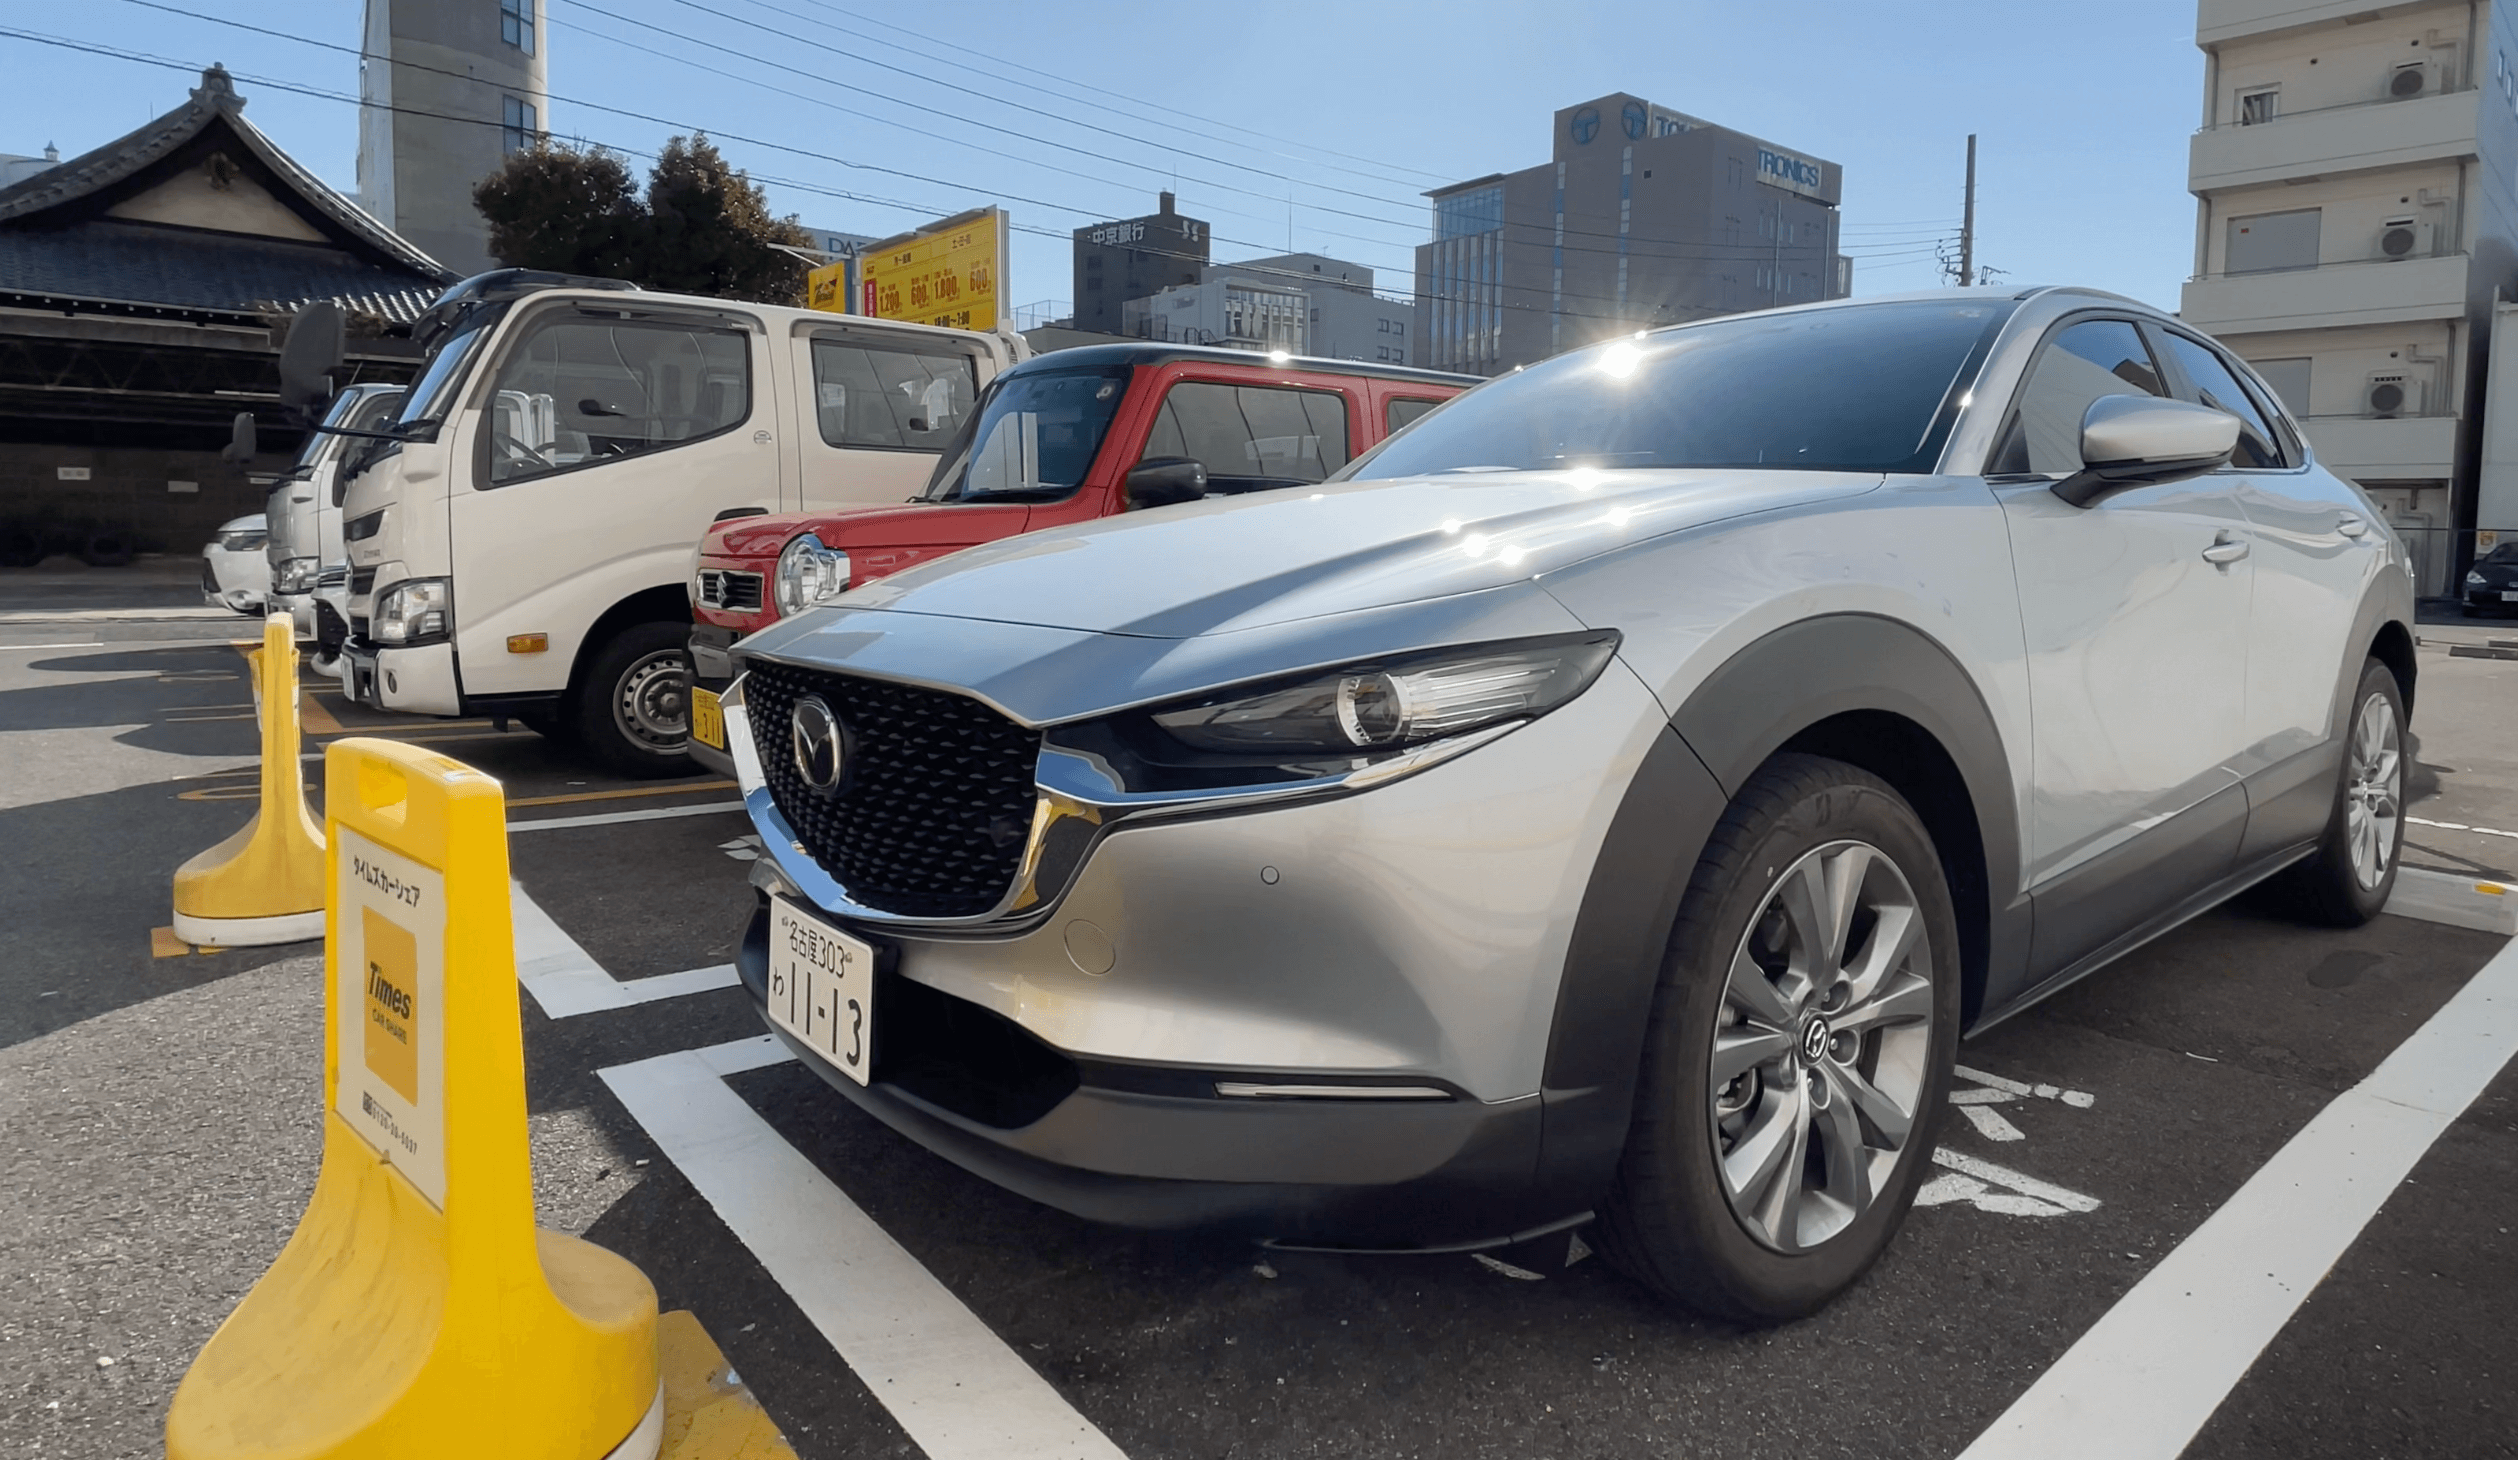
MAZDA CX-30 マイルドハイブリッドをTimesカーシェアでレンタルしたよ!内外装や走行した感想を詳しく紹介!
タイムズカーシェアでMAZDAのcx30を借りました!2000cc(マイルドハイブリッド)となります!こちらはTimesカーシェアで、ミドルクラスの料金でレンタルできます画像だけでなく、動画でも見たい方はこちらのYouTube動画をどうぞ!まずは外装から紹介していきますフロントMAZDA車らしいフロントフェイスですねグリルを近くで見るとかなり立体的なデザインです普段利用する際に気にすることはないと思いますが、バンパー下にはエアロダクトがあります走りにこだわって作ってある車だとよく分かりますねライトやハザードつけるとこんな感じ全部LEDですタイヤサイズは18インチホイールはMAZDA純正ですリアもフロント同様、MAZDA車と一目で分かるデザインです少し独特な見た目をしていますよねサイドの樹脂バンパーはリアまで一直線につながったようなデザインですクーペのようにリアガラスに傾斜はありますが、ボディが突き出ているので荷室容量は確保できてますねマフラーは2本出しですリアのライトを全て点灯させるとこんな感じハザードランプはリアライトの丸の中にあります全てのライトがLEDです!それでは内装に移りますまずはインパネはこんな感じドアパネルとインパネ部分は一体感があるデザインですねドア内側はインパネ同様にブルーとブラックの革が使われていたり、ブラック基調のファブリックで上品な質感です!ステアリングは革巻きですスイッチ周りは艶消しシルバーとなってますチルト&テレスコ調節可能ですフロントシートは2色のファブリックシートです位置調節については、側面に・リクライニング角度・座面の高さ・もも裏の高さを調節するレバーやダイヤルがあります足元には前後の位置調節のレバーがありますアクセルペダルはオルガン式です左側のフットレストと同じ角度になっているので、長時間の運転でもバランスの取れた足の配置となりますメーターは中央が液晶で、両サイドは文字盤と針ですステアリングにある「INFO」と書かれたボタンで中央の画面表示を切り替えできますウィンカーやワイパーレバーは一般的な車とほとんど変わりませんが、オートハイビームの場所だけお気をつけ下さい!ウィンカーレバーの外側に付いてますよ!サンバイザーは鏡とLEDライトとチケットホルダー付きです!ライトが結構上の位置に付いているので、太陽光に当たった時と同じ角度で自分の表情を確認できます!助手席側も同じですルームミラーは通常の鏡だけでなく、レバーを手前に下げることで防眩ミラーに切り替わりますルームライトは全てLEDですパッといきなり点灯せず、ゆっくり明るくなったり、ゆっくり暗くなったりしますさらに手前にはサングラスホルダーありますエアコンは物理ボタンとダイヤル操作です左右独立で温度調節可能です!エアコンパネルの近くにハザードスイッチがあります点灯すると、フロントとリアのハザードと同じようにゆっくり点灯する演出になってます!エアコンパネルの下にはキーやスマホ、財布などを収納できる小物収納があります更に手前の黒いパネルを押すと、ドリンクホルダーが出てきます!ちゃんとツメがついているので、細い筒状のものや紙カップタイプも安心して収納できます!シフトレバーはストレート式ですギアの文字はメーターの中央に表示されますパーキングブレーキは電動式ですオートホールドも搭載されていますナビの操作はダイヤルや各アイコンボタンを使用しますダイヤル操作には慣れが必要ですが、走行中でもマップの拡大や縮小を直感的に操作できるのは便利です!家のアイコンボタンでホーム画面になりますマップ画面でダイヤルをプッシュすると、ナビメニューが表示されますナビ操作の手前にはスライド式のアームレストがあります幅は非常に広いです!中を開けるとこんな感じ位置調整可能な仕切り板が中にあります前方にはHDMI、タイプAのUSB2口、ACソケットがありますこちらのUSBにて、転送可能USBケーブルを使用すれば、ディスプレイオーディオが利用可能ですApple CarPlayを接続すると、最初はナビにこんな画面が出てきますiPhone側はこんな画面が表示されましたディスプレイオーディオの画面に切り替えた場合でも、通常のナビと同様にダイヤルやアイコンボタンで操作が必要です※ちょっと操作が面倒に感じましたねマツダのナビ画面に戻したい時は、マツダアイコンを選べばOKです給油口は鍵が空いている状態であれば、ワンプッシュで開けられます給油口は左についていますそれでは、後部座席を見ていきましょう!ドア内側はこんな感じです一部の革の素材がハードプラになってはいますが、肘掛けの部分は前席と変わらずブルーの革素材になっていますね!後席シートはこんな感じ前席と同じような色合いです運転席を私160cmくらいのシートポジションにすると足元はこんな感じかならスペースに余裕ありますねシート下に足を入れることも可能です中央には後席用のエアコンが取り付けされています!シート中央にはドリンクホルダー付きのアームレストがあります天井にあるライトは手動で点灯はできないみたいですドア連動での点灯のみ対応しているみたいです荷室を見ていきますミドルサイズのSUVにしては空間は広く確保できていますね!cx30と同サイズくらいのC-HRと比べてもかなり広く感じますリアのドアが突き出たデザインのおかげで、荷室手前まで高さがしっかり確保されてますカバンを置いてみるとこんな感じです箱買いの荷物をたくさん買っても荷室スペースいっぱい使えそうです両サイドにはフックがついています滑りやすい荷物はこちらでロープ固定ができます下のボード部分は簡単に取り外せるので、汚れた場合はすぐに取り外して払ったりできますね収納スペースもありますシートを倒したい時は、後席の方のレバーを押して倒しますトノカバーが付いている場合は、後席ドアからイスを倒す必要がありますシートベルトが方の輪っかに収納されているので、イスを元に戻した時に挟まれないようになっていますシートを倒した時はシートベルトも一緒に前に出るようになっています倒すとこんな感じほんの数センチの段差が発生するくらいなので、高さ調節しなくてもギリギリ車中泊はできるかもしれないですね最後に走行した時に感想についてですノーマルモードでの加速感としては、40km/hくらいまではちょっと重さを感じる加速となっていますスポーツモードならキビキビした加速感を味わえます!サイドミラーは手前に取り付けされていますそのためAピラーと重ならないですそのため、右折の際に視界が広いです!ただし、左側のサイドミラーも手前に配置されているので、結構外側にあるように感じます車線変更の時にサイドミラーで目視確認をする時にちょっとサイドミラーが遠く感じますねただ、左折の時は、自然と視線が外側に向くので、広い範囲で目視確認できます!リバースに切り替えると、・バックモニター・フロント、リアのセンサー作動画面が表示されますカメラ映像の画質はいいと思います!ただ、ガイド線はハンドルの動きとは連動しないみたいです…そして、TimesのMAZDA車と言えば、ヘッドアップディスプレイ(以下HUDと書きます)が搭載されてる車種が多いですね!サイドミラーには、ブラインドスポットモニター(以下BSMと書きます)が搭載されてます!ステアリングの自動制御はありませんが、全車速対応であるアダプティブクルーズコントロール(以下ACCと書きます)もありますよ!メーター中央画面の切り替えによっては、BSMやACCの情報が表示されますメーターだけでなく、HUDにも連動して表示されます!ACCで車間距離の調節を行うとー?もちろんHUDにも表示されます!メーターとHUDを同時に見るとこんな感じですナビの案内はナビ画面だけでなく、HUDにも表示されます走行レーンもこのように表示されます交差点が近くなると、ナビの音声と連動して、矢印の色が変わりますちなみに、ディスプレイオーディオで使用できるGoogleマップでは、HUDにルート案内は表示されないのでご注意下さいcx30の紹介は以上になります!MAZDAらしい走りの楽しさと使い勝手の両立がされたオススメのSUVですよ!気になる方はぜひ!では、また🖐
2024.02.26
コメント(2)
-
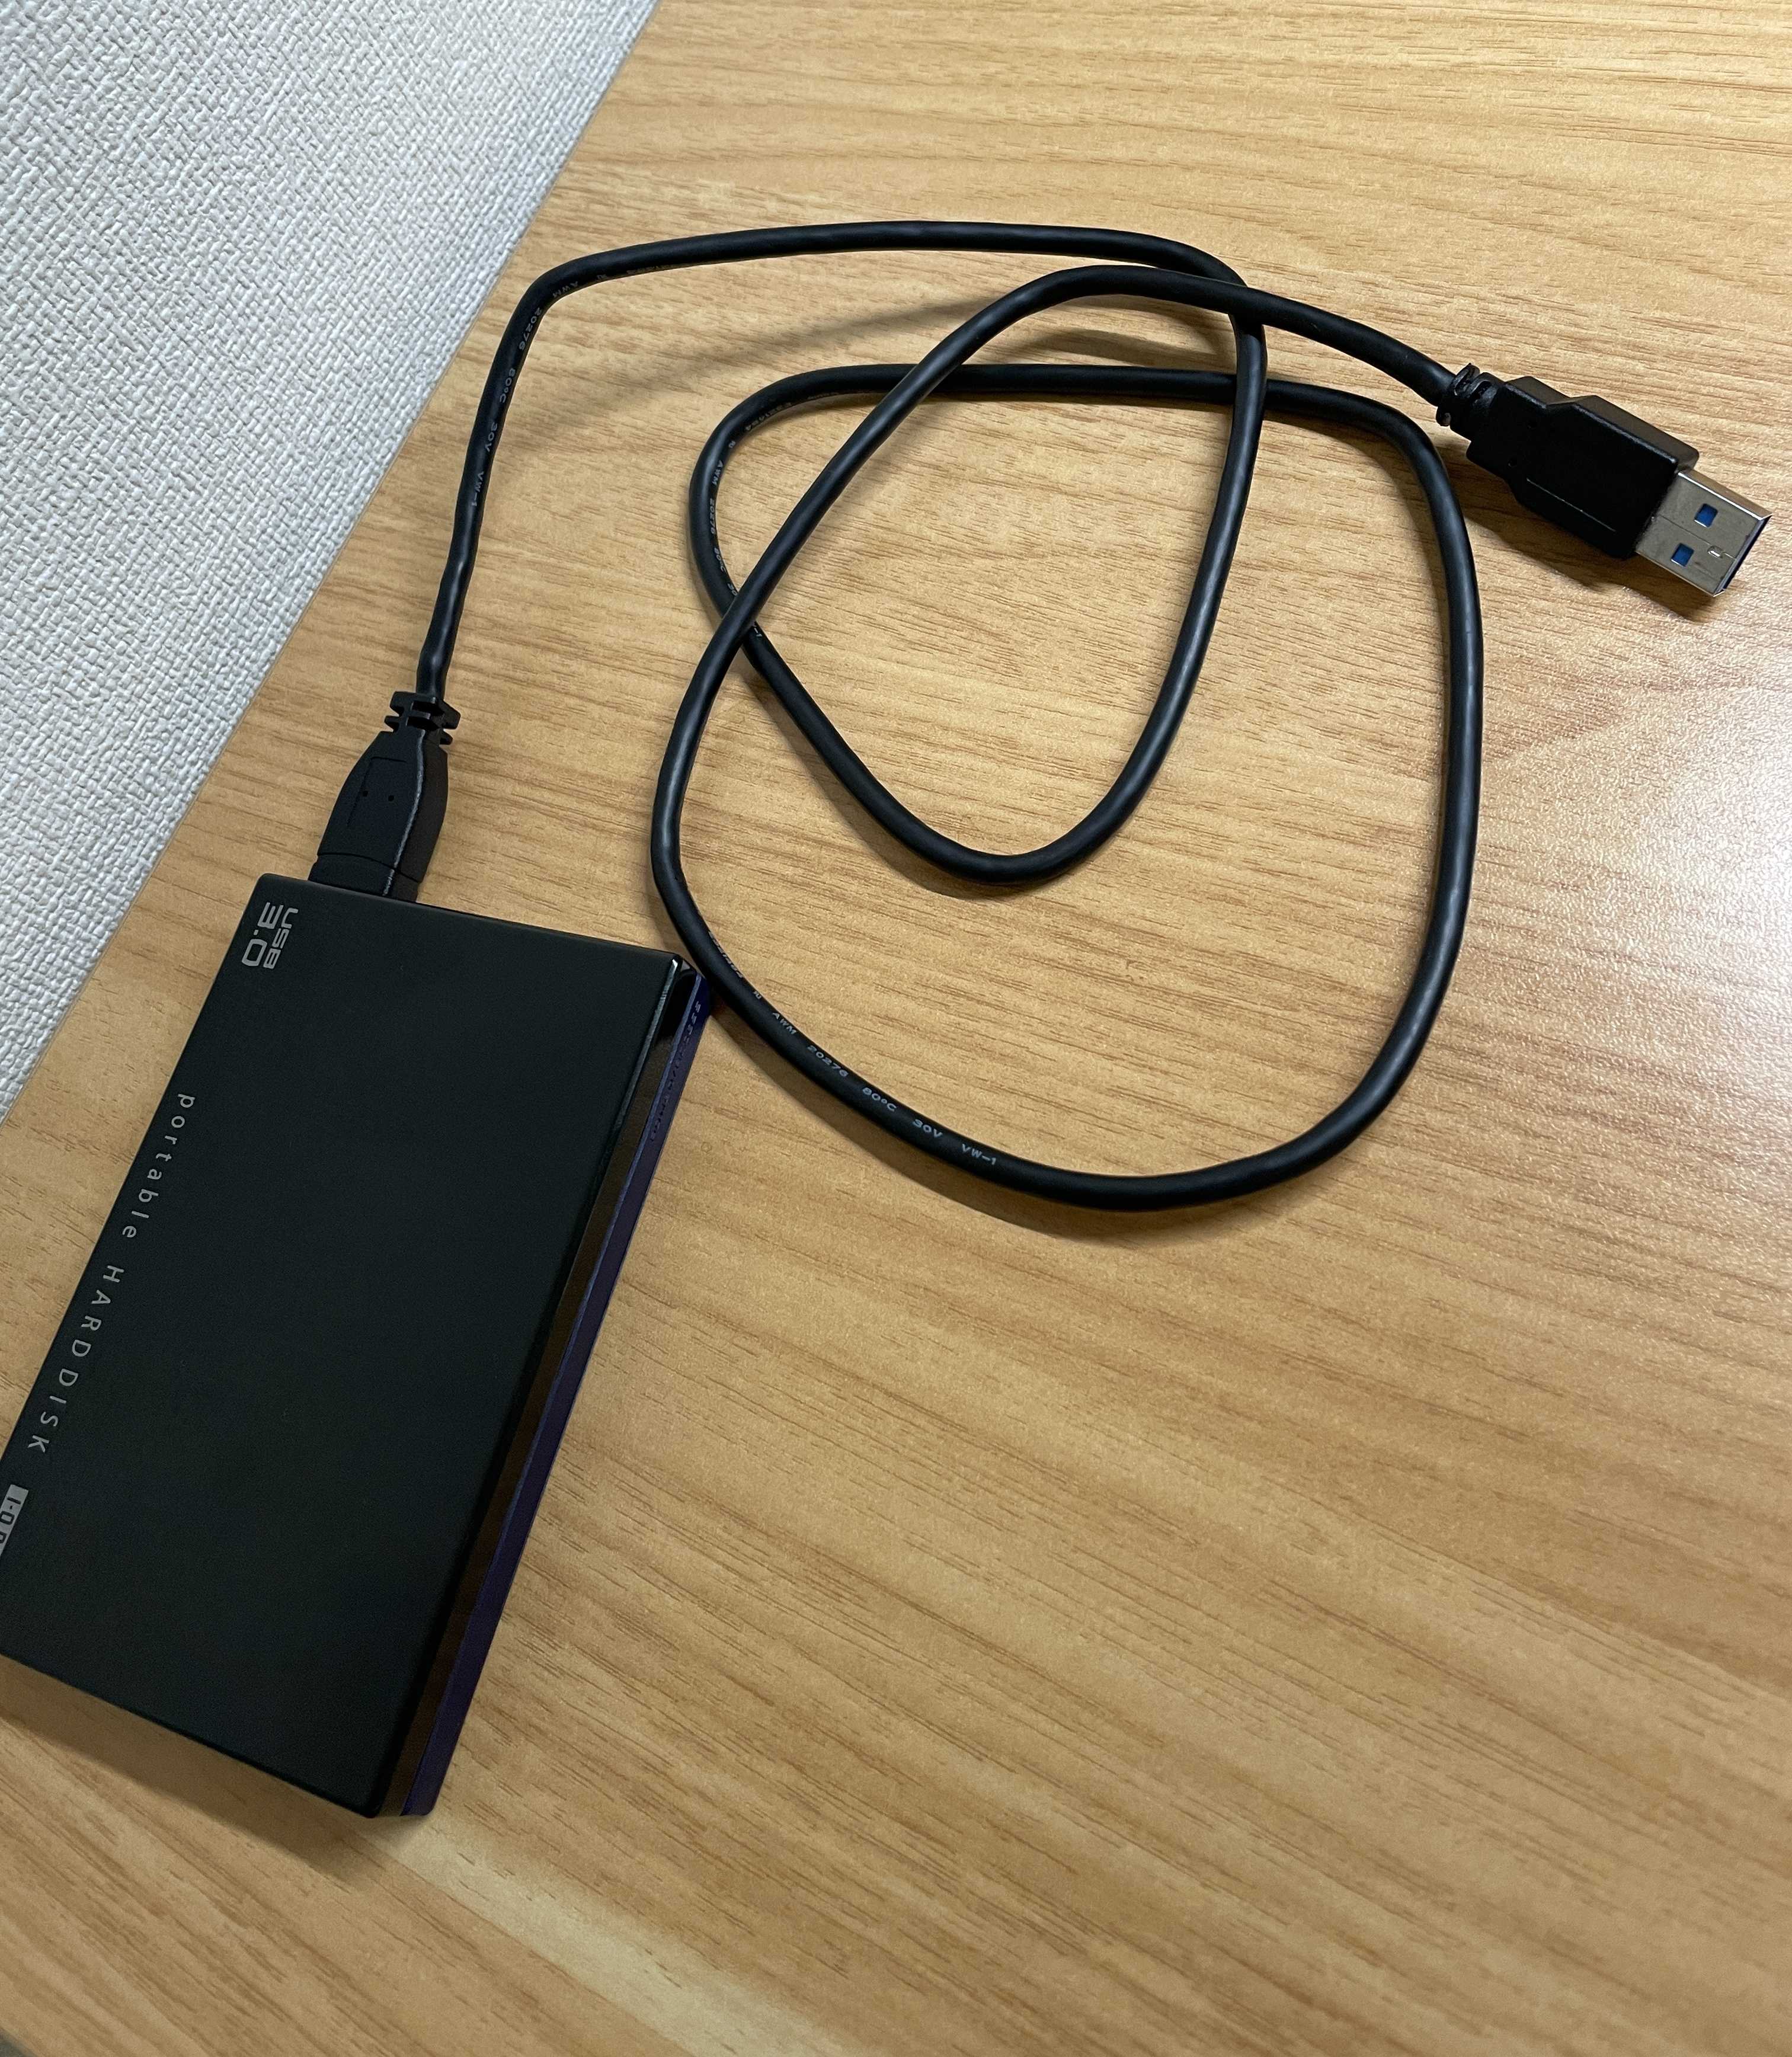
【MacBookの方にオススメ】UGREENのUSB C to Micro Bケーブルでハードディスクが認識されない問題が解決できた!
長く使用していたハードディスクが突然MacBookProで読み込みができなくなりました…買い替えかなと思いましたが、明らかにハードディスク本体ではなくケーブルの劣化が原因な気がしますね実際近くで見ると、ケーブルがグニャッていますし…そんなわけでケーブルだけ購入してみました!UGREEN USB C to Micro B ケーブル 0.5m USB 3.1 10Gbps高速データ転送 外付けhddケーブル マイクロB変換ケーブル 外付けHDD/SSD ハードドライブ/MacBook Pro/Galaxy S5 Note 3/カメラなどに対応-0.5m価格:1,780円(税込、送料無料) (2024/2/22時点)楽天で購入私が使用しているPCはMacBook Proなため、USB端子はタイプCしか付いておりません今まではタイプA→タイプC変換器を使用していましたが、最初からタイプCであれば差し込みがラク転送速度がタイプAに比べてかなり早いといったメリットがあるので、こちらを選んでます!UGREENは急速充電器やケーブルモバイルバッテリーポータブル電源など充電関係のガジェットで有名なメーカーですね!Ankerに比べて安価(←ダジャレのつもりはありませんw)で性能がそんなに変わらないところがいいところです!袋から中身を出すとこんな感じケーブルの長さは50cmです外側は紐素材なので曲げやすいしキズが付きにくいです!PC接続側はタイプCですハードディスク側はMicroBになります早速、私が使用しているI/OデータのHDDの接続してみます純正品ではなく初めての社外品ケーブルですが、うまく接続できるのでしょうか…差し込みました!出たー!デスクトップのHDDのアイコンが表示されました!しかも接続してから認識されるまでのスピードが純正品よりも圧倒的に早い!これで私のYouTubeの動画編集に必要な素材動画や動画編集中のデータが使用できます!最初にハードディスクがMacで認識されない時は終わったと思いましたが…wハードディスクは結構いい値段するので、ケーブルの買い替えだけで済ませられたのはかなりコスパいいですね!あとは、読み込み速度が格段に上がりましたし!PCでハードディスクが認識されなくて悩んでる方の参考になったら嬉しいです!では、また🖐️
2024.02.22
コメント(0)
-

Ankerの体重計・体組成計「Anker Eufy Smart Scale P2 Pro」を購入したよ!使い勝手を紹介!
健康管理のために、充電器などの家電製品メーカーで有名なアンカーのAnker Eufy Smart Scale P2 Pro 体重計・体組成計を購入しました!【あす楽対応】【最大24ヶ月保証】Anker Eufy Smart Scale P2 Pro 体重計・体組成計 T9149 スマホ連動 アプリ対応 自動認識機能 体脂肪率 BMI 心拍数 筋肉量 基礎代謝量 水分量 体脂肪量 骨量 内臓脂肪 タンパク質価格:6,990円(税込、送料無料) (2024/1/31時点)楽天で購入色はホワイトにしました!理由は・壁に立てかけて保管するので、壁紙に同化させたい・ブラックだと足裏の指紋が付いた時に目立つの2つです!最初のフタを開けるとこんな感じ中身は・体重計/体組成計本体・取説・単四電池4本・身体測定用のメジャーの4つです電源入れるとこんな感じ計測する方法は至ってシンプルで乗れば勝手に専用アプリに計測結果を記録してくれます!スマホアプリを事前に立ち上げたりする必要は一切ありません!体組成計本体がBluetoothやWi-Fiと接続されているので、スマホを用意することなく手軽に計測できます!また、体重だけでなく、体脂肪率、BMI、心拍数、筋肉量、基礎代謝量、水分量、体脂肪量、骨量、内臓脂肪、タンパク質、骨格筋量、皮下脂肪、体内年齢、ボディタイプといった、16項目のデータを取得することができます!実際、アプリの計測結果はこんな感じで見れます!心拍数については体重計に一定時間乗っていないと計測できないみたいですね試しに1分乗ってみたところ、ちゃんと計測できました!風呂上がりに計測したので、心拍数は高めに出てしまいました笑専用アプリ「Eufy Life」のホーム画面はこんな感じですiPhoneをお使いの方は、Apple純正の健康アプリ「ヘルスケア」とも連携可能!Anker体組成計の計測項目全部反映されるわけではないみたいです普通の体重計に比べて価格は少し高いですが、アプリとの連携の良さを考えたら妥当な価格かと思います!楽天市場では定期的に限定割引で販売されてることがあるので、そこが狙い目ですよ!気になる方はぜひ!では、また
2024.02.06
コメント(0)
全3件 (3件中 1-3件目)
1
-
-

- 自動車・バイクのメンテナンス
- オイルとオイルフィルター交換
- (2024-09-17 22:29:03)
-
-
-

- 最近、愛車と楽しく付き合ってますか…
- 清濁併せ呑む
- (2024-09-20 07:01:38)
-
-
-

- 道の駅めぐり
- 熊本 【道の駅 小国】梅干 かぼす果汁
- (2024-08-29 08:28:12)
-


