

1. Before You Begin
This codelab teaches you how to use the Maps SDK for iOS with SwiftUI.
Prerequisites
- Basic Swift knowledge
- Basic familiarity with SwiftUI
What you'll do
- Enable and use the Maps SDK for iOS to add Google Maps to an iOS app using SwiftUI.
- Add markers to the map.
- Pass state between a SwiftUI and a
GMSMapViewobject.
What you'll need
- Xcode 11.0 or later
- A Google Account with billing enabled
- Maps SDK for iOS
- Carthage
2. Get set up
For the following enablement step, enable Maps SDK for iOS.
Set up Google Maps Platform
If you do not already have a Google Cloud Platform account and a project with billing enabled, please see the Getting Started with Google Maps Platform guide to create a billing account and a project.
- In the Cloud Console , click the project drop-down menu and select the project that you want to use for this codelab.

- Enable the Google Maps Platform APIs and SDKs required for this codelab in the Google Cloud Marketplace . To do so, follow the steps in this video or this documentation .
- Generate an API key in the Credentials page of Cloud Console. You can follow the steps in this video or this documentation . All requests to Google Maps Platform require an API key.
3. Download starter code
To get you started as quickly as possible, here's some starter code to help you follow along with this codelab. You're welcomed to jump to the solution, but if you want to follow along with all the steps to build it yourself, keep reading.
- Clone the repository if you have
gitinstalled.
git clone https://github.com/googlecodelabs/maps-ios-swiftui.git
Alternatively, you can click the following button to download the source code.
- Upon getting the code, in a terminal
cdinto thestarter/GoogleMapsSwiftUIdirectory. - Run
carthage update --platform iOSto download the Maps SDK for iOS - Finally, open the
GoogleMapsSwiftUI.xcodeprojfile in Xcode
4. Code Overview
In the starter project you downloaded, the following classes have been provided and implemented for you:
-
AppDelegate- the application'sUIApplicationDelegate. This is where the Maps SDK for iOS will be initialized. -
City- a struct that represents a city (contains a name and coordinate of the city). -
MapViewController- a scoped-down UIKitUIViewControllercontaining a Google Map ( GMSMapView )-
SceneDelegate- the application'sUIWindowSceneDelegatefrom whichContentViewis instantiated.
-
Additionally, the following classes have partial implementations and will be completed by you by the end of this Codelab:
-
ContentView- the top-level SwiftUI view containing your app. -
MapViewControllerBridge- a class that bridges a UIKit view to a SwiftUI view. Specifically, this is the class that will makeMapViewControlleraccessible in SwiftUI.
5. SwiftUI versus UIKit
SwiftUI was introduced in iOS 13 as an alternative UI framework over UIKit for developing iOS applications. Compared to its predecessor UIKit, SwiftUI offers a number of advantages. To name a few:
- Views update automatically when state changes. Using objects called State , any change to the underlying value it contains will cause the UI to automatically update.
- Live previews enable faster development. Live previews minimize the need to build and deploy code to an emulator to see visual changes as a preview of the SwiftUI view can readily be seen on Xcode.
- The source-of-truth is in Swift. All views in SwiftUI are declared in Swift so using Interface Builder is no longer necessary.
- Interoperates with UIKit. Interoperability with UIKit ensures that existing apps can incrementally use SwiftUI with their existing views. In addition, libraries that don't support SwiftUI yet, like the Maps SDK for iOS , can still be used in SwiftUI.
There are some drawbacks too:
- SwiftUI is only available on iOS 13 or later.
- The view hierarchy cannot be examined in Xcode previews.
SwiftUI State and data flow
SwiftUI offers a novel way to create UI using a declarative approach—you tell SwiftUI how you want your view to look along with all the different states for it, and the system will do the rest. SwiftUI handles updating the view whenever underlying state changes due to an event or user action. This design is commonly referred to unidirectional data flow . While the specifics of this design is out of scope in this codelab, we recommend reading up on how this works in Apple's documentation of State and Data Flow .
Bridge UIKit and SwiftUI using UIViewRepresentable or UIViewControllerRepresentable
Since the Maps SDK for iOS
is built on top of UIKit, and doesn't provide a SwiftUI-compatible view, using it in SwiftUI requires conforming to either UIViewRepresentable
or UIViewControllerRepresentable
. These protocols enable SwiftUI to include UIKit-built UIView
s and UIViewController
s, respectively. While you can use either protocol to add a Google Map to a SwiftUI view, in the next step, we will take a look at using a UIViewControllerRepresentable
to include a UIViewController
containing a map.
6. Add a map
In this section, you will add Google Maps to a SwiftUI view.
Add your API key
The API key that you created in an earlier step needs to be provided to the Maps SDK for iOS to associate your account with the map that would be displayed on the app.
To provide your API key, open the AppDelegate.swift
file and navigate to the application(_, didFinishLaunchingWithOptions)
method. The SDK is initialized using GMSServices.provideAPIKey()
with the string "YOUR_API_KEY". Replace that string with your API key. Completing this step will initialize the Maps SDK for iOS when the application launches.
Add a Google Map using MapViewControllerBridge
Now that your API key is being provided to the SDK, the next step is to display the map on the app.
The view controller that is provided in the starter code, MapViewController
contains a GMSMapView
in its view. However, since this view controller was created in UIKit, you will need to bridge this class to SwiftUI so that it can be used inside ContentView
. To do so:
- Open the file
MapViewControllerBridgein Xcode.
This class conforms to UIViewControllerRepresentable
which is the protocol that is needed to wrap a UIKit UIViewController
so it can be used as a SwiftUI view. In other words, conforming to this protocol facilitates bridging a UIKit view to a SwiftUI view. Conforming to this protocol requires the implementation of two methods:
-
makeUIViewController(context)- this method is called by SwiftUI to create the underlyingUIViewController. This is where you would instantiate yourUIViewControllerand pass it its initial state. -
updateUIViewController(_, context)- this method is called by SwiftUI whenever state changes. This is where you would make any modifications to the underlyingUIViewControllerto react in response to the state change.
- Create a
MapViewController
Inside the function makeUIViewController(context)
, instantiate a new MapViewController
and return it as a result. After doing so, your MapViewControllerBridge
should now look like this:
MapViewControllerBridge
  import

 GoogleMaps
 import

 SwiftUI
 struct

 MapViewControllerBridge
 :

 UIViewControllerRepresentable

 {

 func

 makeUIViewController
 (
 context
 :

 Context
 )

 -
>
 MapViewController

 {

 return

 MapViewController
 ()

 }

 func

 updateUIViewController
 (
 _

 uiViewController
 :

 MapViewController
 ,

 context
 :

 Context
 )

 {

 }
 }
Use MapViewControllerBridge in ContentView
Now that the MapViewControllerBridge
is creating an instance of MapViewController
, the next step is to use this struct within ContentView
to display a map.
- Open the file
ContentViewin Xcode.
ContentView
is instantiated in SceneDelegate
and contains the top-level application view. The map will be added from within this file.
- Create a
MapViewControllerBridgewithin thebodyproperty.
Within the body
property of this file, a ZStack
has already been provided and implemented for you. The ZStack
contains an interactable and draggable list of cities which you will use in a later step. For now, within the ZStack
create a MapViewControllerBridge
as the first child view of the ZStack
so that a map will be displayed in the app behind the list of cities view. Upon doing so, the contents of the body
property within ContentView
should look like this:
ContentView
  var

 body
 :

 some

 View

 {

 let

 scrollViewHeight
 :

 CGFloat

 =

 80

 GeometryReader

 {

 geometry

 in

 ZStack
 (
 alignment
 :

 .
 top
 )

 {

 // Map

 MapViewControllerBridge
 ()

 // Cities List

 CitiesList
 (
 markers
 :

 $
 markers
 )

 {

 (
 marker
 )

 in

 guard

 self
 .
 selectedMarker

 !=

 marker

 else

 {

 return

 }

 self
 .
 selectedMarker

 =

 marker

 self
 .
 zoomInCenter

 =

 false

 self
 .
 expandList

 =

 false

 }

 handleAction
 :

 {

 self
 .
 expandList
 .
 toggle
 ()

 }

 // ...

 }

 }
 }
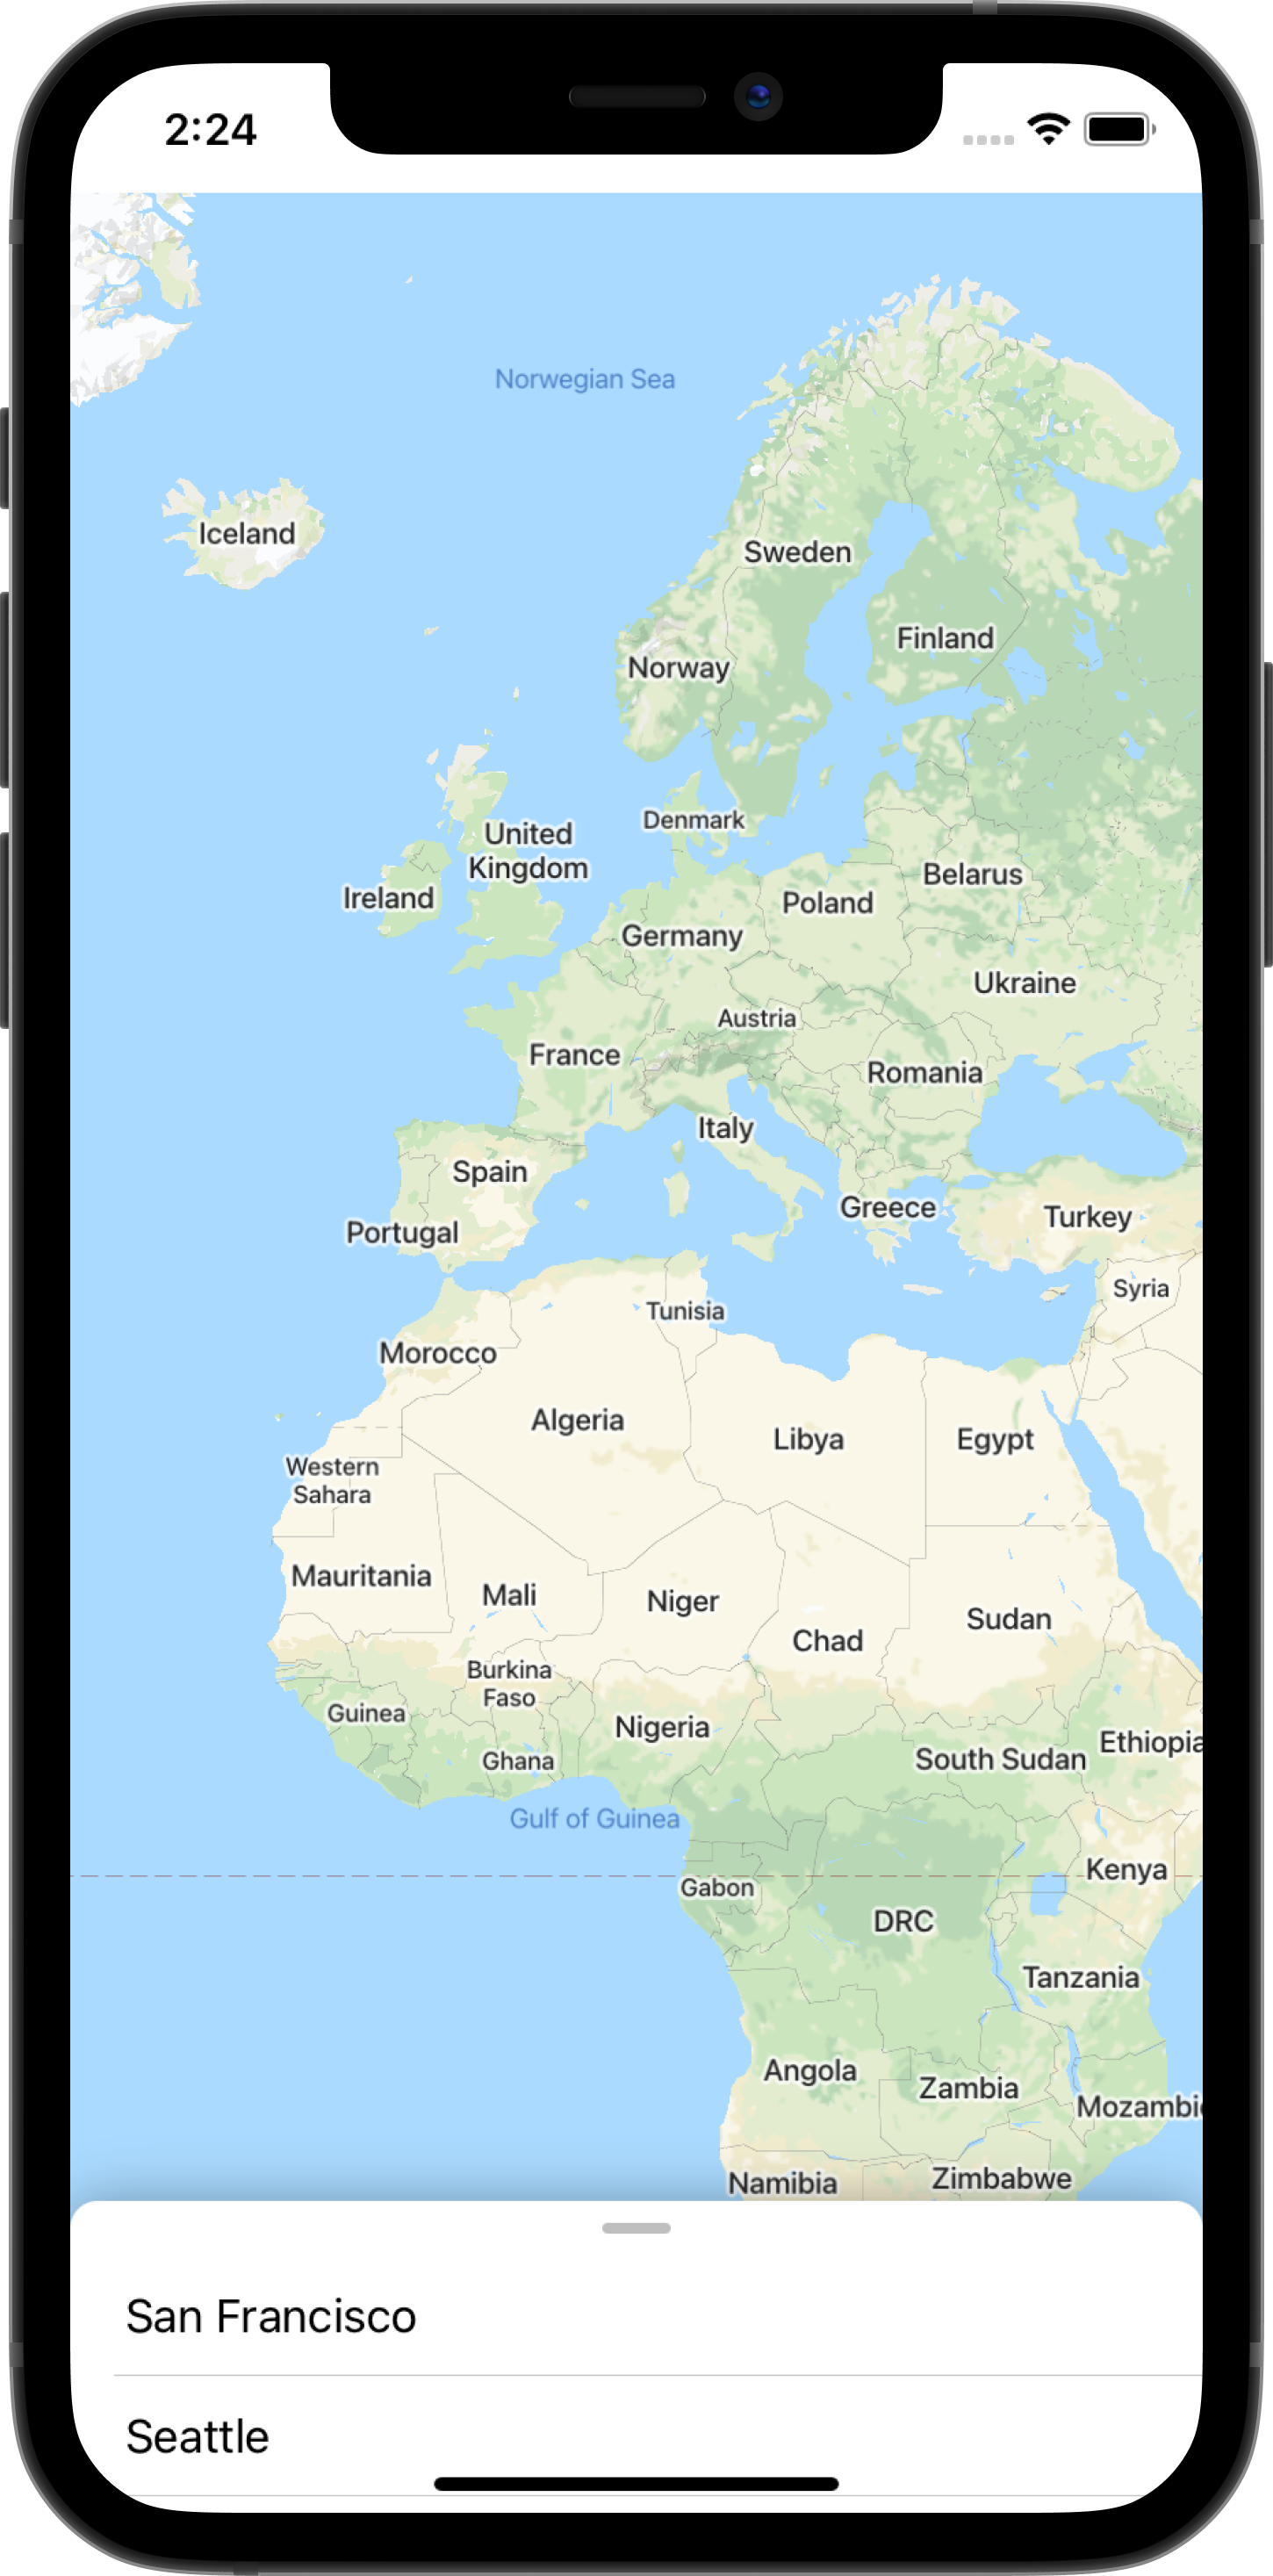
- Now go ahead and run the app. You should now see the map load on your device's screen along with a draggable list of cities towards the bottom of the screen.
7. Add markers to the map
In the previous step, you added a map alongside an interactable list displaying a list of cities. In this section, you will add markers for each city in that list.
Markers as State
ContentView
declares a property called markers
which is a list of GMSMarker
representing each city declared in the cities
static property. Notice that this property is annotated with the SwiftUI property wrapper State
to indicate that it should be managed by SwiftUI. So, if any changes are detected with this property, like adding or removing a marker, views using this state will be updated.
ContentView
 static

 let

 cities

 =

 [

 City
 (
 name
 :

 "San Francisco"
 ,

 coordinate
 :

 CLLocationCoordinate2D
 (
 latitude
 :

 37.7576
 ,

 longitude
 :

 -
 122.4194
 )),

 City
 (
 name
 :

 "Seattle"
 ,

 coordinate
 :

 CLLocationCoordinate2D
 (
 latitude
 :

 47.6131742
 ,

 longitude
 :

 -
 122.4824903
 )),

 City
 (
 name
 :

 "Singapore"
 ,

 coordinate
 :

 CLLocationCoordinate2D
 (
 latitude
 :

 1.3440852
 ,

 longitude
 :

 103.6836164
 )),

 City
 (
 name
 :

 "Sydney"
 ,

 coordinate
 :

 CLLocationCoordinate2D
 (
 latitude
 :

 -
 33.8473552
 ,

 longitude
 :

 150.6511076
 )),

 City
 (
 name
 :

 "Tokyo"
 ,

 coordinate
 :

 CLLocationCoordinate2D
 (
 latitude
 :

 35.6684411
 ,

 longitude
 :

 139.6004407
 ))

 ]

 /// State for markers displayed on the map for each city in `cities`

 @
 State

 var

 markers
 :

 [
 GMSMarker
 ]

 =

 cities
 .
 map

 {

 let

 marker

 =

 GMSMarker
 (
 position
 :

 $0
 .
 coordinate
 )

 marker
 .
 title

 =

 $0
 .
 name

 return

 marker

 }
Notice that ContentView
uses the markers
property to render the list of cities by passing it to the CitiesList
class.
CitiesList
  struct

 CitiesList
 :

 View

 {

 @
 Binding

 var

 markers
 :

 [
 GMSMarker
 ]

 var

 body
 :

 some

 View

 {

 GeometryReader

 {

 geometry

 in

 VStack
 (
 spacing
 :

 0
 )

 {

 // ...

 // List of Cities

 List

 {

 ForEach
 (
 0.
 .
< self
 .
 markers
 .
 count
 )

 {

 id

 in

 let

 marker

 =

 self
 .
 markers
 [
 id
 ]

 Button
 (
 action
 :

 {

 buttonAction
 (
 marker
 )

 })

 {

 Text
 (
 marker
 .
 title

 ??

 ""
 )

 }

 }

 }.
 frame
 (
 maxWidth
 :

 .
 infinity
 )

 }

 }

 }
 }
Pass State to MapViewControllerBridge using @Binding
In addition to the list of cities displaying data from the markers
property, pass this property to the MapViewControllerBridge
struct so that it can be used to display those markers on the map. To do that:
- Declare a new
markersproperty withinMapViewControllerBridgethat is annotated with@Binding
MapViewControllerBridge
  struct

 MapViewControllerBridge
 :

 :

 UIViewControllerRepresentable

 {

 @
 Binding

 var

 markers
 :

 [
 GMSMarker
 ]

 // ...
 }
- In
MapViewControllerBridge, update theupdateUIViewController(_, context)method to make use of themarkersproperty
As mentioned in the previous step, updateUIViewController(_, context)
will be called by SwiftUI whenever state changes. It's within this method that we want to update the map so display the markers in markers
. To do this, you will need to update the map
property of each marker. After completing this step, your MapViewControllerBridge
should look like this:
  import

 GoogleMaps
 import

 SwiftUI
 struct

 MapViewControllerBridge
 :

 UIViewControllerRepresentable

 {

 @
 Binding

 var

 markers
 :

 [
 GMSMarker
 ]

 func

 makeUIViewController
 (
 context
 :

 Context
 )

 -
>
 MapViewController

 {

 return

 MapViewController
 ()

 }

 func

 updateUIViewController
 (
 _

 uiViewController
 :

 MapViewController
 ,

 context
 :

 Context
 )

 {

 // Update the map for each marker

 markers
 .
 forEach

 {

 $0
 .
 map

 =

 uiViewController
 .
 map

 }

 }
 }
- Pass the
markersproperty fromContentViewtoMapViewControllerBridge
Since you added a new property in MapViewControllerBridge
, this now requires that the value for this property be passed in the initializer for MapViewControllerBridge
. So, if you try to build the app, you should notice that it won't compile. To fix this, make an update to ContentView
where the MapViewControllerBridge
is created and pass in the markers
property like so:
  struct

 ContentView
 :

 View

 {

 // ...

 var

 body
 :

 some

 View

 {

 // ...

 GeometryReader

 {

 geometry

 in

 ZStack
 (
 alignment
 :

 .
 top
 )

 {

 // Map

 MapViewControllerBridge
 (
 markers
 :

 $
 markers
 )

 // ...

 }

 }

 }
 }
Notice the prefix $
was used to pass in markers
to MapViewControllerBridge
since it expects a bound property. $
is a reserved prefix for use with Swift property wrappers. When applied to a State, it will return a Binding
.
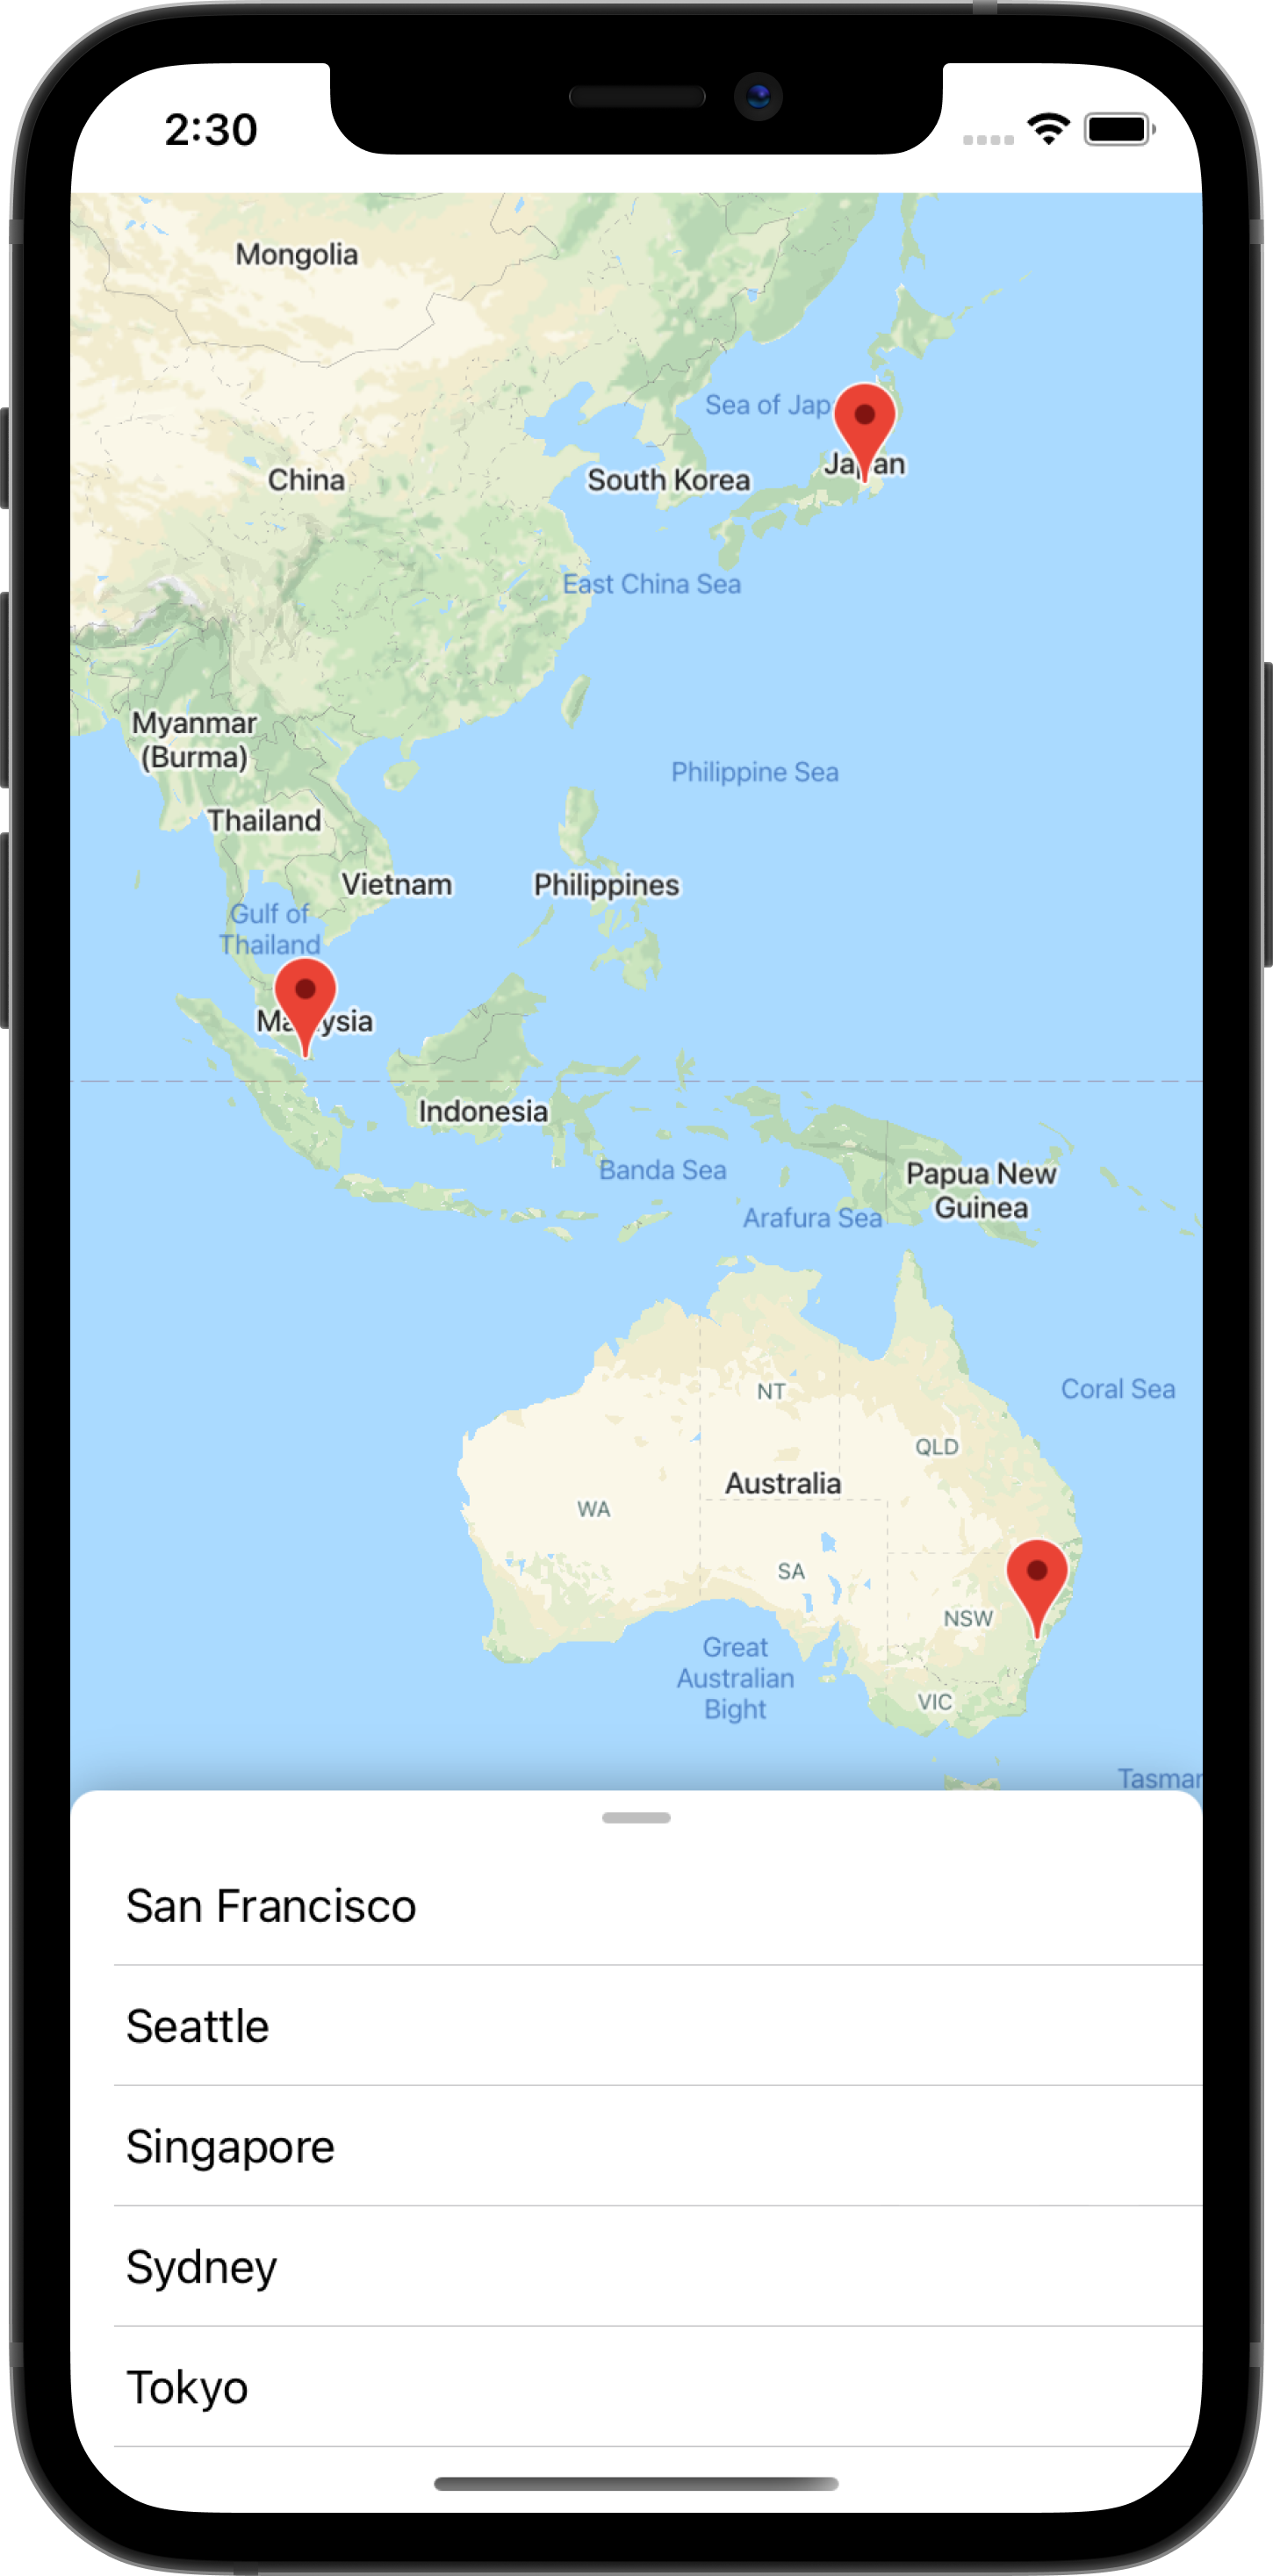
- Go ahead and run the app to see the markers displayed on the map.
8. Animate to a selected city
In the previous step, you added markers to a map by passing State from one SwiftUI view to another. In this step, you will animate to a city or marker after it has been tapped in the interactable list. To perform the animation, you will react to changes to a State by modifying the map's camera position when the change occurs. To learn more about the concept of the map's camera, see Camera and View .

Animate map to selected city
To animate the map to a selected city:
- Define a new Binding in
MapViewControllerBridge
ContentView
has a State property called selectedMarker
that is initialized to nil and gets updated whenever a city is selected on the list. This is handled by the CitiesList
view buttonAction
within ContentView
.
ContentView
  CitiesList
 (
 markers
 :

 $
 markers
 )

 {

 (
 marker
 )

 in

 guard

 self
 .
 selectedMarker

 !=

 marker

 else

 {

 return

 }

 self
 .
 selectedMarker

 =

 marker

 // ...
 }
Whenever selectedMarker
changes, MapViewControllerBridge
should be aware of this state change so that it can animate the map to the selected marker. So, define a new Binding within MapViewControllerBridge
of type GMSMarker
and name the property selectedMarker
.
MapViewControllerBridge
  struct

 MapViewControllerBridge
 :

 UIViewControllerRepresentable

 {

 @
 Binding

 var

 selectedMarker
 :

 GMSMarker
 ?
 }
- Update
MapViewControllerBridgeto animate the map wheneverselectedMarkerchanges
Once a new Binding has been declared, you need to update MapViewControllerBridge
's updateUIViewController_, context)
function so that the map animates to the selected marker. Go ahead and do so by copying the following code:
  struct

 MapViewControllerBridge
 :

 UIViewControllerRepresentable

 {

 @
 Binding

 var

 selectedMarker
 :

 GMSMarker
 ?

 func

 updateUIViewController
 (
 _

 uiViewController
 :

 MapViewController
 ,

 context
 :

 Context
 )

 {

 markers
 .
 forEach

 {

 $0
 .
 map

 =

 uiViewController
 .
 map

 }

 selectedMarker
 ?.
 map

 =

 uiViewController
 .
 map

 animateToSelectedMarker
 (
 viewController
 :

 uiViewController
 )

 }

 private

 func

 animateToSelectedMarker
 (
 viewController
 :

 MapViewController
 )

 {

 guard

 let

 selectedMarker

 =

 selectedMarker

 else

 {

 return

 }

 let

 map

 =

 viewController
 .
 map

 if

 map
 .
 selectedMarker

 !=

 selectedMarker

 {

 map
 .
 selectedMarker

 =

 selectedMarker

 DispatchQueue
 .
 main
 .
 asyncAfter
 (
 deadline
 :

 .
 now
 ()

 +

 0.5
 )

 {

 map
 .
 animate
 (
 toZoom
 :

 kGMSMinZoomLevel
 )

 DispatchQueue
 .
 main
 .
 asyncAfter
 (
 deadline
 :

 .
 now
 ()

 +

 0.5
 )

 {

 map
 .
 animate
 (
 with
 :

 GMSCameraUpdate
 .
 setTarget
 (
 selectedMarker
 .
 position
 ))

 DispatchQueue
 .
 main
 .
 asyncAfter
 (
 deadline
 :

 .
 now
 ()

 +

 0.5
 ,

 execute
 :

 {

 map
 .
 animate
 (
 toZoom
 :

 12
 )

 })

 }

 }

 }

 }
 }
The animateToSelectedMarker(viewController)
function will perform a sequence of map animations using GMSMapView
's animate(with)
function.
- Pass
ContentView'sselectedMarkertoMapViewControllerBridge
Once MapViewControllerBridge
has the new Binding declared, go ahead and update ContentView
to pass in the selectedMarker
where MapViewControllerBridge
is instantiated.
ContentView
  struct

 ContentView
 :

 View

 {

 // ...

 var

 body
 :

 some

 View

 {

 // ...

 GeometryReader

 {

 geometry

 in

 ZStack
 (
 alignment
 :

 .
 top
 )

 {

 // Map

 MapViewControllerBridge
 (
 markers
 :

 $
 markers
 ,

 selectedMarker
 :

 $
 selectedMarker
 )

 // ...

 }

 }

 }
 }
Completing this step will now animate the map whenever a new city is selected in the list.
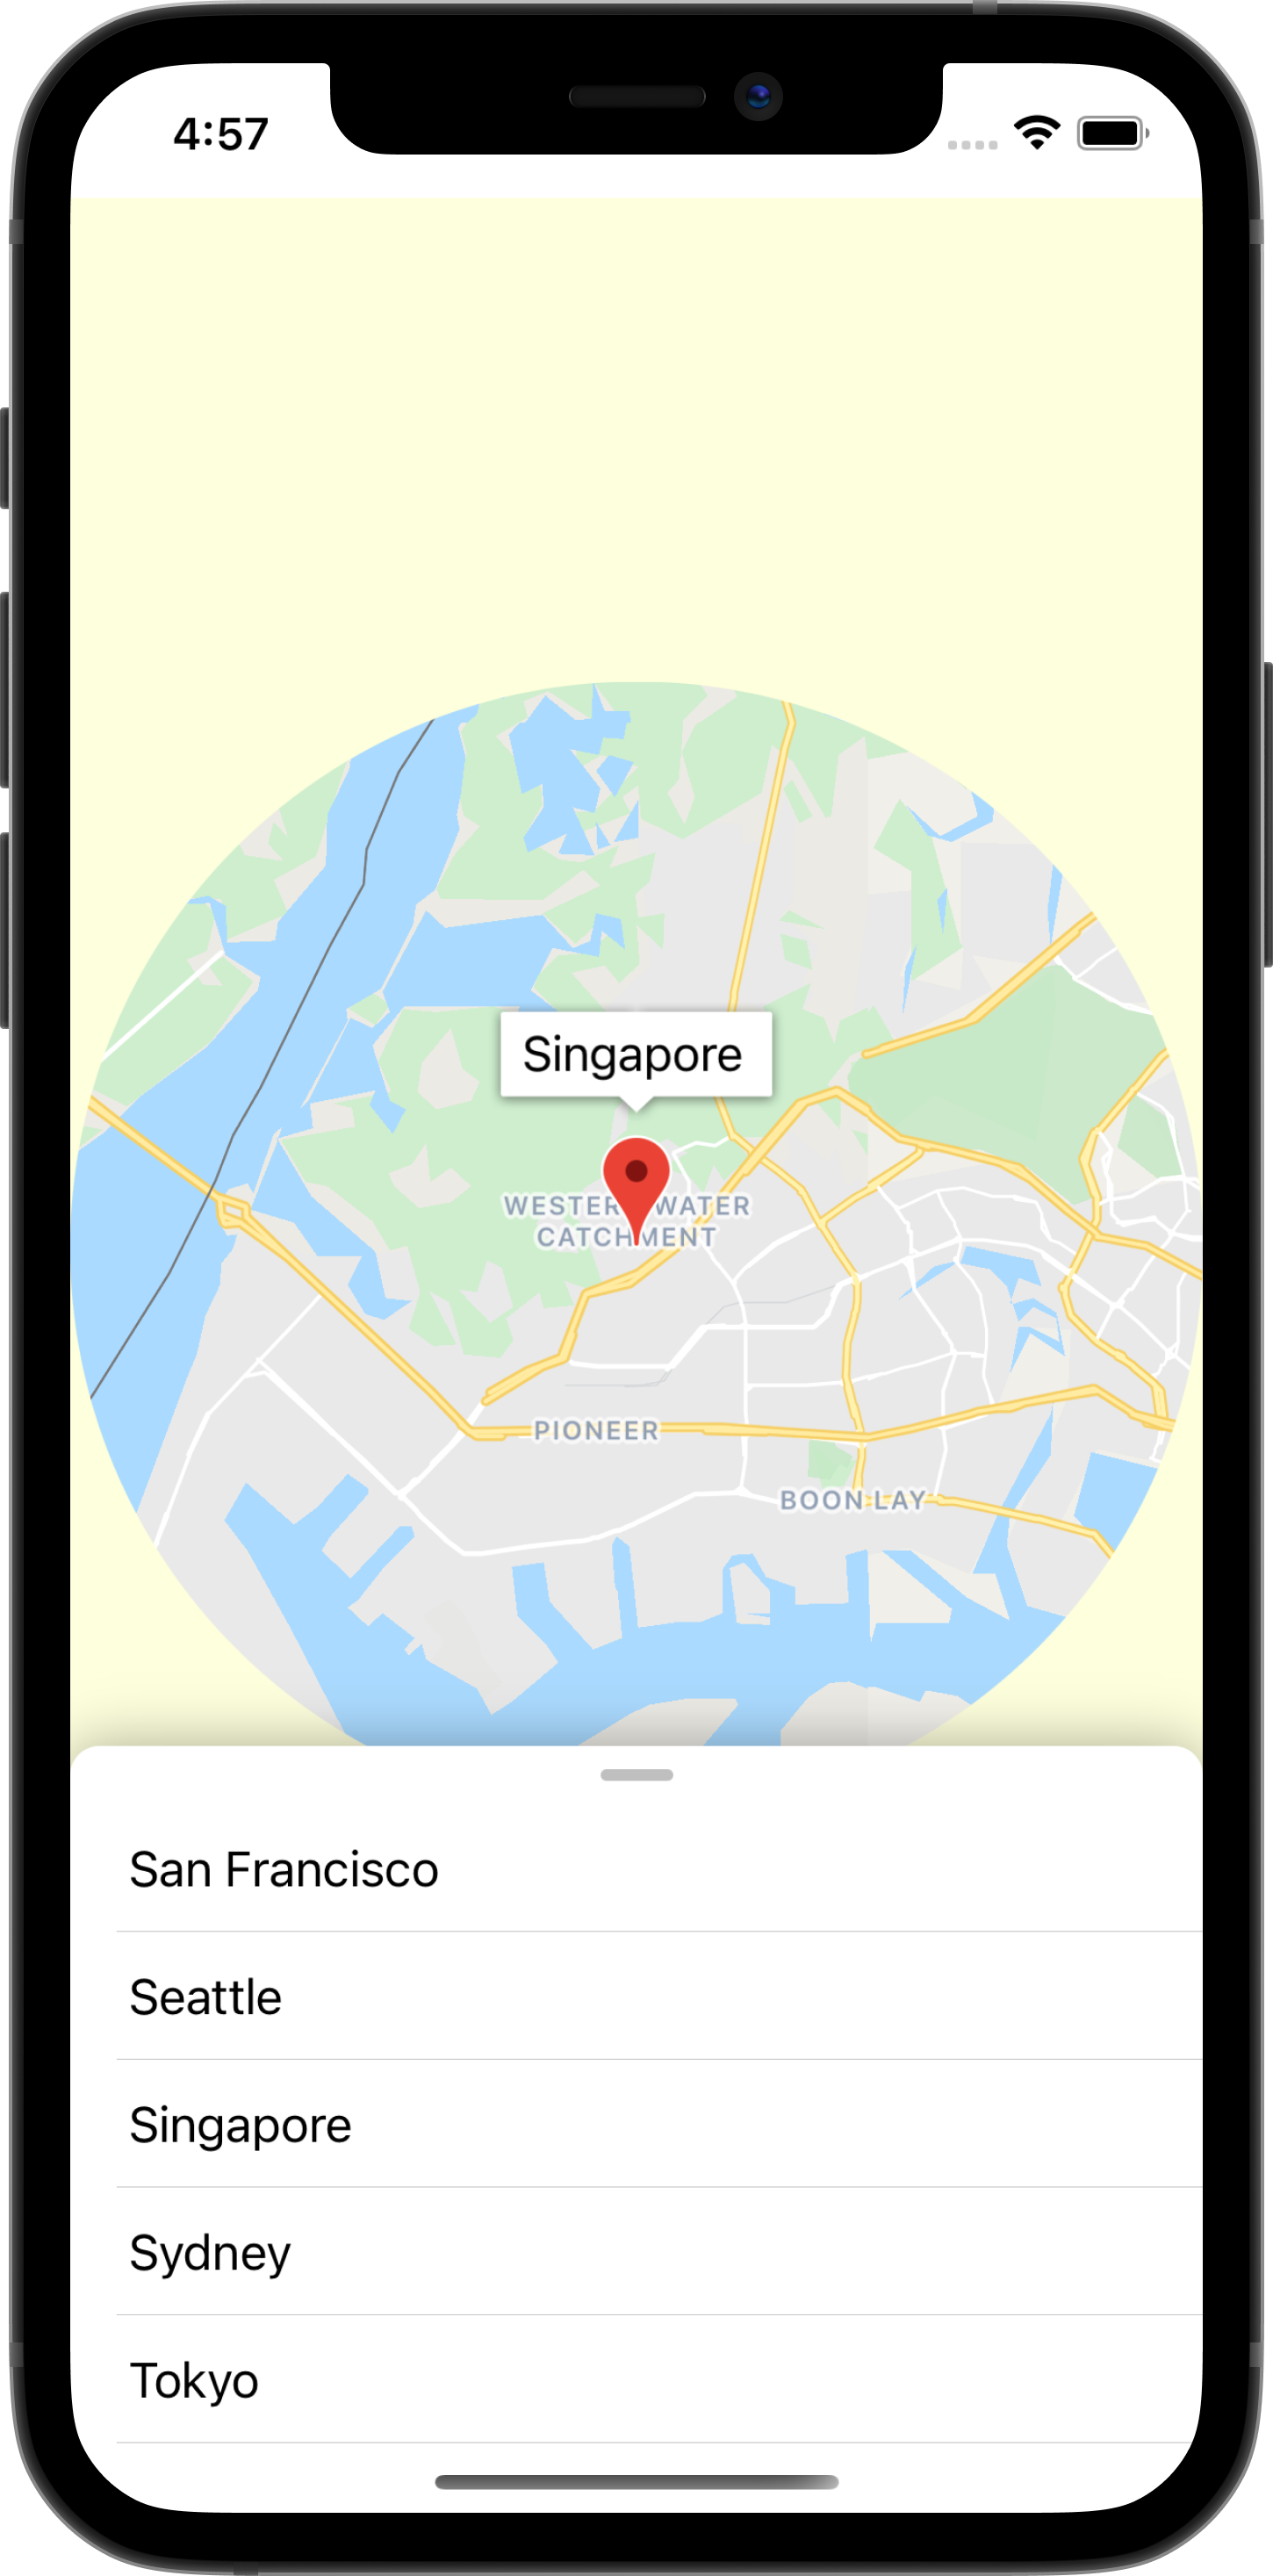
Animate SwiftUI view to emphasize city
SwiftUI simplifies the process of animating views, as it will handle performing animations for State transitions. To demonstrate this, you will be adding more animations by focusing the view to the selected city after the map animation completes. To accomplish this, complete the following steps:
- Add an
onAnimationEndedclosure toMapViewControllerBridge
Because the SwiftUI animation will be performed after the map animation sequence you added previously, declare a new closure called onAnimationEnded
within MapViewControllerBridge
and invoke this closure after a 0.5 second delay after the last map animation within the animateToSelectedMarker(viewController)
method.
MapViewControllerBridge
  struct

 MapViewControllerBridge
 :

 UIViewControllerRepresentable

 {

 var

 onAnimationEnded
 :

 ()

 -
>
 ()

 private

 func

 animateToSelectedMarker
 (
 viewController
 :

 MapViewController
 )

 {

 guard

 let

 selectedMarker

 =

 selectedMarker

 else

 {

 return

 }

 let

 map

 =

 viewController
 .
 map

 if

 map
 .
 selectedMarker

 !=

 selectedMarker

 {

 map
 .
 selectedMarker

 =

 selectedMarker

 DispatchQueue
 .
 main
 .
 asyncAfter
 (
 deadline
 :

 .
 now
 ()

 +

 0.5
 )

 {

 map
 .
 animate
 (
 toZoom
 :

 kGMSMinZoomLevel
 )

 DispatchQueue
 .
 main
 .
 asyncAfter
 (
 deadline
 :

 .
 now
 ()

 +

 0.5
 )

 {

 map
 .
 animate
 (
 with
 :

 GMSCameraUpdate
 .
 setTarget
 (
 selectedMarker
 .
 position
 ))

 DispatchQueue
 .
 main
 .
 asyncAfter
 (
 deadline
 :

 .
 now
 ()

 +

 0.5
 ,

 execute
 :

 {

 map
 .
 animate
 (
 toZoom
 :

 12
 )

 DispatchQueue
 .
 main
 .
 asyncAfter
 (
 deadline
 :

 .
 now
 ()

 +

 0.5
 ,

 execute
 :

 {

 // Invoke onAnimationEnded() once the animation sequence completes

 onAnimationEnded
 ()

 })

 })

 }

 }

 }

 }
 }
- Implement
onAnimationEndedinMapViewControllerBridge
Implement the onAnimationEnded
closure where MapViewControllerBridge
is instantiated within ContentView
. Copy and paste the following code which adds a new State called zoomInCenter
and it also modifies the view by using clipShape
and varies the diameter of the clipped shape depending on the value of zoomInCenter
ContentView
  struct

 ContentView
 :

 View

 {

 @
 State

 var

 zoomInCenter
 :

 Bool

 =

 false

 // ...

 var

 body
 :

 some

 View

 {

 // ...

 GeometryReader

 {

 geometry

 in

 ZStack
 (
 alignment
 :

 .
 top
 )

 {

 // Map

 let

 diameter

 =

 zoomInCenter

 ?

 geometry
 .
 size
 .
 width

 :

 (
 geometry
 .
 size
 .
 height

 *

 2
 )

 MapViewControllerBridge
 (
 markers
 :

 $
 markers
 ,

 selectedMarker
 :

 $
 selectedMarker
 ,

 onAnimationEnded
 :

 {

 self
 .
 zoomInCenter

 =

 true

 })

 .
 clipShape
 (

 Circle
 ()

 .
 size
 (

 width
 :

 diameter
 ,

 height
 :

 diameter

 )

 .
 offset
 (

 CGPoint
 (

 x
 :

 (
 geometry
 .
 size
 .
 width

 -

 diameter
 )

 /

 2
 ,

 y
 :

 (
 geometry
 .
 size
 .
 height

 -

 diameter
 )

 /

 2

 )

 )

 )

 .
 animation
 (.
 easeIn
 )

 .
 background
 (
 Color
 (
 red
 :

 254.0
 /
 255.0
 ,

 green
 :

 1
 ,

 blue
 :

 220.0
 /
 255.0
 ))

 }

 }

 }
 }
- Go ahead and run the app to see the animations!
9. Send an event to SwiftUI
In this step, you will listen to events emitted from the GMSMapView
, and send that event to SwiftUI. Specifically, you will set a delegate to the map view and listen to camera move events so that when a city is focused and the map camera moves from a gesture, the map view will unfocus so you can see more of the map.
Use SwiftUI Coordinators
GMSMapView
emits events such as camera position changes or when a marker is tapped. The mechanism for listening to these events is through the GMSMapViewDelegate
protocol. SwiftUI introduces the concept of a Coordinator which is specifically used for acting as a delegate for UIKit view controllers. So, in the SwiftUI world, a Coordinator should be in charge of conforming to the GMSMapViewDelegate
protocol. To do this, complete the following steps:
- Create a Coordinator called
MapViewCoordinatorwithinMapViewControllerBridge
Create a nested class inside the MapViewControllerBridge
class and call it MapViewCoordinator
. This class should conform to GMSMapViewDelegate
and should declare MapViewControllerBridge
as a property.
MapViewControllerBridge
  struct

 MapViewControllerBridge
 :

 UIViewControllerRepresentable

 {

 // ...

 final

 class

 MapViewCoordinator
 :

 NSObject
 ,

 GMSMapViewDelegate

 {

 var

 mapViewControllerBridge
 :

 MapViewControllerBridge

 init
 (
 _

 mapViewControllerBridge
 :

 MapViewControllerBridge
 )

 {

 self
 .
 mapViewControllerBridge

 =

 mapViewControllerBridge

 }

 }
 }
- Implement
makeCoordinator()inMapViewControllerBridge
Next, implement the makeCoordinator()
method within MapViewControllerBridge
and return an instance of the MapViewCoodinator
you created in the previous step.
MapViewControllerBridge
  struct

 MapViewControllerBridge
 :

 UIViewControllerRepresentable

 {

 // ...

 func

 makeCoordinator
 ()

 -
>
 MapViewCoordinator

 {

 return

 MapViewCoordinator
 (
 self
 )

 }
 }
- Set the
MapViewCoordinatoras the map view's delegate
With the custom coordinator created, the next step is to set the coordinator as the delegate for the view controller's map view. To do this, update the view controller initialization in makeUIViewController(context)
. The created coordinator from the previous step will be accessible from the Context object.
MapViewControllerBridge
  struct

 MapViewControllerBridge
 :

 UIViewControllerRepresentable

 {

 // ...

 func

 makeUIViewController
 (
 context
 :

 Context
 )

 -
>
 MapViewController

 {

 let

 uiViewController

 =

 MapViewController
 ()

 uiViewController
 .
 map
 .
 delegate

 =

 context
 .
 coordinator

 return

 uiViewController

 }
 }
- Add a closure to
MapViewControllerBridgeso the camera will move event can be propagated up
Since the goal is to update the view with the camera moves, declare a new closure property that accepts a boolean within MapViewControllerBridge
called mapViewWillMove
and invoke this closure in the delegate method mapView(_, willMove)
within MapViewCoordinator
. Pass the value of gesture
to the closure so that the SwiftUI view can react only to gesture-related camera move events.
MapViewControllerBridge
  struct

 MapViewControllerBridge
 :

 UIViewControllerRepresentable

 {

 var

 mapViewWillMove
 :

 (
 Bool
 )

 -
>
 ()

 //...

 final

 class

 MapViewCoordinator
 :

 NSObject
 ,

 GMSMapViewDelegate

 {

 // ...

 func

 mapView
 (
 _

 mapView
 :

 GMSMapView
 ,

 willMove

 gesture
 :

 Bool
 )

 {

 self
 .
 mapViewControllerBridge
 .
 mapViewWillMove
 (
 gesture
 )

 }

 }
 }
- Update ContentView to pass in a value for
mapWillMove
With the new closure declared on MapViewControllerBridge
, update ContentView
to pass in a value for this new closure. Within that closure, toggle the State zoomInCenter
to false
if the move event is related to a gesture. This will effectively show the map in full view again when the map is moved by a gesture.
ContentView
  struct

 ContentView
 :

 View

 {

 @
 State

 var

 zoomInCenter
 :

 Bool

 =

 false

 // ...

 var

 body
 :

 some

 View

 {

 // ...

 GeometryReader

 {

 geometry

 in

 ZStack
 (
 alignment
 :

 .
 top
 )

 {

 // Map

 let

 diameter

 =

 zoomInCenter

 ?

 geometry
 .
 size
 .
 width

 :

 (
 geometry
 .
 size
 .
 height

 *

 2
 )

 MapViewControllerBridge
 (
 markers
 :

 $
 markers
 ,

 selectedMarker
 :

 $
 selectedMarker
 ,

 onAnimationEnded
 :

 {

 self
 .
 zoomInCenter

 =

 true

 },

 mapViewWillMove
 :

 {

 (
 isGesture
 )

 in

 guard

 isGesture

 else

 {

 return

 }

 self
 .
 zoomInCenter

 =

 false

 })

 // ...

 }

 }

 }
 }
- Go ahead and run the app to see the new changes!
10. Congratulations
Congratulations on getting this far! You covered a lot of ground and hopefully the lessons you learned allow you to now build your own SwiftUI app using the Maps SDK for iOS.
What you learned
- The differences between SwiftUI and UIKit
- How to bridge between SwiftUI and UIKit using UIViewControllerRepresentable
- How to make changes to the map view with State and Binding
- How to send an event from the map view to SwiftUI using a Coordinator
What's next?
- Maps SDK for iOS
- official documentation for the Maps SDK for iOS
- Places SDK for iOS - find local businesses and points of interest around you
- maps-sdk-for-ios-samples
- sample code on GitHub demonstrating all the features within the Maps SDK for iOS.
- SwiftUI - Apple's official documentation on SwiftUI
- Help us create the content that you would find most useful by answering the following survey:
What other codelabs would you like to see?
Can't find the codelab you're most interested in? Request it with a new issue here .