
Page Summary
-
Creating an issue in Google Issue Tracker requires being signed in to a Google Account and having the necessary permissions for the component.
-
Templates can be used to pre-populate issue fields with default values, and the default template for a component is automatically selected when creating an issue.
-
To create an issue, you navigate to the Create Issue page, select a component, optionally choose a template, and fill in the required and optional fields before submitting.
-
You can also create a new issue based on an existing one, which copies some fields from the original issue to save time.
This page shows how to create an issue in Google Issue Tracker.
To create an issue, you must be signed in to a Google Account. You also must have Create Issuesor Admin Components permission for the component where the issue will be created. If you have Comment on Issuespermission, you may set the issue title and description only. If you have Edit Issuespermission, you can set other fields.
Templates
Templates in Google Issue Tracker specify default values for fields in new issues in a component . Each component has a default template but may have additional templates as configured by the Google employee who is responsible for managing it. Public and partner users cannot create or modify the templates associated with a component.
Choose a template
When you create an issue in Issue Tracker, the default template for the component is automatically selected. If additional templates are available, you can select them from the Templatedrop-down list on the Create Issuepage.

When you select a template, the fields in the page are automatically populated with the default values defined.
Create an issue
To create an issue:
-
Open Issue Tracker in your web browser.
-
Click Create Issue.
Issue Tracker opens the Create Issuepage and has the Componentfield selected. This field shows a drop-down list of components.
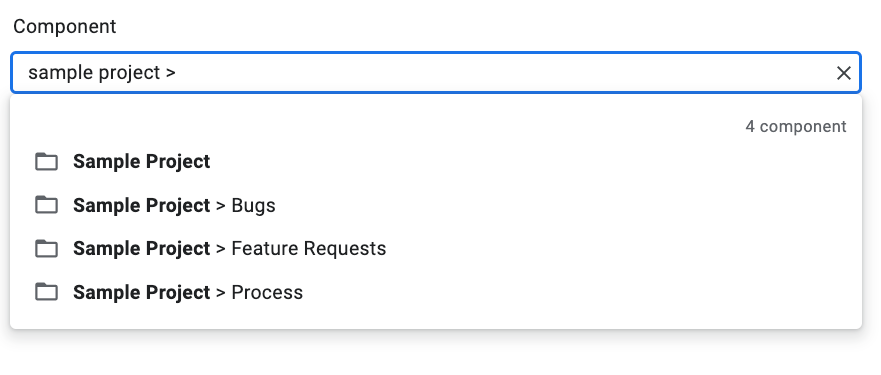
-
Use the drop-down list to find the component where you want to create the issue. You can only find components where you have Create Issuesor Admin Componentspermission.
-
(Optional) Choose a template that best applies to the issue you are reporting. Some components only have a default template.
-
Enter a title in the Titlefield. The title is displayed when you view the details of the issue, as well as in search results, hotlists and other places where you are viewing lists of issues.
-
Select a priority from the Prioritydrop-down list. The Priorityfield is only visible if you have Edit Issuespermission.
-
Select the issue type from the Typedrop-down list. The Typefield is only visible if you have Edit Issuespermission.

-
(Optional) Designate an assignee or add email addresses (including mailing list addresses) to the Collaborators and CC lists. These fields are only visible if you have Edit Issuespermission.
-
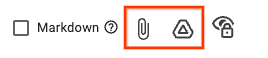
(Recommended) Enter a description for the issue in the Descriptionfield. This field might already be partially populated for you if description text is provided by the selected template. You can also check the Markdownoption to write the description as markdown text.
-
(Optional) Add attachments from your computer or from a Drive location.
-
(Optional) Fill in the advanced fields for the issue.
You can view these fields by toggling the Advanced fieldspanel. The Advanced fieldspanel is only visible if you have Edit Issuespermission. In most cases, you can skip advanced fields when creating an issue. However, some components require you to enter values for them. If this is the case, the Advanced fieldssection appears automatically, and the required fields are marked with an asterisk (*).

-
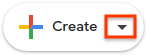
Click the Createbutton to submit the issue or click Create & Start Anotherto submit the issue and open a new Create Issuepage pre-populated with the values used for the issue you just created.

Create an issue based on an existing one
You can also create an issue based on an existing one. This method can save you time by using the existing issue to pre-fill certain fields.
To create an issue based on an existing one:
-
Open the existing issue.
-
Click the button next to Create.
-
Choose how you want to create the new issue from the drop-down list. The options in the drop-down list vary depending on the page that you are viewing. The button only becomes visible if there is at least one option available.
There are 7 possible options.
| Option | Description | Appears when |
|---|---|---|
|
In Same Component
|
Starts a new issue with component set to the current component. | (1) Managing a component, (2) Viewing issues in a component, (3) Viewing an issue |
|
Similar To Current
Issue
|
Starts a new issue with the fields of the current issue copied to the new issue. | Viewing an issue |
|
Blocked By Current
Issue
|
Starts a new issue with the current issue as a blocking issue. | Viewing an issue |
|
Blocking Current
Issue
|
Starts a new issue with the current issue as a blocked issue. | Viewing an issue |
|
Parent Of Current
Issue
|
Starts a new issue with the current issue as a child issue. | Viewing an issue |
|
Child Of Current
Issue
|
Starts a new issue with the current issue as a parent issue. | Viewing an issue |
|
In Same Hotlist
|
Starts a new issue with the current hotlist added to it. | (1) Managing a hotlist, (2) Viewing issues under a hotlist |