2010年01月の記事
全12件 (12件中 1-12件目)
1
-
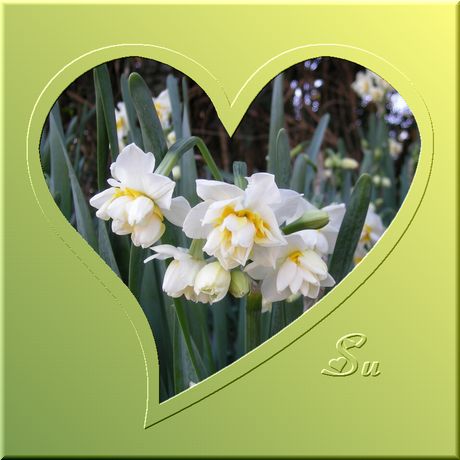
「ハートの枠」にカスタムフィルタを使って縁取り
「ハート(Webdings Shift+Y)の枠」にカスタムフィルタを使って縁取り ≪ 城ヶ島の水仙 ≫≪ ガザニア&ノースポール ≫昨日の続編です。今回は「最大濃度抽出」を20回かけて、「縁取りの幅を広くしました。出来上がった「縁取り線」に、カスタムフィルタを使って立体感を出しました。手順を追加しておきました。作成手順はこちらから ⇒
2010.01.31
コメント(9)
-
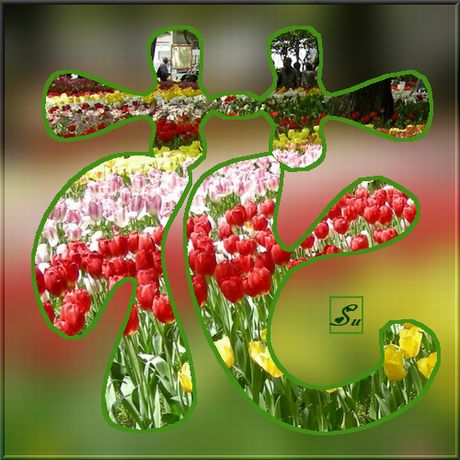
フォントにカラーの縁取り
≪ モフ字の「花」に縁取り ・ 横浜公園のチューリップ ≫≪ Webdings Shift+Y (ハート)に桜色の縁取り ・ 河津桜 ≫≪ Wハートに縁取り ・ 紅白梅 ≫最小(最大)濃度抽出を使うと、「フォント」に自由に縁取りが付けられます。フォントだけでなく、複雑な図形でもOK!これまで作成した「JTrimで描画」の手順の中でも、「花びらの輪郭線」の画像が簡単に出来るなど、色々と役に立ちそうです !(^^)!もっと良い使い道が有りそうなのですが、現時点ではこれくらいしか思い浮かびませんでした。☆お詫びとご報告濃度抽出を使って文字を大きくする方法は、なんだろな(kumiさん)が前から使っていらしたそうです。簡単な加工なので、もしかしたら既にどなたかが・・・とは思っていましたが、見つけられませんでした。skyさんkumiさん、お知らせありがとうございました。☆撮影場所 河津桜(神奈川県三浦市)、チューリップ(横浜市中区・横浜公園)、紅白梅(横浜市内) 平成21年2月~4月作成手順はこちらから ⇒
2010.01.30
コメント(16)
-
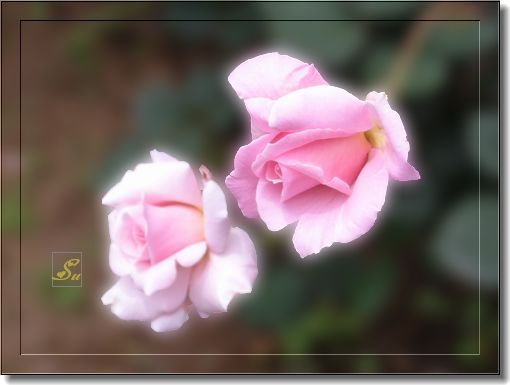
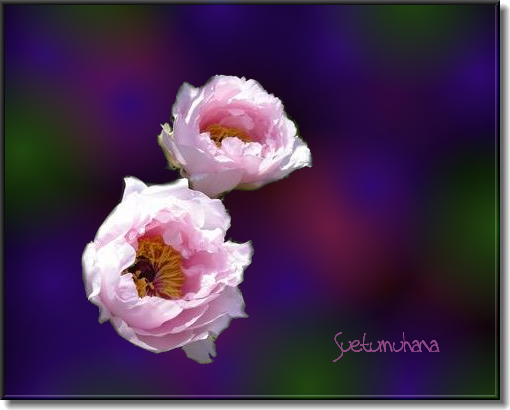
ピンクのバラ二輪・JTrim+v2
≪ ピンクの薔薇二輪 ・ JTrim+JTrim v2 ≫今日の画像は「元の画像」を生かして、「ピンクの薔薇の花」だけ浮かび上がるように加工しました。※詳しくは、1月24日の日記「「JTrim v2 で背景の塗りつぶし」をご覧下さい。☆JTrim v21.JTrim v2で、画像を開き、リサイズ(&トリミング) → コピー →保存 もしくは、 JTrimに貼り付けておく。 「ペイント」で塗りつぶした後、 塗り残した部分は、「ブラシ」を上下左右に動かして塗りつぶします。※様子を見ながら「色許容誤差」「ブラシの大きさ」「ステップ」の数値を変えて塗りつぶします。 細かい部分 →(例)ブラシの大きさ=10.ステップ=5 ☆JTrim2.背景を塗りつぶした画像=2階調化→ネガポジ反転→最大濃度抽出→コピー3.元の画像=加工→ガウスぼかし=54.編集→合成、暗い画素優先 元に戻し、明るい画素優先で合成そういえば、今日は一度も作業中にフリーズせずにすんなり出来ました。もしかして、JTrim v2は人見知りする?、それともWoodyBells さんが修正して下さった?両方ともそんなわけ無いですよね(^^ゞ余談ですが、以前から作ってみたかった「木目込みの雛人形」作りにチャレンジしています。横浜高島屋のローズサークルの講習会で、1月25日(月)と2月1日(月)の2回で、合計6時間です。一回目は比較的楽な「男雛」で、慣れてきた2回目に「女雛」を作るとの事。「木目込み」は生まれて始めて・・・。普段使っていない脳みそと筋肉を使ったため、授業が終わる頃にはクタクタ・・・^_^;中には、何度か作った事があって慣れた人は、男雛の衣装はすっかり出来上がっていましたが、私は3分の2作るのがやっとでした。こんな調子では果たして2回で出来るかしら・・・と心配になりました。ともかく男雛の衣装だけでも仕上げなくてはと、夜続きをやってみました。落ち着いてやってみると、単純な作業で面白いように捗り思ったより早く出来上がりました。面白くなって、昨夜は女雛の衣装にチャレンジ。模様の配置を考えながら楽しくて夢中になってやっている内にどんどん捗り、殆ど出来上がってしまいました。来週は、「頭」の部分を差し込んで完成です。
2010.01.27
コメント(4)
-
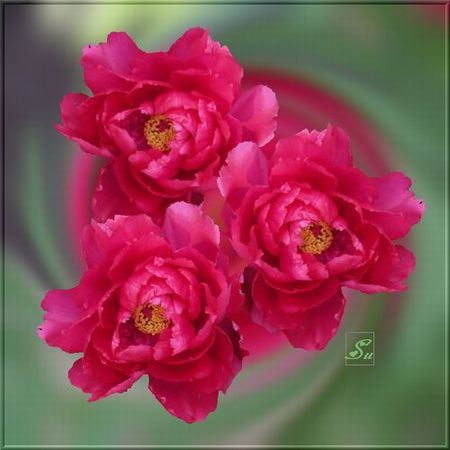
JTrim v2 で背景の塗りつぶし ・赤い牡丹
≪ JTrim v2(塗りつぶし) + JTrim(背景画像の作成&合成) ≫今回は、JTrim v2 の「ペイント」を使って、牡丹の花の背景を塗りつぶし、塗り残した部分は、「ブラシ」を使って「刷毛塗り」する要領で塗りつぶしました。塗りつぶし作業に関しては、使う画像にもよりますが、「JTrim」より格段に楽で面白いように塗りつぶせました。JTrim v2=切抜き、リサイズ、塗りつぶしJTrim =背景画像の作成と合成☆JTrim v2 ☆先ず最初に「表示項目」を確認しておきます。… 下図 A参照 表示→「プロパティウインドウ」と「ステータスバー」にチェック 「ツールバー」⇒全項目にチェック1.「ファイル」→開く 使いたい画像を開きます。2.四角形選択→切り抜きたい部分をマウスで囲み→編集→切り取り3.イメージ→リサイズ … 500x500px ※1~3は、JTrimでも可 その場合は、リサイズ後→コピー、JTrim v2 に貼り付け )4.「ペイント」をクリック→ JTrim v2 右上から、今回は「黒」を選びました。… B参照 ※矢印の位置をクリックすると、JTrimと同じ「色の設定」のウインドウが出ます。 「白」で塗りつぶしたい場合は、色を変更します。5.ペイントをクリック→ 「プロパティウインドウ」の数値を変更→塗りつぶしたい位置をクリック 今回は、右上辺りの「葉」の位置をクリック→ 下段右端の画像は、1クリックで塗りつぶした状態の画像です。6.場所を変えて、再度クリック … 下段左端の画像 同じ手順で何度か塗りつぶします。 ※余計な部分まで黒くなってしまう場合は「色許容誤差」の数値を変更(小さく)して 塗りつぶして見てください。7.最後に、残った細かい部分を、「ブラシ」を使って塗りつぶします。 「ブラシ」をクリック→「プロパティウインドウ」の数値を変更(下図参照) クリック&ドラックで、ブラシで色を塗る要領で、上下左右に動かして塗りつぶします。 ※細かい部分を塗る時には「ブラシの大きさ」と「ステップ」を小さくします。 編集→名前をつけて保存 … A※前に戻りたいとき=編集→「アンドゥ(元に戻す)」をクリック もしくは、下図の位置をクリックすれば前の画面に戻れます。 進むとき=リドゥ(やり直し)をクリック。☆JTrim 8.新規作成、黒、(今回は1000x1000px) 9・画像A=コピー 編集→好みの位置に「合成貼り付け」下記の手順で、残りの2つの画像も合成します。 10.A=表示→背景色、黒 任意回転(or ミラー+任意角度回転)→画像の周囲をマウスで囲み→切抜き→コピー 編集→全選択、イメージ→座標指定切抜き→OK(画像のサイズを記憶させる)11.イメージ→座標指定切抜き、枠を移動、明るい画素優先で合成 … B(保存)※画像次第では、↓の14~17の手順を参考に、二階調化を使って合成して下さい。↓ の作品は、ピンクの牡丹の画像を使いました。12.背景に使う画像を用意します。(1000x1000px) 今回は同じ画像を使いましたが、他の画像でも良いと思います。13.加工→渦巻き=最大を2回、ガウスぼかし=最大を一回、渦巻き=最大を一回 … C※色合いを見ながらご自由に・・・。14.画像B カラー→2階調化 … D 15.カラー→ネガポジ反転 イメージ→濃度抽出→最大濃度抽出(1~2回) … E → コピー (※合成して、花の周囲に黒い色が残る場合は2回)16.C(背景)=編集→合成、暗い画素優先 … F17.Eを元の状態(B)に戻し→コピー F=明るい画素優先で合成☆参考までに・・・JTrim v2 は、プロパティの数値を変更していると「エラーウィンドウ」が出てフリーズ、通常の手段では消せない場合があります。その場合、私は下記の「ウラワザ」を使って切り抜けています。ダメモトで、困った時にはお試し下さい。ア.エスケープキー(Esc)を長押し→「エラーウインドウ」が消えた隙に、 「JTrim v2」を閉じる。 ※運がよければ、そのまま作業を継続できる場合もあります。もう一つの方法は、イ.スタートメニューに「JTrim v2」を入れておき、 目障りですが、フリーズしたv2は無視して、新しい「v2」を開きます。フリーズしてしまった場合は作業中の画像は消えてしまいますので、大事な画像は面倒でも途中で保存しておかれることとお勧めします。
2010.01.24
コメント(8)
-
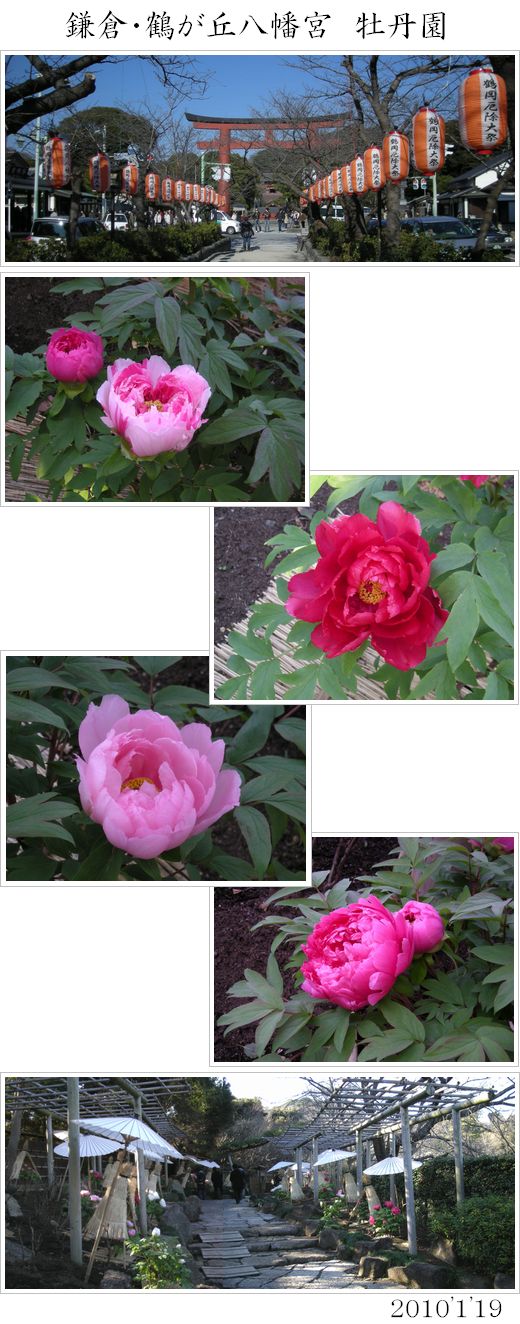
鎌倉鶴岡八幡宮の「正月牡丹」
≪ 鶴岡八幡宮の「正月牡丹」 ≫まるで春のような陽気に誘われて、昨日はペピママさんと二人で鎌倉へ行ってきました。小町通で買い物をした後、鶴岡八幡宮の「牡丹園」へ行きました。人も花も同じでしょうか、暖かな陽気に誘われて「花びら」まで気持ちよさそうに伸び伸びと開いているように見えました。確か以前は「寒牡丹」と書いてあったと思ったのですが、今年のパンフレットには「正月ぼたん」とありました。「冬牡丹」なら聞いたことがありますが、「正月牡丹」と言う呼称は始めて目にしました。「一体どう違うの???」と検索して見ましたが、「正月ぼたん(正月牡丹)」ではヒットしませんでした。調べているうちに、「寒牡丹」と「冬牡丹」は違うらしいと言うことが分かりました。「葉が無いのが二期咲きの寒牡丹で、あるのが開花時期を調節してこのころに咲かせる冬牡丹」だとか・・・。ということは、「冬牡丹」というのが正しいのでしょうか・・・?ニュースでは、「上野東照宮の冬牡丹」は、今年は寒波の影響でで花が小ぶりだと言うことですが、「鶴岡八幡宮の牡丹」は例年より花が大きくて見事でした。☆ 正月牡丹 ・ 後日談 (22.1.22 追記)「正月牡丹」について記載されている「ぼたんの里 江島牡丹園」のサイトを、JTrimで加工(skyさん)が教えて下さいました。江島牡丹園さんのサイトには下記のように記載されています。正月牡丹とは牡丹を正月頃咲く様に開花調整したもので、当園が正月牡丹として商品化し販売したのが始まりです。1990年(平成2年)12月よりお歳暮として正月牡丹の販売開始鶴岡八幡宮では、一昨年までは「寒牡丹」と書いてありましたが、昨年は「正月ぼたん」となっていたと、マルリッキーさんが教えて下さいました。ということは、鶴岡八幡宮さんに聞いてみないことは確かなことは分かりませんが、もしかしたら牡丹の種類を変えられたのかも・・・。skyさん、マルリッキーさんありがとうございました。
2010.01.20
コメント(19)
-
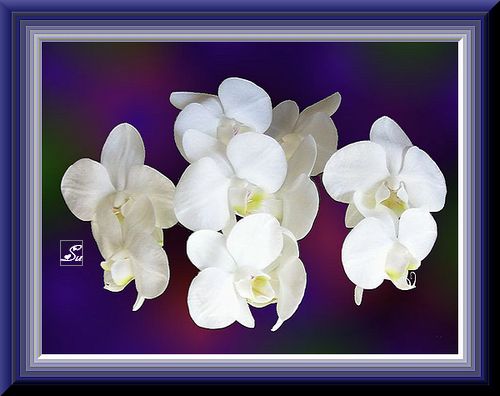
白い胡蝶蘭 ・ JTrim v2+JTrim
≪ JTrim v2 + JTrim ・ sunaさんの額 ≫≪ JTrim v2 + JTrim ・ 簡単透明枠 ≫頂いた「白い胡蝶蘭」の背景を「黒」で塗りつぶし、JTrim v2で作成した背景と合成しました。「白い花」なら背景はどんな色でも使える半面、色によって全く違った雰囲気になってしまうので、逆に難しかったです。「額縁」の参考サイト ⇒ JTrimで楽しい画像遊び(sunaさん)→ちょっと繊細な「簡単写真額」JTrimは素晴らしい! → 簡単透明枠
2010.01.18
コメント(8)
-
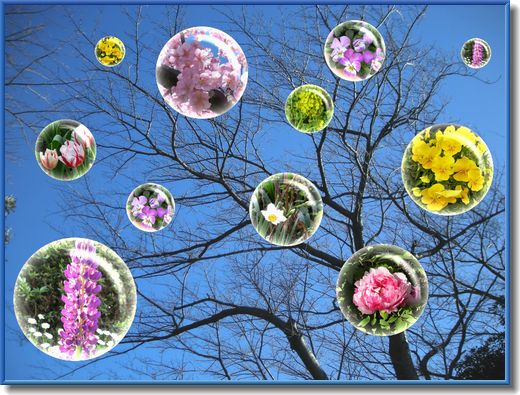
「水晶球風」の作成手順 ・ 春を待つ
≪ 春を待つ ・ 水晶球風 ≫午前中写してきた、近くの公園の「桜」の枝に、春の花たちを「水晶球」に詰めて浮かべました。≪「水晶球風」の作成手順≫☆加算合成するための画像 1.新規作成、500x500px、黒 表示→ 背景色=RGB値:32、32、32 → 円形フェードアウト=100 2.背景色=RGB値:72、72、72 →円形フェードアウト=75 3.背景色=RGB値:108,108、108 → 円形フェードアウト=50 4.背景色=RGB値:163.163.163 →円形フェードアウト=25 5.背景色=RGB値:225、225、225 →円形フェードアウト=5 … A (保存)☆光 6.新規作成、白、400x400px イメージ→円形切抜き、背景色=黒 7.編集→文字入れ、丸(●)、色=黒 フォントサイズと位置は、下段の画像を参考にして下さい。 8.イメージ→余白作成、黒、上下左右=各50 … 500x500px 9.加工→ブレ=7 加工→ガウスぼかし=3 … B → コピー10.A=加工→ガウスぼかし=5 編集→合成、明るい画素優先 … C(保存) → コピー11.画像(500x500px) 編集→合成、「クリップボードから入力」と「加算」にチェック→OK12.表示→背景色、192、192、192 加工→円形フェードアウト=313.イメージ→円形切抜き、背景色=白 … D(保存)☆型14.新規作成、白、500x500px イメージ→円形切抜き、背景色=黒15.イメージ→濃度抽出、最小濃度抽出 イメージ→リサイズ、500x500px … E(保存) 16.水晶球(D)、型(E)を同じ大きさにリサイズ、(E’,D’とします) リサイズした型(E’)=編集全選択、イメージ→座標指定切抜き→OK … サイズを記憶させる。17.背景になる画=イメージ→座標指定切抜き 左上に表示された「枠」をクリック&ドラッグで、好みの位置に移動→ 「ウインドウ」を「×」で閉じ「枠」を残す E’=コピー、編集→]合成、明るい画素優先 D’=コピー、編集→合成、暗い画素優先16~17を繰り返し、合成していきます。
2010.01.14
コメント(20)
-

空に浮かんだ 「しゃぼん玉?」
≪ 空に浮かんだ 「しゃぼん玉 ?」 ・ 横浜みなとみらい21 ≫この写真は8日に写したものですが、今日の横浜も抜けるような青空が広がっています。パピヨン姫子の日記(pchimekoさん)が「フォトショップ」を使って作成された「水晶球」のイメージをお借りして、JTrimで再現できないかと試してみました。「水晶球」のつもりで作成したのですが、「しゃぼん玉」に見立てて「みなとみらい21」の空にいっぱい飛ばして遊びました。「水晶の玉?」「しゃぼん玉?」の作成手順 ↓↓ 水晶球風の作成手順pchimekoさんの作品はこちら ⇒ パピヨン姫子の日記:1月11日
2010.01.13
コメント(10)
-
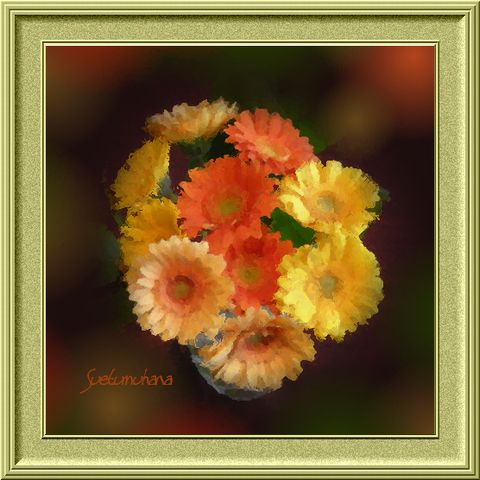
続 ・ JTrim + JTrim v2
≪ 続 ・ 【JTrim v2】にチャレンジ ≫「ぼかし」の背景が気に入って、前回とは違った方法で使ってみました。【JTrim】1.「こげ茶色」のテーブルを背景に写した画像を用意 背景色=「こげ茶」→円形フェードアウト → 保存【JTrim2】2.JTrim v2 で保存してあった画像を開く (J1=コピー、J2=貼り付けでも可)2.ガーベラの「花」と「葉」の 色を「スポイト」を使って「色抽出」3.左の「ステータスバー」の中の、「ブラシ」(筆のマーク)をクリック→ 「プロバティ」ウインドウが表示されます。 円形、「ブラシの大きさ=100~200位 ブラシの硬さ=0、ステップ=20 同じ手順で、ブラシのサイズを変えて好みの位置に色を入れていきます。↑の作品は、トリミング後、加工→オイルペイントで油絵風に仕上げ、miyaさんの、額縁に入れました。額縁の作成手順 ↓We Love JTrim(miyaさん)→ tutrial → バックナンバー → 額縁 → 晩秋の住吉神社
2010.01.12
コメント(6)
-
【JTrim v2】にチャレンジ
≪【JTrim v2】にチャレンジ ≫Thank You JTrim(どてかぼちゃさん)が、素晴らしい「寒中見舞い」を届けてくださいました。【JTrim v2】を使って作成されたとの事・・・。見たことも無い雰囲気の作品に、「目が点」になってしまいました。【JTrim2】の存在は知ってはいましたが、使い方がまったく分からず、以前一度ダウンロードしたもののそのままになっていました。どてかぼちゃさんの作品は、右のフレームの中の「参考作品」をクリックして下さい。書いて下さったコメントをご紹介しますので、宜しかったら皆様も試してみてください。☆どてかぼちゃさんが書いて下さったコメント☆「寒中見舞い」の背景の暈かしは「JTrim v2」の描画機能を利用しています。 「JTrim2」のことはすでにご存知かと思いますが、もしご存じなければWoodyBellさんの「JUNK」の中にあります。切り取りと簡単な描画機能だけですが、「JTrim」同様に使えるので重宝しています。 よろしければお試しになってみて下さい。上の画像は背景と牡丹の切抜きはJTrim v2、合成はJTrimを使って手探りで仕上げました。果たしてこんな方法で良いのか分かりませんが、簡単にご紹介します。1.牡丹の花の輪郭&周囲を、ブラシ(円形)、色=黒 で塗りつぶしました。 ※明るい背景色を使う場合は、白で塗りつぶしたほうが良いようです。 ※最初は「自由選択(フリーハンド)」で画像の輪郭を囲み、 切り取ろうと思いましたが難しくて挫折…^_^; あれこれ試した結果、今回は「ブラシ」を使ってみました。2.新規作成、白、 ブラシを使い、円のサイズを変えて水滴のように色を重ねて塗ってみました。 ↑の作品は、背景をネガポジ反転して使いました。 3.そこから先がどうすれば良いのか分からず、 JTrimを使って合成しました。どなたか【JTrim v2】の使い方か、使い方を記載されているサイトをご存知でしたら是非教えて頂けないでしょうか。どうぞよろしくお願いします。
2010.01.10
コメント(4)
-
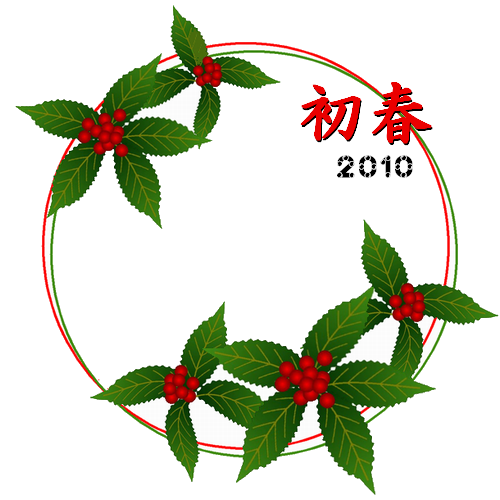
初春(千両) ・ JTrimで描画
≪ 千両の輪 ・ JTrimで描画 ≫少しだけ お正月らしい気分の画像にまとめました。「千両の描き方」手順はこちらから ⇒
2010.01.04
コメント(12)
-
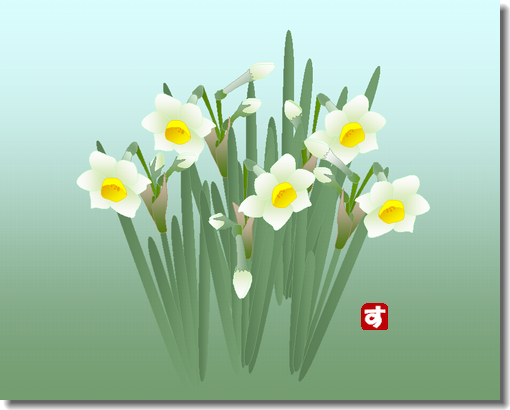
和水仙 ・ Wordの絵
≪ Wordの絵 ・ 我が家の「和水仙」 ≫暮れからお正月にかけて 関東地方は穏やかな晴天が続いていますが今年が雪が多いとの事、皆様のお住まいの地方はいかがでしょうか・・・。我が家の庭に咲いている「和水仙」をモデルに、Wordを使って描きました。今年もますます「お絵描き」に嵌りそうな予感がします。新年もどうぞよろしくお願いいたします。
2010.01.03
コメント(10)
全12件 (12件中 1-12件目)
1