
-
1
日本一周ライダーが選ぶおすすめ鹿児島ツーリングスポット 〜快走路・絶景スポット編〜
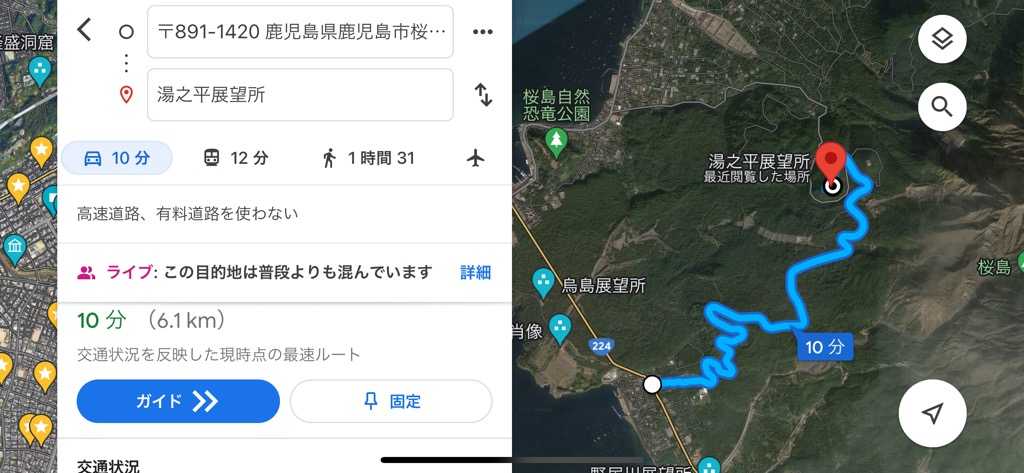
どうも!ちょっとコメントで「九州の情報ください!」とありましたので、書いていきたいと思います。ここで気づいたのが、九州にいながら九州の情報をほとんど発信していないこと^_^;北海道の情報ばかり発信していたことに、ちと反省^_^;そんなわけで、これから九州ツーリングに来られる方向けに情報を発信していきます!1回目の本日は、鹿児島の快走路・絶景ポイント情報からお送りします。●鹿児島絶景ロード〜大隅半島〜・桜島展望道路(日本100名道)桜島の展望台、湯之平展望所へと続く絶景快走路。全線桜島が見え、反対側には鹿児島湾(錦江湾)と鹿児島市内を一望できる。路面に火山灰があるためスリップ注意。・桜島一周南側は溶岩剥き出しの荒々しい桜島を望め、北側は小さな港をつなぐ静かな路。ゆっくり景色を見ながら走ることをおすすめします。・国道220号線桜島から国分まで繋がる海岸線の道。南下すれば常に桜島が見え、北上しても常に美しい錦江湾が望める快走路。・佐多岬ロードパーク以前は有料であったが、現在南大隅町が管理しており無料で走れる。南国らしいガジュマルの木が立ち並び、鹿児島にいながら沖縄や奄美大島を感じれる道。佐多岬を目指すなら必ず通る道。〜薩摩半島〜・指宿スカイライン(日本100名道)薩摩半島を指宿市まで縦断する有料道路。ですが、実は有料区間はあまり展望は開けず、どちらかというと地元の走り屋が集う場所となっております。おすすめしたいのは頴娃(えい)インターより南側の無料区間。桜島は望めませんが、南薩の開聞岳をはじめ遠くに三島村や佐田岬。条件がいいときは屋久島まで見ることができます。・国道226(枕崎より西)薩摩半島の陸の孤島、笠沙通じる道。テクニカルワインディングを抜けるとどーんと東シナ海が眼下に広がる。沖秋目島より西側の眺望が最高。(道が狭いため対向車と落石注意)・霧島高原道路(日本100名道)霧島神宮から丸尾温泉まで続く快走路。天気が良ければ桜島まで一望でき、道の途中にはいい温泉が点在する。●絶景スポット〜大隅半島〜・佐多岬言わずと知れた本土最南端。展望台まで少し歩くが、展望台からの絶景は一度見るべき。目の前に太平洋が広がり、大型船が行き来する。最南端到達証明書は、駐車場売店で入手可能。・南大隅ウィンドファーム地元民もあまり知らない絶景ポイント。風力発電が立ち並ぶ丘からは薩摩半島と錦江湾が一望でき、最高な眺め。・パノラマパーク西原台ウィンドファームに行きにくいならここでもOK。錦江湾を挟んで指宿市街の眺望が最高。・ゴールドビーチ大浜海水浴場ここからの夕陽が最高に美しい。開聞岳の鼻先をかすめ沈んでいく夕陽をずっと眺めてられる。・国際の森志布志湾が一望できる隠れ絶景スポット。行き来する船を眺めながらぼーっと過ごすのもあり。人気車中泊スポットでもある。(写真撮ってなかった。)・有村溶岩展望所桜島に1番近い展望所。大きな噴火の際には軽石が飛んでくることもある。南岳火口や昭和火口からのゴゴゴという地響きを感じれる展望所。・湯之平展望所桜島と薩摩半島両方を眺められる絶景ポイント。桜島の荒々しさを体感できる場所です。展望所内には売店や桜島のメカニズムも紹介。(写真見つけられず。)・輝北うわば公園キャンプ場と天文台を併設した公園。ここからの桜島や錦江湾の眺望が最高。(写真みつけられず。)・道の駅神話の里公園霧島高原道路の途中にある絶家ポイント。道の駅から展望所までリフトで登ることができる(有料)。〜薩摩半島〜・城山公園展望台テレビで鹿児島が紹介される時は、必ずここからの景色が使われるほど有名絶景ポイント。(写真見つけられず。)・錦江台展望公園スカイぱれっと指宿スカイライン有料区間で1番の絶景ポイント。ただし、駐車場から展望所まで少し離れてるためバイクと一緒に記念撮影はできない。・開聞岳周辺。薩摩富士と言われる美しい円錐形の開聞岳。この周囲は絶景ポイントだらけ。私の年賀状は基本開聞岳周辺で撮影したもの。・大野岳開聞岳、池田湖、大隅半島が一望。条件が揃えば屋久島まで見える。展望所は階段を登らなければならないが、駐車場からの展望も素晴らしいため、愛車との記念撮影もOK。・瀬平自然公園。開聞岳が最も美しく見れる場所。国道沿いなので見つけやすい。展望所はバイクは入れないので、愛車とのツーショットは難しい。・前原海岸開聞岳×バイク×海の写真ならここがおすすめ。午後からが逆光にならず綺麗に撮れる。・サンセットブリッジ日本三大砂丘のひとつ吹上浜の南端にある美しい吊り橋。名前の通り夕陽がとても美しい。橋は歩行者と自転車のみ通行可能なので、バイクや車は入れない。・江口浜海浜公園東シナ海が一望できる人工のビーチ。白い砂浜が美しく、背後にはシラス大地の壁がそびえ立つ。・行人岳長島で1番高い展望所。東シナ海、不知火海が一望できる。頂上までバイクで行くことができ、ツーショットもOK。細かく言えばまだまだ快走路や絶景ポイントはありますが、とりあえずこれぐらいで。次回は鹿児島のグルメ、酒情報をお届けっ!#九州観光 #鹿児島観光 #ツーリング #九州ツーリング #鹿児島ツーリング #快走路 #絶景 #観光スポット #九州グルメ #鹿児島グルメ #温泉 #居酒屋 #酒
2022年08月14日
閲覧総数 3678
-
2

インカム導入 ~Cardo FREECOM 4+使用レビュー編
〜3ヶ月経過使用レビュー〜〜r3.12.13-ペアリング不具合報告〜それでは、cardo FREECOM 4+を実際に使ってみた感想をお送りします。★送料無料★カルド cardo FREECOM4+ SINGLE JBL フリーコム4プラス バイク用インカム "FREECOM4の性能にプレミアムな性能をプラス" 0828831842725 日本国内正規品 JBLサウンドまずは音質。想定通り低音が走行音に吸われ、聞こえ辛い。それでも音量を上げれば十分な低音を楽しむことができる。例としていうと、REGZAのZシリーズ搭載のバズーカスピーカーよりしっかりとした低音を感じれる。そして、iPhone純正のイヤフォンよりも低音を感じ取ることができます。さて今、音量を上げればといいましたが、スマホ側の音量をMAX、そしてインカム側の音量をMAXにしても一切音割れを起こさない!中音域から高音域まで綺麗に聞こえます。特にフィンガースナップ(指パッチン)やハンドクラップ(手拍子)なんかは耳元で鳴らしているかのような臨場感。音の立体感がすごいんです。バイクで走りながらでこの音質は素晴らしい。音質はスマホ側で設定が効きます。iPhoneならCardo 純正アプリでなくとも、iPhone側の音質設定で結構調整できますよ。音質もガラリと変わりますので、調整してみることをお勧めします。こんな感じで音質は言うことなし!しかし、音量関係で色々アラが目立ちました。まず、音量調整。細かい調整ができない。本体のダイヤルかボイスコマンドで調整するのですが、ざっくり言うと、大・中・小みたいな調整しかできません。実際は数段階あるのですが、ボリュームの段差が激しく、細かい音量調整はスマホ側で行う必要があります。「Hey cardo ボリュームアップ」と言った際の音量の爆上げにビツクリ。ここはもう少しどうにかして欲しいですねぇ。お次は「AGC」機能。なんだしなんだし「AGC」もといAGC機能とは、走行速度に合わせて音量が自動で変化する機能のことです。走行風などを意識したモードだと思うのですが、MT-10のように大型バイクはエンジン音そのものが大きいため、低速でもそこそこ音がするんです。なので、低速走行で勝手に音を下げられては聞こえなくなるので困ります。反対に低速でも音楽が聞こえるように調整していると、スピードアップとともに爆音になるので非常に困ります。AGCは、cardo純正アプリで調整できるようなので、今後調整してみます。お次は操作編。結論から言うとボイスコマンドマジサイコー!まだアプリでSiriなどは使えるようにしていませんので、簡単な機能しか使えませんが、音量調節だけでもかなり便利です。心配した感度も良好で、和製英語の発音でボイスコマンドを操作できます。ボイスコマンドのアナウンス音声も女性の声で非常に聞き取りやすい。手が離せない峠走行中や、半クラが続く渋滞中などにボイスコマンドは重宝します。そしてSiriの設定ができれば、電話やその他の機能も使うことができる。これは最高!ついてて良かった機能でした^_^さて、お次はペアリングについて。これが爆速ペアリング!一度機器を登録してしまえば、cardoを起動してからほんの数秒でペアリングを完了してしまいます。登録できる機器は2台までですが、なんと同時に接続可能。試しに両方同時に音楽を流してみたところ、先に音楽が流れた機器の方を優先して音楽が流れました。そこで音楽を一旦停止して、すぐにもう一台の機器を操作するとタイムラグなしで音楽が流れます。うん、これは超便利!ただし、いただけない点が一つ。これはiPhoneだけの機能なのかもしれませんが、一度登録したペアリングを消去するとiPhone側でインカムのデバイスを削除しないと再度ペアリングできないんです。これが説明になかったため、削除後ペアリングできない理由を突き止めるのに時間がかかりました。さてお次は防水性能。実は霧島からの帰り道にゲリラ豪雨に遭遇しまして、インカムも全身もずぶ濡れになってしまいました。そんな状況下で約30分走行しましたが、インカムは正常に作動。しかし、本機説明書によると、防水ではないので雨天での長時間使用は避けてくださいとのこと。ベースは外すことができないので、電極が錆びないよう雨天走行後はしっかりメンテナンスしてあげましょう。さて、残った機能は、cardo同士や他インカムとのペアリングと通話。スマホ経由での通話。iPhone以外とのペアリング。これらは今後試していくことにしましょう。ここまで長々と書きましたが、結果から言って大満足!これぞ私の求めていたインカムそのものでした。これからはこのcardo FREECOM 4+で、快適なツーリングライフが送れそうです^_^
2020年07月25日
閲覧総数 5672
-
3
リアバンパーステッカーボム
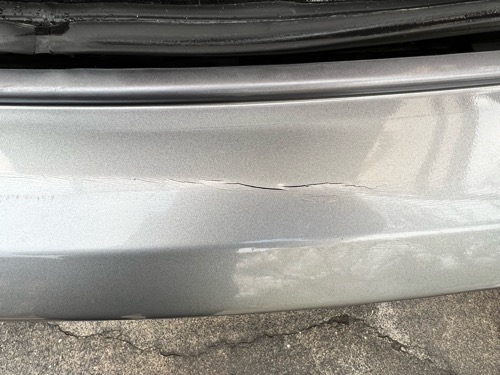
ご無沙汰してますどうも僕です。仕事が忙しすぎて、ここ最近記事をアップできないでいました^_^;あれやこれやネタは溜まっているので、気が向いたらアップしたいと思います。さて、今回は残念なご報告。今まで大きな事故もなく過ごしてきたBKアクセラちゃん。自分の油断から、思いっきりぶつけてしまいました。。。バックしながら車止めにぶつけたため、リアバンパーが押されて割れてしまった。。。とりあえず修理の見積もりをお願いすると、工賃込みで10万オーバー。。。うん、これは無理だ。そんなわけで、割れた部分のリペアを行います。最初はカーボンシートを貼り付けようかと思いましたが、この場所はかなり複雑に曲がっており、シワなく貼り付けることは至難の業。そこで、比較的簡単な方法でリペア&ドレスアップをDIYで行います。その方法とは「ステッカーボム」です。まずは密林にモノクロステッカーを200枚発注。防水でいい感じのステッカーが大量に届きました♪ではこれらをリアバンパーの一部にペタペタ貼り付けていきます。ここでポイント。1、お気に入りのステッカーは後から貼る。 お気に入りが目立つようにします。2、ステッカーの枠を切り落としておく。 枠があるままだとステッカーが浮いたように見えるので、枠を切り落として他のステッカーと馴染むようにする。3、ステッカーは真っ直ぐに貼らない。 ステッカーの種類にもよりますが、真っ直ぐに貼ると子供のイタズラみたいになります。4、角はドライヤーを当てながらスキージでしっかり貼り付ける。 ドライヤーで温めることで、びっくりするくらい貼りやすくなります(ヒートガン推奨)5、ステッカーを切ってアウトラインを揃える。 これをすることで、カッティングフィルムのような仕上がりに。6、脱脂はしっかりと 当たり前ですが、ステッカーが剥がれないよう貼り付ける場所をしっかり脱脂してあげましょう。7、ステッカーの角は丸く。 ステッカーの角は出来るだけ丸くカットしてあげましょう。これをすることで、かなり剥がれにくくなります。ちなみに今回はステッカーの上からクリアを吹くので、角取りはしていません。以上のことに気をつけて、しっかりと貼り付け完了!このままでもよさそうですが場所が外装ですし、青空駐車ではすぐに剥がれてきそう。そこで、剥がせなくはなってしまいますが、上からウレタンクリアでコートしてやります。とりあえずマスキング完了!と、ここでバイク仲間に荷物を届けに一旦離脱。帰ってきたところで塗装開始!まずはステッカーが剥がれないように慎重にステッカーの表面を脱脂。ここからウレタンクリアを吹いていきます。ここで使うのは、以前ヘッドライトリペアで大活躍した「ホルツウレタンクリアコート」です。ホルツ ウレタンクリアコートスプレー MH11603|カー用品 補修用品 スプレー塗料 カー用品 補修用品 タッチペン塗料(下地処理・仕上げ)缶底のピンをしっかり打ち込んで、液を混ぜます。指定された時間を過ぎたら、30回以上振りまくる!と、いつもならここで塗装開始となりますが、今回は前回ヘッドライトリペアでの失敗を教訓とし、缶をお湯に浸します。お湯の温度は約50度。缶の膨張に気をつけながら温めたところで塗装開始。温める前とでは噴射力が全然違います。そして噴霧するウレタンクリアも目が細かい。これは大成功だ。そのまま塗装→10分乾燥→塗装を繰り返し、約10回塗装することができました。それではこのまま一晩放置して、翌日マスキングを外します。翌日。うん、完璧!ステッカー間の段差もほぼなくなるくらいウレタンクリアが乗りました。ただ、やはり角が浮いてしまったので、樹脂(透明マニキュア)でコートしてやります。さて、このまま完全硬化まで1〜2週間待った後、コンパウンドで磨きます。2週間後〜。それではいつものコンパウンドで表面を磨いてやります。3M ハード1 チューブ 270g 極細目コンパウンド 5981ねり状 磨き剤1本売りステッカー面は綺麗に塗装できたので磨く必要はありません。今回はステッカーと下地の段差を磨いて解消します。しかし、私はウレタンの硬度を舐めていた・・・。磨けど磨けど一向に解消されない段差。先にボディ側がツルツルになってしまい、これ以上は塗装を削りすぎてしまうので断念。ウレタン硬すぎやろ^_^;さてそんなこんなでバンパー修理完了!結果的に普通に修理するより安く、そしてオシャレに仕上がりました(笑)転んでもただでは起きない漢(笑)リペア完了したBKアクセラちゃんで、今度はどこに行こうかな?
2022年04月14日
閲覧総数 1074
-
4
ヘッドライトリペア大失敗。
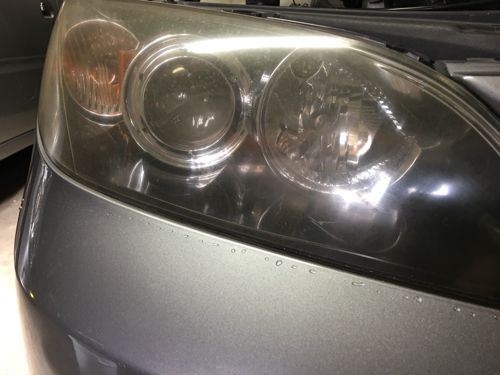
※最後に経過報告があります。以前、ソフト99のヘッドライトリフレッシュでヘッドライトのリペアをしてから早1年。ヘッドライトが曇ってしまいました。コートを6度塗りしたのにもかかわらず、3ヶ月後にはうっすら曇りだし、1年経つ現在では、完全に黄変してしまいました。いやはや、ヘッドライトリフレッシュでもだめだったか。そんなわけで、今回のヘッドライトリペアは違う方法を試します。購入したのは「ホルツ ウレタンクリアコート」【ホルツ ウレタンクリアコートスプレー】耐水ペーパーで磨いたあと、こいつで表面を保護してやろうという算段です。では、ヘッドライトをしっかり洗ってから2000番の耐水ペーパーで満遍なく磨いていきます。【水研ぎペーパー 耐水ペーパー #2000】黄色い汁(じる)が、白い液体(他意はありません)になるまで、磨いていきます。おっと、磨くときはしっかりと濡らしてあげましょう。何事もしっかり濡らしてあげないと痛い目にあいます(意味深)時折、洗い流しながら満遍なく磨けているか確認して磨きが終わればもう一度中性洗剤で洗い、脱脂してあげます。今思えばこの工程もダメだったのかも・・・。そこから完全乾燥させて、いよいよ塗装していきます。このウレタンコートは、薬液と硬化剤が別々に封入されており缶底のピンを打ち込み薬液と硬化剤を混ぜる必要があります。そして、薬液と硬化剤が混ざると、12時間で完全に硬化してしまい使用不能となります。ヘッドライトの塗装だけでは、かなり余ってしまうのでなにかコーティングしたいものを別に用意しておくといいでしょう。では塗装準備。1、缶を30回以上しっかり振る。2,缶底のピンをコンクリなどの硬い場所でしっかりと打ち込む。3、缶を逆さまにして、5分~10分放置。4、塗装前に30回以上缶をしっかり振る。これで塗装していきます。今回、耐水ペーパーのみで終わらせて、コンパウンドを使わなかったのは塗装の乗りを良くするためです。塗装すれば研磨傷は消えてくれます。では1回目の吹き付けを。ここで気をつけることは2点。1、吹き付ける位置が近いと、液だれしてしまう。2、1度で厚塗りすると、乾燥の段階でひび割れが発生したしまう。これらに気をつけて塗装していきますが・・・。1回目の塗装が甘かった気がする・・・。研磨傷は消えましたが、表面がすでにゆず肌に。あちこちで仕入れた情報と違う・・・。すでに不安でいっぱいに。しかしここで中断できないので、10分置いてから2回目の塗装をしていきます。これを6回繰り返し、厚い被膜を形成していきます。6度塗りしたあと、完全硬化までに10時間かかるので、水に濡れないよう気をつけ放置します。~10時間後~はい、見事にカチカチに皮膜が形成されました。しかし、表面が超ザラザラ。これはゆず肌なんて生易しいものではない。これはもうおろし金といっても過言ではない・・・。とりあえず、コンパウンドで磨いてみます。ウェスで磨き込んでいきますが・・・。うん、これは無理だ。全く面が出ません。仕方ない。耐水ペーパーで凸凹面を落とし、面を出していきます。せっかく厚塗した被膜をゴシゴシと落としていくこの悲劇。ようやく凸凹が消え、面が出てきました。それでも、ウレタンがまだら模様に付着しており、ライト表面が曇ったように見えています。ここからはコンパウンドで根気強く磨いていきます。【スリーエム 3M 5981 コンパウンド ハード 1 270g】磨きはポリッシャーを使います。【☆京セラ/リョービ DIY用サンダポリシャ RSE-1250 (637000A)】というか、これを使わないと手が死んでしまいます。コンパウンドをこまめにつけ、こまめに洗い、こまめに確認してようやくまだら模様を落とすことができました。磨き終えたヘッドライトは新品のようにピカピカに。しかし、かなり研磨してしまったので、ウレタンの被膜は殆ど残ってないでしょう。早ければ1ヶ月で黄変してしまうかもしれません。結果、今回のヘッドライトリペアは大失敗。失敗の原因として考えられるものは1、脱脂に中性洗剤を使ったこと。ヘッドライト表面に界面活性剤が残留し、ウレタンの付着を防いだ可能性。2、液ダレを心配するあまり、1回目の吹付けが甘くなったこと。1回目で満遍なくウレタンを乗せることができなかったため、2回目以降吹き付ける際に、ウレタンが乗っている部分のみにウレタンがまとまり、表面が凸凹になってしまった。おそらくこのどちらかもしくは両者が原因でしょう。やはり塗装は苦手だ。※2022年3月に、再度ヘッドライトリペアをしています。その際、ウレタンクリアコートの缶をお湯で温めながら塗布した結果ゆず肌になることもなく綺麗に塗装することができました。この記事でゆず肌になってしまったのは、ズバリスプレーの噴射力が不十分で、ウレタンが綺麗に噴霧されなかったためと思われます。この記事の方法で、ヘッドライトリペアをされる方は、ぜひ!缶を温めながらスプレーしてみてください。なおこの内容は後日ブログで紹介予定。今後、ヘッドライトの状態がどう変化するか、また追って報告します。※3ヶ月後の9月16日の経過報告です。↓↓ヘッドライトリペア大失敗 その後※7ヶ月後のR2年1月16日の経過報告です。↓↓ヘッドライトリペア大失敗?7ヶ月経過レポート※12ヶ月後のR2年6月7日の経過報告です。↓↓ヘッドライトリペア大失敗?12ヶ月経過レポート※18ヶ月後のR2年12月31日の経過報告です。↓↓ヘッドライトリペア大失敗?18ヶ月経過レポート※24ヶ月後のR3年6月22日の経過報告です。↓↓ヘッドライトリペア大失敗?24ヶ月経過レポート
2019年06月15日
閲覧総数 100507
-
5

フューエルワンの効果!
先日投入したフューエルワン。効果を感じ取ることができたので、報告致します。まず燃費。この間書いた通り、普段の燃費は15〜17km/lなのですが、エアコンつけたら一気に13km/lまで落ちてたんです。それが今日給油し計測したところ、15km/lまで向上!!エアコンガンガン入れてたんですけどね〜(^^;;さて、カーボンが落ちてるかどうかはバラしてみないと分かりませんが、今回大きな変化がもう一つありました。それは、エンジン音が静かになったこと!これは決してプラシーボ効果ではありません!昨日、普通に走っていて、エンジンブレーキをかけた際に何か違和感が。エンジン音がいつもより小さいんです。試しにカーステレオを切って、窓を開けてみたところ先日までとは段違いなほどエンジン音が小さい!ちなみに、なぜ昨日まで気づかなかったかというとハードロックな曲をガンガンかけていたからです(^^;;ちなみにこのアクセラ。新車の頃はエンジン音が小さすぎて、乗り合わせた友人が、エンジンかかってる?と言うほどでした。今回はそれに近いほど改善している。ただしこのアクセラ、MTなので、エンジン音が小さくなると、シフトチェンジが難しくなります(^^;;それでも、これほど改善するということは、フューエルワンの効果があったということ。ただしネットで見てる限り、ここまで劇的な変化があった人は見ないんですよね(^^;;これはワタクシの仮説なのですが、エンジンにこびりついたカーボンは、エンジンを高回転、高負荷で回してあげると除去することができるそうです。さらに、メンテナンス工場などで、カーボン除去を行う際にはハイオクを入れた上で、燃料添加剤を投入して、エンジンを吹かすそうです。はて。同じようなことがどこかであったような・・・。はい、先日の鬼の阿蘇走りです。あの時は、ほにゃららな速度で高速を突っ走ったり、山道を低めのギアで負荷をかけまくって走り抜けたりと、まさに上記した走り方をしていました(^^;;これが効果的だったのかはわかりません。しかし、フューエルワンの効果はあったと今回は言えると思います。ただし、今回のケースがどんな場合にも当てはまるとは限りませんので、同じように使われる方は自己責任でお願いします(^^;;今後もフューエルワンを時折入れてメンテナンスしてやりたいと思います♪ps今回、フューエルワンを勧めてくれたのは、リペアニーズ鹿児島の店長でした。┏○)) アザ━━━━━━━━ス!
2015年07月29日
閲覧総数 7485
-
6
【最終回】日本一周ライダーが選ぶおすすめ長崎ツーリングスポット 〜グルメ・温泉・観光スポット編〜
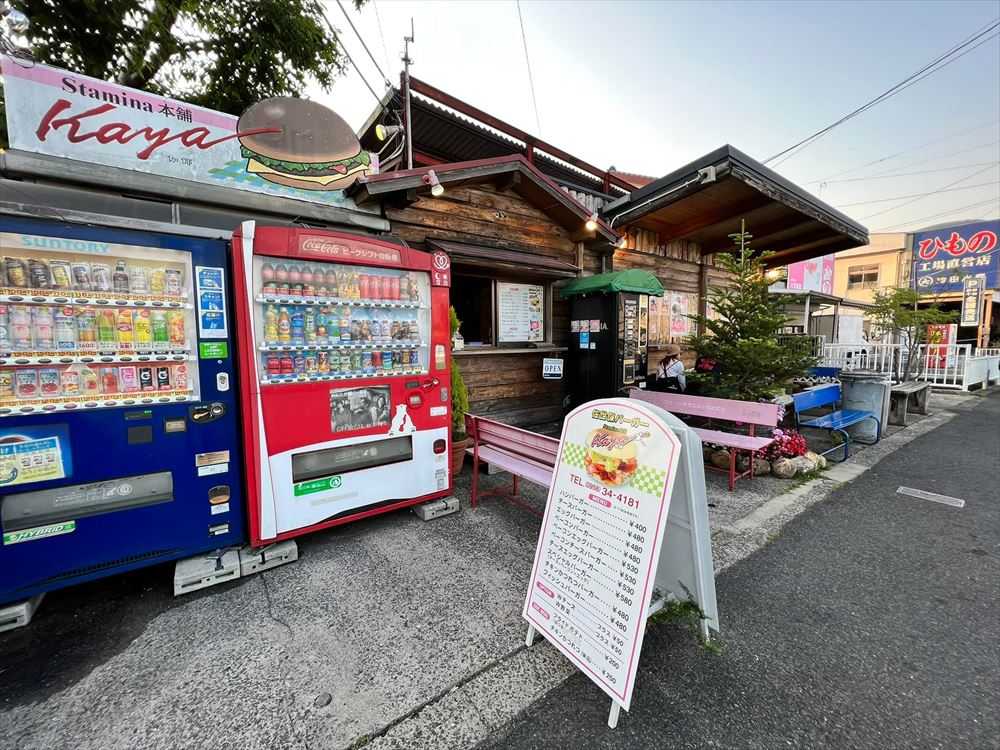
今回は長崎のグルメ・温泉・観光スポット情報をお届け!長崎は美味しいものだらけで、横に成長すること間違いなし!●グルメ情報Kayaバーガーショップ0956-34-4181ボリューム満点の佐世保バーガーならここ!ズシっと重いバーガーは食べ応え満天なのにリーズナブル!ぜひ一緒にフライドポテトも注文してほしい。佐世保バーガー本店 バーガーミュージアム0956-28-5533海を見下ろす絶景に建つ佐世保バーガー屋さん。料金は少々お高めだが、人気店で多くの客が訪れる。連休などはかなり待つことも。バーガーの種類も豊富でどれもおいしい!(有)一栄水産0120-281-407バイク仲間で牡蠣ツーリングの時にはここで牡蠣を買い込む。大きな身にプリップリの牡蠣。そして冬場は日扇貝がめちゃめちゃ美味しい!しかもグラインダーで磨いてるとのことで、かなり綺麗!九十九島の牡蠣は、今まで一度も大腸菌が検出されたことのないきれいな海で、当たる心配もなくバクバク食べられます。※持ち帰り専用です。ここでは食べられません。大氣圏0950-53-3130トビウオの出汁、「あご」を使ったあごだしラーメンが絶品!あっさりとした塩味に、あごだしの深い味が飛び抜けて美味しい。岩崎本舗 本社工場/直売店0120-650-806角煮まんじゅうならここがおすすめ。値段は少々お高いが、それでも満足できるおいしさ。冷凍もあるので、全国発送可能です。千々石観光センター・千鶏カステラ本舗0957-37-2254じゃがちゃんというアメリカンドッグの衣に包まれた揚げじゃがいもが有名でおいしい。しかし、ここは高級カステラを安く手に入れることができる。カステラの形を整える際に、必ず端を切り落とす。この切り落としたカステラの耳をここで格安で購入できる。大人気で午前中には売り切れるので気をつけて。ちなみに本当に高級なカステラは文明堂総本店で購入できる。贈答用の桐箱入りのカステラなども購入可能。天天有095-821-1911長崎県民はちゃんぽんは自宅で作るもの。「おすすめは?」と聞いても「リンガーハット」と返ってくる(笑)そんな中で私個人のおすすめはここ天天有。大将がとてもフレンドリーで、おそらく中国出身の店員さんのカタコト日本語がなんとも愛らしい(笑)ちゃんぽんは麺の硬さが私好み(少し硬め)でスープもあっさりとしていながら、出汁が効いていてとても美味しい。地元密着の中華屋さんといった感じで私は大好きです。口コミで「汚い」とか「イマイチ」とあるが、それを求めるならどうぞ観光客向けの高級中華のお店へ行かれてください。この人らは大衆中華に何を求めて来てるんだか呆れてしまう。元祖茶碗むし 吉宗(よっそう) 浜町本店095-821-0001江戸時代から続く茶碗蒸しの老舗。柔い茶碗蒸しの中にはゴロゴロいろんな身が入っており、食べ応え十分。加えて蒸し寿司も優しい味でどんどん食べ進められる。昭和初期に建てられた建物は大正浪漫を思わせるとてもいい雰囲気。大人気店なので、連休はかなり並びます。(写真見つけられず。)熊屋0950-22-2046伝統の平戸菓子に新たな息吹を吹き込んだ創作菓子を提供しているお店。どのお菓子も綺麗で美味しそうで目移りしてしまう。イートインスペースもあるので、お茶と一緒にゆっくり過ごしてください。(コロナ禍なので、イートインスペースが開いているか不明)(写真見つけられず。)●温泉情報小地獄温泉館0957-73-3273硫化水素の匂い漂う白濁した温泉。湯船には微小の湯の花が浮いておりとてもいいお湯。休憩所も広くて快適。天然温泉 YUYU SPA095-898-2202海沿いにあるリゾート温泉。塩分たっぷりのお湯は体にも傷にも染み渡る〜。●観光スポット長崎はどうしても歴史や戦跡中心の案内になります。南山手町長崎さるく旅にうってつけの丘。景色も最高、立ち並ぶ建物の雰囲気も最高、お腹が空いたらグラバー通りで色んな名物が食べられる。日本二十六聖人記念館095-822-6000キリスト教弾圧の歴史を学ぶことができる。しかし、キリスト教側からの視点でしか説明されていないため、やや偏った認識になりがち。だが幕府が行った残虐な弾圧の内容は知っておいた方が良い。がまだすドーム (雲仙岳災害記念館)0957-65-5555雲仙岳の平成大噴火の被害を伝える記念館。当時の噴火による土石流や火砕流の被害を伝える。土石流被災家屋保存公園平成大噴火により発生した大規模な土石流。その土石流により埋没した家屋を保存してある施設。土石流の凄まじさを体感できる。(データ破損のため、写真なし。)ガラスの砂浜0957-52-3605大村湾の水質改善のために、海岸に砕いたガラスを敷き詰めている。光を反射し、キラキラと輝く砂浜は綺麗の一言。ただし水質改善にはあまり効果がなく、さらに水中生物が住み着かないことで、余計水質を悪くしているという話もある。旧佐世保無線電信所(針尾送信所)0956-58-2718山の中に突然現れるコンクリートの巨大な3本の柱。太平洋戦争の際、真珠湾攻撃の暗号送信を経由した電波塔と言われている。外観も迫力があるが、塔内部も見応えあり。また同敷地内にある電信所や電源室も見応え満天。無窮洞0956-59-2003太平洋戦争の最中、地元の学生や教員の手によって掘られた防空壕。とても手彫りとは思えない綺麗な作りであり、防空壕とは思えない完成度。魚雷発射試験場跡太平洋戦争直前、真珠湾攻撃のために新型の魚雷開発が必要であった。その実験を行なっていた試験場跡。レンガとコンクリートで作られた建造物は戦跡とは思ぬほどの美しさ。また同敷地内にある圧縮ポンプ室跡は「バケモノの子」の劇中に登場する稽古場のモデルとなっている。石原岳森林公園(石原岳堡塁)0959-37-0064明治時代に建造された堡塁跡。横須賀の猿島をコンパクトにした感じでとても雰囲気がある。海上自衛隊 佐世保史料館 (セイルタワー)0956-22-3040海上自衛隊の資料館。7階建のビル全てが資料館という好きな人は半日がかりで見て回れる規模。私も大好きで、5回ほど訪れている。田平天主堂0950-57-0254レンガ造りの天守堂。ここは内部のステンドグラスが素晴らしい。コロナ禍になってから、見学は中止されているが、再開された際にはぜひ訪れてほしい。(ステンドグラスをはじめ、内部は撮影禁止)平戸ザビエル記念教会0950-22-2442平戸の丘にある美しい教会堂。コロナ禍ため、内部の見学はできない。外側のみ見学可能。長崎の情報は以上になります。長崎は四季を通してさまざまな風景を見せてくれます。ランタンフェスティバルや牡蠣祭りなど、私もよく訪れます。さて、これにて九州ツーリングガイド終了となります。この情報を参考に、思い出に残る九州ツーリングを楽しまれてください♪ここまでの情報以外にも、ご質問等あれば可能な限りお応えしますので、コメント欄に書き込みをお願いします。それにしても、紹介してたら自分自身が旅に出たくなってしまった(笑)#九州観光 #長崎観光 #ツーリング #九州ツーリング #長崎ツーリング #快走路 #絶景 #観光スポット #九州グルメ #長崎グルメ #温泉 #居酒屋 #酒
2022年09月01日
閲覧総数 934
-
7
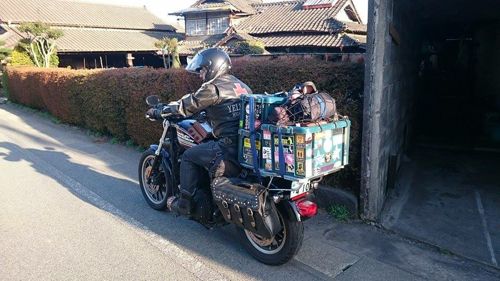
MT-10ツアラー化計画 〜パニアケース編〜
私がバイク旅を送る上で欠かせないもの。それは「過積載」です!バイクにそんなに積んで大丈夫か!?と不安になるような過積載!からは、もう卒業したので(笑)今回は、前相棒883Rの積載を再現します。まずは、MT-10にサイドケース装着!さすがに革のサイドバッグは装着不可ですから。今回選択したのは純正opのソフトケースではなく、GIVIのハードケースV-35を選択。お高いですが、安全安心にカッ飛ばしたいもので(笑)ナレッジの少ないMT-10のパーツ。そんな中でも、GIVIにサイドケースのライナップがあって助かりました。しかし!ここで想定外の事態発生!ケース自体は国内に在庫があったのですが、バイクに装着するためのステーが国内在庫0。いろんなところに問い合わせても、「納期は3〜5ヶ月になります。」とのこと。がっでむっ!そんな中、たどり着いた代理店デモンション3おっと、これはデモリションマンでした。この代理店はヨーロッパ系のパーツ取り扱いで有名で、問い合わせてみたところ「海外在庫ですが、1ヶ月で納入可能です。」と神のお言葉がっ!早速発注して、見事1ヶ月で届きました!ちなみに、サイドケースは密林で47000円。ステーは38000円です(笑)ステー高すぎっ!!これに加え、リアキャリアも同時に発注したため、ステーだけで50000円オーバー(苦笑)とんでもない出費になりましたが、必要経費ということで^_^;さて、到着したところで早速装着!まずはサイドケースのみつけていきます。ステーがつや消し塗装でめっちゃカッコいい(*≧∀≦*)しかしMT-10はホンマにスペースが無いっ!!右側のボルトを付ける際に、エグザップモーターを押し退けながらじゃないと工具が入らない、というかボルトが入らない^_^;他の箇所も、けっこう苦労しました^_^;そしてサイドケース装着完了!超でかい!超張り出す!(汗)これはすり抜けは絶対無理だぁ(汗)無理にすり抜けするとこんな目に(; ̄ェ ̄)↓恐ろしや・・・。さあ!これで第一段階終了!お次はリアキャリア設置に移ります!続く。
2019年02月22日
閲覧総数 1775
-
8
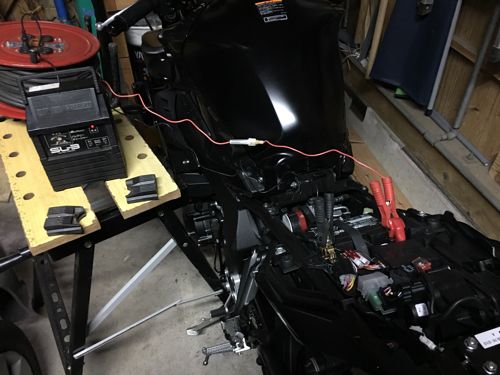
トリクル充電器取り付け
毎日の残業でクタクタなどうも僕です。今日こそは花見に行くぞっ!と息巻いていたのですが、疲労のため布団の魔力に勝てず、結局1日中寝て過ごしてしまいました。これじゃイカンと夕方から起きて、トリクル充電器をMT-10に取り付けました(走らんのかい!)バッテリー容量が小さい上に、発電機も小さいMT-10。そこに常時電気を食うセキュリティの影響で、10日乗らなければセルが回らないという新車にあるまじき事態に。乗る前に充電すればいいのですが、こんなに電圧低下が続けばサルフェーションを起こしてしまい、バッテリーの寿命が縮まってしまいます。そこで、K先生のオススメもあって、「トリクル充電器」を導入しました!2りんかんで投げ売り商品をゲット(笑)トリクル充電については、こちらをご覧ください。そんなわけで、早速装着!と行きたかったのですが、この商品にはクリップしか同封されておらず、毎回シートを取り外さなくては充電できない状態。これはシートバッグを装着する上でも手間なので、K先生に教えていただいたデイトナのUSBポートを購入。じつは2りんかんのトリクル充電器は、デイトナのOEM製品なので、デイトナのオプションパーツが使えるのです。早速バッテリーに接続!コードは唯一空きがあったこの部分を通します。そしてそのままタンデムステップの根元にインシュロックタイで固定します。お次はUSBポートを装着!と思いましたが、シート下のスペースが限界で、装着できず。というか、ポートとIC部分が例の隙間を通せずUSBポート取り付けは諦めました。アクションカムで後方撮影するときに取り付けることにしましょう。そんなわけで、充電準備完了!早速充電開始します。このトリクル充電器は充電開始2時間は、サルフェーション除去が可能なパルス充電を行えるスグレモノ!その後、満充電になると勝手にトリクル充電に切り替えてくれるので、繋いだまま放置でOK!これで、バッテリーを気にせず快適なバイクライフを送れそうです♪
2019年04月02日
閲覧総数 2012
-
9
エンジンを長持ちさせる慣らし運転。ハードブレークイン編
先にこの記事をお読みください。→オイルフラッシング編前回で慣らし運転の準備が整いました。それではいよいよ慣らし運転スタートです。※必要物品などは前回の記事を参照。この慣らし運転を行うにあたって必要なことがいくつかあります。1、信号の少ない郊外の道路で行う。できれば適度なアップダウンのある峠道がよい。2、一定速度で走れないため、交通量の少ない時間帯に行う。平日や夜間など。3、かなり神経を使うため、適度な休憩を取る。決して無理をしない。(集中力が下がると、アクセルの開け方を失敗します)4、オイル交換の距離に気をつける。最初は短い距離でのオイル交換になるため、往復の距離を計算し、オーバーしないよう気をつける。都会にお住みの方には難しい条件かと思いますが、挑戦される方は頑張って環境を整えてください。それではハードブレークインスタート。内容は私が参考にさせていただいたホットワイヤード様のHPから引用させていただいています。※慣らしの間は「急」がつく動作は全て避けてください。アクセルをしっかり決められた回転数まで開けますが、あくまでジワーっと開けていきます。エンジンブレーキをかける際も、急にアクセルをオフにせずにゆっくりアクセルを戻してエンジンブレーキをかけてください。「グワー⤴︎⤴︎!ガッ!ブゥーン⤵︎⤵︎!!」ではなく、「ブワァァァーン⤴︎⤴︎!ブゥォーン⤵︎⤵︎!」のような感じ(語彙力)1、しっかり暖機運転を行う。2、走り出し数キロは優しく全てのギアを馴染ませるようにシフトチェンジする。2、最初の慣らしは15kmまで。4000回転まで(※)のようなアクセルワークで走らせます。エンジンを常に加速しているか減速しているかの状態にすることが重要です。減速も可能な限りエンジンブレーキを使用し、エンジンに負荷をかけてください。3、15km走行したら一旦エンジンを止め、20分ほど休めます。エンジンの金属部分の熱膨張による誤差を防止するためです。4、休憩の後、15km走行します。回転数は5000回転まで。走り方は(※)と同じです。この後オイル交換なので、オーバーしないよう気をつけてください。5、オイルとオイルエレメントの交換。ホットワイヤード様のHPでは、「オイルの中に鉄粉が確認できる」とありましたが、私の時はあまり見られませんでした。おそらく最初のオイルフラッシングが効いているのではと考えます。6、50km走行(総走行距離80km)。回転数は6000回転まで。走り方は(※)と同じです。7、2回目のオイルとオイルエレメントの交換。やはり私の場合は鉄粉は少量しか確認できませんでした。8、220km走行(総走行距離300km)。回転数は7000回転まで。全てのギアで7000回転までしっかり回してください。ここにきて一気に距離が増えます。一度に走り切る必要はありません。時間のある時にじっくり慣らしていきましょう。走り方は(※)と同じです。9、3回目のオイルとオイルエレメントの交換。10、200km走行(総走行距離500km)。回転数は(8)と同じく7000回転まで。走り方も変わらず(※)と同じ。11、4回目のオイルとオイルエレメントの交換。12、300km走行(総走行距離800km)。ここにきて回転数は9000回転までとなります。怖いです、マジで死ねます。ここらへんからは一般道ではなく、サーキットで行ってください。一般道で行う方は自己責任でお願いします。本当に危険ですよ。サーキットで慣らし運転を行う場合、各サーキットのレギュレーションに従って行ってください。13、5回目のオイルとオイルエレメントの交換。14、200km走行(総走行距離1000km)。リミッターが無い車両はレッドゾーン近くまで回してください。私は怖くて回せませんでした。15、1000km終了後、購入店にて初回点検とオイル、オイルエレメント交換。16、本来ならまだ慣らしを続けた方がいいそうですが、私はここで慣らし終了。1000kmの慣らし運転は、メーカーが推奨している最低基準です。とはいえ、サーキットでコンマ1秒を争うような走りをしない限り1000kmまでで慣らし運転は十分と考えています。あとはオイル管理をしっかりすることで、エンジンの調子を保てると。私は初回点検後、ECUチューニングに出してハードブレークインでECUが学習した変わった走りをリセットするとともに、燃調を最適化し、MAPの書き換えも行いました。(ついでにリミッターカットも笑)その後は普通にツーリングに使いました。と言いたいところですが、ハードブレークインの走りグセが抜けずに、しばらくはガンガン開ける走りになってましたね^_^;何はともあれ、この一連の慣らし運転と、3000kmごとのオイル交換でエンジンは絶好調!燃費はもともと悪いので、差はあまり感じませんが(笑)走りは最高の一言ですよ( ´∀`)みなさんも新車を購入されたら、ぜひこの方法で慣らし運転を行い、快適なバイクライフを送られてください^_^
2021年05月17日
閲覧総数 2983
-
10
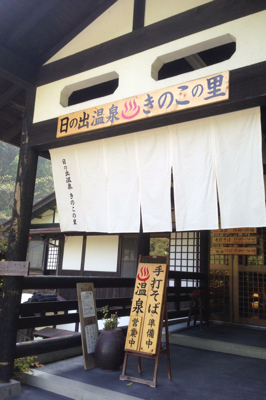
霧島の秘湯 日の出温泉きのこの里
え~、なんだか温泉ブログみたいになってますが(^^;)今回紹介するのは、霧島の南に位置します「日の出温泉きのこの里」です。ここの最高な蕎麦は、度々掲示板で紹介していますが実はここは温泉が素晴らしいのです。炭酸水素塩泉の湯は、濃い成分で体を芯から温めてくれます。しかも、ここからの景色が素晴らしく、眼下には天降川を見下ろす最高の景観となっています。露天もどきはあるのですが、駐車場から丸見えになるので要注意!(笑)入浴料も200円と破格!!かなりお勧めです♪
2013年12月11日
閲覧総数 139
-
11

ヒロシキャンプ、レシピ採用。
お笑い芸人のヒロシ、ネッツ熊本のコラボ企画ヒロシキャンプ×ASOにて私のレシピが採用されました!「絶対インスタ映えしない料理、キャンパーうどん」まずはヒロシさん。体に悪いものを作らせて食べさせてゴメンナサイm(_ _)mでもね、材料と作り方が違うんですよ^_^;ちゃんと作れば、けっこう美味しく出来るんです。そんなわけで、レシピをご紹介!今回採用されたキャンパーうどんは、元々阿蘇び心のオーナーであるじゃけんさんが考案されたもので、日本一周中、少ない食材で、保存もでき、保冷もいらないというコンセプトのもとに作り出されたものなのです。私も日本一周中は、袋ラーメンにスーパーのカット野菜をぶち込むという食事を摂っていましたがキャンパーうどんは摂取カロリーのケタが違う!そして何よりも美味しい!これを教えてもらってから、キャンプ(ほぼ野宿)でよく作っていました。それではレシピをご覧ください。[絶対インスタ映えしない料理、キャンパーうどん]材料うどん 一袋塩こんぶ 10g〜20gチューブバター 10g〜20gしめじ 1/2袋作り方1、しめじの石づきを切り落とし、しめじをほぐしておく。2、コッヘルにチューブバターをひと回し(ビール缶の直径ぐらい)入れる。弱火で熱する。※焚き火台を使う場合、遠火で熱してください。3、バターがグツグツ言い出したら、しめじを入れ炒める。4、しめじがしんなりしてきたら、うどんを入れる。5、うどんの上からチューブバターをひと回し(先ほどより少なめに)入れてしっかり混ぜながら炒める。※汁気がないので焦げ付き注意。6、うどんがほぐれ、しめじと混ざったら、塩こんぶを入れる。※塩こんぶは少し塩辛いかな?と思うぐらいの量が適量7、しっかり混ぜながら炒めたら完成です。レシピは以上になります。簡単でしょ?(笑)これだけ簡単で、美味しい料理なので、調理が苦手なヒロシさんでも大丈夫と思い投稿したのですが、違うポイントが2点。まず、チューブバターではなく、普通のバターを使ったこと。この料理は、チューブバターの味気なさを塩昆布の塩っ気と旨味でカバーするものなのですが普通のバターを使われたんじゃ、バターと塩昆布がケンカしてしまいます。そして、バターにも塩分が含まれているので、結果「味が濃すぎる」「塩辛い」ものとなってしまいます。これはヒロシさんじゃなくて、準備したネッツ熊本側のミスですね〜。そしてもう一点は、塩昆布の量。一応チューブバターを使ってもらうと、あの量でOKなんです。これには皆さん驚かれると思うのですが、少し塩辛いかな?と思う量を入れることで、びっくりするくらい美味しく仕上がるのです。実は私もじゃけんさんから教えていただいた際に「塩昆布入れすぎでしょっ!」と思っていたのですが、食べてみて今までの常識を覆されました。しかし今回のケースでは、普通のバターを使ったことで、塩昆布を減らす必要がありました。たぶん相当塩辛かったと思います^_^;私でも食べれないくらい。そりゃあスタッフの方と譲り合って当然です(笑)うーん、ちゃんとしたキャンパーうどんを食べてほしかったなぁ・・・。ちなみに、ネッツ熊本側でも実際にキャンパーうどんを作って試食し「イケる料理」として選定したそうです。〜以下ネッツ熊本様より〜ヒロシさんの調理上、レシピ通りの再現が出来ずかずやん様が意図していた料理とおそらく、別物になってしまったと思います。ご了承ください。(事前にスタッフが調理し、イケるレシピとしてのセレクトだったのですが・・。)ーーーーーーーーーーーーーーーーーーーーーーーこの通り、他の方でもちゃんと作れば美味しいんです(笑)さて、レシピ通りに作ればびっくりするくらい美味しいキャンパーうどん。しかし、糖質・脂質・塩分のカタマリなので体にはすこぶる悪いです(笑)ヒロシさんのおっしゃるとおり、1週間食べ続ければ何らかの病気になると思います(笑)これを作られる方は、何人かでシェアして食べることをお勧めします。美味しくてガツガツ食べてしまいがちですが、1人で全部食べると若干胃にきます(笑)白湯に癒されたヒロシさんへお詫びとして以下の簡単メニューをお届けします。[鶏のせせり肉のにんにく醤油焼き]材料鶏のせせり肉100gにんにく3片さしみ醤油ハウス香りソルト(ガーリック&オニオン)作り方序章、ご飯を炊いておく(笑)1、スキレットに油をしく(オリーブオイル推奨)2、薄くスライスしたにんにく3片を全部入れる。3、にんにくがきつね色になったら、せせり肉を入れる。4、せせり肉の表面に火が通った時点で醤油をふた回し。5、せせり肉が、ぐにゃっとした感じから、弾力をもつまで炒める。6、香りソルトで味を整え完成。これも簡単でしょ?(笑)肉好きなヒロシさんにはこちらの方が良かったかなぁ〜。でもこんなありきたりなレシピじゃ採用されなかっただろうなぁ(笑)次回のヒロシキャンプ×ASOでは、美味しいお肉を満面の笑みで頬張るヒロシさんが見たいです^_^
2019年01月17日
閲覧総数 504
-
12
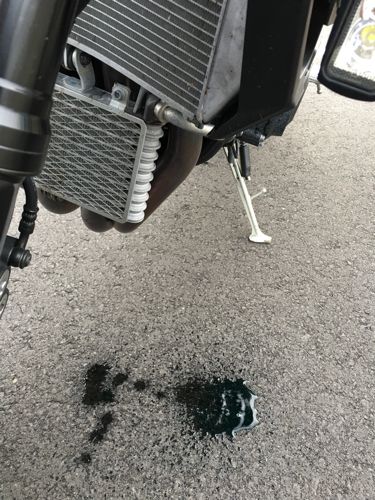
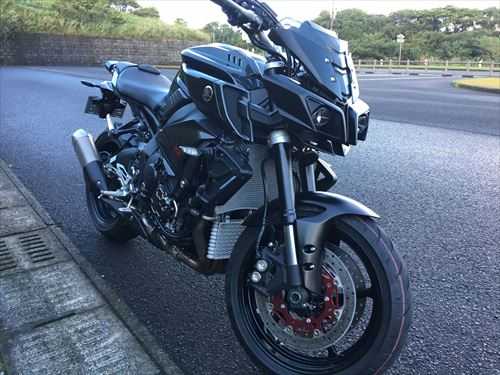
MT-10、スタントケージ取り付け。
先日、キャンプ場で転がして、ラジエーターが逝ったMT-10。柔らかい芝生の上にゆっくり転がったのにも関わらず、ラジエーターが割れるという重傷を負いました。ということは、アスファルトの上で立ちゴケなんかした日には、大ダメージ必須。立ちゴケの度にラジエーター交換というとんでもない事態になってしまいます。まぁ、先日つけたフォグランプの影響も大きいのですが。そんなわけで、これからも安心安全に旅を続けるために、車体保護を行います。スライダーなんかでは、転倒や勢いよく立ちゴケした際にフレームをやってしまいますので、今回はボツ。そこで選択したのが、「スタントケージ」です。これは元々、スタントやバイクパフォーマンスを行う際に、車体に深刻なダメージを生じさせないために開発されたものでその性能はお墨付き!それをMT-10に装着します。MT-10のジャンルはストリートファイター系なので、海外ではこいつでパフォーマンスをする方が非常に多い!ようこんな高いバイクでやりよるわ・・・。ってかスタントケージつけてないやん(汗)気をとりなおして。このように海外で人気のあるMT-10。そのパーツも海外製が非常に多いのです。先日取り付けたパニアケースのホルダーもイタリア製でしたし。早速検索をかけると、出てきました!しかもAmazonで(笑)さすが密林です(意味不)早速購入と思ったのですが、値段を二度見。えっ!?この鉄パイプのカタマリがこんなにすんの!?今のMT-10に付けてるパーツで一番高い・・・。しかし背に腹はかえられぬ。出るであろう夏の棒茄子に期待して、購入します!そして業者からメールが来ましたが、なんとこの商品、露西亜からやってくるそうです( ゚д゚)USAのセキュリティ。ITAのパニアホルダー。そして、RUSのスタントケージ。なんと国際色豊かなバイクなんでしょう(笑)もうなんでもありですな(笑)そして約5週間で商品到着。いかついですなぁ〜^_^;そしてやたらと重い^_^;これでバイクを守ってくれるのだから、重いのはしょうがないですね。このスタントケージは、ボルトオンでポン付けできるのですが、工具を持っていないので、いつものこーじょーちょーに取り付け依頼。灼熱の工場の中で、試行錯誤してやってくれました!存在感ヤバイ!迫力凄い!もはや軽快なMT-10はどこかへ行ってしまい目の前にあるのは立派なツアラーマシン(笑)これにパニアケースつけたら誰もMT-10とは思うまい(笑)さて、スタントケージの取り付けが完了しましたが、今回はこれで終わらない!このスタントケージに「フォグランプ」「マルコホーン」を取り付けます。ここなら立ちゴケしても車体にダメージは無いし、幅が広がる分、視認性もアップします(車検はグレーゾーン)ちなみにフォグランプ取り付けは私個人でやっています。ショップはこのことを知りませんし、車検が怪しいカスタムは基本やりません。装着していざ試走してみたところ、取り付け位置があまりにも低すぎて、コーナーの先を全く照らさない。そのくせ、対向車へ素晴らしいほどの目潰しをかます。これじゃあフォグを付ける意味が無いです。そんなわけで、フォグランプについては原点回帰。ラジエーター横に装着します。配線を延長したから、取り回しが面倒・・・。以前とは違って、スタントケージが張り出してるので倒れてもフォグがラジエーターを押すなんてことはありません。MT-10 フォグランプ点灯そして今度はホーン取り付け。スタントケージの内側で、あまり目立たないところにホーンを差し込んで行く。なんか知恵の輪みたいでした(笑)そしてうまく収まったら、先ほどのフォグランプ用に作成したステーを使用して取り付けます。左右とも若干ラジエーターのパイプカバーに干渉しますが、間にゴム板を挟み外装用両面テープで固定したので大丈夫と思われます。場所が決まれば配線をば!MT-10の純正ホーンは、シングルなので、ホーンハーネスを組み込んで装着します。これで原付ホーンともオサラバ( ´∀`)MT-10 ホーン比較さあ!これにて令和元年カスタム完了!立派なMT-10ツアラーが爆誕しました(笑)今年の夏はこれで走りまくるぞ〜!!#YAMAHA #ヤマハ #MT-10 #カスタム #スタントケージ #フォグランプ #LEDライト #アストロプロダクツ #マルコホーン #スーパーギガ #ホーン交換 #ツーリング #立ちゴケ #ラジエーター #壊れる #故障 #転倒
2019年07月26日
閲覧総数 6231
-
-

- F1ニュース・レース
- 鈴鹿市 亀山市 吠え蒼空中!
- (2024-08-11 14:21:11)
-
-
-
- 道の駅めぐり
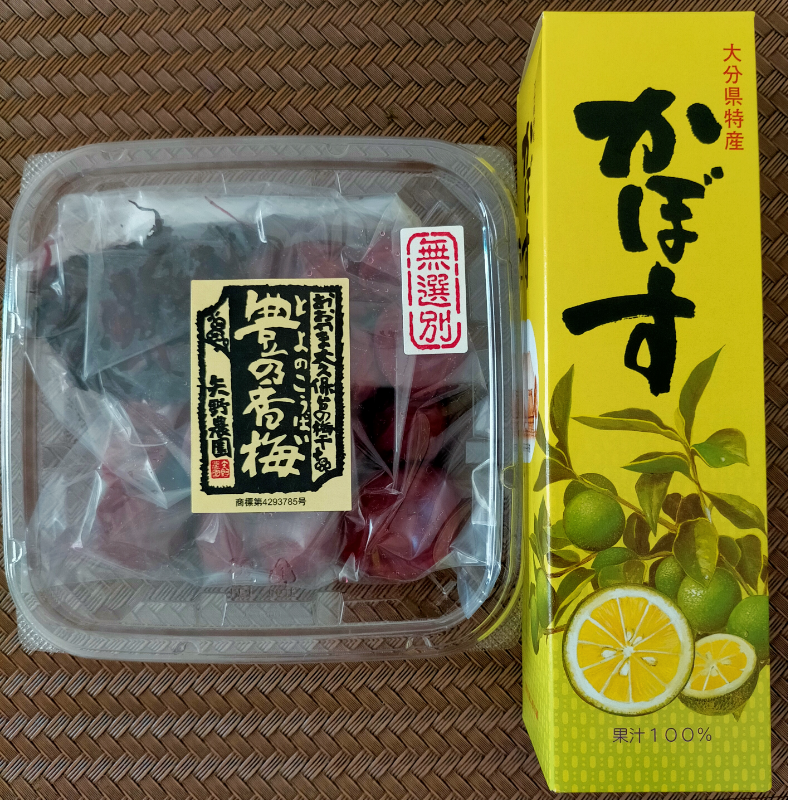
- 熊本 【道の駅 小国】梅干 かぼす果汁
- (2024-08-29 08:28:12)
-
-
-

- BMWのある暮らし
- BMW X4 xDrive28i M…
- (2022-10-30 12:49:52)
-


