

[腕時計] カテゴリの記事
全12件 (12件中 1-12件目)
1
-
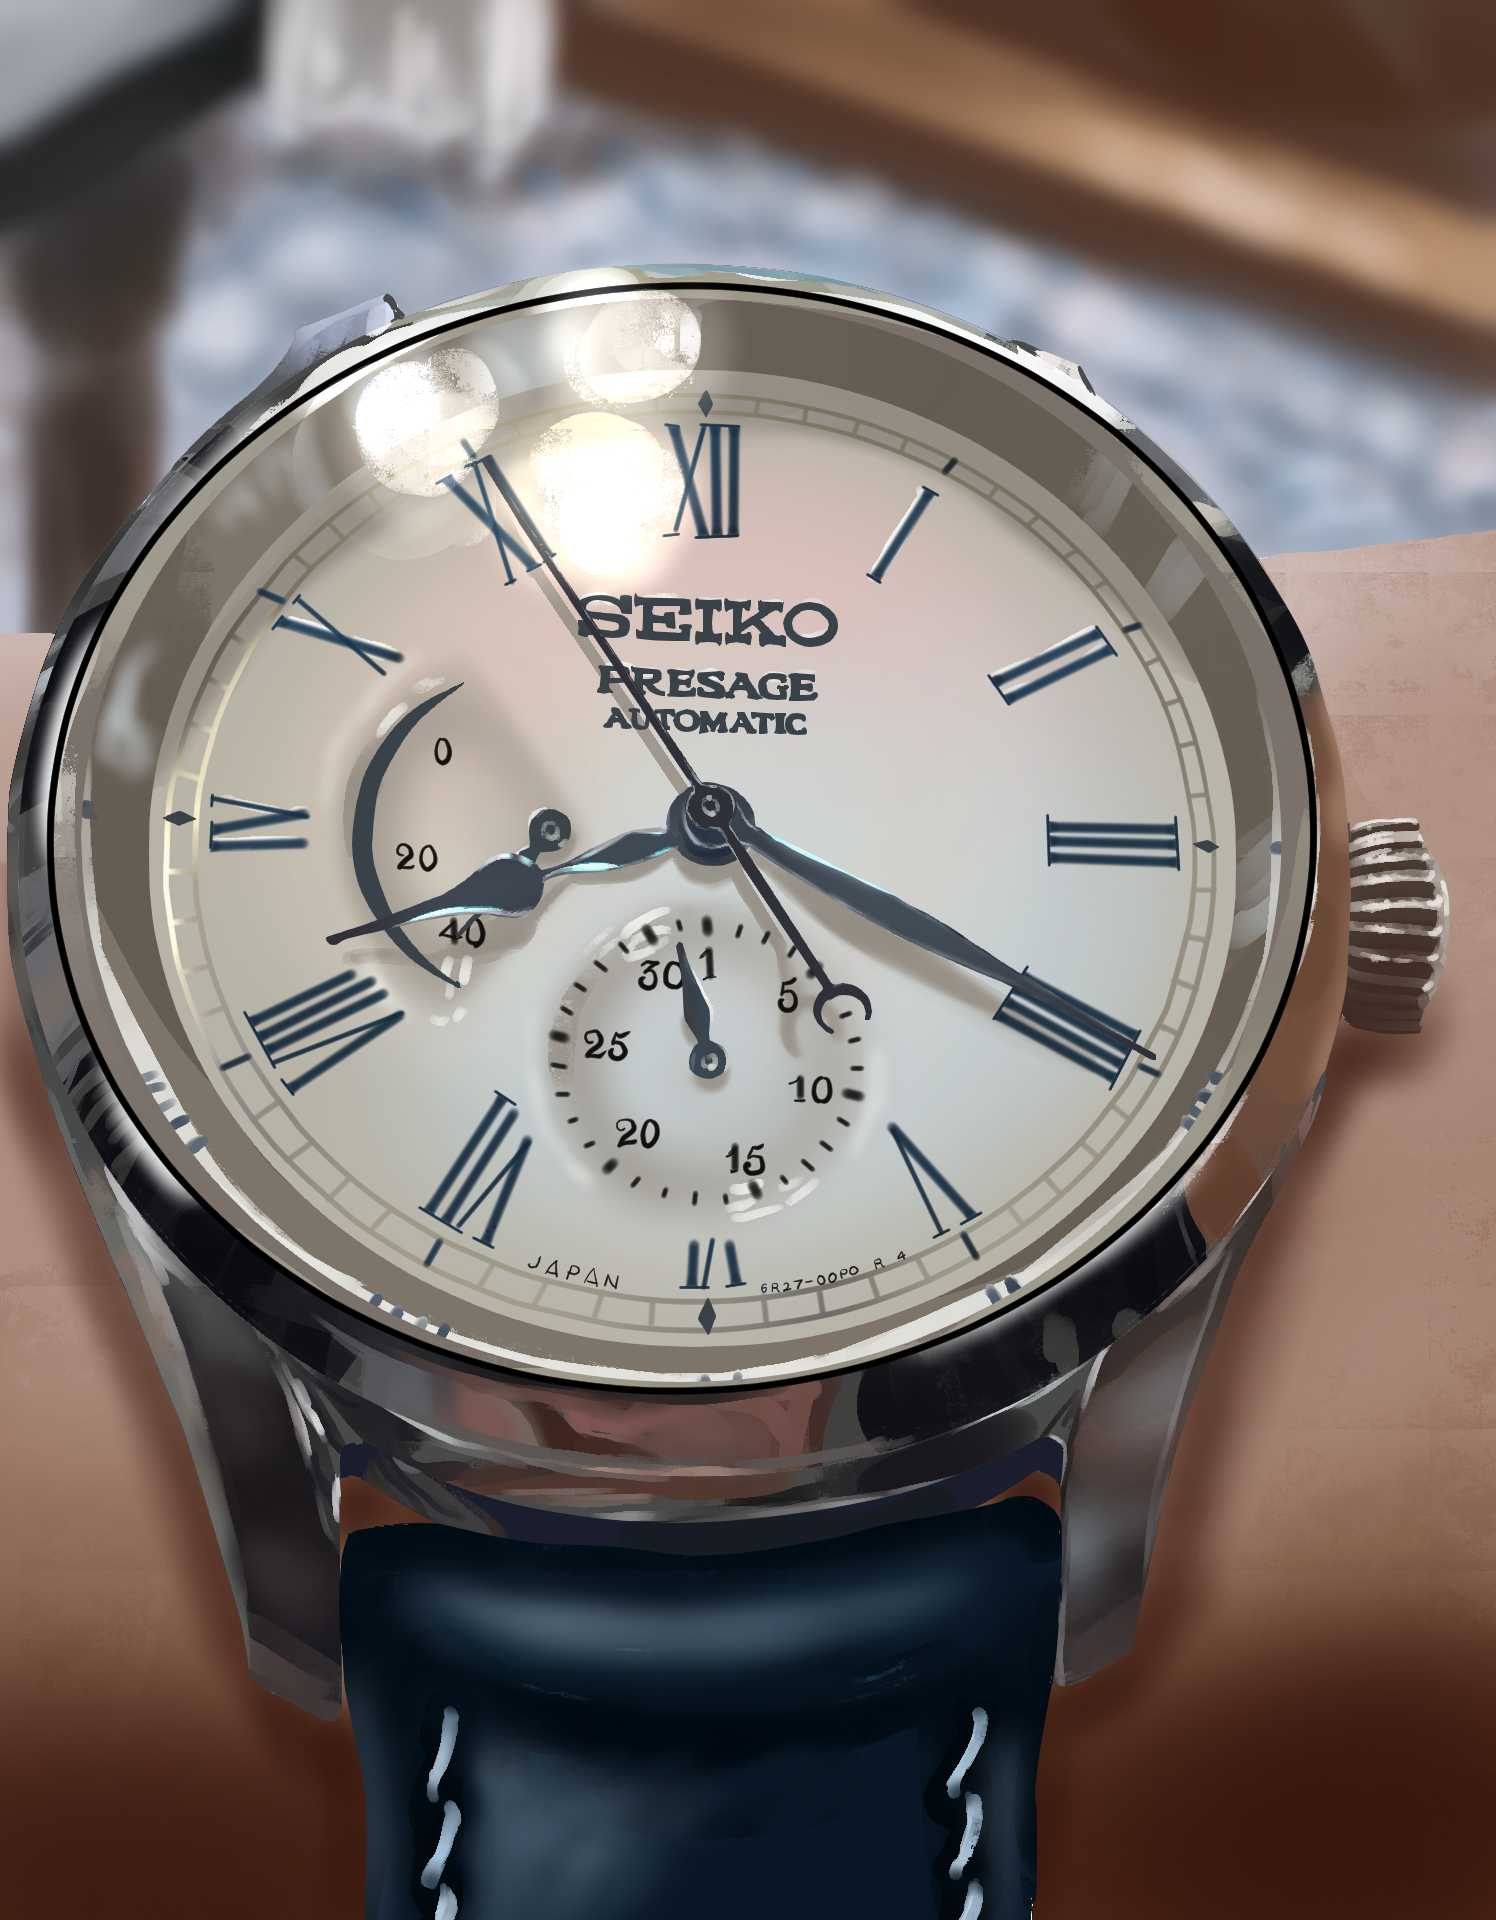
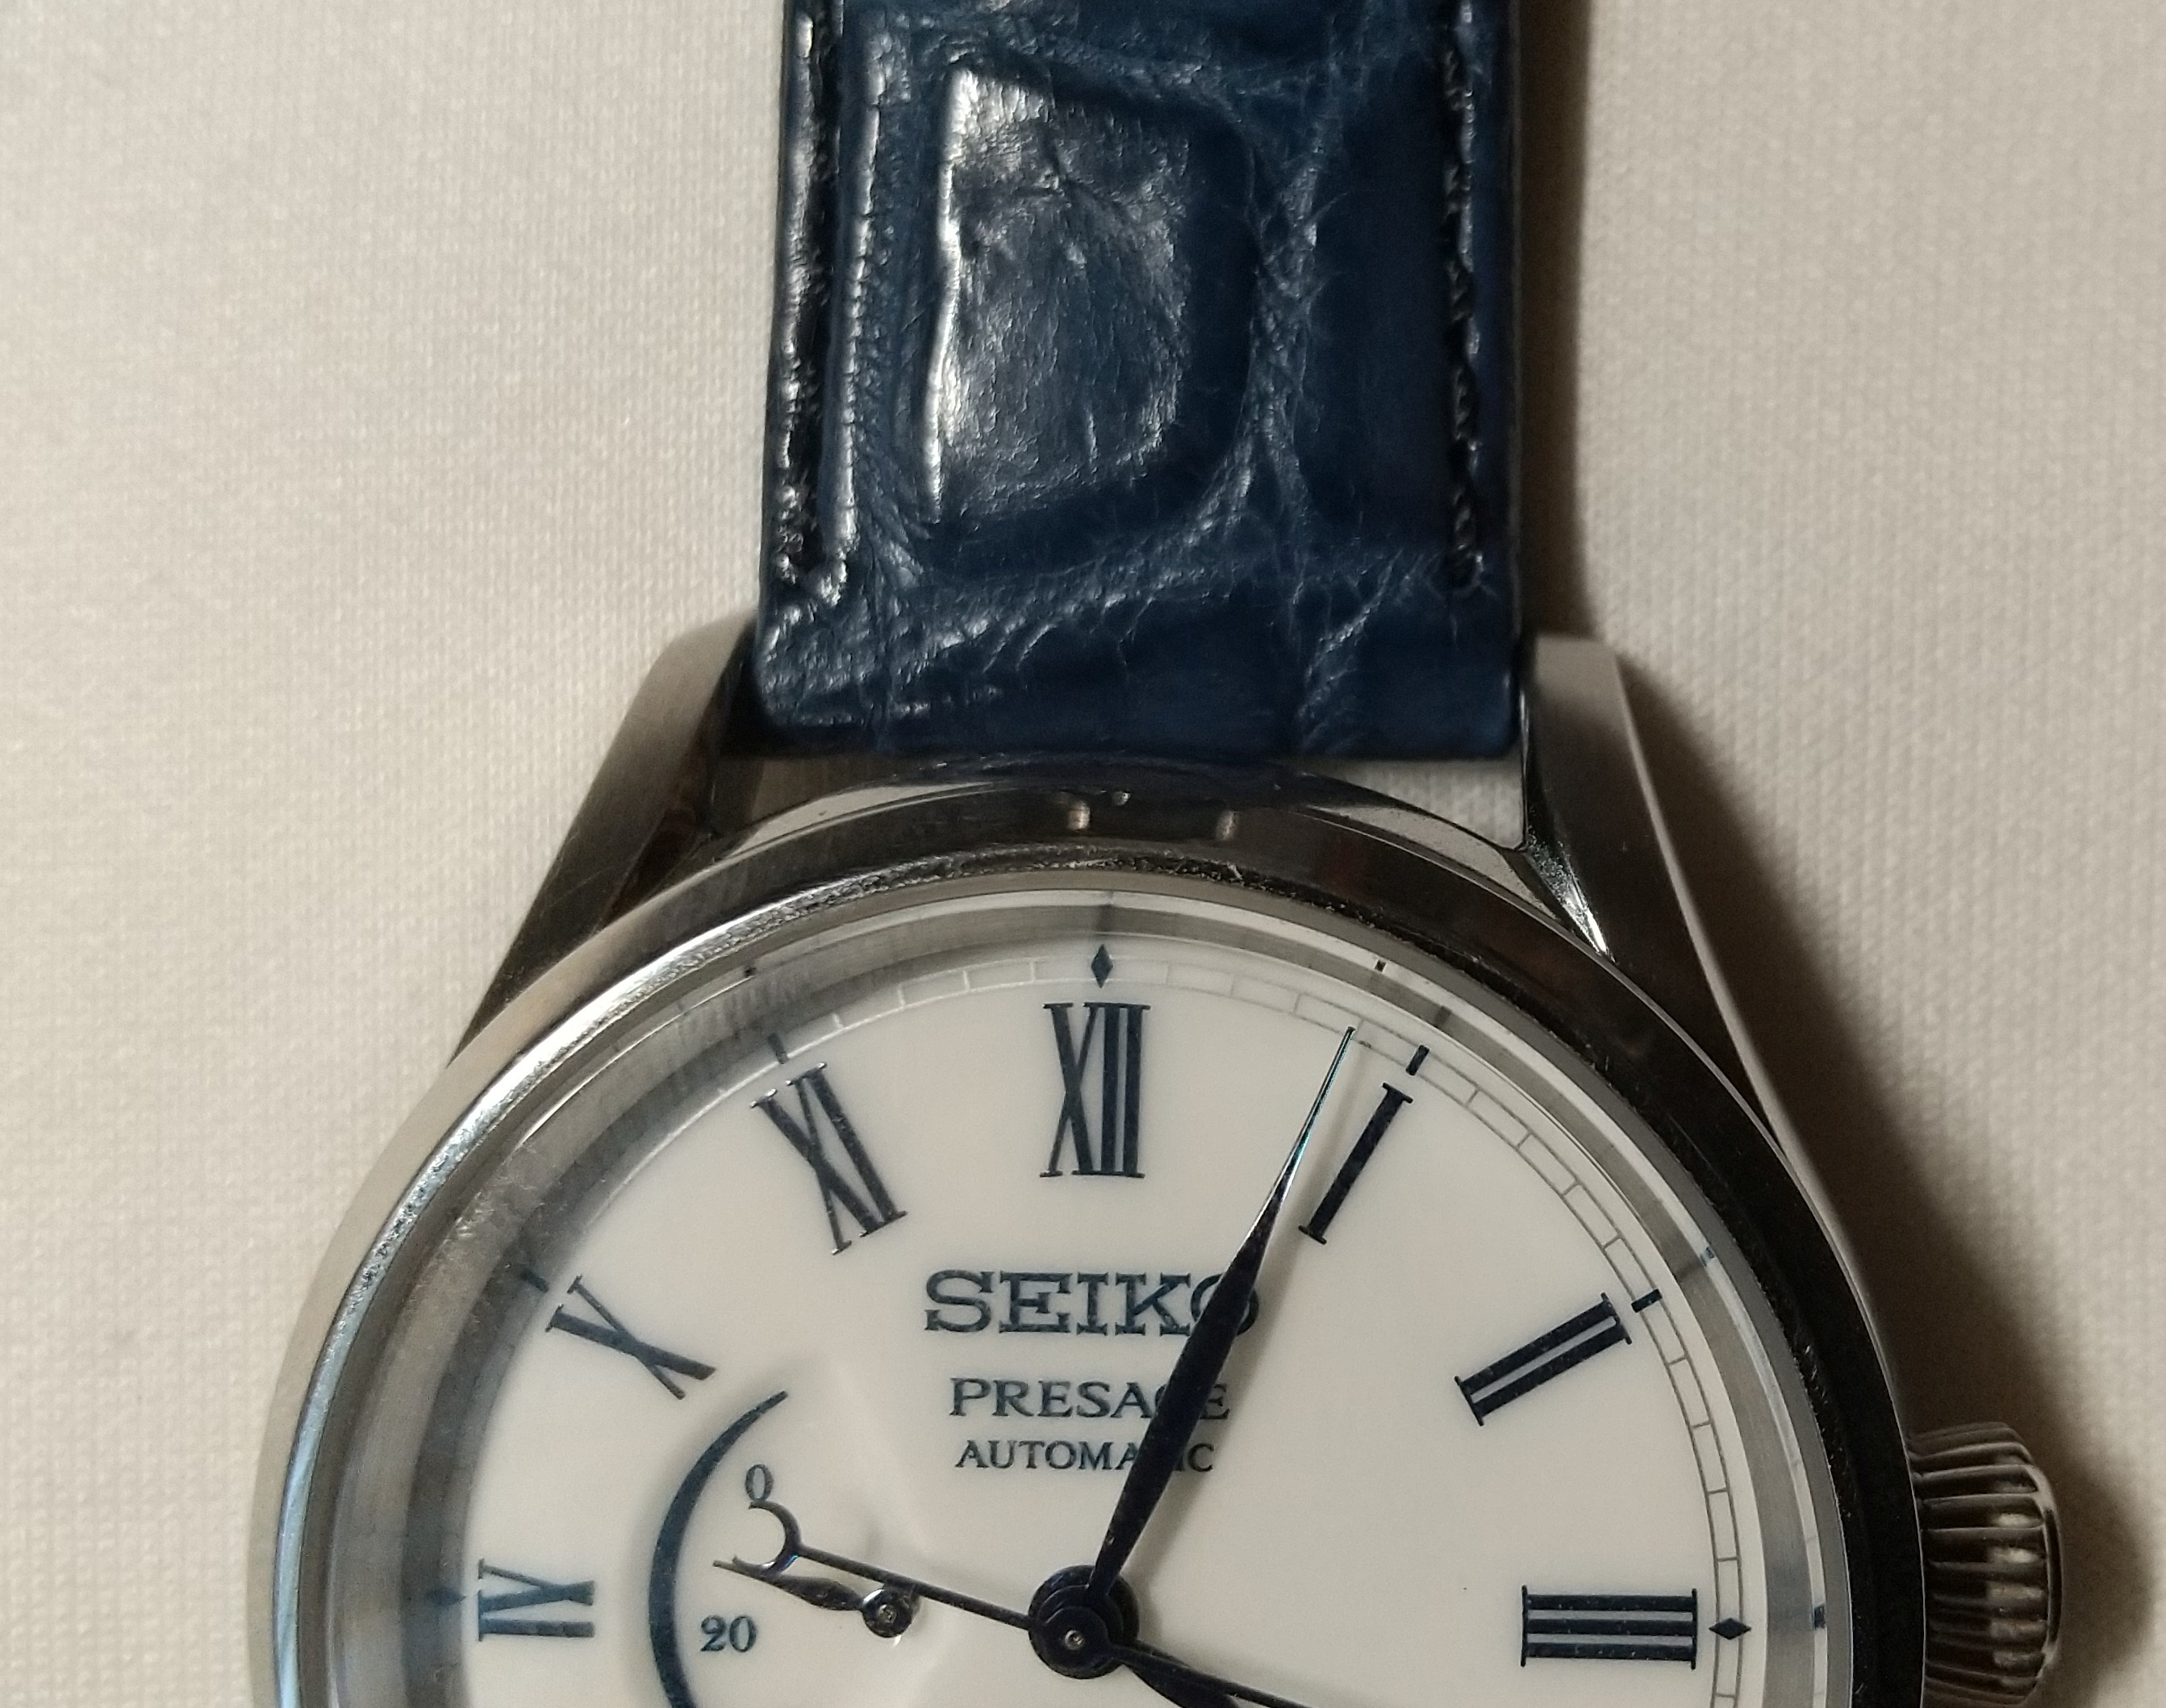
セイコープレサージュ
セイコープレサージュの絵をクリスタで描いてみました。有田焼の文字盤のつやつや感がちょっと表現できた気がします。
2022.07.08
コメント(0)
-
時計ベルトの型押し
セイコープレステージの有田焼バージョンとてもいい感じなので、WENA3でも使えるようにしました。ちょっと気になるのが、革の時計ベルトの場合、取り付け部にちょっと隙間があいてしまいます。これは、ベルトの先端が直線で、時計のケースが円形のためです。メタルバンドの時計の場合、ここにエンドピースがついて隙間を埋めています。せっかく自作するのだからということで、ここをできるだけなくそうということをやってきました。今までのブログでも何度か紹介したと思います。今回は、3Dプリンターで型押しして、確実に取り付け部の隙間を小さくすることと、ベルトの中央部をこんもり盛り上げるようにしてみました。革の材料は、左側の写真です。ベルトの中央部を盛り上げるための、厚めの革も用意しました。3Dプリンターで作った型(右の写真)は、取り付け部を丸くするための部分とベルトの中央部を盛り上げる凹みを設けたものです。革は水に30分程度漬けて柔らくしてタオルで拭き取りました。裏側の革と表側の革の先端に芯材を接着し、折り返し、木の板との間に挟んで型押しします。ベルトの先端に丸いパーツを押し付けて、湾曲させて乾燥します。こんな感じで挟んで、一晩乾燥させます。バネ棒が入りやすいようクリップを伸ばして入れました。乾燥後、型を取り外すと尖端が湾曲して、中央部がこんもり盛り上がっています。残念なことに、型が不透明なので、型押しするとき曲がってしまいました。紫外線硬化の透明樹脂の3Dプリンターで作れば、位置は合わせやすいかもしれません。カットするとき修正することにしました。カット後、サイビノールで接着しました。少しでもずれが目立たないようにクリップで、挟んでみました。決着後ですが、あまりずれの修正はできませんでした。仕方がないので、縫う位置で修正しました。菱目打ちはハンドプレスを用いました。まあ何とか、目立たなくなったような気がします。出来上がりがこちら。WENA3に取り付けました。ケースのカーブに合わせて、時計ベルトが湾曲して当たり、隙間はだいぶ目立たなくなりました。ステッチは、有田焼の白に合わせて、白としました。ベルトの中央部もこんもり盛り上がっていい感じかと思います。改良点としては、バネ棒を通した部分が折り返しているため、少し厚くなってしまいました。次回は、折り返し部を削って、薄くすっきりさせたいと思います。また、型押しするとき、サイビノールを塗って行えば、工程を少し減らせると思います。
2022.01.23
コメント(0)
-
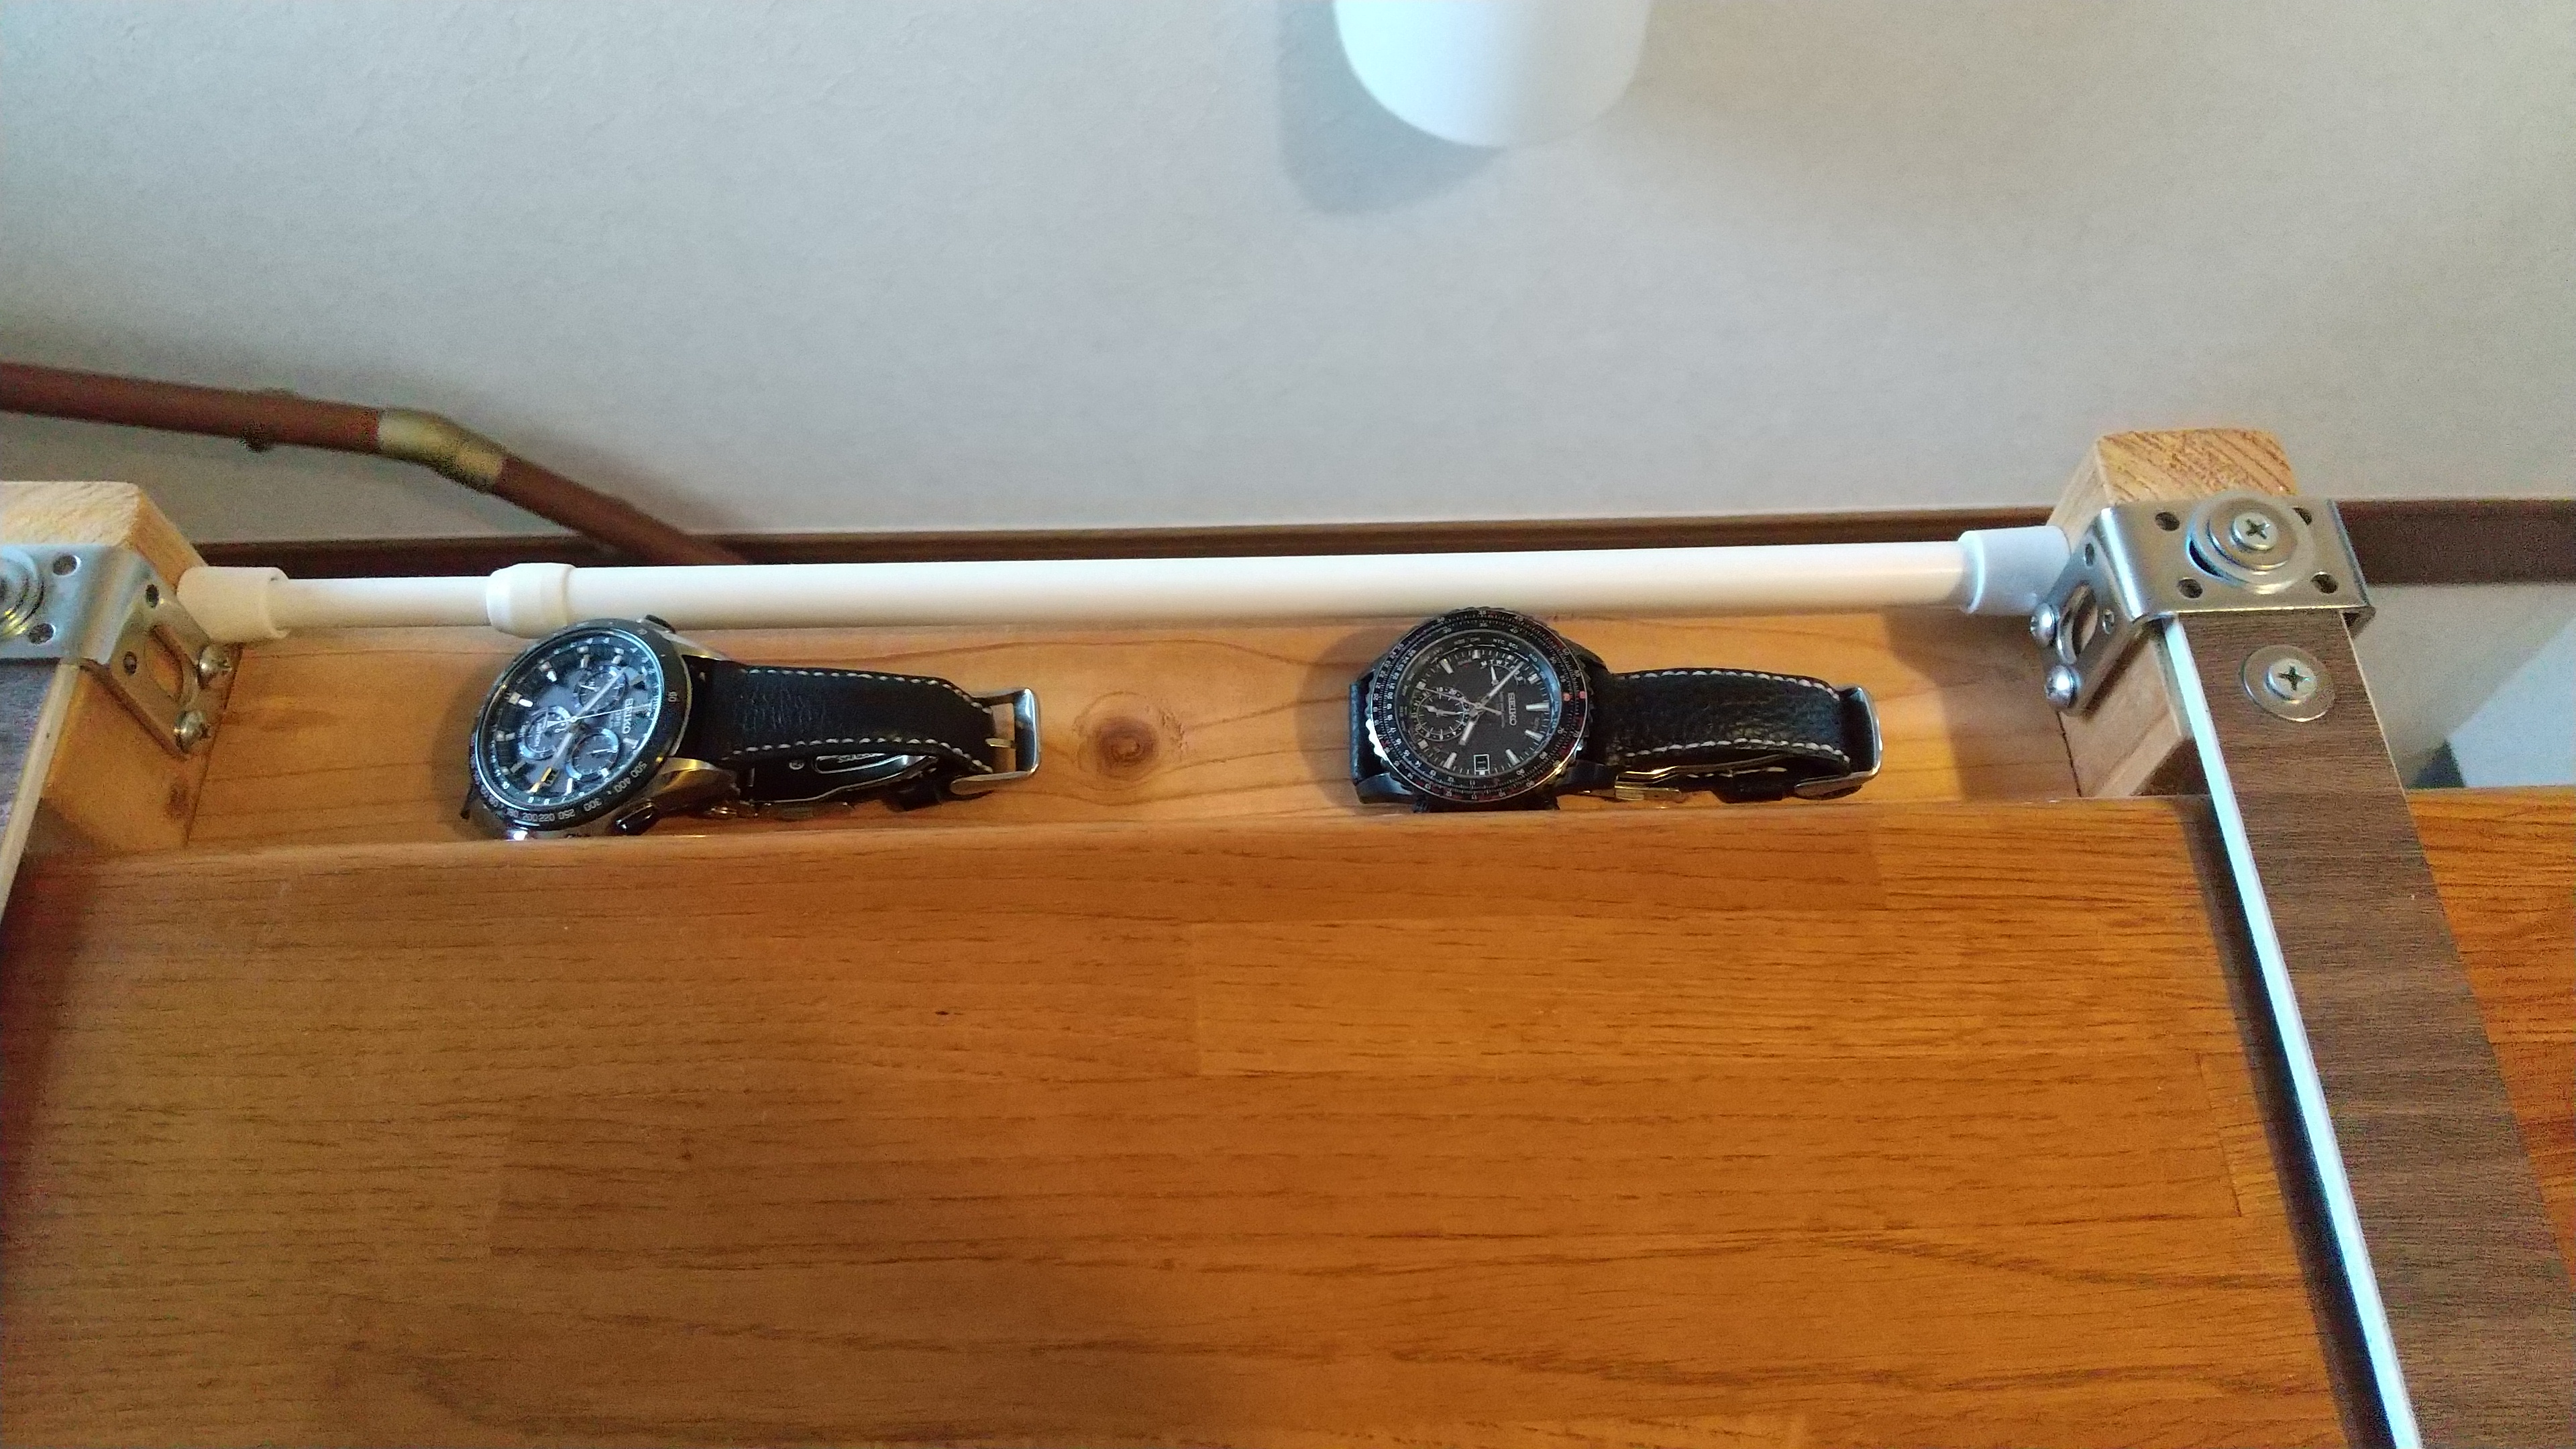
時計置き
ソーラーの腕時計は、ある程度明るいところに置かないと、過放電に至り電池がダメージを受けます。特に、大事に机の引き出しにしまっておくなどは、決してしない方がいいと思います。家にあるセイコーアストロンは、マクセルのCLB937のリチウムイオン電池が入っています。もう一つのセイコーブライツは、パナソニックのMT920の電池が入っていると思われます。セイコーアストロンには、充電状況のインジケーターが付いているので、それが下がらない程度の明るさのところに置いています。そのため、階段の手すりにスペースを作っておいておりました。直置きも何なので、また、3Dプリンターで置き台を印刷しました。こんな感じで、直置き感は、なくなりました。でも、あまり変わり映えはしないような気がします。3Dプリンターが、家にある間にまた何か作ろうと思います。
2022.01.12
コメント(0)
-

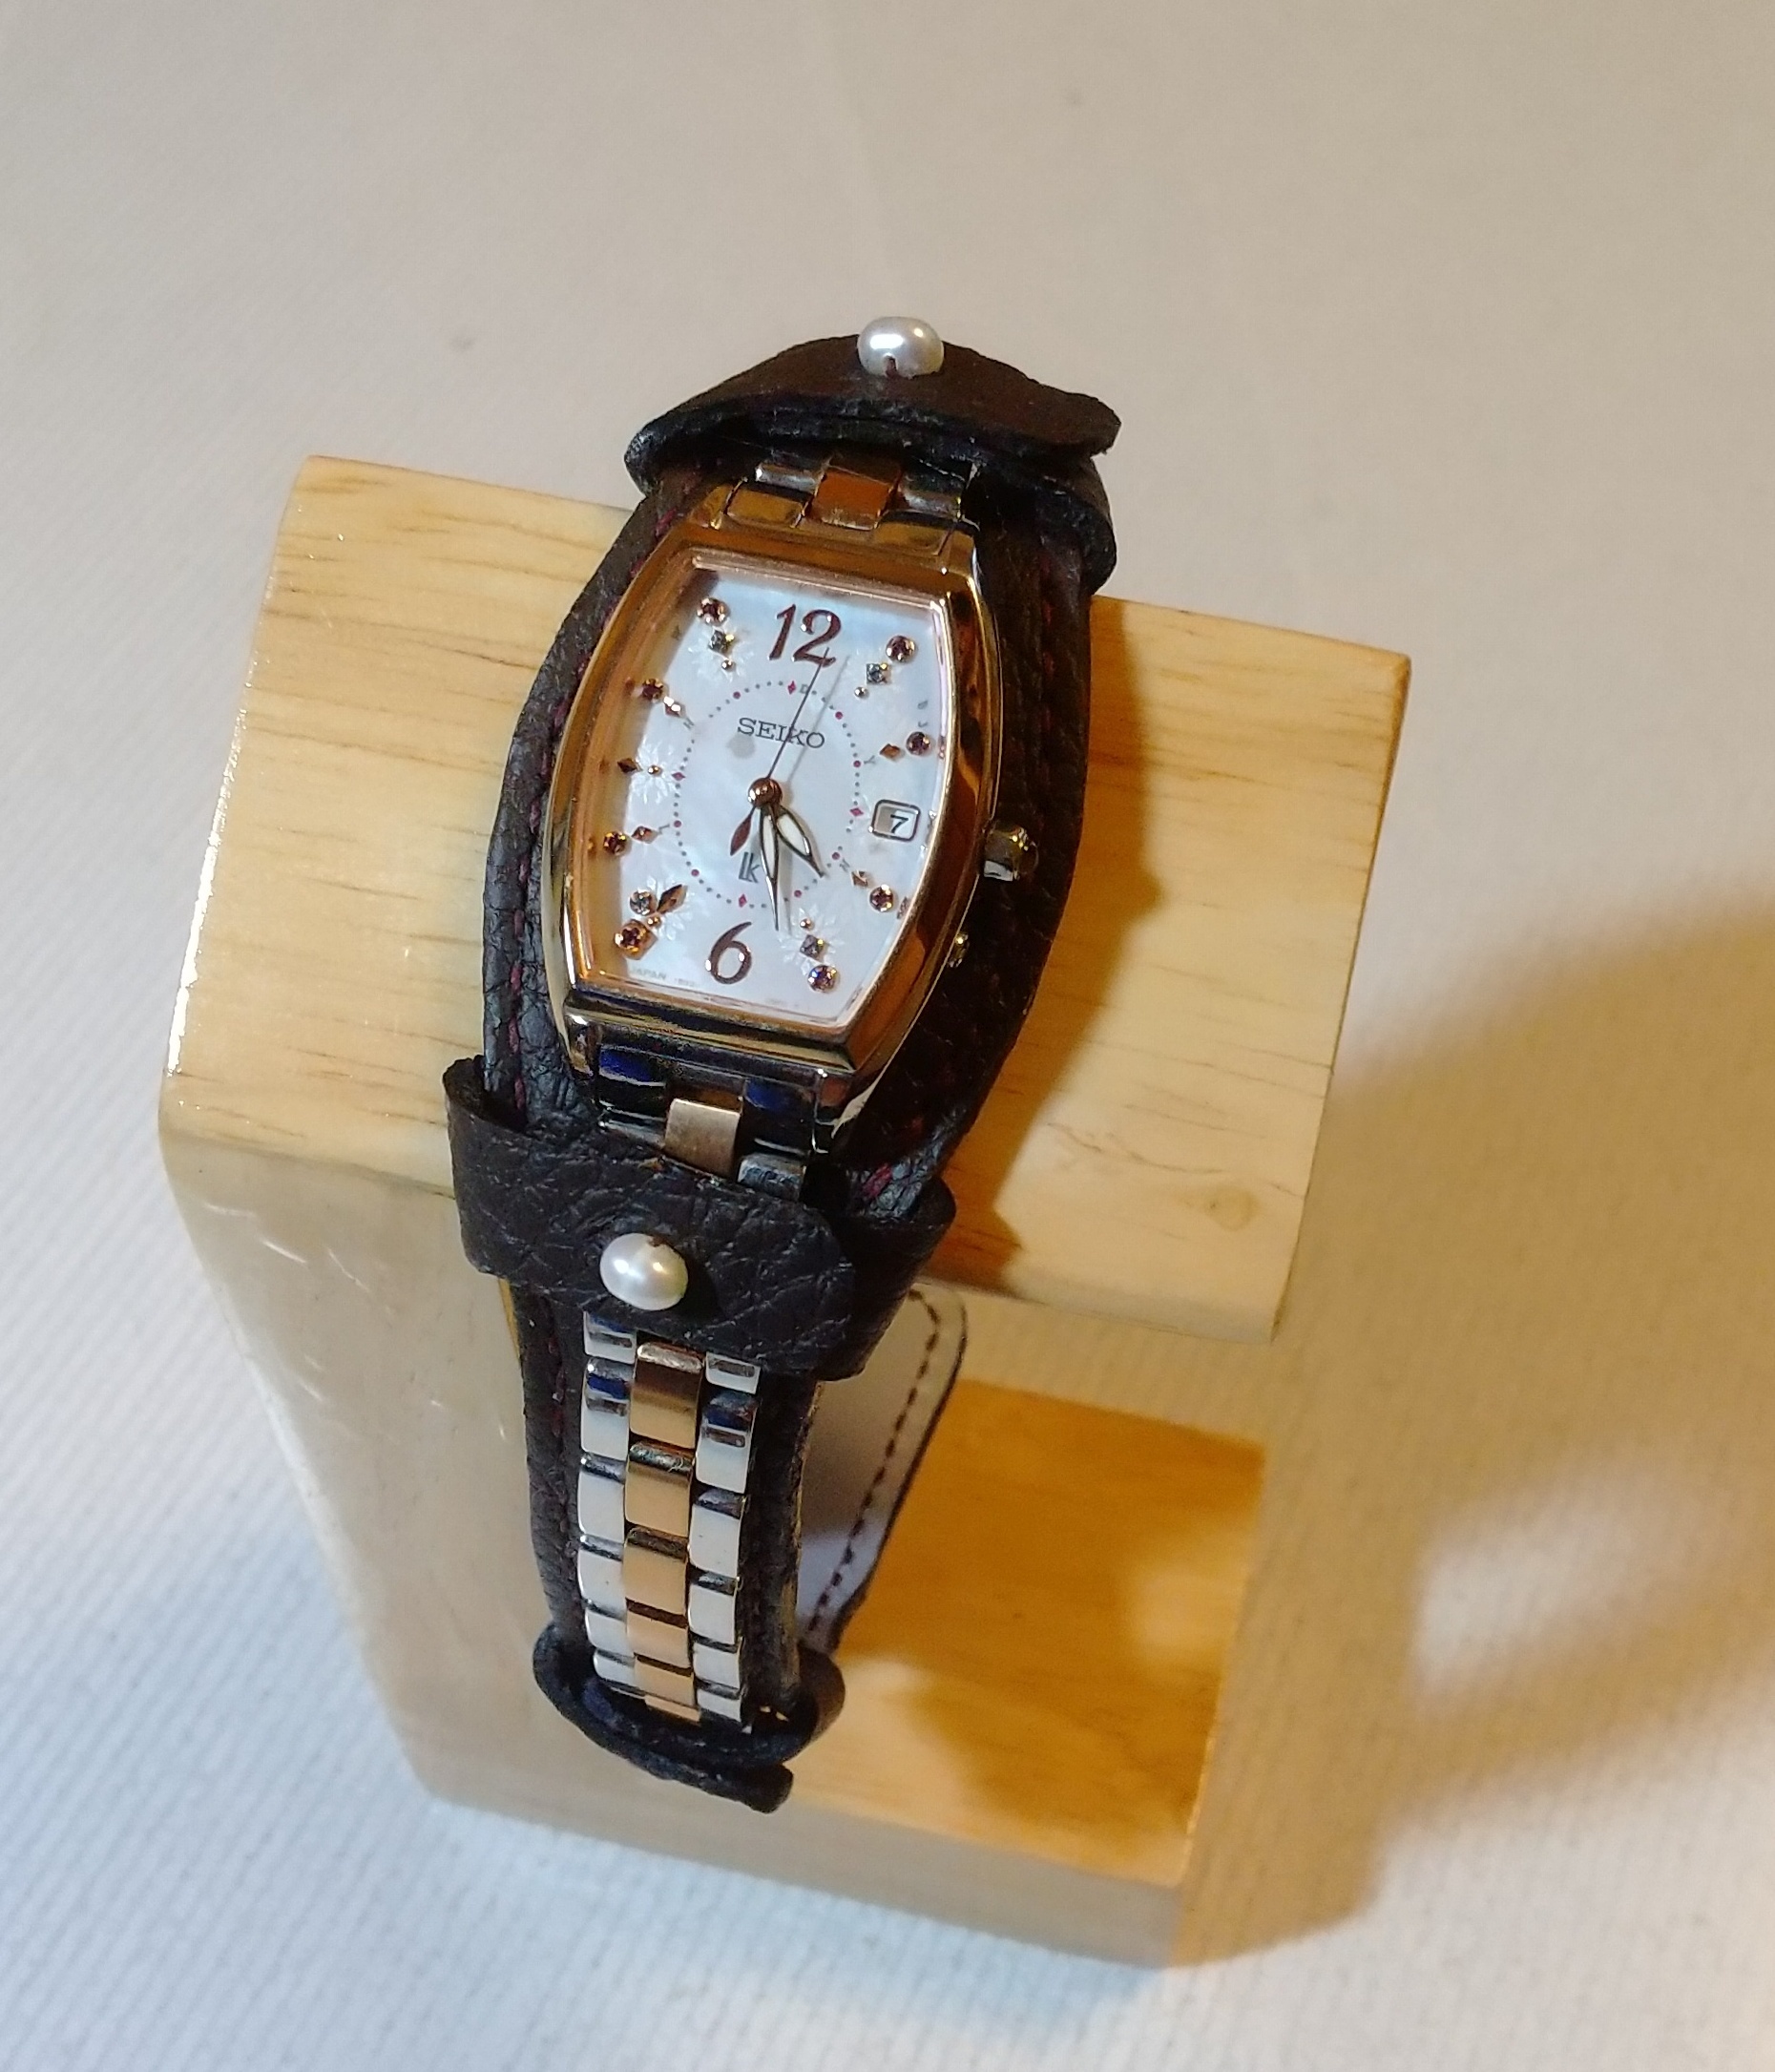
金属アレルギー対策 時計バンド その4
金属アレルギー対策ベルトを何個か作りましたが、家内からだんだん上手になったねと褒められました。今日は、取り付け方法について紹介します。写真1が最初の状態で、セイコールキアに取り付けます。写真2のようにボタンを外します。ボタンを外した状態が、写真3となります。写真4のように時計を取り付けていきます。ボタンを締めていきます。写真5小さなボタンなので、竹串等でちょっと引っ張り出して、しっかり止めます。写真6時計上側のベルトの長さは、ベルトのエンドの近くに調整しました。写真7反対側のベルトは、バックルの金属が隠れる長さにしています。写真8また、革のベルトの分、素手に着けるときより時計のベルトは一コマ長く調整しました。取り付けるとこんな感じになります。取り付け方の動画も下の方にリンクしました。写真10のようなタイプの時計に取り付け可能です。時計のベルトの幅は、10mm以下で取り付け可能です。時計の上側の金属ベルトが約60mm、下側の金属ベルトが約70mmのセイコールキアに取り付けました。セイコールキアと同じような構造の時計をお持ちで、金属アレルギーにお悩みの方、一名だけとなってしまいますが、今回作製した革製の時計ベルトをプレゼントします。時計は家内のなので、差し上げられませんが。時計側のベルト調整ができる方限定となります。手作りなので、あまりきれいではありませんが、それでも使ってみたいという金属アレルギーでお悩みの方は、fromtheforesttown@jcom.zaq.ne.jpにメールしてください。
2021.11.25
コメント(0)
-
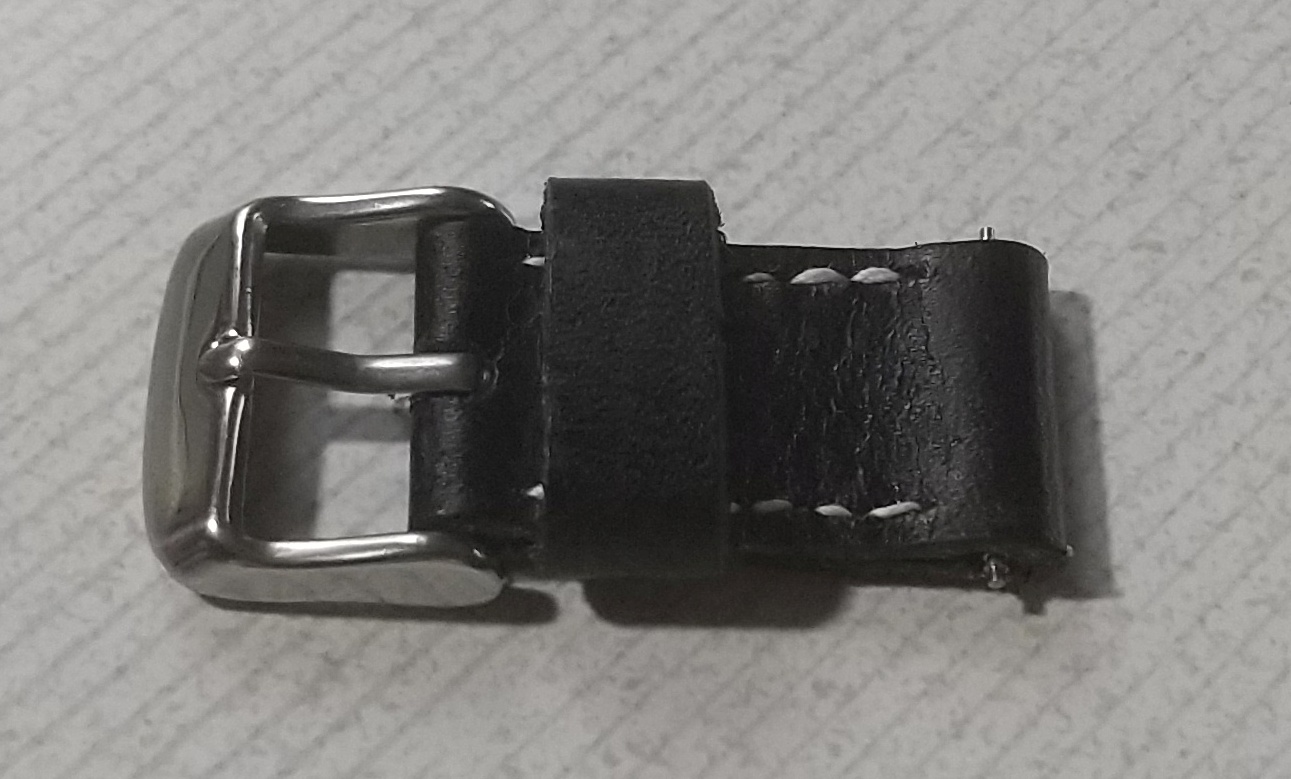
WENA3用ベルトアタッチメントの作製
こんにちは。お元気でしょうか。持っている腕時計にWENA3用のベルトをつけていったら、元に戻すのが面倒と気が付きました。なので、こんなものを作ってみました。SONYのWENA3は、こんな感じで、時計ベルトの裏側につけます。普通の時計をスマートウオッチに変えるものです。それ用のベルトを持っている時計にだいぶつけてしまいました。WENA3への取り付けも結構面倒だし、元のメタルベルトに戻すのも面倒です。そこで、アタッチメントをレザークラフトで作りました。尾錠とバックルを買いました。バックルは、バンビ製です。出来上がありは、こんな感じです。時計につけるとこうなります。そんなに違和感は、ないと思っています。これを何個か作れば、めんどうから解放されると思います。
2021.10.17
コメント(0)
-
金属アレルギー対策 時計バンド その3 ルキア
ルキア用の金属アレルギー対応ベルトを簡単に付け替えられるようにしたいという要望に答えてみました。初めにお話ししますが、ルキアは、チタン素材を使ったり、金属アレルギーについても考慮している時計です。綾瀬はるかさんや池田エライザさん応援しているいい時計だとお思います。それでも、敏感な人はいるので、そんな方でも金属アレルギーを気にせずルキアを楽しんでもらいたいと、ベルトを作りました。いつものように作り方です。バッタみたいな形になってしまいましたが、革の材料はこんな感じです。バッタの手足の分は、時計を止めるところなので、少し長めにしています。時計の近くを止めるところは、天然パールのボタンにしてみました。ちょっと形がいびつです。バックル側のボタンは、革を打ちぬいて、二つ糸通しの穴を開けて作りました。机等にぶつかり易いかなとの配慮です。でも、取り付けにくいとちょっと不評。でも、金属の接触は回避して、時計を楽しむことはできました。
2021.10.16
コメント(0)
-
金属アレルギー対策 時計バンド その1 ルキア
アレルギーって多いですよね。私は、アレルギー性鼻炎で、ハウスダストと花粉に反応します。息子は、花粉症。娘は、花粉症とアトピー。家内は、金属アレルギーっぽくて、ネックレスや時計に反応します。そこで、今回、メタルバンドの時計の金属が肌に触れないベルトを作りました。一つ目は、セイコールキア用です。革ベルトを腕一周した上から、メタルのバックルを締める構造です。裏から見るとこんな感じ。一応、肌に金属が触れることはありません。ベルトを外して、取り付ける必要があるので、違う時計への取り付けは、面倒です。簡単に、別の時計も取り付けられるものも今度考えてみます。ちなみに寸法は、こんな感じです。
2021.10.06
コメント(0)
-
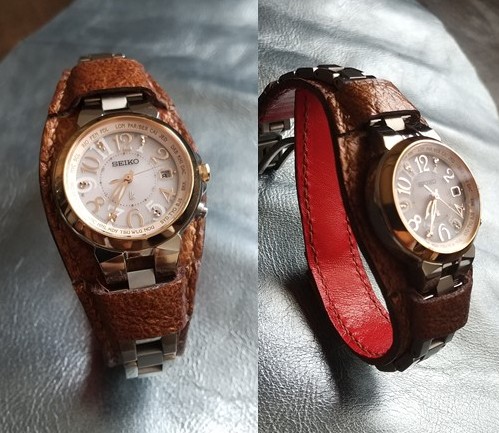
時計ベルトの背あて作製 その2
この前の時計ベルトの背あてですが、ちょと別のバージョンにして、作りかえてみました。外装ケースの白いプラスチック部分を隠して、ベルトも同一系統のクロコ調に作りかえました。試しにステッチも色を変えたのですが、あまり効果はなかったようです。青っぽい目立たないステッチにすればよかったと思いました。全体的にワイルドな感じには、なったと思います。
2021.10.01
コメント(0)
-
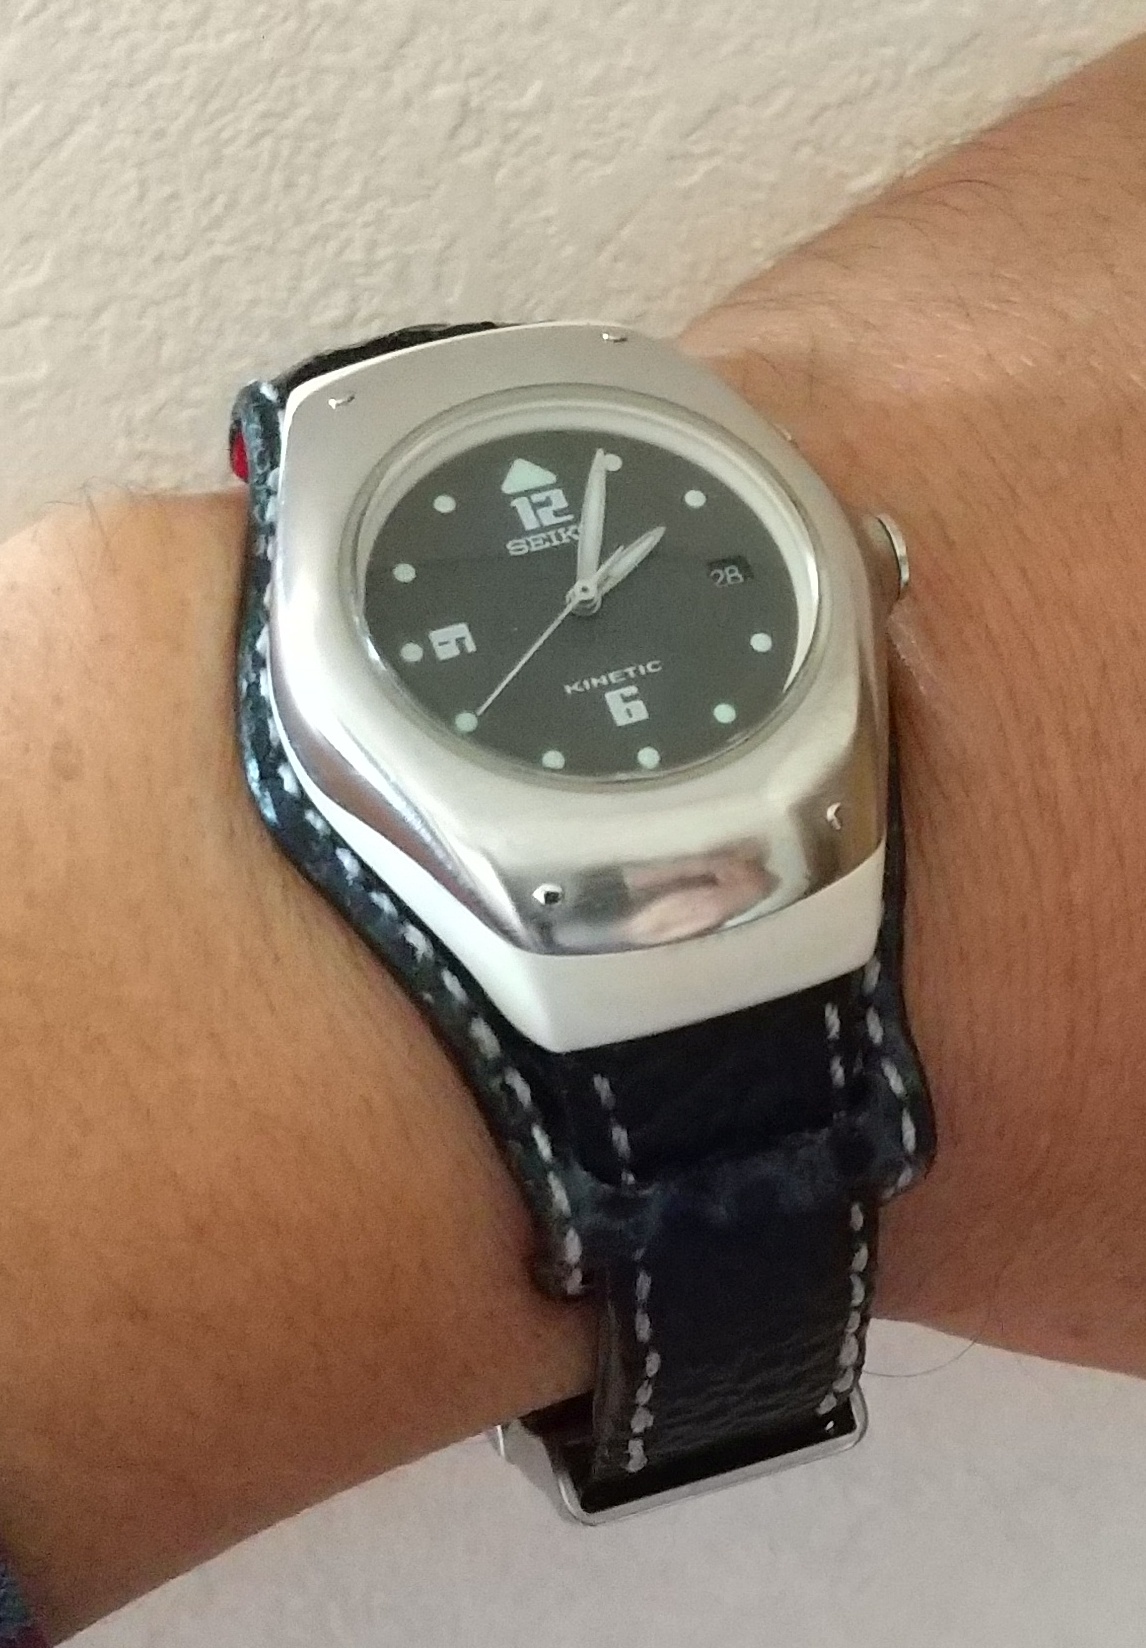
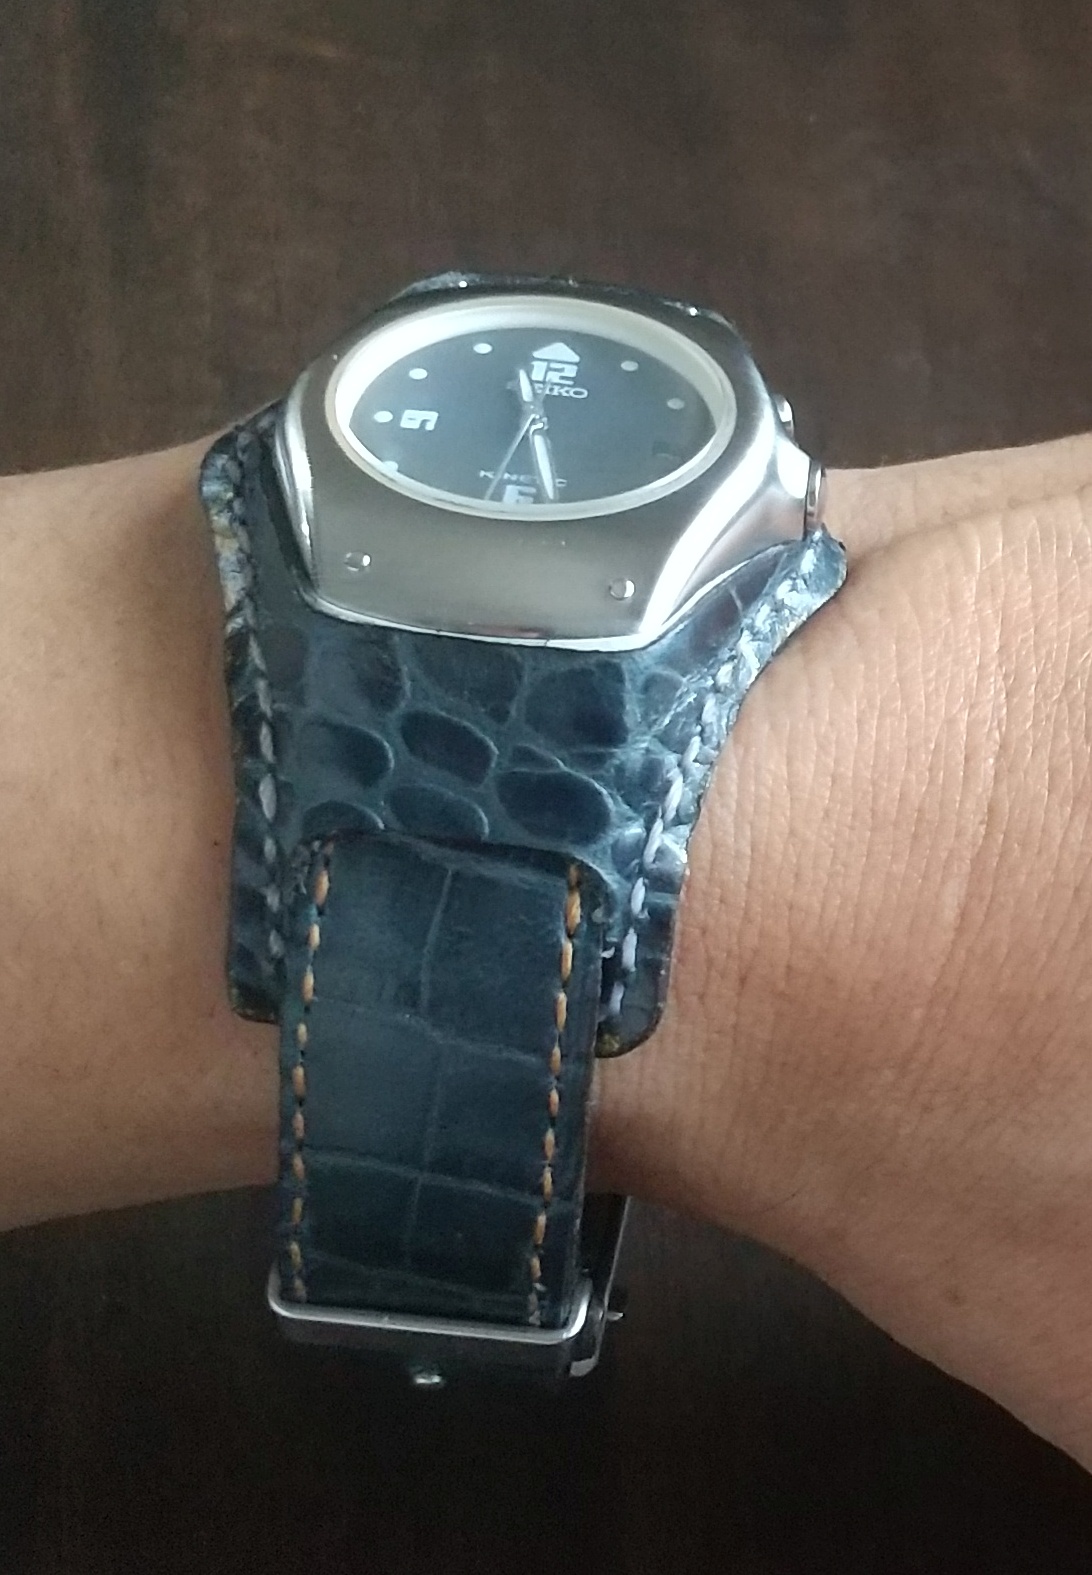
時計ベルトの背あて作製
こんにちは。時計ベルトの背あてを作ってみました。8月に下のタイトルで、紹介しました。セイコーKineticとWENA3こんな感じのベルトなんですが、ちょっとシンプルなので作り直しました。ボリューム感をアップするために、ベルトの背あてというものを作ってみました。いつものようにCADで型紙を作って作製しました。クロコ調の型押しの革と裏は、試しに赤い革にしました。裏から見るとちょっとおしゃれ。背あてを付けると、ボリューム感がでて、印象が変わりました。背あてが、ちょっと小さくて革の模様が見えません。背あての色も、青っぽいのにしたのに、小さくてよくわかりません。次回は、もっと大きめに作りたいと思います。
2021.09.29
コメント(0)
-
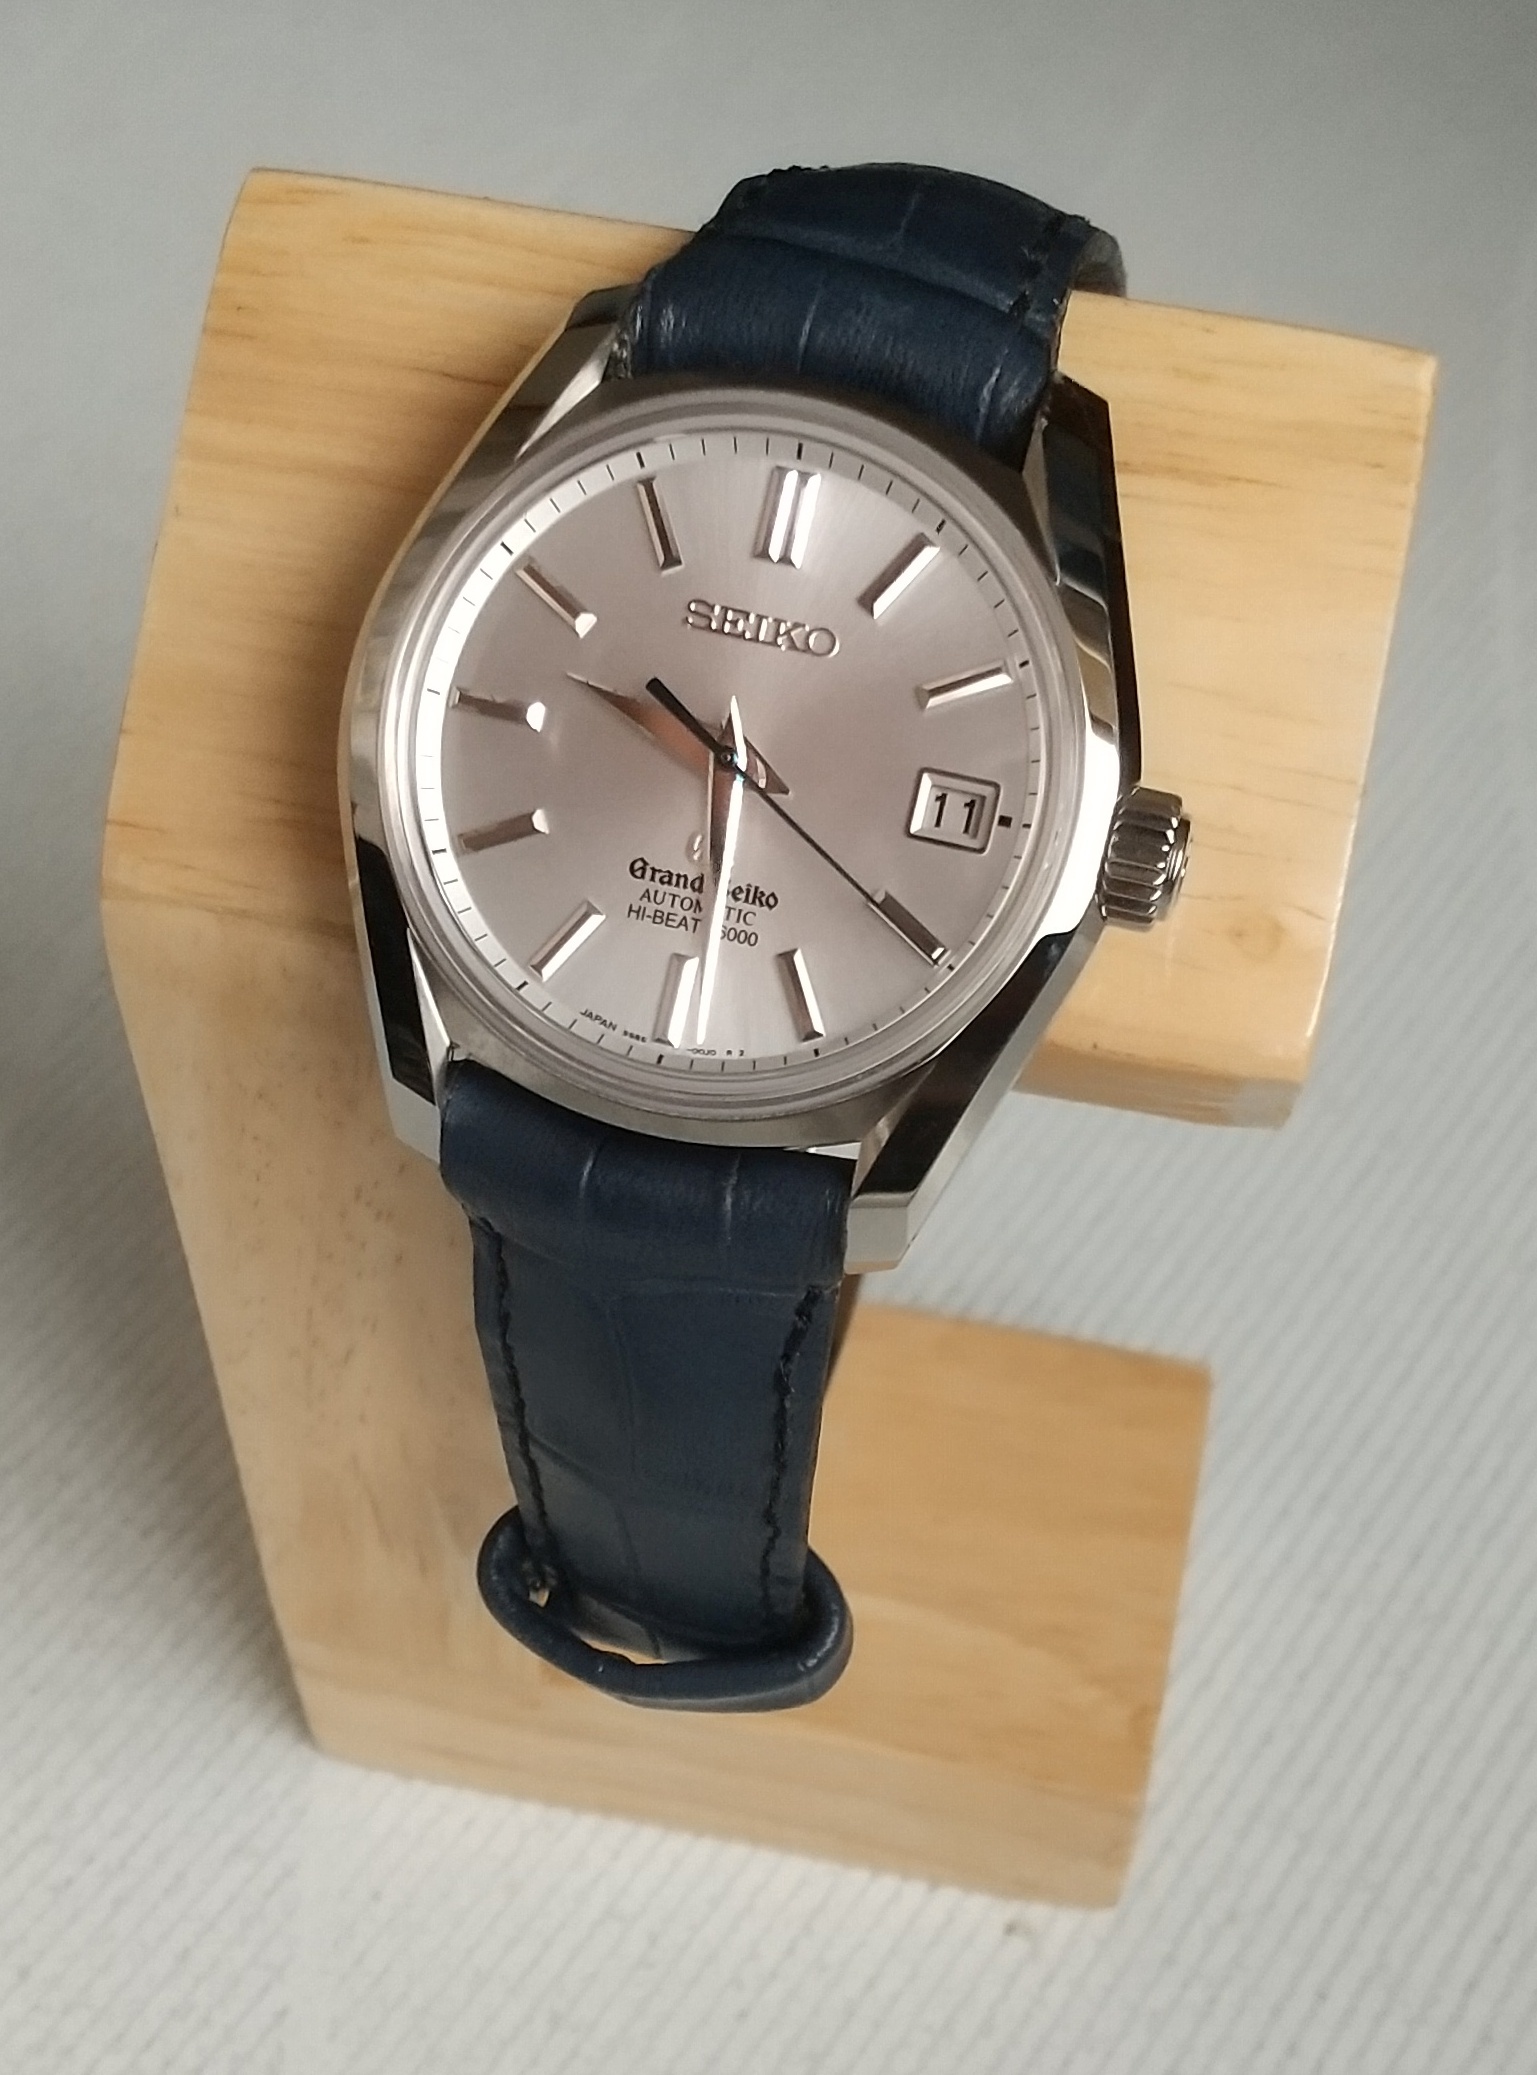
グランドセイコーの革ベルト作製
GSといえば、グランドセイコー。フォーマルでの出番がめっきり少なくなってきたので、革ベルトを自作して、カジュアルに身に着けることにしました。 時計は、9S85のグランドセイコー。 グランドセイコーのブランドが独立する前のSEIKOのロゴ付きの最後のモデルでしょうか。 9S85は、10振動のムーブメントを内蔵しています。それを支える動力ゼンマイは、SPRON530のコバルト合金で、SPRON510より、高ヤング率になっています。ひげゼンマイは、SPRON610の恒弾性材料。SPRON200を継承する材料で、耐磁性も向上しています。 自作した革ベルトのこだわりポイントは、外装ケースに近い革ベルトのエンドの部分の湾曲です。何とか美しく湾曲できるようにトライしました。 金具は、BAMBI バンビ レザーバックル D-バックル シルバー 18mm ZS0007Pにしました。国内時計メーカーとつながりの深いバンビ製であれば問題ないはずです。 では作り方です。 いつものように、革の型紙を作る図面をAR_CADで作成しました。芯材は、革ベルト装着したとき、湾曲するように写真のように加工しました。 湾曲するイメージをイラストで描いてみました。 準備できた材料はこんな感じです。 革の周辺部を別立ちで、薄く削ってから、材料を接着して、縫っていきます。こちらが完成したGSです。ブルースチールの秒針の青とベルトの青がいい感じになりました。カジュアルでもいけそうです。#seiko #セイコー #グランドセイコー#9s85 #spron610 #spron530
2021.09.11
コメント(0)
-
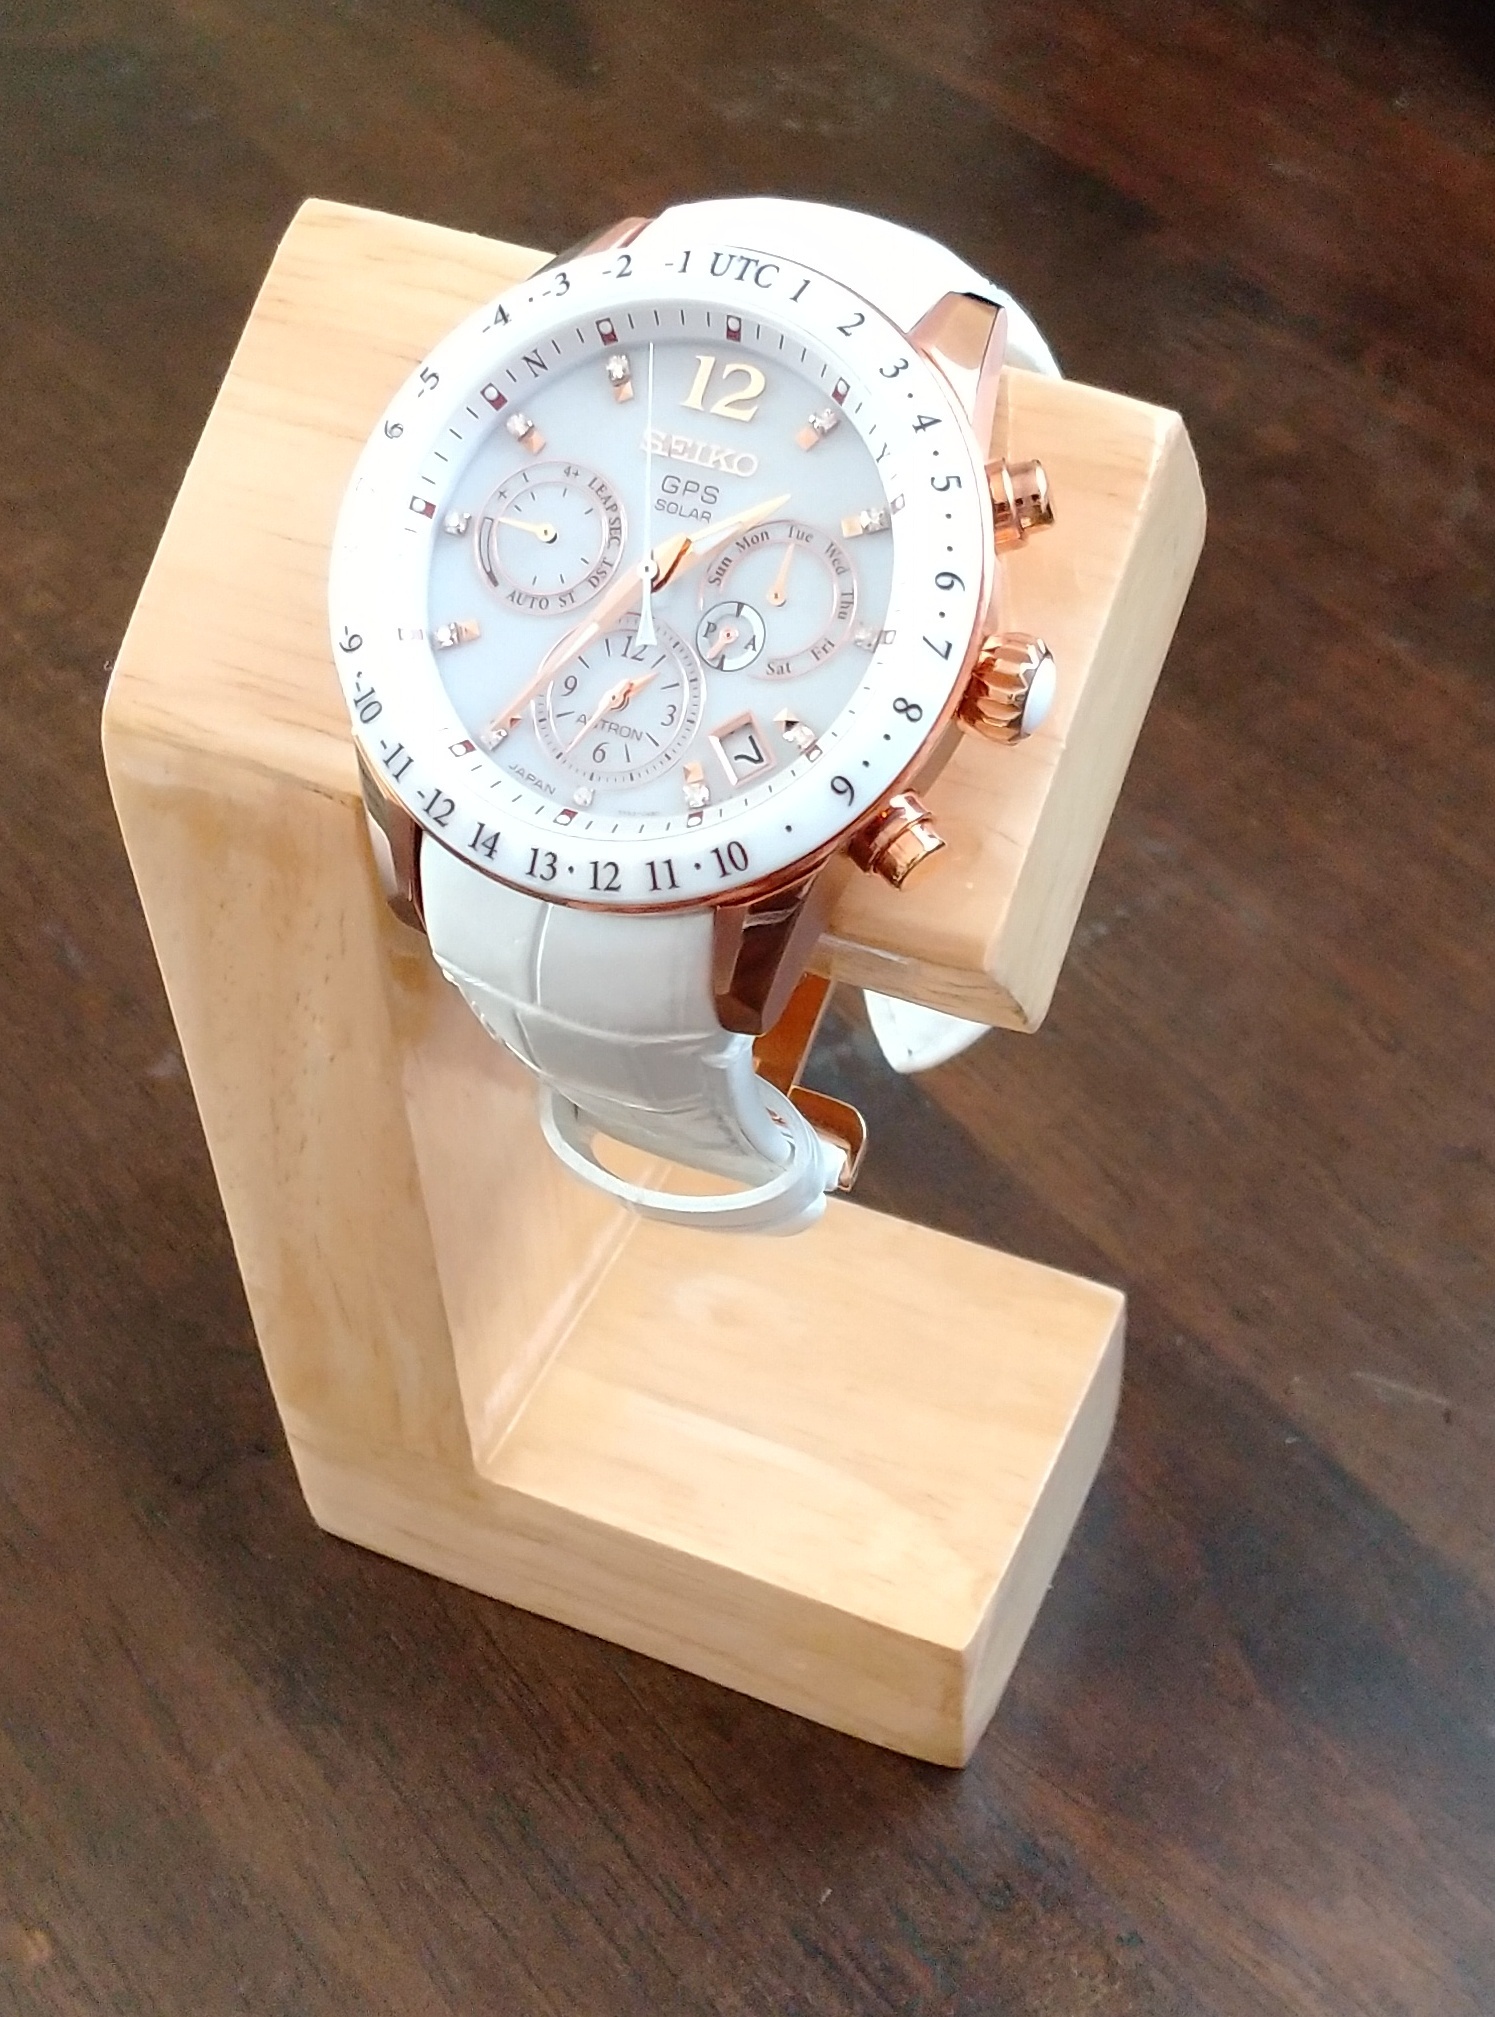
SEIKOアストロンレディース用のベルト
またまた、時計ネタで申し訳ありません。以前、奥さんに、セイコーアストロン 5X53-0AC0を買ったのですが、文字盤のはでさと、白のクロコ調のベルトがぎょうぎょうしくて、あまりつけてもらえません。そこで、シルバーがかったグレーの柔らかい革でベルトを作りました。ちょっとは、控えめになりました。今度は、着けてもらえるでしょうか。
2021.09.08
コメント(0)
-
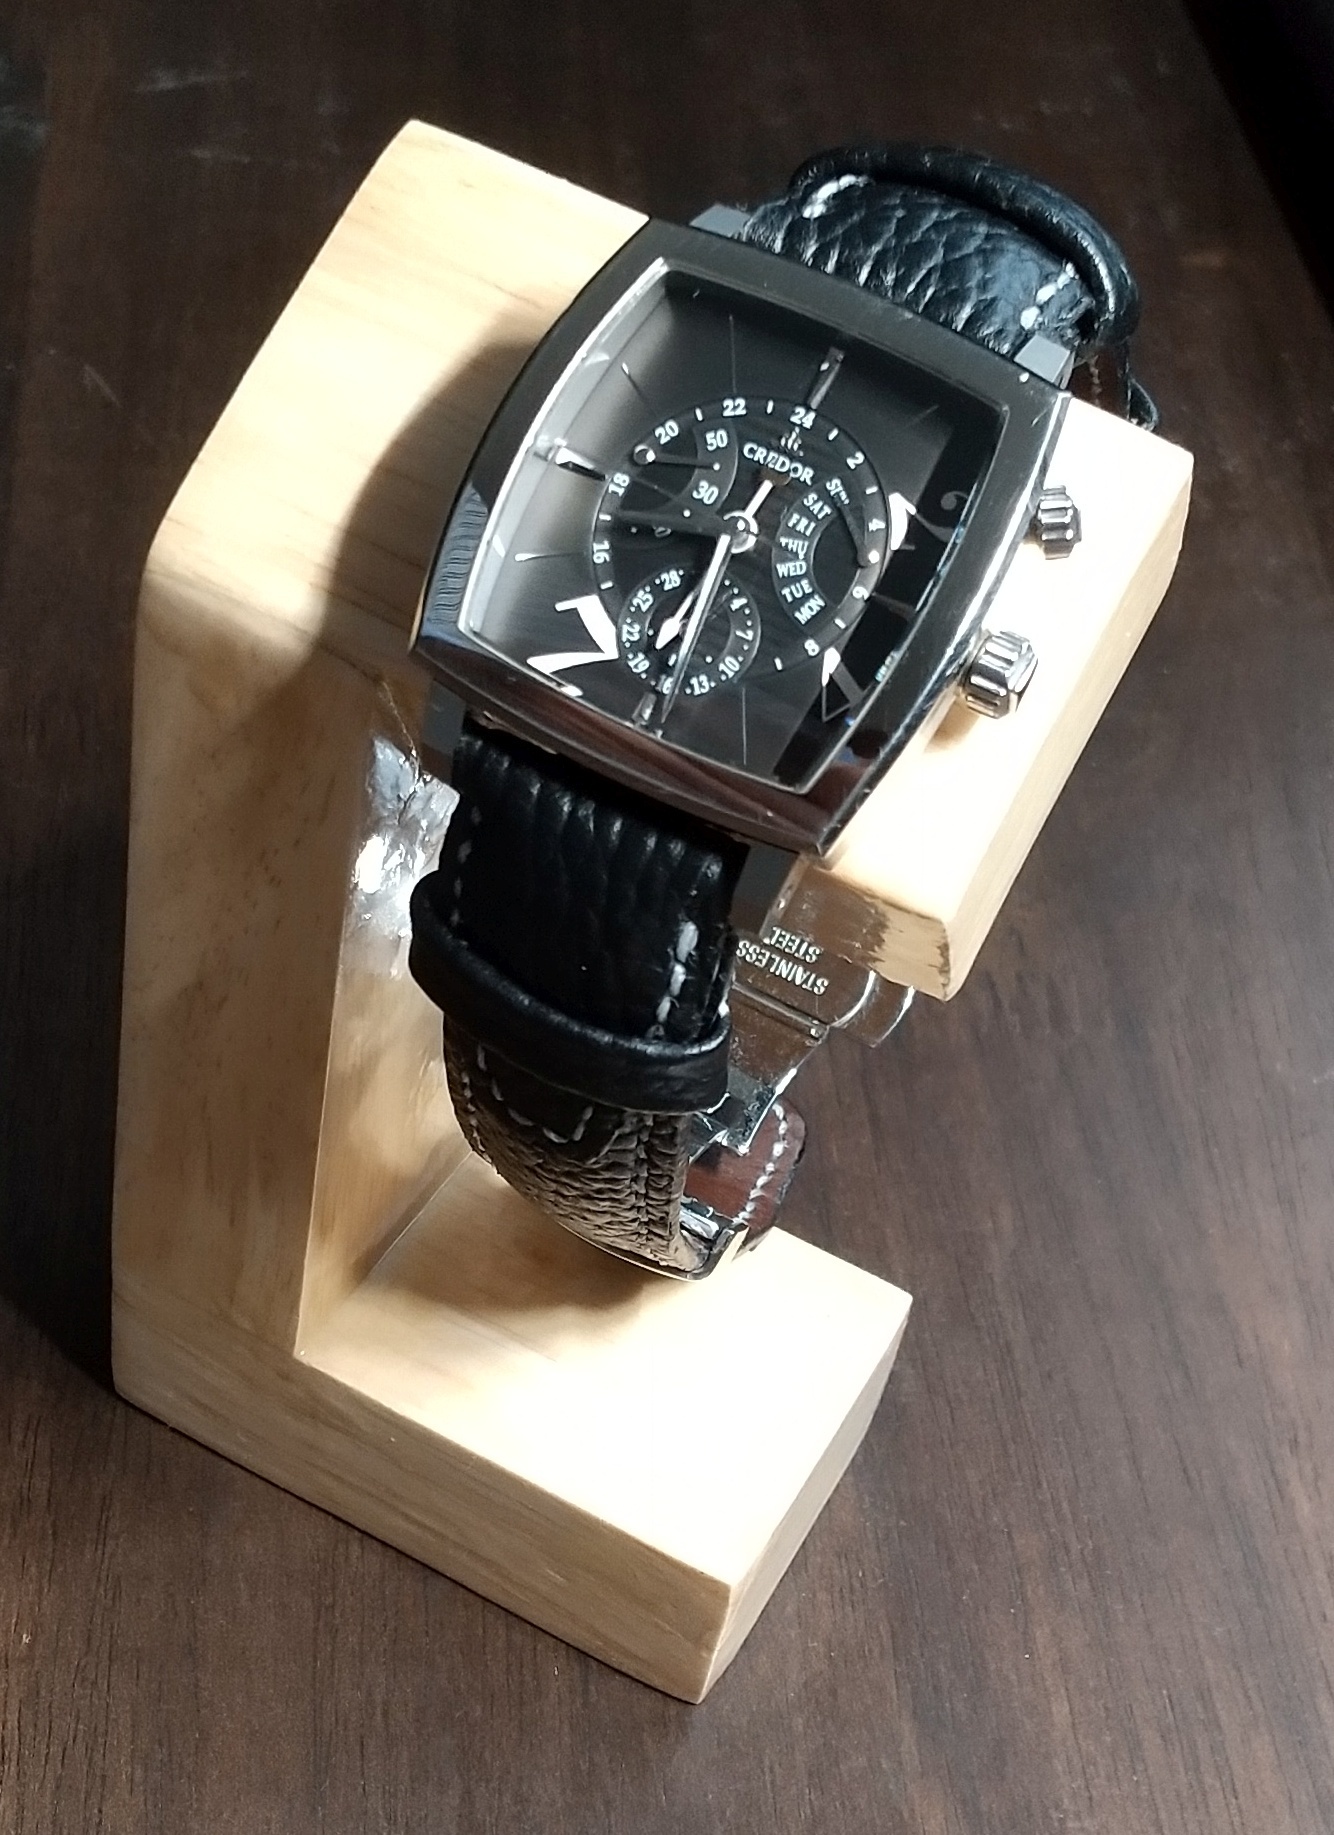
SEIKOクレドールのカジュアル化
こんにちは。お元気ですか。SEIKOクレドールといえば、長嶋さんの時計!ちょっと古いですね。´80年代の話でした。今持っているSEIKOクレドールは、ちょっとおしゃれですが、なかなか普段は出番の少ない時計でした。コロナ禍では、会社にもあまり行かないし、ますます身に着けなくなってしまいました。そこで、ベルトを作り直して、カジュアルな感じにしてみました。もともとのクレドールはこんな感じです。メタルバンドで、ちょっとお堅い感じです。どんなふうにしたらカジュアルにできるか、絵を描いて、ベルトの図面を起こしてみました。へたくそな絵で申し訳ありません。ベルトを横から見たイメージも描いてみました。留め具は、購入して、革のパーツを切り抜きました。そこからは、手縫いです。完成がこちら。ベルトを止める定革の位置がちょっと変だったかな。次は、改善します。比べると、無機的な感じから変わって、暖かみが出ました。かなりカジュアルになったと思います。これなら、普段使いもOKですね。
2021.09.06
コメント(0)
全12件 (12件中 1-12件目)
1
-
-

- *雑貨*本*おやつ*暮らし*あんな…
- P20倍♪i’m meme×サンリオコラボもお…
- (2024-09-22 07:38:19)
-
-
-

- 「気になるあの商品」&「お買得商品…
- ☆布たわし☆
- (2024-09-22 20:18:56)
-
-
-

- 日記を短歌で綴ろう
- ★♡ 同時期にロサンゼルスで快挙のニ…
- (2024-09-22 10:00:33)
-


