
This page applies to Apigeeand Apigee hybrid.
View Apigee Edge
documentation.

Configure the creation and sign-in experience for user accounts, as described in the following sections.
Exploring the Account creation & sign in section
To configure the creation and sign-in experience for user accounts:
-
Open the Portals page.
In the Apigee in Cloud console, go to the Distribution > Portalspage.
Go to Portals -
Click the row of the portal that you want to configure.
-
Click Accounts.
-
Click the Authenticationtab.
The Authentication details page displays. The Account creation & sign in section lets you:
- Manage company information that appears on the registration and sign-in pages, including the company logo, name, and copyright information
- Add custom registration fields to the account creation page for user credential authentication
- Configure notifications for new user account registration and identify a portal administrator
- Configure manual activation of user accounts
Managing company information
Manage the company logo, name, and copyright information that appear on the portal registration and Sign In pages.
To manage company information:
- Access the Authentication page .
- Open the editor. Click Edit .
- Select a logo.
- Click Browse.
- Navigate to the new logo, and then click Open.
- Edit the Company nameand Copyrightfields, as required.
- Click Save.
Add custom registration fields to the account creation page
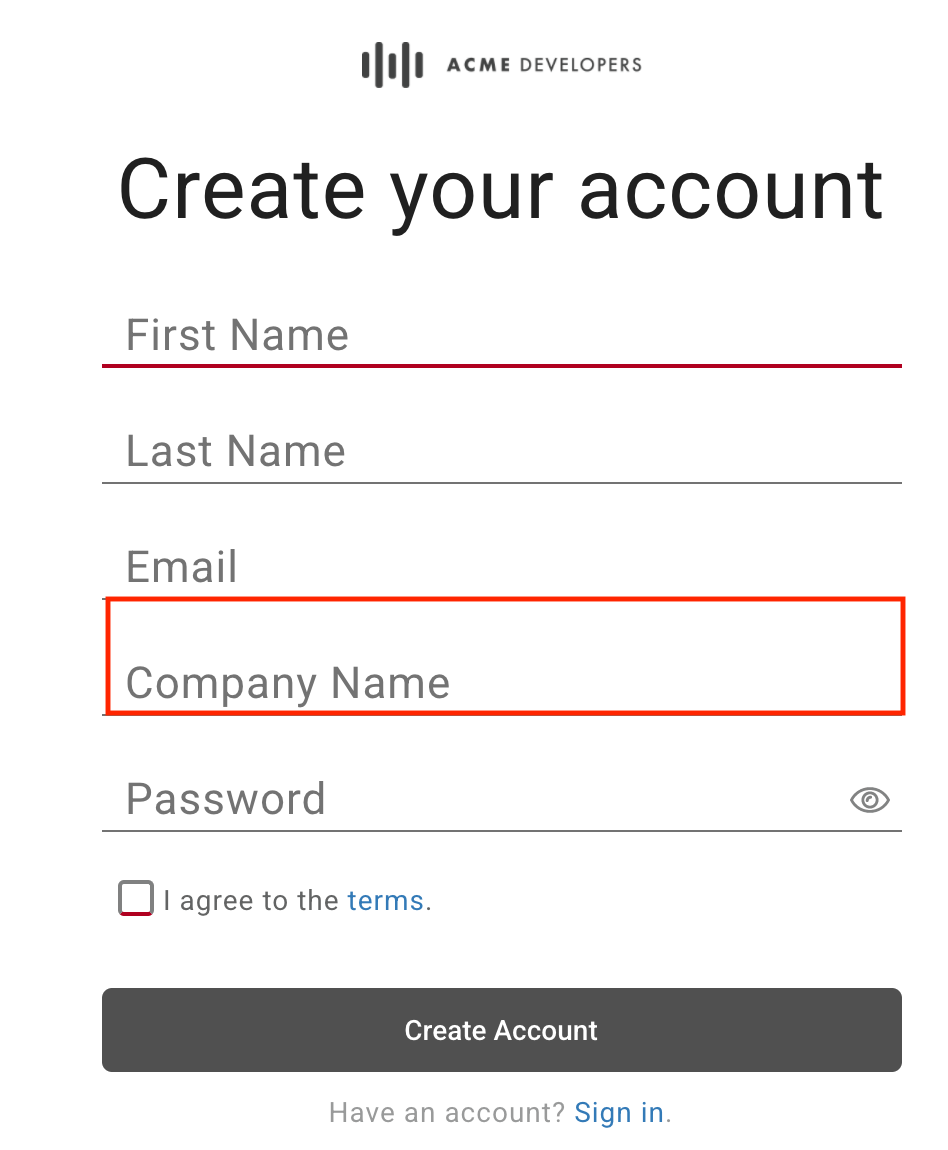
By default, when registering with your portal, a portal user is prompted for their first and last name, an email, and a password. You can add up to three additional custom registration fields to the Create Account form to capture additional details. For example, you might want to capture the company name.
When a portal user provides data for a custom registration field, the content is displayed in the Users details. If you disable or remove a custom registration field, the custom information moves to the Legacy Data column in the Users list. See Managing users .
Note: The custom registration fields are accessible only from the Users page in the UI.
To add custom registration fields to the account creation page:
- Access the Authentication page .
-
Open the editor. Click Edit .
-
Edit one or more of the custom field labels. To remove a custom registration field, delete the field label.
-
Select Requiredto require that the field be completed during registration.
-
Click Save.
Configuring notifications for new user account registration
Note: This section applies to the built-in identity provider .
See also Configuring email notifications .
To enable notifications for new user account registration:
- Access the Authentication page .
-
Open the editor. Click Edit .
-
Select Notify portal administrator when a new portal user signs up. The Portal administrator email field displays.
-
Enter an email to receive a notification about the new user account registration in the Portal administrator emailfield.
-
Click Save.
Configuring manual activation of user accounts
By default, when portal users register on the integrated portal, their user accounts are activated automatically.
Alternatively, you can configure your portal to require manual activation by an administrator for each new user account, as described in Activating user accounts . In this case, the status for the user account is listed as Inactivein the user accounts list and the portal user cannot sign in.
To configure manual activation of user accounts:
- Access the Authentication page .
-
Open the editor. Click Edit .
-
Select Require approval for all new user accountsto require manual activation of user accounts. To disable this feature, clear the option.
-
Click Save.