

This tutorial shows you how to use the Cloud Data Fusion plugin for Cloud DLP to redact sensitive data.
Scenario
Consider the following scenario, in which some sensitive customer information must be redacted:
Your support team documents the details of each support case they handle in a support ticket. All of the information in the support ticket is pulled into a CSV file. The support technicians are not supposed to document any customer information that's considered sensitive, but sometimes they mistakenly do so. You notice that in the CSV file some customers' phone numbers appear.
You want to go through the CSV file and hide all phone numbers. You create a Cloud Data Fusion pipeline that redacts the sensitive customer data by using the Cloud DLP plugin.
In this tutorial, you create a pipeline that does the following:
- Redacts customer phone numbers by masking them with the
#character. - Stores the masked sensitive data and the non-sensitive data in a Cloud Storage bucket.
Objectives
- Connect Cloud Data Fusion to a Cloud Storage source.
- Deploy the Cloud DLP plugin.
- Create a custom Cloud DLP template.
- Use the Redact transform plugin to mask sensitive customer data.
- Write the output data to Cloud Storage.
Costs
In this document, you use the following billable components of Google Cloud:
To generate a cost estimate based on your projected usage, use the pricing calculator .
Before you begin
- Sign in to your Google Cloud account. If you're new to Google Cloud, create an account to evaluate how our products perform in real-world scenarios. New customers also get $300 in free credits to run, test, and deploy workloads.
-
In the Google Cloud console, on the project selector page, select or create a Google Cloud project.
Roles required to select or create a project
- Select a project : Selecting a project doesn't require a specific IAM role—you can select any project that you've been granted a role on.
- Create a project
: To create a project, you need the Project Creator role
(
roles/resourcemanager.projectCreator), which contains theresourcemanager.projects.createpermission. Learn how to grant roles .
-
Verify that billing is enabled for your Google Cloud project .
-
Enable the Cloud Data Fusion, BigQuery, Cloud Storage, and Dataproc APIs.
Roles required to enable APIs
To enable APIs, you need the Service Usage Admin IAM role (
roles/serviceusage.serviceUsageAdmin), which contains theserviceusage.services.enablepermission. Learn how to grant roles . - Create a Cloud Data Fusion instance .
Get Cloud DLP permissions
-
In the Google Cloud console, go to the IAM page.
-
In the permissions table, in the Principalcolumn, find the service account that matches the format
service- project-number
@gcp-sa-datafusion.iam.gserviceaccount.com
.
-
Click edit Edit.
-
Click Add Another Role.
-
Use the search bar to search and then select DLP Administrator.

-
Click Save.
-
Check that DLP Administratorappears in the Rolecolumn.

Navigate to the Cloud Data Fusion UI
When using Cloud Data Fusion, you use both the Google Cloud console and the separate Cloud Data Fusion UI. In the Google Cloud console, you can create a Google Cloud console project and create and delete Cloud Data Fusion instances. In the Cloud Data Fusion UI, you can use the various pages, such as Studioor Wrangler, to use Cloud Data Fusion features.
-
In the Google Cloud console, open the Instancespage.
-
In the Actionscolumn for the instance, click the View Instancelink. The Cloud Data Fusion UI opens in a new browser tab.
Create the pipeline
Create a pipeline that redacts sensitive customer data. The pipeline you build does the following:
- Reads the input data using the Cloud Storage source plugin.
- Deploys the Cloud DLP plugin from the Hub.
- Writes the output data using a Cloud Storage sink plugin.
Load the customer data
This tutorial uses the input dataset, CallCenterRecords.csv
, provided in a
publicly available Cloud Storage bucket.
-
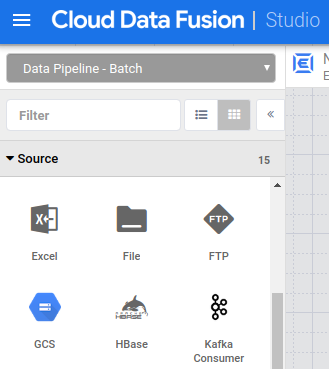
Open your Cloud Data Fusion instance and click menu Menu > Studio.
-
In the Sourcemenu, click the Cloud Storageplugin.
-
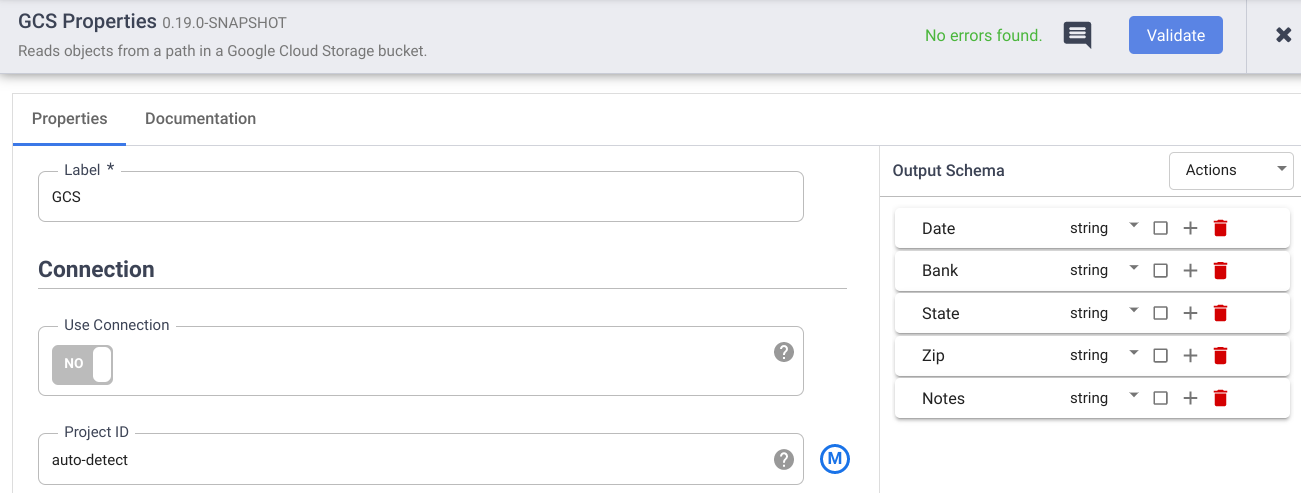
On the Cloud Storagenode, click Properties.
-
In the Reference namefield, enter a name.
-
In the Pathfield, enter
gs://datafusion-sample-datasets/CallCenterRecords.csv. -
In the Formatfield, select
CSV. -
For the Output Schema, delete the offsetand bodyfields. Click Addand enter the following fields:
- Date
- Bank
- State
- Zip
- Notes
-
Click Validateto check for errors.
-
Click Close.
Redact sensitive data
The Cloud DLP Redact plugin identifies sensitive records in your input stream of data and applies transformations that you define to those records. A record of data is considered sensitive if it matches predefined Cloud DLP filters you choose or a custom template you define.
In this tutorial, you want to redact customer phone numbers that some support technicians on your team accidentally took note of. They entered the sensitive information in the Notessection of the support tickets, which appears as the Notescolumn in the CSV file. You create a custom Cloud DLP template, and then provide the template ID in the properties menu of the plugin.
Deploy the Cloud DLP plugin
-
In your Cloud Data Fusion instance, click Hub.
-
Click the Cloud DLPplugin.
-
Click Deploy.
-
Click Finish.
-
Click Closeto exit the Cloud DLP dialog.
-
Click Closeto exit the Hub.
Create a custom template
-
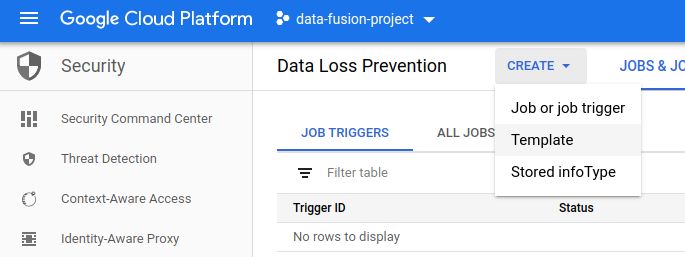
In the Google Cloud console, go to the Cloud DLP page.
-
From the Createmenu, choose Template.
-
In the Template IDfield, enter an ID for your template.
-
Click Continue.
-
In the Configure detectionfield, click Manage infotypes.
-
In the Built-intab, use the filter to search for "phone number".
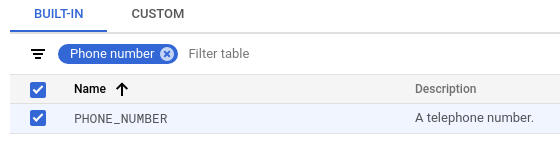
-
Select PHONE_NUMBER.
-
Click Done > Create.
Learn more about creating Cloud DLP templates .
Apply the Cloud DLP Redact transformation
-
Go to the Cloud Data Fusion Studiopage and click to expand the Transformmenu.
-
Click the Cloud DLP Redactplugin.

-
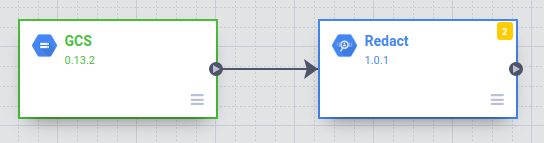
Drag a connection arrow from the Cloud Storagenode to the Redactnode.
-
Hold the pointer over the Redactnode and click Properties.
-
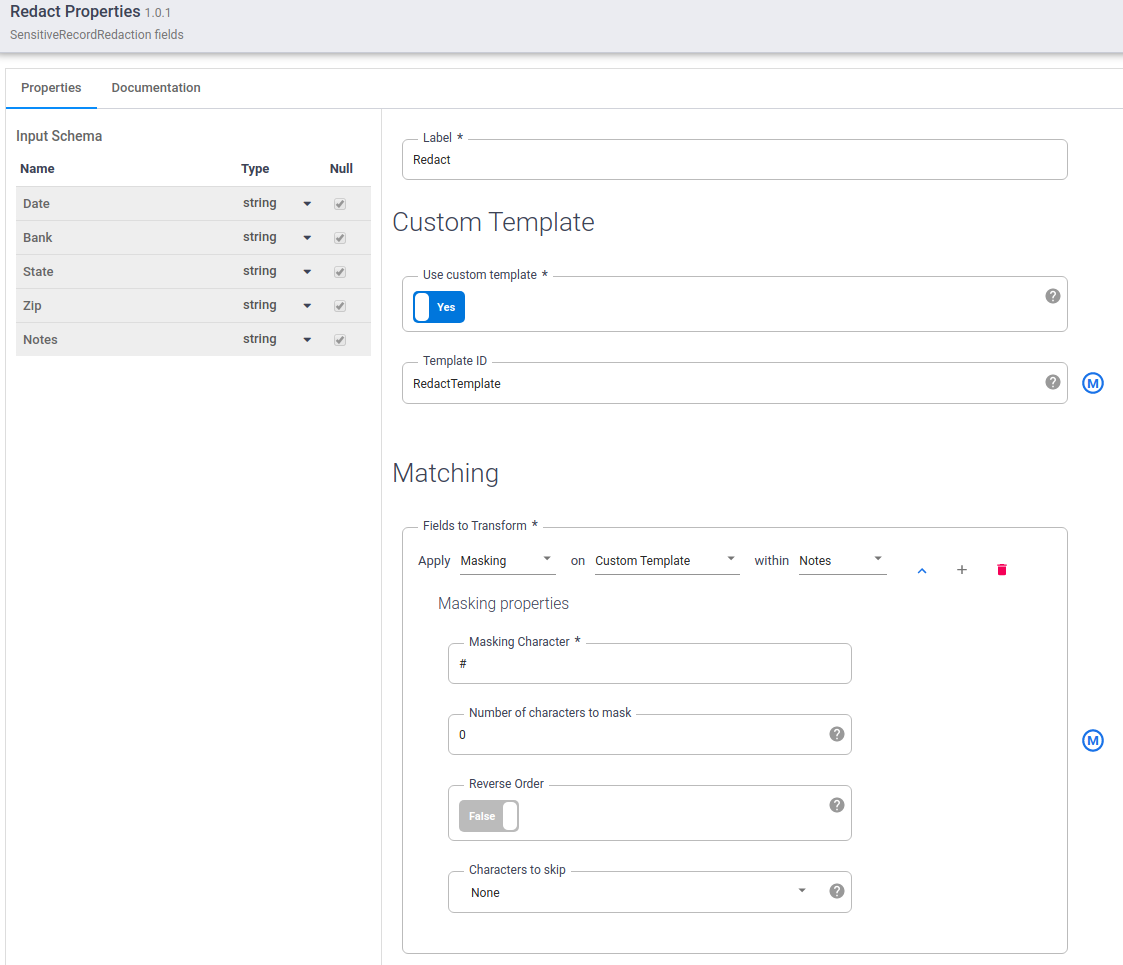
Set Custom Templateto
Yes. -
In the Template IDfield, enter the template ID of the custom template you created .
-
In the Matchingfield , apply Maskingon Custom templatewithin Notes.
-
In the Masking Characterfield, enter
#.
-
Click Validateto check for errors.
-
Click Close.
-
Store the output data
Store the results of your pipeline in a Cloud Storage file.
-
From the Studiopage, click to expand the Sinkmenu.
-
Click Cloud Storage.
-
Drag a connection arrow from the Redactnode to the Cloud Storage2node.

-
Hold the pointer over the Cloud Storage2node and click Properties.
-
In the Reference namefield, enter a name.
-
In the Pathfield, enter the path of a Cloud Storage bucket where you'd like to store the pipeline results. Cloud Data Fusion creates the bucket for you. Be sure to follow the bucket naming guidelines .
-
In the Formatfield, select CSV.
-
Click Validateto ensure that there are no errors.
-
Click Close.
-
Run the pipeline in preview mode
Run the pipeline in preview mode before you deploy it.
-
Click Preview, and then click Run.

Clicking Rundisplays the pipeline status, which starts with Starting, then turns to Stop, and then to Run.
-
When the preview run completes, on the Redactnode, click Preview Datato see a side-by-side comparison of the input and output data. Check that phone numbers have been masked with the
#character.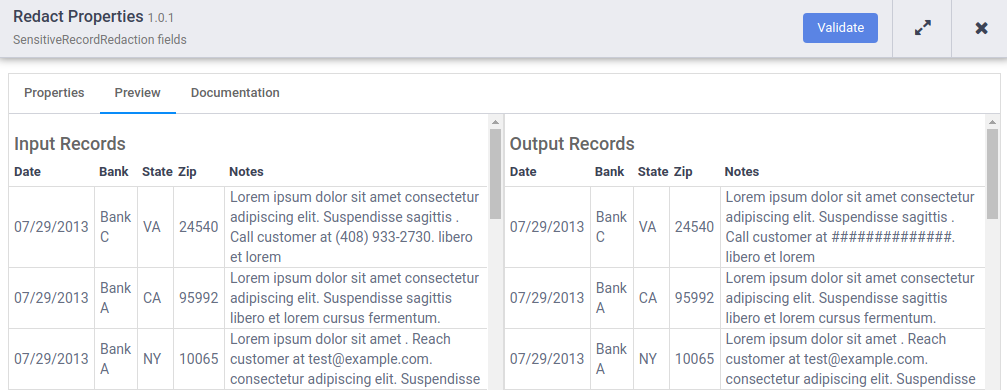
Redact another data type
While examining the preview run results, you notice that there's still sensitive information that appears in the Notescolumn: email addresses. You go back and edit the Cloud DLP template to redact email addresses as well.
-
In the Google Cloud console, go to the Cloud DLP page.
-
On the Configurationtab, select your template.
-
Click Edit.
-
Click Manage infotypes.
-
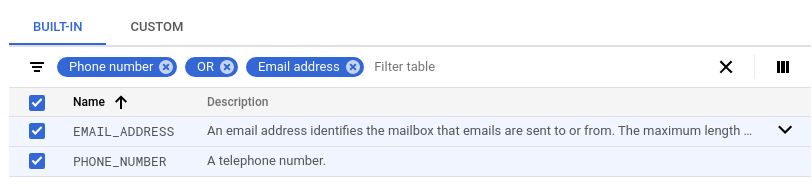
In the Built-intab, use the filter to search for "OR" "email address".
-
Select all and click Done.
-
Click Save.
-
Once again, run your pipeline in preview mode . Cloud Data Fusion will automatically use the updated Cloud DLP template.
-
Check that both phone numbers and email addresses have been masked with the
#character.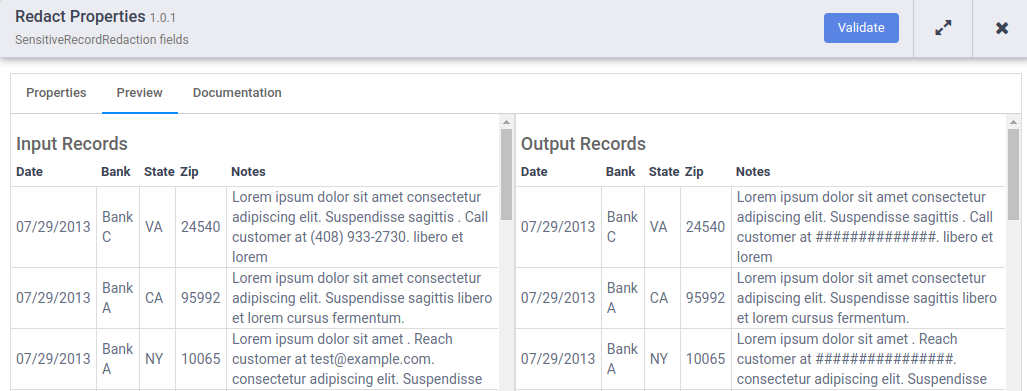
Deploy and run the pipeline
-
Make sure Previewmode is unchecked.
-
Click Save. Clicking Saveprompts you to name your pipeline. Then, click OK.
-
Click Deploy.
-
When deployment completes, click Run. Running your pipeline can take a few minutes. While you wait, you can observe the Statusof the pipeline transition from Provisioningto Startingto Runningto Deprovisioningto Succeeded.
View the results
-
In the Google Cloud console, go to the Cloud Storage page.
-
In the Storage browser, navigate to the sink Cloud Storage bucket you specified in the sink Cloud Storage plugin properties .
-
In Link URL, click the link to download the CSV file with the results. Check that the phone numbers and email addresses have been masked with the
#character.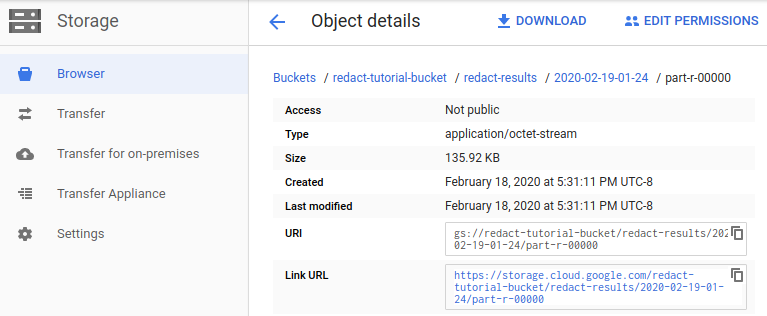
Clean up
To avoid incurring charges to your Google Cloud account for the resources used in this tutorial, either delete the project that contains the resources, or keep the project and delete the individual resources.
Delete the Cloud Data Fusion instance
Follow these instructions to delete your Cloud Data Fusion instance .
Delete the project
The easiest way to eliminate billing is to delete the project that you created for the tutorial.
To delete the project:
- In the Google Cloud console, go to the Manage resources page.
- In the project list, select the project that you want to delete, and then click Delete .
- In the dialog, type the project ID, and then click Shut down to delete the project.
What's next
- Learn more about Cloud Data Fusion .
- See how to use the Cloud Data Fusion plugin , which provides the Redact and Filter PII transform plugins.