

This tutorial shows how to build a reusable pipeline that reads data from Cloud Storage, performs data quality checks, and writes to Cloud Storage.
Reusable pipelines have a regular pipeline structure, but you can change the configuration of each pipeline node based on configurations provided by an HTTP server. For example, a static pipeline might read data from Cloud Storage, apply transformations, and write to a BigQuery output table. If you want the transformation and BigQuery output table to change based on the Cloud Storage file that the pipeline reads, you create a reusable pipeline.
Objectives
- Use the Cloud Storage Argument Setter plugin to allow the pipeline to read different input in every run.
- Use the Cloud Storage Argument Setter plugin to allow the pipeline to perform different quality checks in every run.
- Write the output data of each run to Cloud Storage.
Costs
In this document, you use the following billable components of Google Cloud:
- Cloud Data Fusion
- Cloud Storage
To generate a cost estimate based on your projected usage, use the pricing calculator .
Before you begin
- Sign in to your Google Cloud account. If you're new to Google Cloud, create an account to evaluate how our products perform in real-world scenarios. New customers also get $300 in free credits to run, test, and deploy workloads.
-
In the Google Cloud console, on the project selector page, select or create a Google Cloud project.
Roles required to select or create a project
- Select a project : Selecting a project doesn't require a specific IAM role—you can select any project that you've been granted a role on.
- Create a project
: To create a project, you need the Project Creator role
(
roles/resourcemanager.projectCreator), which contains theresourcemanager.projects.createpermission. Learn how to grant roles .
-
Verify that billing is enabled for your Google Cloud project .
-
Enable the Cloud Data Fusion, Cloud Storage, BigQuery, and Dataproc APIs.
Roles required to enable APIs
To enable APIs, you need the Service Usage Admin IAM role (
roles/serviceusage.serviceUsageAdmin), which contains theserviceusage.services.enablepermission. Learn how to grant roles . - Create a Cloud Data Fusion instance .
Navigate to the Cloud Data Fusion web interface
When using Cloud Data Fusion, you use both the Google Cloud console and the separate Cloud Data Fusion web interface. In the Google Cloud console, you can create a Google Cloud console project, and create and delete Cloud Data Fusion instances. In the Cloud Data Fusion web interface, you can use the various pages, such as Pipeline Studioor Wrangler, to use Cloud Data Fusion features.
-
In the Google Cloud console, open the Instancespage.
-
In the Actionscolumn for the instance, click the View Instancelink. The Cloud Data Fusion web interface opens in a new browser tab.
Deploy the Cloud Storage Argument Setter plugin
-
In the Cloud Data Fusion web interface, go to the Studiopage.
-
In the Actionsmenu, click GCS Argument Setter.
Read from Cloud Storage
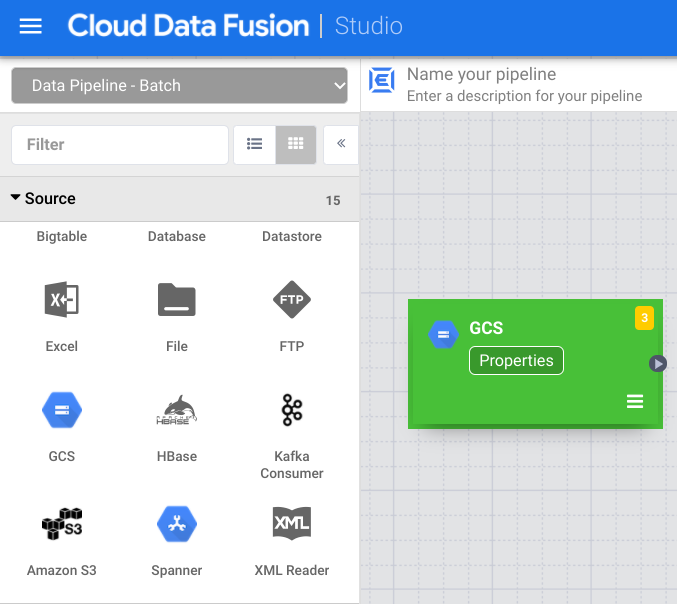
- In the Cloud Data Fusion web interface, go to the Studiopage.
- Click arrow_drop_down Sourceand select Cloud Storage. The node for a Cloud Storage source appears in the pipeline.
-
On the Cloud Storage node, click Properties.
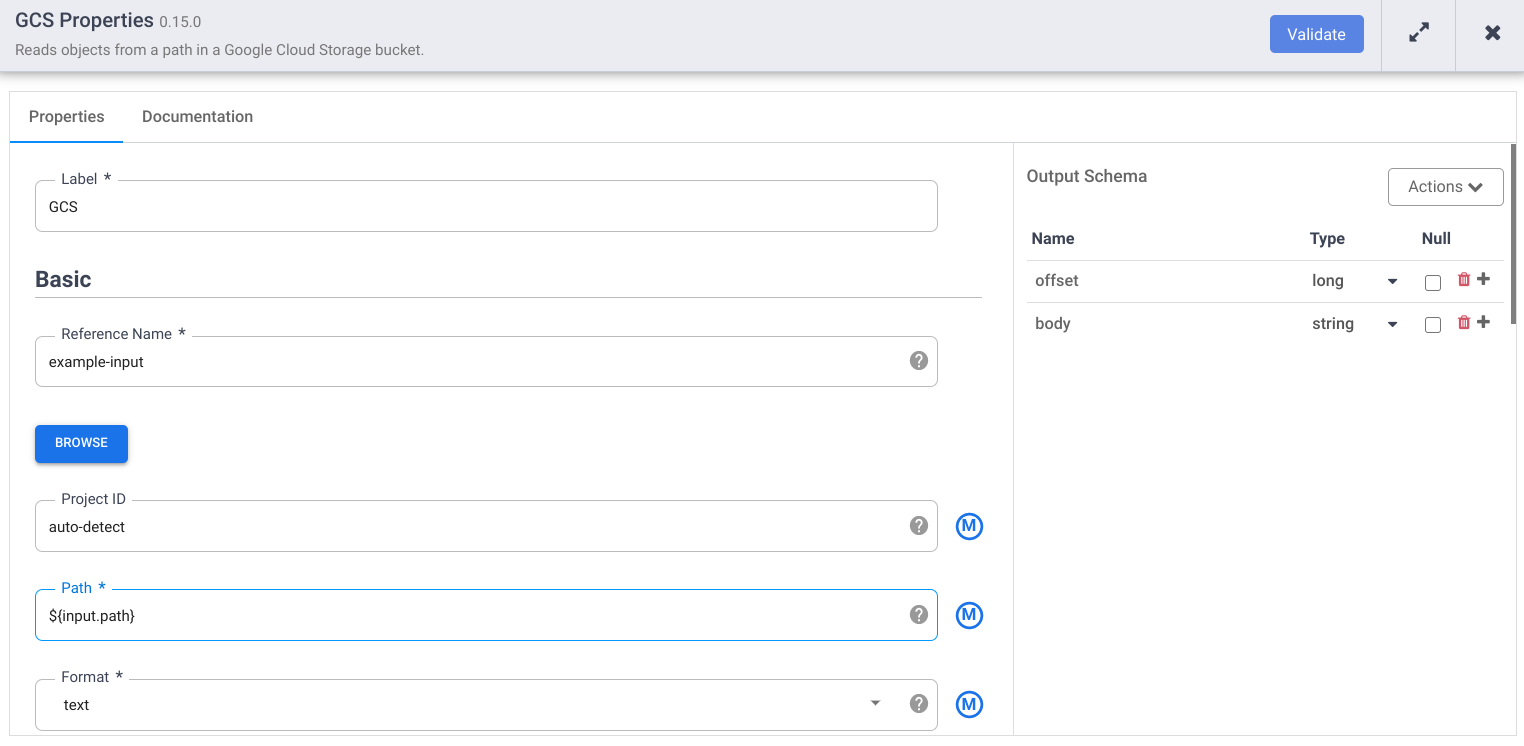
-
In the Reference namefield, enter a name.
-
In the Pathfield, enter
${input.path}. This macro controls what the Cloud Storage input path will be in the different pipeline runs. -
In the right Output Schema panel, remove the offsetfield from the output schema by clicking the trash icon in the offset field row.
-
Click Validateand address any errors.
-
Click the to exit the Propertiesdialog.
Transform your data
- In the Cloud Data Fusion web interface, go to your data pipeline on the Studiopage.
- In the Transformdrop-down menu arrow_drop_down , select Wrangler.
- In the Pipeline Studio canvas, drag an arrow from the Cloud Storage node
to the Wrangler node.

- Go to the Wrangler node in your pipeline and click the Properties.
- In the Input field name, enter
body. - In the Recipefield, enter
${directives}. This macro controls what the transform logic will be in the different pipeline runs.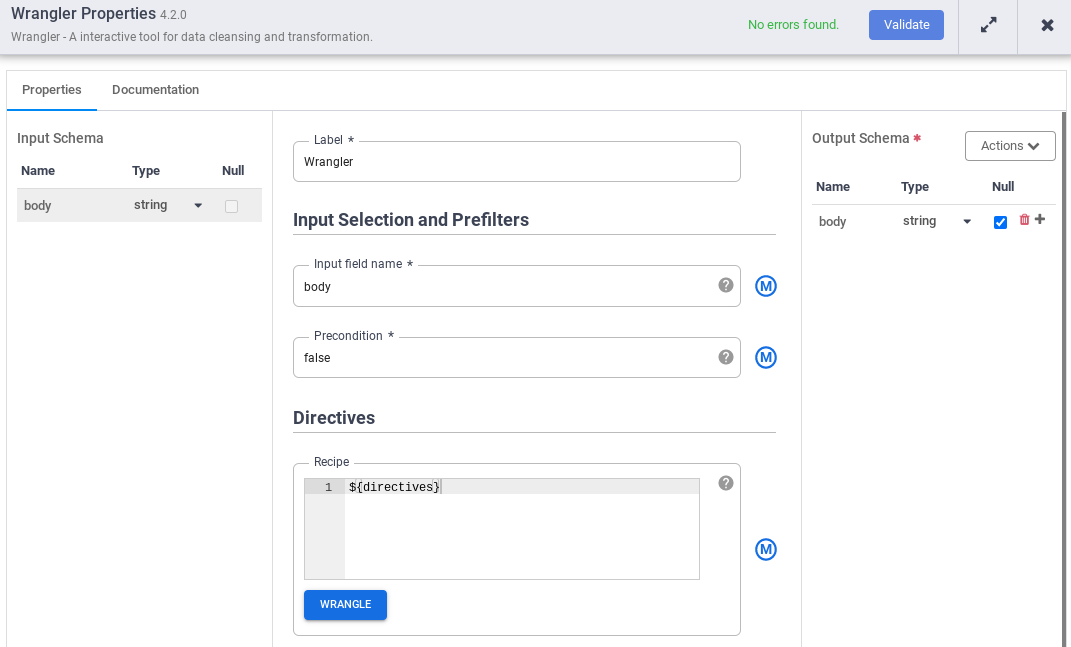
- Click Validateand address any errors.
- Click the to exit the Propertiesdialog.
Write to Cloud Storage
- In the Cloud Data Fusion web interface, go to your data pipeline on the Studiopage.
- In the Sinkdrop-down menu arrow_drop_down , select Cloud Storage.
- In the Pipeline Studio canvas, drag an arrow from the Wrangler node to the
Cloud Storage node that you just added.
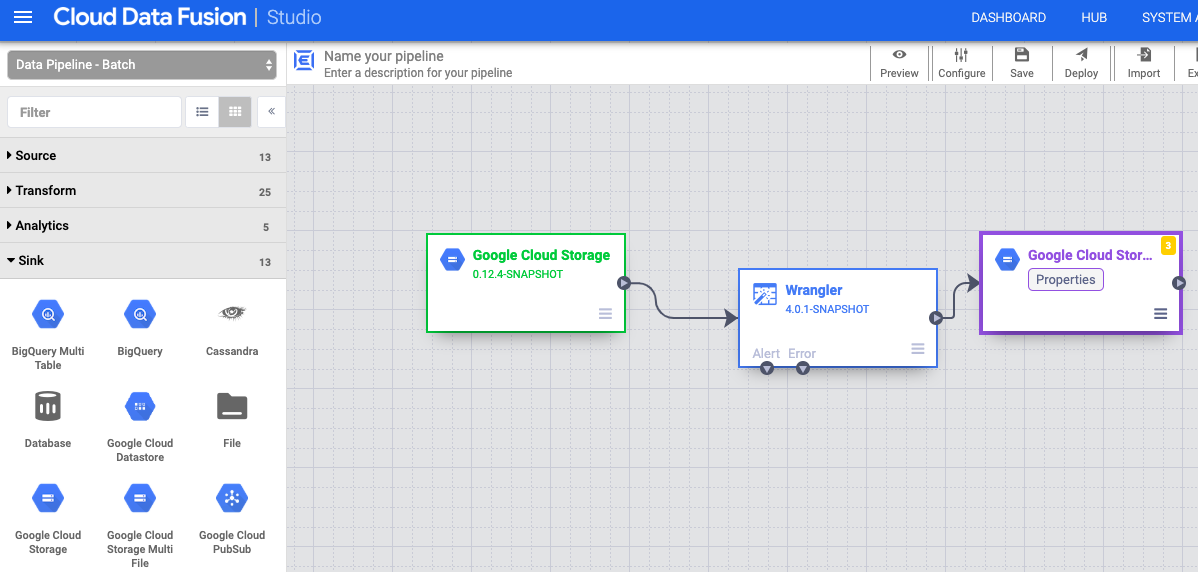
- Go to the Cloud Storage sink node in your pipeline and click Properties.
- In the Reference namefield, enter a name.
- In the Pathfield, enter the path of a Cloud Storage bucket in
your project, where your pipeline can write the output files. If you don't have
a Cloud Storage bucket, create one
.

- Click Validateand address any errors.
- Click the to exit the Propertiesdialog.
Set the macro arguments
- In the Cloud Data Fusion web interface, go to your data pipeline on the Studiopage.
- In the arrow_drop_down Conditions and Actionsdrop-down menu, click GCS Argument Setter.
- In the Pipeline Studio canvas, drag an arrow from the Cloud Storage Argument Setter node to
the Cloud Storage source
node.
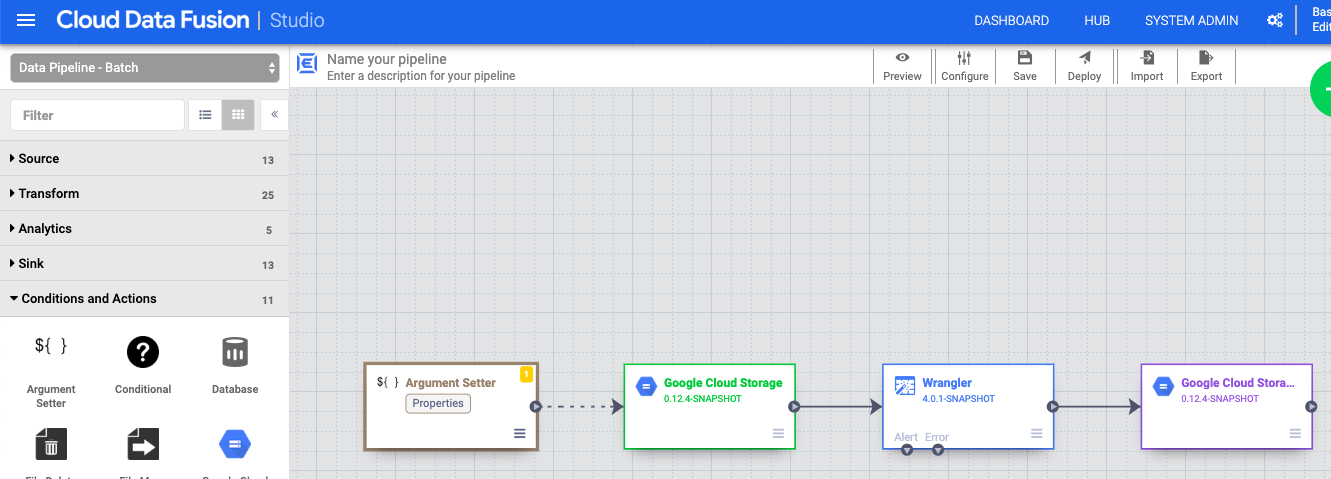
- Go to the Cloud Storage Argument Setter node in your pipeline and click Properties.
-
In the URLfield, enter the following URL:
gs://reusable-pipeline-tutorial/args.jsonThe URL corresponds to a publicly accessible object in Cloud Storage that contains the following content:
 {
  "arguments" : [
    {
      "name": "input.path",
      "value": "gs://reusable-pipeline-tutorial/user-emails.txt"
    },
    {
      "name": "directives",
      "value": "send-to-error !dq:isEmail(body)"
    }
  ]
}
The first of the two arguments is the value for
input.path. The pathgs://reusable-pipeline-tutorial/user-emails.txtis a publicly accessible object in Cloud Storage that contains the following test data:alice @example . com bob @example . com craig @invalid@example . comThe second argument is the value for
directives. The valuesend-to-error !dq:isEmail(body)configures Wrangler to filter out any lines that are not a valid email address. For example,craig@invalid@example.comis filtered out. -
Click Validateto make sure you don't have any errors.
-
Click the to exit the Propertiesdialog.
Deploy and run your pipeline
-
In the top bar of the Pipeline Studiopage, click Name your pipeline. Name your pipeline and click Save.
-
Click Deploy.
-
To open the Runtime Argumentsand view the macro (runtime)
input.pathanddirectivesarguments, click the arrow_drop_down drop-down next to Run.Leave the value fields blank to notify Cloud Data Fusion that the Cloud Storage Argument Setter node in the pipeline will set the values of these arguments during runtime.
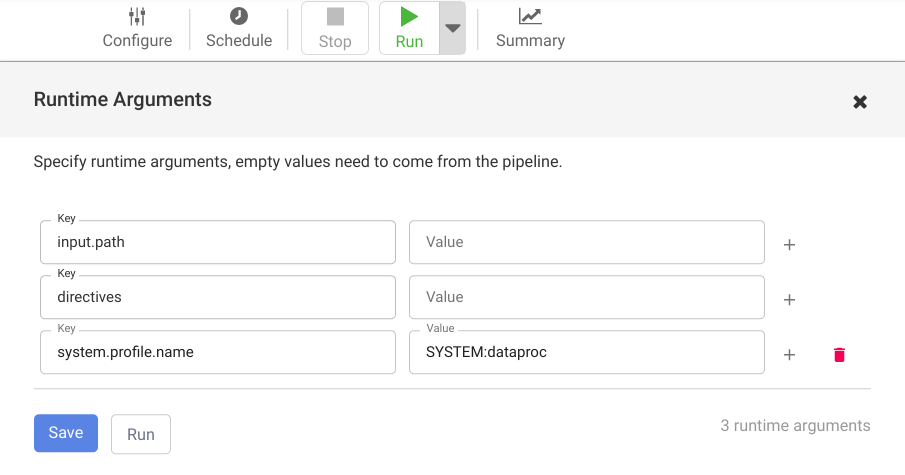
-
Click Run.
Clean up
To avoid incurring charges to your Google Cloud account for the resources used in this tutorial, either delete the project that contains the resources, or keep the project and delete the individual resources.
After you've finished the tutorial, clean up the resources you created on Google Cloud so they won't take up quota and you won't be billed for them in the future. The following sections describe how to delete or turn off these resources.
Delete the Cloud Data Fusion instance
Follow the instructions to delete your Cloud Data Fusion instance .
Delete the project
The easiest way to eliminate billing is to delete the project that you created for the tutorial.
To delete the project:
- In the Google Cloud console, go to the Manage resources page.
- In the project list, select the project that you want to delete, and then click Delete .
- In the dialog, type the project ID, and then click Shut down to delete the project.
What's next
- Read the how-to guides
- Work through another tutorial