2023年04月の記事
全11件 (11件中 1-11件目)
1
-

【テレビ録画&ラジオ録音サーバー】自宅と外出先・実家をつなぐ最適解はOneDrive?
foltia Anime Locker のサーバーPCを自宅に設置し、外出先や実家から録画ファイルを利用する最適解は、今のところ、「OneDriveに録画ファイルをコピーして利用する」というものです。理由1:PPPoE経由のVPNは速度が遅いので録画ファイルのダウンロードに時間がかかる(録画サーバーに長時間負荷がかかる)理由2:OneDriveへのアップロードも時間がかかるが、録画サーバーと同一LAN内のパソコンにコピー後にOneDriveにアップロードするようにすれば、録画サーバーの負担が軽減できる(録画サーバーから短時間でファイルをコピーできる)。エンコードに失敗したファイルも同一LAN内のパソコンにコピーしてエンコードし直せる。理由3:実は、OneDriveは、ブラウザ経由での動画視聴が便利だったりする理由4:OneDriveを録画ファイルのファイルサーバーとして利用できる。自宅、外出先、実家など、通信環境さえあれば場所を問わずに利用できる贅沢をいうと、自宅と実家にNGN経由でのVPN接続を設定して高速アクセスができればいいのですが。NGNを利用するためのフレッツV6・オプション自体は無料なのですが。。NGN経由でのVPN接続は、現時点ではネットワークエンジニアの領域という色彩が強く、専用ルーターなどのコストもかかるなど、知識・機器などのハードルはまだまだ高いというのが現実のようです。ルーターもパソコンの一種なので、専用ルーターではなくLinuxのミニミニパソコンでルーターを自作するという方法であれば比較的安価ではあるようですが、ゼロからだと知識・労力のコストは大きいです。。IPv4のPPPoE経由のVPNサーバー機能のある家庭用ルーターがあれば、リモートアクセスVPNの設定は30分もかからずにできるのに、IPv6のIPoE経由でのVPNの設定は素人ではかなり無理な感じです。フレッツのサイトの説明では、「フレッツV6・オプションでユーザー同士がダイレクトに高速通信できる」ということだそうですが、では、「どうやって?」「どういう機器で?」といったことがよくわかりません。個人が簡単に手を出せるような領域ではないことは確かなようですが・・・
2023.04.30
コメント(0)
-
【OneDrive】ファイル・フォルダ共有設定はブラウザのほうがよさそう
個人向けのOneDriveについての話です。ファイルやフォルダ共有の際に、特定のユーザーに対して共有する場合がほとんどだと思います。少なくとも私の場合は、基本的に特定ユーザー向けの共有設定にしています。Microsoft 365 Familyを利用しているので、家族向けの共有設定が多いのですが、共有対象のファイルやフォルダをエクスプローラーから右クリックで指定して設定すると、共有対象ユーザー入力欄の入力支援が効かず、アカウント(メールアドレス)をフルに入力しないといけません。Teamsのチャット相手のアカウントを表示させ、アカウントをコピーして貼り付けていました。コピーメニューがあるので、アカウントのコピーのニーズは多いようです。家族全員に共有する場合は、一人ひとりのアカウントをコピペする必要があります。さすがに、複数アカウントの場合は「グループ」で設定できないものかと思って調べたところ、家族グループあるいは、Outlookグループで共有対象を設定できるとのことです。Outlookグループの作成の場合は、Outlookアカウントが必要です。Outlookアカウントのない家族もいるので、この方法はとりあえず却下です。Microsoft 365 Familyに入っているので、家族全員がマイクロソフトアカウントを持っています。ということで、ファミリーセーフティーに家族を登録しました。招待メールによる承認の手続きが必要な点は、個人主義のアメリカらしいです。これで家族のグループで共有設定できると思ったのですが、エクスプローラーから指定する方法では、家族グループは指定できませんでした。さらに調べ、ブラウザを利用して共有設定する場合に家族グループが利用できることがわかりました。確かに、ブラウザを利用した場合は、共有設定で「家族」と入力すると、候補が表示されます。それだけでなく、一人のアカウントの場合もアカウントの一部の入力で対象候補が表示されます。つまり、「ブラウザでの共有設定の場合、共有対象アカウントの入力支援機能がある」ということです。しかし、共有対象を複数にすると、リンク作成に時間がかかるというか、フリーズしてしまうようです。。
2023.04.24
コメント(0)
-
【QuickTimePro】動画・音声の必要部分の取り出しには最強?ただし、脆弱性があるため、自分で録画したファイルの利用に限りましょう。
QuickTimeは、すでにサポートが終了しているレガシーアプリです。パソコン内のファイルを整理している際に、QuickTime Pro版の登録コード情報を記載したメモのファイルを発見しました。動画の切り取りが非常に簡単にできたことを思い出し、再び使用してみました。クリップの切り出しの作業の簡単さ・わかりやすさは最強かもしれません。ただし、QuickTimeには致命的な脆弱性があり、アンインストールが推奨されています。ということは、ダウンロードした動画ファイル・音声ファイルの再生などをしてはいけないということです。とはいえ、自分で録画・録音したファイルであれば問題ないはずです。私のPCの環境では、マイクロソフトのClipchampは、エラー頻発でまともに動作しません。動画のハードウェアエンコードはできませんが、録画や録音から必要な部分を切り出すだけであれば、簡単にごく短時間で作業ができるQuickTime Proが最強のような気がします。↓Windows Vista,Windows 7用という古いアプリですが、使いやすさは最強ではないでしょうか。
2023.04.22
コメント(0)
-
【Wake On LAN】VPN接続時でもWOL用に追加のポート開放が必要なようです
Anime LockerのパソコンにはVPN接続でアクセスできるのですが、MP4の作成に失敗したTSファイルをVPN接続でダウンロードするのはかなり時間がかかるため非現実的です。やはり、VPN接続時には、Anime Lockerのパソコンと同じLAN内にあるパソコンで、MP4の作成に失敗したTSファイルの再エンコードを実施する必要があります。Anime Lockerのパソコンは24時間稼働ですが、再エンコード用のパソコンは作業時のみ電源をONにしたいと思います。そこで、Wake On LANを利用することにしました。LANケーブルをパソコンのLANポートに接続すると、パソコンの電源オフ時でもLANポートのランプがチカチカ点滅しています。つまり、パソコンの電源オフ時でもLANポートは通電状態にあるわけです。これを利用しない手はありません。Wake On LANとは、常時通電しているLANポートを利用し、LAN経由で特殊な信号を送ってパソコンを起動させる仕組みです。同一のLAN内であればマジックパケットを送信するソフトを利用して電源をONにすることができ、リモートデスクトップ接続で操作が可能です。しかし、自宅外からのVPN接続時には、マジックパケットが通らないため、ルーターの設定でポートの開放を追加することが必要でした。マジックパケットのために追加でポート開放とかはしたくありません。HPのMicroServerのリモートアクセスカード(専用LANポートでLANに接続している)であればブラウザ経由でアクセスでき、ポートの開放の追加なしで電源のONができます。MicroServerはスペックが低いため、エンコード処理には向いていません。そこで、MicroServerにリモートデスクトップで接続し、MicroServerから同一のLAN内の別のパソコンにマジックパケットを送信することにしました。リモートアクセスカードでMicroServerを起動⇒MicroServerにリモート接続⇒MicroServerから録画ファイル変換用パソコンをWake On LANで起動⇒録画ファイル変換用パソコンにリモート接続し、Anime Lockerの録画サーバーにアクセス、といったフローになります。VPN接続時には、家のLANに接続した状態なので、新たにポートの開放をしなくてもWake On LANが実現できると思っていたのですが・・。SwitchBotなどでパソコンのボタンを物理的に押すという、まさしく「力技」もあるにはあります。SwitchBotプラグを利用する方法もあるにはあります。スマートプラグが一つあるので、いずれ試してみようと思います。というか、スマートプラグを接続しておけば、強制終了ができるということになるので、長期不在の場合は必要なことだと思います。スリープからの復帰時やシャットダウン時にフリーズすることも時々あるので・・。いずれにしても、LANポートが通電状態なのですから、Wake On LAN用のポート開放などが必要ない、SwitchBot的な仕組みがパソコンに内蔵されていれば言うことがないのですが・・・。リモートアクセスカードを入手しておいてよかったと思います。
2023.04.22
コメント(0)
-

【パソコンの処理の自動化】番組録音ファイルのタグ編集をPower Automateで一括処理:プログラム学習に役立つ!
radikoからRajikoでダウンロードしたファイルを、SONYのwalkmanで、より便利に再生するために、下記の処理をPower Automate Desktopで実行するようにしてみました。といっても、Power Automate Desktopですべて完結するわけではなく、ffmpegやid3v2win.exeといったアプリでの処理をPower Automate Desktopのフローの中で実行するという内容です。もちろん、Power Automate Desktopも「繰り返し処理」と「タグに入力する日付の文字列を各録音ファイルの名前から取り出す」などの重要な処理内容を担っています。Power Automate Desktopの利用は、プログラム学習に役立つというか、プログラム学習初心者に最適というか、言語を学習しなくてもプログラム作成と同等のことができるというか、いろいろな側面があると思います。「小学生が習うプログラミング」的なところがあるようなので、親子で取り組むのもいいかもです。いずれにしても、MP3の「アルバム」タグにラジオ番組放送年月日の情報を書き込むという、極めてニッチ?な処理をプログラム言語の学習なしで達成できるのはかなりすごいことだと思います。「アルバム」のタグに番組放送日を入れることにより、番組放送日でファイルを選択することが手軽にできるようになりました。まあ、walkmanの「フォルダ」から入った場合、ファイルは番組名別に放送日の順に並ぶので、ちょっとだけ便利な感じです。まだ、下記の1.と2.の処理を統合しておらず、それぞれで動作確認をしているところです。動作確認後、walkmanにmp3のファイルをコピーするフローの前に2.のタグ編集の処理を入れます。===1.radikoからRajikoでダウンロードした.aac形式のファイルを.mp3形式に変換2.walkmanで検索がしやすいようにタグの「アルバム」のところに番組の放送日を書き込む===1.の変換処理は、処理を実行するバッチファイルをPower Automate Desktopで起動させる方法でできました。⇒先日の日記で言及しています。2.の処理ですが、普通のバッチファイルを使用してフォルダ内の全ファイルに対して繰り返し処理する際に、「タグに入力する日付の文字列を各録音ファイルの名前から取り出す」ということが上手くいきませんでした。Windowsのバッチファイルの「for in() do」の構文では、各ファイル名から文字列の一部を取得する処理が簡単ではありません。変数を利用して上手く処理するには、PowerShellやVBSなど、別の方法を採用する必要があるようです。処理内容の概要はイメージできていますが、PowerShellやVBSのコードを作るために文法や作法を調べるのが大変そうなので、Power Automate Desktopを試したところ、意外と簡単にできてしまいました。「何を」「どうする」かが明確であり、Power Automateで「どうする」の処理が対応可能な範囲内にあれば、簡単にフローができます。まあ、Power Automateは、PowerShellやVBSのコードなどの代替手段なので、当然といえば当然なのですが、PowerShellやVBSのコードを知らなくても結構いろいろなことができるようです。ただし、PowerShellやVBSのコードの置き換えのようなものなので、PowerShellやVBSのコードを参考にしながらPower Automateのフローを作成するのが効率的ではあります。「For each」のフローとかは、PowerShellっぽいです。今回のフローも、バッチファイルの「for in() do」のイメージがあったから、比較的簡単にできたのではないかと思います。まあ、フローチャートのイメージがあればいいということだと思います。いずれは、ふんわりとした処理イメージの指示だけでAIが処理するようになるのでしょうが。。GitHub Copilotなど、AIによるコード作成支援が実用化されてきています。プログラム言語の細かな文法・作法を覚えていなくても、変数のところをうまくごにょごにょできれば、コードが作成できる時代になってきています。下図が2.の処理用に作成したPower Automateフローです。サブテキストの取得の部分がWindowsの繰り返し処理のバッチファイルではうまくいかなかったのですが、Power Automateでは簡単にできました。ただし、Power Automate内の処理では、現状は文字列の末尾からの取得(Right関数のような処理)ができないのが残念なところです。現状、文字列の取得は先頭からが既定の動作になっていますまた、ファイル名に空白があるとファイル名からの文字列抽出がうまくできなかったため、最初にファイル名から空白を除く処理を入れています。空白の表現がわかりにくく、正規表現もうまくいかなかったため、いろいろと調べて「%''% %''%」を半角の空白の表現に使っています。こういうわかりにくい表現は何とかならないものかと思います。Rajikoでダウンロードしたファイルのファイル名は、放送局名_番組放送開始日時_放送終了日時といった形式なので、アンダーバー「_」でファイル名を分割して取得すると番組放送開始日時から始まる文字列となります。そこから日付の部分8文字だけを取り出して、タグのアルバム名の欄に書き込みます。↓タグに書き込むメインの処理です。id3v2win.exeというアプリを作業フォルダに置いておき、DOSコマンドを実行しています。このタグの編集処理自体はWindowsの繰り返し処理のバッチファイルでも実行できるのですが、引数の%Subtext%をファイルごとに生成する処理がバッチファイル内でうまくできなかったためPower Automateを利用しています。例えば、処理実行日の「%DATE%」(一定の値)を書き込む処理であれば簡単なバッチファイルだけで可能です。タイムフリーの番組をRajikoでダウンロードし、番組名をファイル名の先頭にコピペします。ここまでが手動で、後はウォークマンをUSBケーブルでパソコンにつないで、フローを実行すると、「.aacのファイルを.mp3に変換」「アルバムのタグに番組の放送日時を書き込む」「ウォークマンにファイルをコピー」といった処理を一括で自動実行します。ウォークマンにコピー済みのファイルは自動でOneDriveのフォルダにバックアップします。
2023.04.15
コメント(0)
-
【foltia Anime Locker】バッチ処理でTSファイルからワンセグデータを取り出す
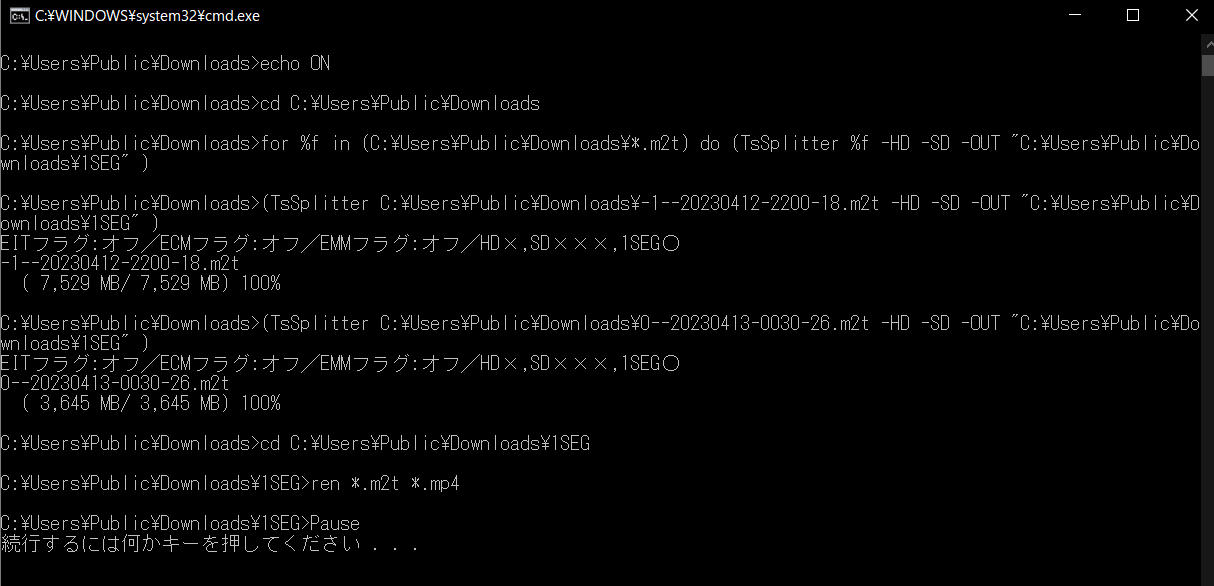
MP4ファイルの作成が失敗していた録画ファイル(TSファイル)からワンセグデータを取り出す処理をバッチファイルにしてみました。ワンセグデータを取り出すだけのシンプルな処理内容ですが、フォルダ内のファイルを一括して処理できるので便利です。Power Automate Desktopでバッチファイルを起動してもよいかもしれません。<前提など>・TsSplitter.exeなどはC:\Users\Public\Downloadsに置いておきます。・TSファイルをC:\Users\Public\Downloadsにダウンロードします。・ワンセグの動画ファイルは、C:\Users\Public\Downloads\1SEGに書き出します。・進行状況がわかるようにcmdウィンドウは表示させています。=============echo ONcd C:\Users\Public\Downloadsfor %%f in (C:\Users\Public\Downloads\*.m2t) do (TsSplitter %%f -HD -SD -OUT "C:\Users\Public\Downloads\1SEG")cd C:\Users\Public\Downloads\1SEGren *.m2t *.mp4Pause=============OneDriveにアップロードしたファイルは、ブラウザから拡張子の変更ができないので、拡張子変更処理も加えています。
2023.04.13
コメント(0)
-
【Microsoft Teams】無料版 (クラシック)が終了
Microsoft Teams 無料版 (クラシック)が終了です。職場・学校用アカウントで利用できる無料版がMicrosoft Teams 無料版 (クラシック)だったのですが、無料での利用は個人用アカウント向けのMicrosoft Teams 無料版に一本化されたということになります。つまり、これまでは3種類だったものが、2種類になるということです。というか、これまでも実質はビジネス用と個人用の2種類だったと言えるのですが、ビジネス用は無料で利用できなくなるということだと思います。一方、個人用は有料利用の場合(Microsoft 365 Familyなどの場合)、会議時間やストレージ容量が無料利用の場合よりも多いという違いはあります。OneDriveの例で考えるとわかりやすかもしれません。OneDriveはビジネス用と個人用ではCloudのサーバーの種類が異なるようです。また、個人用では有料のマイクロソフトアカウントと無料のアカウントでは容量に違いがあります。↓マイクロソフト社のページから
2023.04.12
コメント(0)
-

【WALKMAN】Power Automateで.aacのファイルを.mp3のファイルに変換してコピー
Rajikoでradikoのタイムフリーのラジオ番組をダウンロードすると、.aac形式となっています。パソコンで再生すれば何の問題もなく、スマホに移して再生する場合も問題ありませんが、ラジオ番組を聴くのであれば、ウォークマンで十分です。特に、寝ながら聞く場合にまでパソコンを使用しなくてもいいのではないかと考えた次第です。しかし、WALKMANでは、.aac形式のファイルを再生できないため、.mp3形式に変換することにしました。ラジオ番組をダウンロードしてファイル名に番組名を貼りつけるところまでは手動で行い、.mp3形式への変換、.aac形式のファイルの削除、WALKMANのMusicフォルダへのコピーをPower Automateで処理するようにしました。フローは、「.mp3形式への変換を実施するバッチファイルの起動」「.aac形式のファイルの削除」「WALKMANのMusicフォルダへのmp3ファイルのコピー」の3つに分けて作成しています。なお、バッチファイルの内容は下記の通りです。ffmpegを利用してフォルダ内のファイルをループ処理しています。このループ処理のパターンは、TSファイルからワンセグデータを取り出す処理でも使用していますが、シンプルでわかりやすいと思います。======バッチファイルの内容echo ONpushd %0¥..for %%f in (*.aac) do (ffmpeg -i "%%f" -b:a 64k "%%~nf.mp3")Pause======別途下記のような内容のバッチファイルを用意して、作成済のmp3ファイルに適用すれば、「アルバム」タグにmp3ファイルに変換した日の情報を書き込めます。ウォークマンで再生する時にファイルを日付で探せるようになります。<前提:id3v2win.exeというタグ編集アプリを導入している>======echo ONpushd %0¥..for %%f in (*.mp3) do (id3v2win -A %DATE%_converted %%f)Pause======↑本当は、ファイル名に番組の放送日時の情報があるので、それを取り出して利用したかったのですが、ループ処理のバッチファイルでは、ファイル名の一部を取り出して利用するといったことが難しいため、今のところ「変換日」を利用しています。なお、アニメロッカーで録音したラジオ番組のファイルは.mp4形式で、ウォークマンでそのまま再生できます。とりあえず、フローは一つにまとめていません。ラジオ番組のダウンロードは随時行うため、一つにまとめていると都合が悪い場合があるからです。なお、一つにまとめたフローも用意しておき、たくさんのファイルを一括処理できるようにするというのもいいのかもしれません。この場合、.mp3形式への変換を実施する処理時間の問題やエラー発生の有無などの問題があるので、変換終了後にコピーするための判断の処理が必要になりそうです。バッチ処理終了時のメッセージ表示もPower Automateでできるので、いろいろなことができそうです。
2023.04.10
コメント(0)
-
【Microsoft 365 Family】複数のOneDriveをエクスプローラーで参照する方法
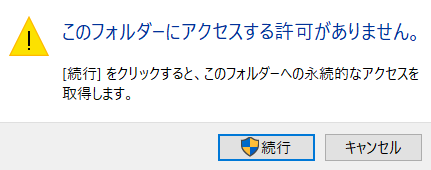
個人用OneDriveは、一つのアカウントに一つの利用が原則です。しかし、下記の「力技?」の方法で複数のローカルの個人用OneDriveをエクスプローラーから利用参照できます。ローカルへのファイルの保存は可能、Cloudにあるファイルの読み込みは不可能。【追記】下記の手順で、サインインしていないOneDriveのフォルダ、ファイルを見ることができるようになりますが、ファイルを開くことはできません。Cloudからのダウンロードができない、ということになっています。サインインしていないOneDriveのフォルダにファイルを保存できますが、これはローカルに保存しているだけのようです。なお、アカウントを切り替えてサインインしてCloudにローカルのファイルをアップロードすることはできます。CloudのOneDriveと接続できるのは、一度に一つのアカウントである、ということは変わりませんでした。職場・学校用と個人用は一度に利用できるのですが・・・。つまり、個人のAアカウントにサインインしている状態で、個人のBアカウントのローカルのOneDriveにファイルを保存はできます。その後、Bアカウントでサインインして、ローカルのOneDriveに保存したファイルをCloudにアップロードすることができます。1.Aアカウントでパソコンにサインイン2.コントロールパネル>ユーザーアカウント>アカウント管理>PC設定で新しいユーザーを追加で、Bアカウントを追加3.パソコンを再起動し、Bアカウントでサインインする4.パソコンを再起動する5.Aアカウントでサインインする6.Cドライブ直下のユーザーフォルダにBアカウントのフォルダが作成されているので、クリックする。警告表示が出たら「続行」ボタンをクリックする。これで、Aアカウントでサインインしていながら、BアカウントのOneDriveのフォルダを利用することができるようになります。BアカウントのローカルのOneDriveにファイルを保存することできます。BアカウントのCloudのファイルは見れますが、アクセスはできません。7.Aアカウントにサインインしている状態で、BアカウントのローカルのOneDriveにファイルを保存はできます。その後、Bアカウントでサインインして、ローカルのOneDriveに保存したファイルをCloudにアップロードすることができます。OneDriveのフォルダ「共有」設定の方法では、ブラウザ経由での利用しかできないので、エクスプローラー経由での利用が必要な場合は上記の方法をとるしかなさそうです。複数のCloudドライブに接続できるサードパーティーのアプリを利用する方法以外では上記の方法がよさそうです。【追記】やはり、本格的に複数アカウントで同時利用するためにはサードパーティーのアプリを使用するしかないようです。そこで、FreeのAir Live Drive Basicを試してみました。Onedriveをネットワークドライブとして利用できるので、パソコンにサインインしているアカウントとは別のアカウントのOnedriveをネットワークドライブとしてマウントできました。クラウドの複数の個人用Onedriveを同時にエクスプローラーで使えるのですごく便利です。------------追記終わりOneDriveのフォルダの「共有」設定の方法でも、エクスプローラー経由で利用できるようになればいいのですが。。「フォルダの共有設定→ブラウザで共有フォルダ利用」は可能です。それをエクスプローラ経由でできるようにしてほしい、というささやかな願いです。なお、上記の方法以外で、標準の機能だけでごにょごにょしてネットワークドライブとしてマウントする方法もありますが、大きなファイルを利用できないので、動画ファイルの移動やコピーには使えません。。とにかく、上記の方法で、録画ファイルの移動・コピーをエクスプローラーやバッチファイル、Power Automateなどで処理することができるようになります。ローカルに保存→アカウント切り替え→Cloudに保存、はできます。なお、OneDriveは「ファイルオンデマンド」の設定にしているので、録画ファイルの視聴はブラウザ経由で行います。エクスプローラー経由だとファイルのダウンロードが必要になるためです。
2023.04.09
コメント(0)
-

【Power Automate Desktopはじめました】まずは1つのステップから
Windows 10/11の環境で「Power Automate Desktop」なるものを無料で利用できるとのことで、録画ファイルの整理に使ってみました。Windows 10の場合はマイクロソフトストアから無料で入手できます。Windows 11の場合は標準でインストールされています。まずは、「ファイルの移動」という一つのステップだけの利用ですが、AフォルダからBフォルダにワイルドカードで指定した「*ファイル名の一部*」の録画ファイルを移動させてみました。ジャンルごとのフォルダに保存していた録画ファイルを番組ごとにフォルダを作成して整理しました。コマンドプロンプトで実行するのと同じような感覚で、フォルダ、ファイルのパスを指定して実行ボタンを押すだけです。一つのステップだけの処理であれば、Windows PowerShellのターミナルで実行するのと違いはありませんが、Power Automate Desktopの場合は処理のカスタマイズが簡単にできそうです。平成の時代にバッチファイルで処理していたことを、令和の時代はPower Automate DesktopのようなRPA(ロボティック プロセス オートメーション)アプリで処理するようになってきている、ということなのでしょうか。まあ、米国のマイクロソフトにとって、平成も令和も関係ありませんが。。少なくとも、GUIでマウスを使ってファイルを移動させるよりも簡単で確実です。
2023.04.09
コメント(0)
-
【Microsoft 365 Family】OneDriveでの動画再生:ブラウザで手軽に再生可能
アニメロッカーで録画したファイルをパソコンにログインしているアカウントとは別のアカウントのOneDriveに保存したりしています。Microsoft 365 Familyでは、家族で最大6人分のOneDriveが利用できます、一人あたり1TBなので、最大6TBです。問題は、パソコンで利用する場合にパソコンにログインしているアカウントのOneDriveしかまともに利用できないことです。スマホだとファイルマネージャーを使えば、複数アカウントのOneDriveを簡単に切り替えて利用できるのですが・・・。パソコンのエクスプローラーで普通に利用できるのはログインしているアカウントのOneDriveのみです。ログインしているアカウント以外のアカウントのOneDriveをネットワークドライブとしてマウントする方法もありますが、大きなファイルを扱えなかったりします。ログインしているアカウント以外のアカウントのOneDriveを利用する場合は、フォルダの共有の設定をして、ブラウザでOneDriveの共有フォルダを利用することになると思います。つまり。AアカウントのOneDriveのフォルダをBアカウントに対して共有する設定をしておけば、Bアカウントでログインしているパソコンでもブラウザ経由でAアカウントのOneDriveのフォルダを利用することができます。【追記】Windows パソコンの場合、別のアカウントでパソコンにサインインしてCドライブ直下の「ユーザー」フォルダに作成された別アカウントのOneDriveフォルダを利用するという方法があることを発見しました。コントロールパネルでアカウントを追加して、再起動し、追加したアカウントでサインインします。これで、Cドライブ直下の「ユーザー」ホルダに、追加したアカウント用のフォルダが追加されます。通常は、別アカウントのユーザーフォルダは利用できませんが、下図の警告表示があった際に「続行」とすれば利用できるようになります。エクスプローラーで利用できるようになるので、複数アカウントのOneDriveの利用方法としては、この方法がほぼベストなのではないかと感じています。ブラウザ上でファイル一覧を見ると、ファイルについての情報の列名に「撮影日」とあるので、スマホで撮影した動画ファイルなどの再生が主な用途なのでしょうが、アニメロッカーで録画したMP4ファイルもブラウザで再生できます。拡張子.mp4のファイルをブラウザでクリックするとブラウザで再生が始まります。専用のプレーヤーという感じで、気のせいか、メディアプレーヤーで再生するよりもキレイに見えます。↓マイクロソフトのOneDriveのヘルプページに下記の記載があります。ちょっと意外ですが、OneDriveでの動画再生は一般的な用途の一つのようです。そういえば、動画編集アプリがMicrosoft 365 Familyに含まれています。ただし、ブラウザ経由のこの方法では、アップロードしたファイルの拡張子を変更できないという問題がありました。酷い仕様です。TSファイル(拡張子.m2t)からワンセグデータを取り出したファイルの拡張子が.m2tのままOneDriveにアップロードしてしまうとブラウザ経由の再生ができませんでした。なお、拡張子を.mp4に変更してからアップロードした場合は、ブラウザ経由でもワンセグ動画を再生できました。OneDriveは、「ファイルオンデマンド」の設定をしていて、ローカルにファイルがない状態なので、ブラウザ経由での再生が適しています。
2023.04.07
コメント(0)
全11件 (11件中 1-11件目)
1
-
-

- 携帯電話のこと
- [ウイルスバスター クラウド]「お…
- (2024-09-24 05:28:22)
-
-
-

- モバイルよもやま
- スマートフォンソフトウエア競争促進…
- (2024-09-26 08:08:06)
-
-
-

- パソコンの調子が悪い
- ど素人の私が動かなくなったパソコン…
- (2024-09-22 14:06:46)
-


