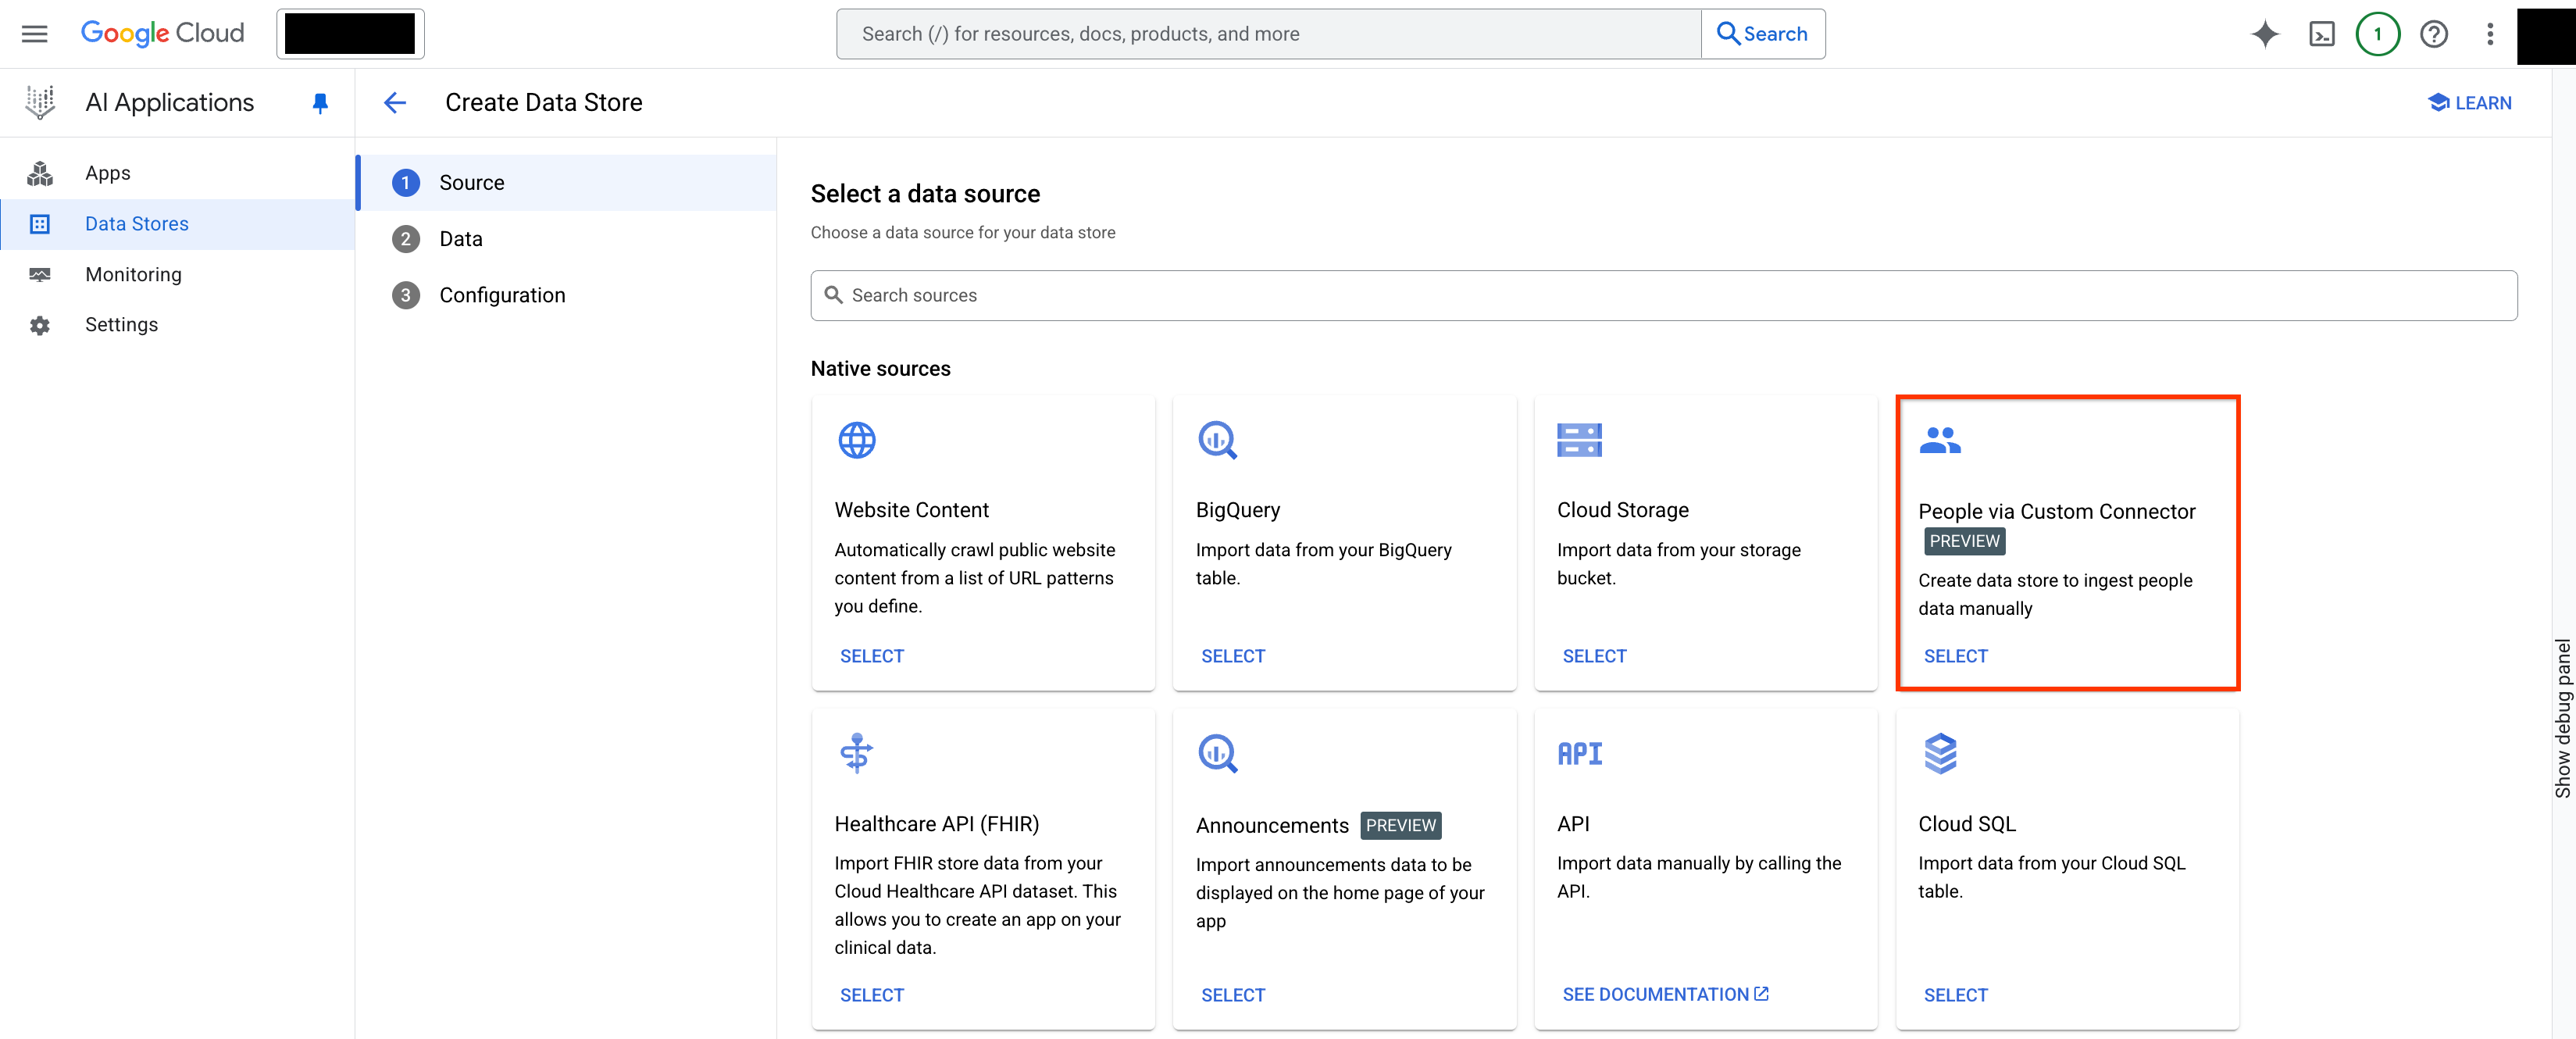
On theSourcepage, in theNative sourcessection,
selectPeople via Custom Connector.
Select a data source.
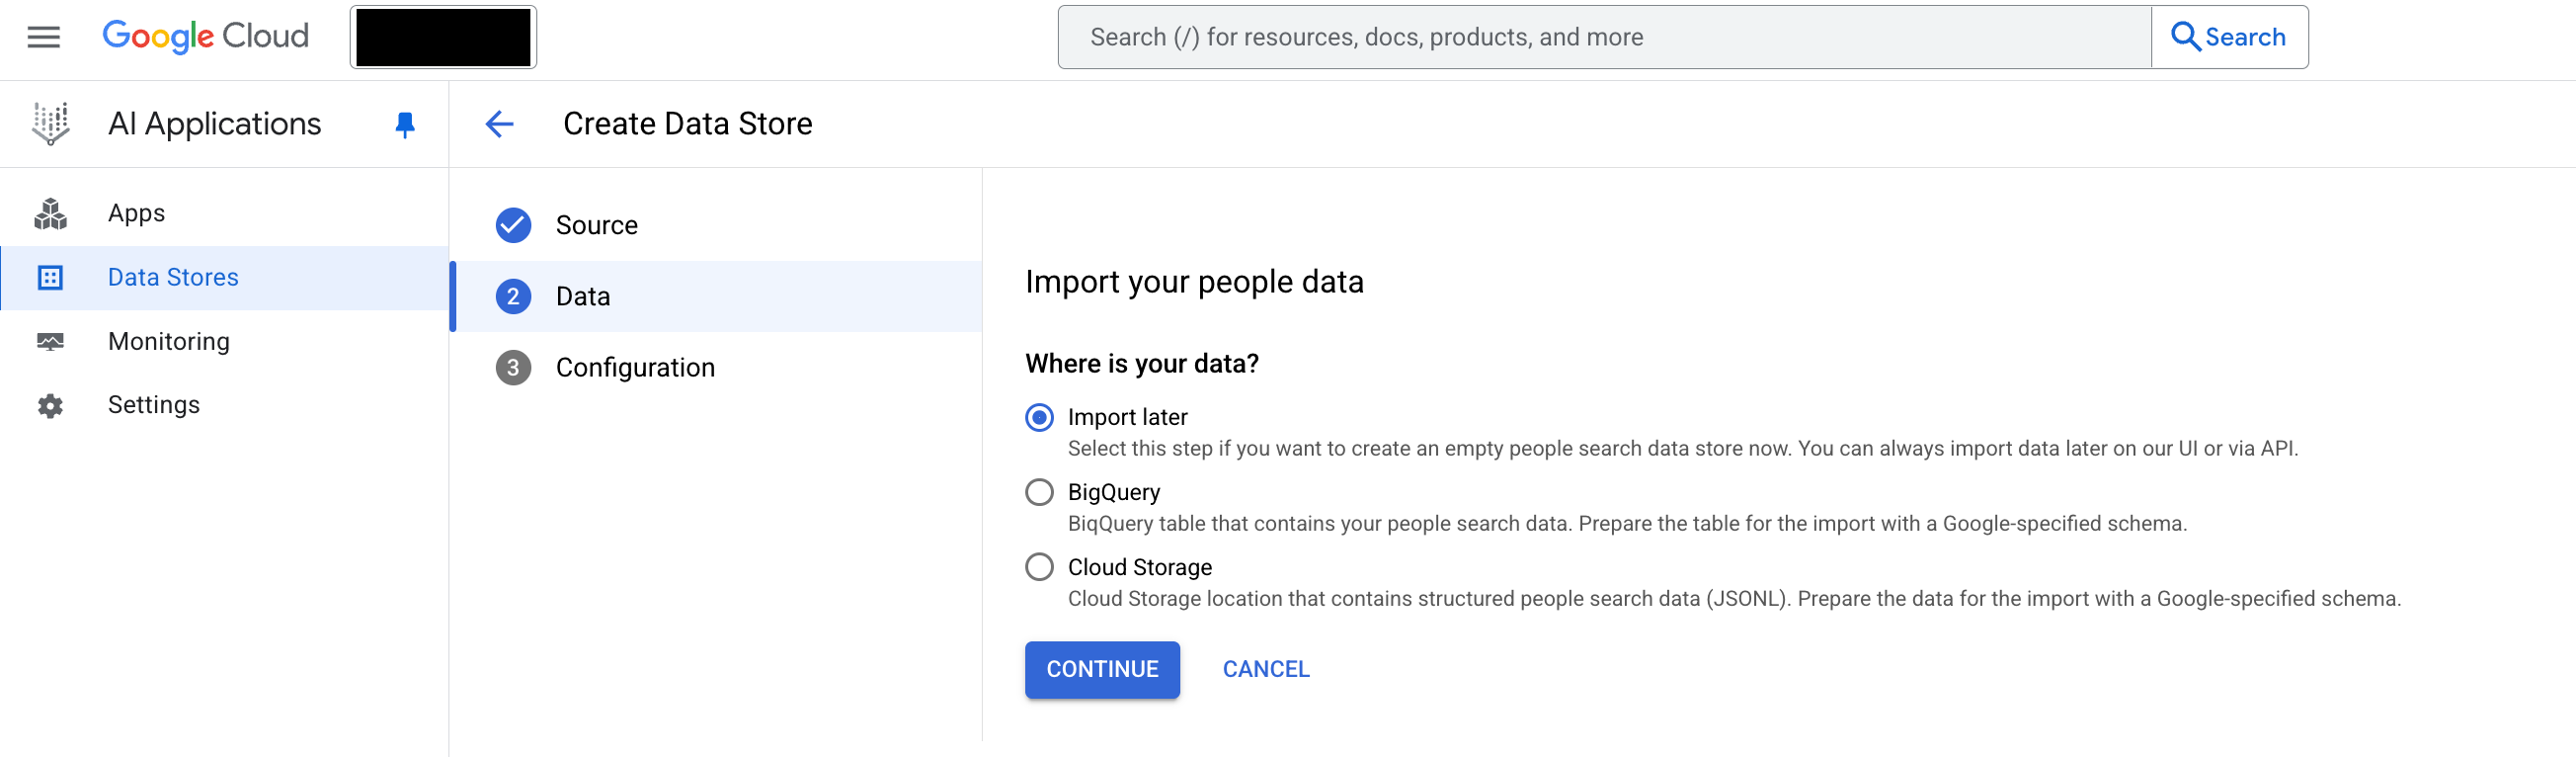
Import the people data:
Import later: If you haven't imported your people data to
Cloud SQL or BigQuery yet, selectImport later.
BigQuery: Upload the data from a BigQuery
table.
Cloud Storage: Upload the data from a Cloud Storage table.
Import people data.
ClickContinue.
Choose a region for your data store.
Enter a name for your data store.
Optional: If the data needs to be access controlled, selectThis data store contains access control information. For more information, seeData source access control.
ClickCreate.
Configure the data connector.
To check the status of your ingestion, go to theData Storespage
and click your data store name to see details about it on itsDatapage.
When the status column on theActivitytab changes fromIn progresstoImport completed, the ingestion is complete.
Depending on the size of your data, ingestion can take several
minutes or several hours.
Customize search results
To include or exclude personal information from the search results,
follow these steps:
In your data store, click theEntitytab, and clickUsers.
In theUserspage, click theSchematab.
ClickEdit.
Select or clear the attributes, such as country, to specify whether they're
retrievable, searchable, and indexable. To be searchable, the attribute must
be markedRetrievable,Indexable, andSearchable.
ClickSave.
Preview people search results
If you have already connected the data store to an app, clickApps, and
click the name of your app.
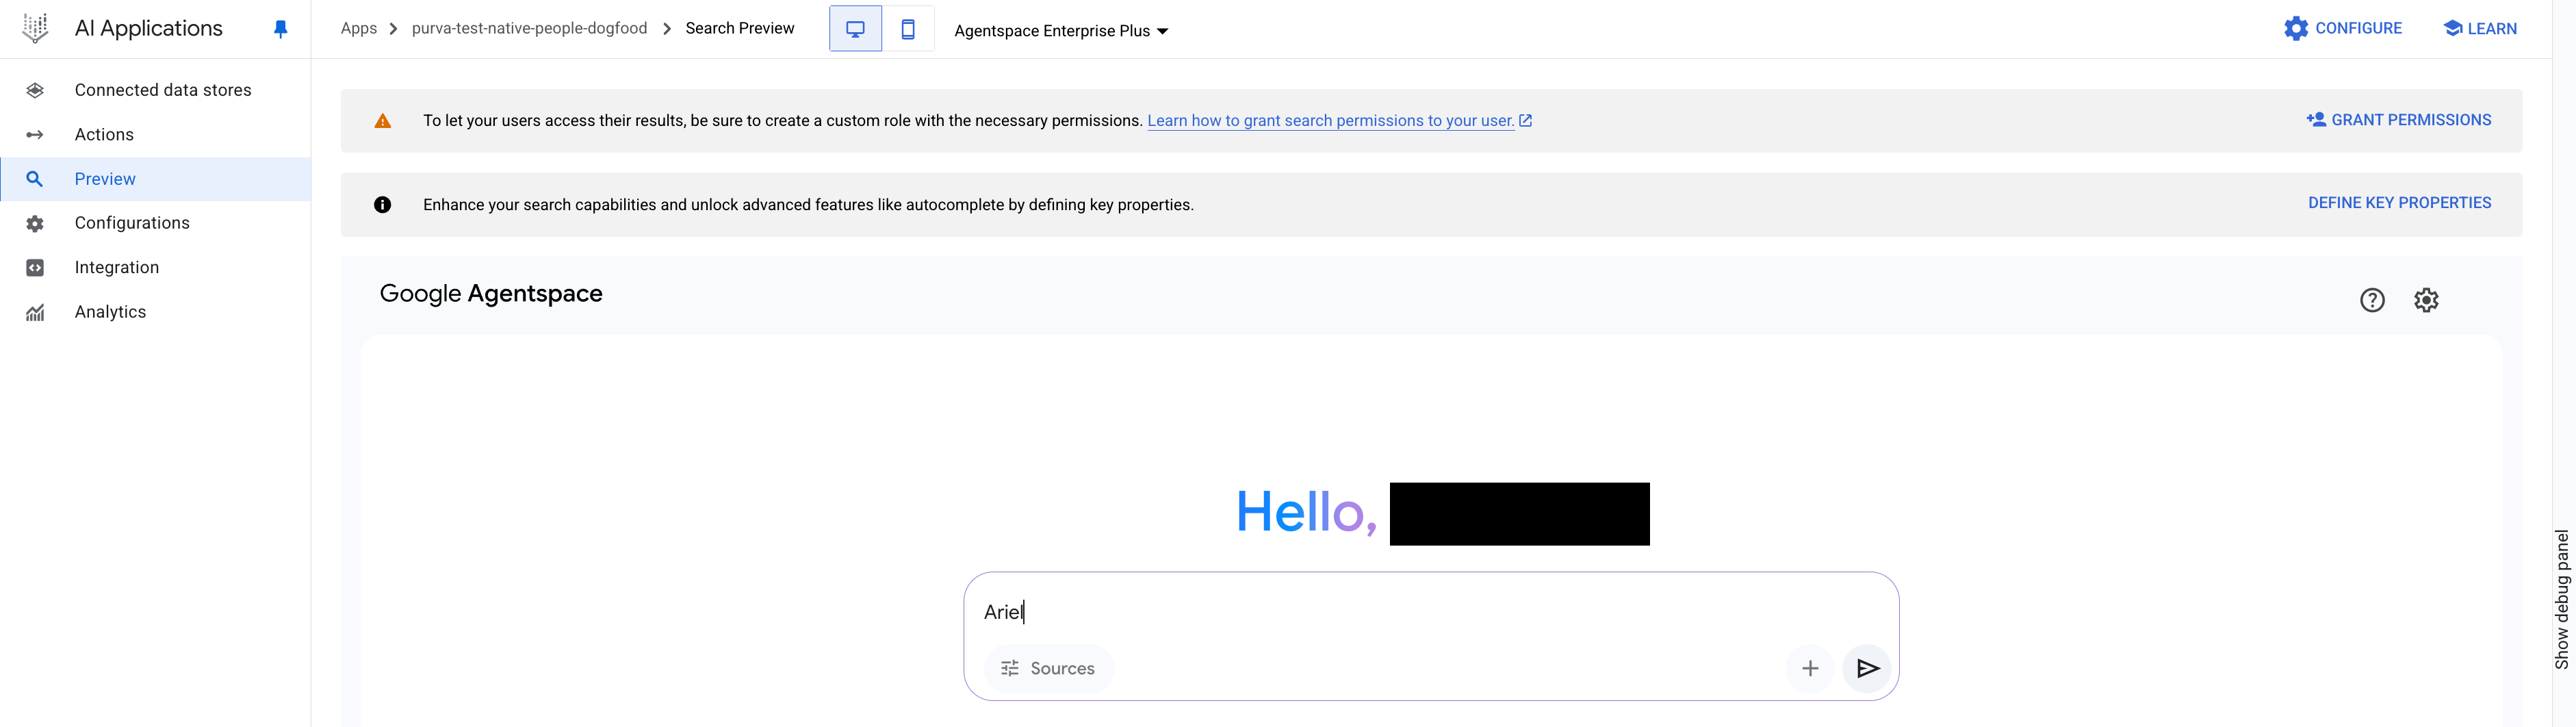
ClickPreview.
Search for people in your organization using the
search bar. The search results show details such as name, job title,
email, and profile picture.
If you have made custom attributes searchable, then you can use the
attributes in searches, but the attributes themselves aren't returned in
profiles. For example, ifteam-positionis a custom attribute and marked
retrievable, indexable, and searchable in the schema, then you can search
for people with a specific team position, such as "tech lead".
You get a list of people who have
that position, but the output won't include the words "tech lead".
View the search web app
To view your Agentspace web app, do the following:
In the navigation menu, clickIntegration.
Make sure thatEnable the Web Appis enabled.
In theThe link to your web appsection, clickCopyand open the link
in your browser.
[[["Easy to understand","easyToUnderstand","thumb-up"],["Solved my problem","solvedMyProblem","thumb-up"],["Other","otherUp","thumb-up"]],[["Hard to understand","hardToUnderstand","thumb-down"],["Incorrect information or sample code","incorrectInformationOrSampleCode","thumb-down"],["Missing the information/samples I need","missingTheInformationSamplesINeed","thumb-down"],["Other","otherDown","thumb-down"]],["Last updated 2025-09-05 UTC."],[],[],null,["# Import people data from a custom source\n\nYou can upload people data from Cloud Storage or BigQuery.\n| **Note:** After you configure a people data source for your app, Google strongly recommends that you enable Knowledge Graph to significantly enhance search quality for your users. For more information, see [Knowledge Graph: Powering intelligent and context-aware search](/agentspace/docs/use-knowledge-graph-search).\n\nTo use the Google Cloud console to ingest people data, follow these steps: \n\n### Console\n\n1. In the Google Cloud console, go to the **Agentspace** page.\n\n [Agentspace](https://console.cloud.google.com/gen-app-builder/)\n2. Go to the **Data stores** page.\n\n3. Click add **Create data store**.\n\n\n Create a new data store.\n\n \u003cbr /\u003e\n\n4. On the **Source** page, in the **Native sources** section,\n select **People via Custom Connector**.\n\n\n Select a data source.\n\n \u003cbr /\u003e\n\n5. Import the people data:\n\n - **Import later** : If you haven't imported your people data to\n Cloud SQL or BigQuery yet, select **Import later**.\n\n - **BigQuery**: Upload the data from a BigQuery\n table.\n\n - **Cloud Storage**: Upload the data from a Cloud Storage table.\n\n\n Import people data.\n\n \u003cbr /\u003e\n\n6. Click **Continue**.\n\n7. Choose a region for your data store.\n\n8. Enter a name for your data store.\n\n9. Optional: If the data needs to be access controlled, select\n **This data store contains access control information** . For more information, see\n [Data source access control](/agentspace/docs/identity).\n\n10. Click **Create**.\n\n\n Configure the data connector.\n\n \u003cbr /\u003e\n\n11. To check the status of your ingestion, go to the **Data Stores** page\n and click your data store name to see details about it on its **Data** page.\n When the status column on the **Activity** tab changes from **In progress**\n to **Import completed**, the ingestion is complete.\n\n Depending on the size of your data, ingestion can take several\n minutes or several hours.\n\n### Customize search results\n\nTo include or exclude personal information from the search results,\nfollow these steps:\n\n1. In your data store, click the **Entity** tab, and click **Users**.\n\n \u003cbr /\u003e\n\n2. In the **Users** page, click the **Schema** tab.\n\n3. Click **Edit**.\n\n \u003cbr /\u003e\n\n4. Select or clear the attributes, such as country, to specify whether they're\n retrievable, searchable, and indexable. To be searchable, the attribute must\n be marked **Retrievable** , **Indexable** , and **Searchable**.\n\n5. Click **Save**.\n\n \u003cbr /\u003e\n\n | **Note:** After you save your changes, the **Edit** button remains inactive for a few minutes before reactivating.\n\n### Preview people search results\n\n1. If you have already connected the data store to an app, click **Apps**, and\n click the name of your app.\n\n | **Note:** If you haven't connected your data store to an app yet, follow the steps in [Create an app](/agentspace/docs/create-app) to create an app and select your data store.\n2. Click **Preview**.\n\n3. Search for people in your organization using the\n search bar. The search results show details such as name, job title,\n email, and profile picture.\n\n To open your Agentspace Enterprise web app in a browser, see\n [View the search web app](/agentspace/docs/quickstart-agentspace#view_the_search_web_app).\n\n\n Preview the search results.\n\n \u003cbr /\u003e\n\n If you have made custom attributes searchable, then you can use the\n attributes in searches, but the attributes themselves aren't returned in\n profiles. For example, if `team-position` is a custom attribute and marked\n retrievable, indexable, and searchable in the schema, then you can search\n for people with a specific team position, such as \"tech lead\".\n You get a list of people who have\n that position, but the output won't include the words \"tech lead\".\n\n### View the search web app\n\nTo view your Agentspace web app, do the following:\n\n1. In the navigation menu, click **Integration**.\n\n2. Make sure that **Enable the Web App** is enabled.\n\n3. In the **The link to your web app** section, click **Copy** and open the link\n in your browser."]]