
This page describes how to connect Workday to Agentspace.
After you set up your data source and import data the first time, the data store syncs data from that source at a frequency that you select during setup.
Before you begin
Before you create a Workday datastore, make sure you have the following:
- Client ID
- Client secret key
- Refresh token
These credentials are necessary for connection authentication.
Use the following steps to generate a client ID, secret key, and refresh token, create a new user in the Workday instance, assign them to a security group, and grant the necessary permissions.
Register API client in Workday
To register an API client in Workday, do the following:
-
Sign in to your Workday instance using administrator account. The login URL has following format: https:// YOUR_INSTANCE_ID .workday.com/wday/authgwy/ YOUR_TENANT /login.html
-
In the search bar, search for
Register API client for integrations. -
In the Register API client for integrationsdialog:
- Enter Client name.
- Select Non-expiring refresh tokenscheckbox.
- Select Include workday owned scopecheckbox.
- Add all values in the Scope (Functional area)by pressing Ctrl+A and then spacebar.
-
Click Ok.

Register API client for integrations
-
Save the Client IDand Client secretvalues from the confirmation page for later use.
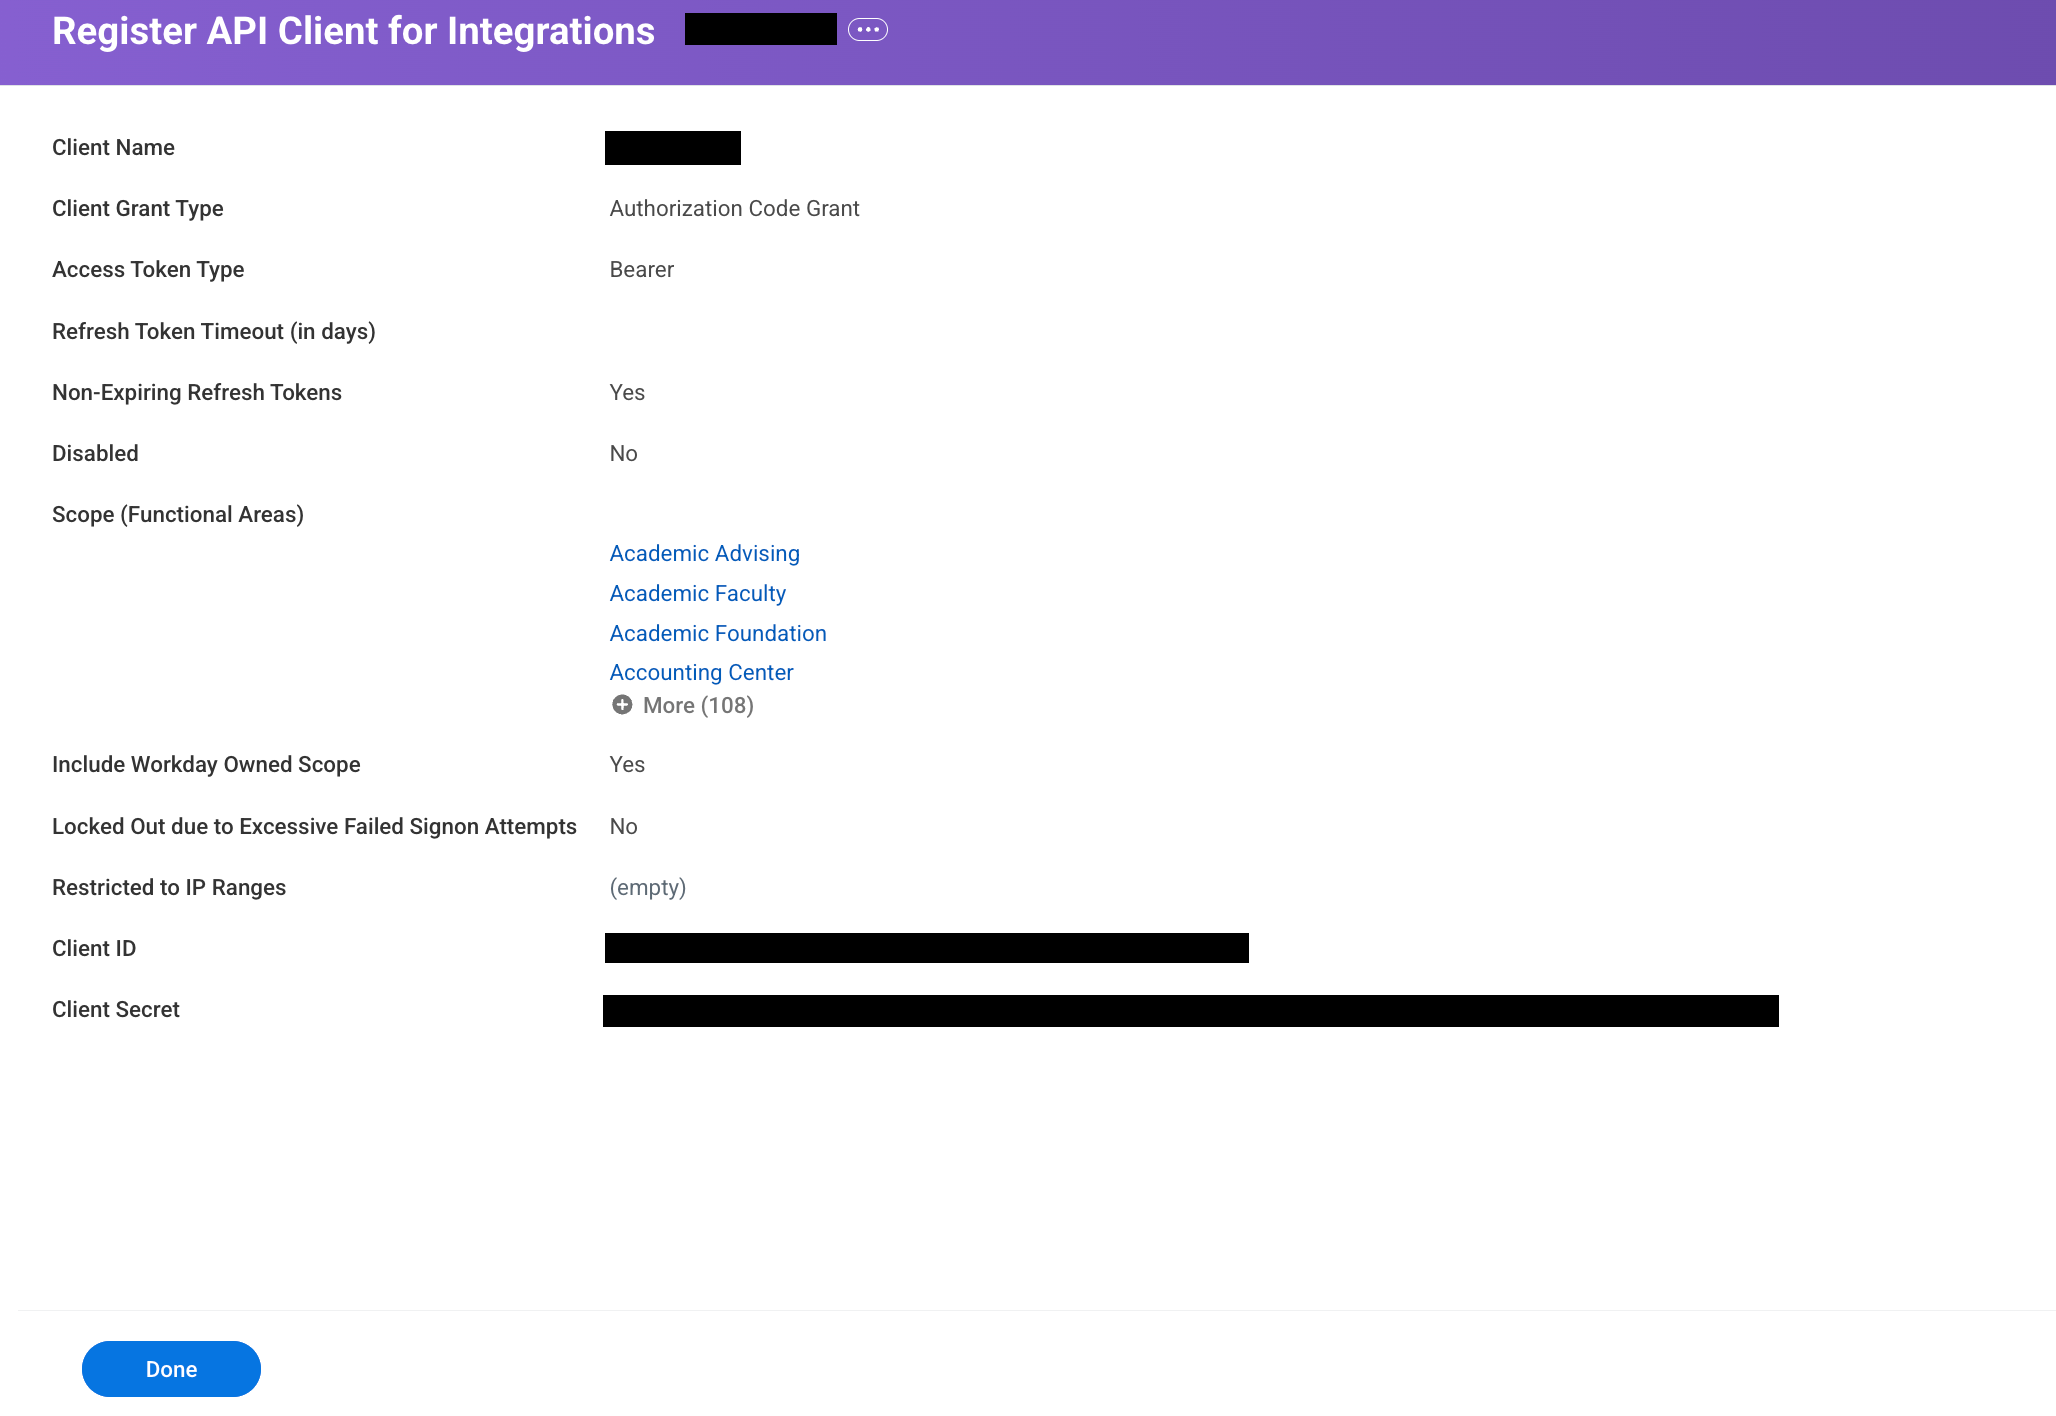
Register API client for integrations confirmation -
Click Done.
Set permissions and roles for Workday user
To set up an integration system user, create a security group, add the user to the group, and assign required permissions, do the following:
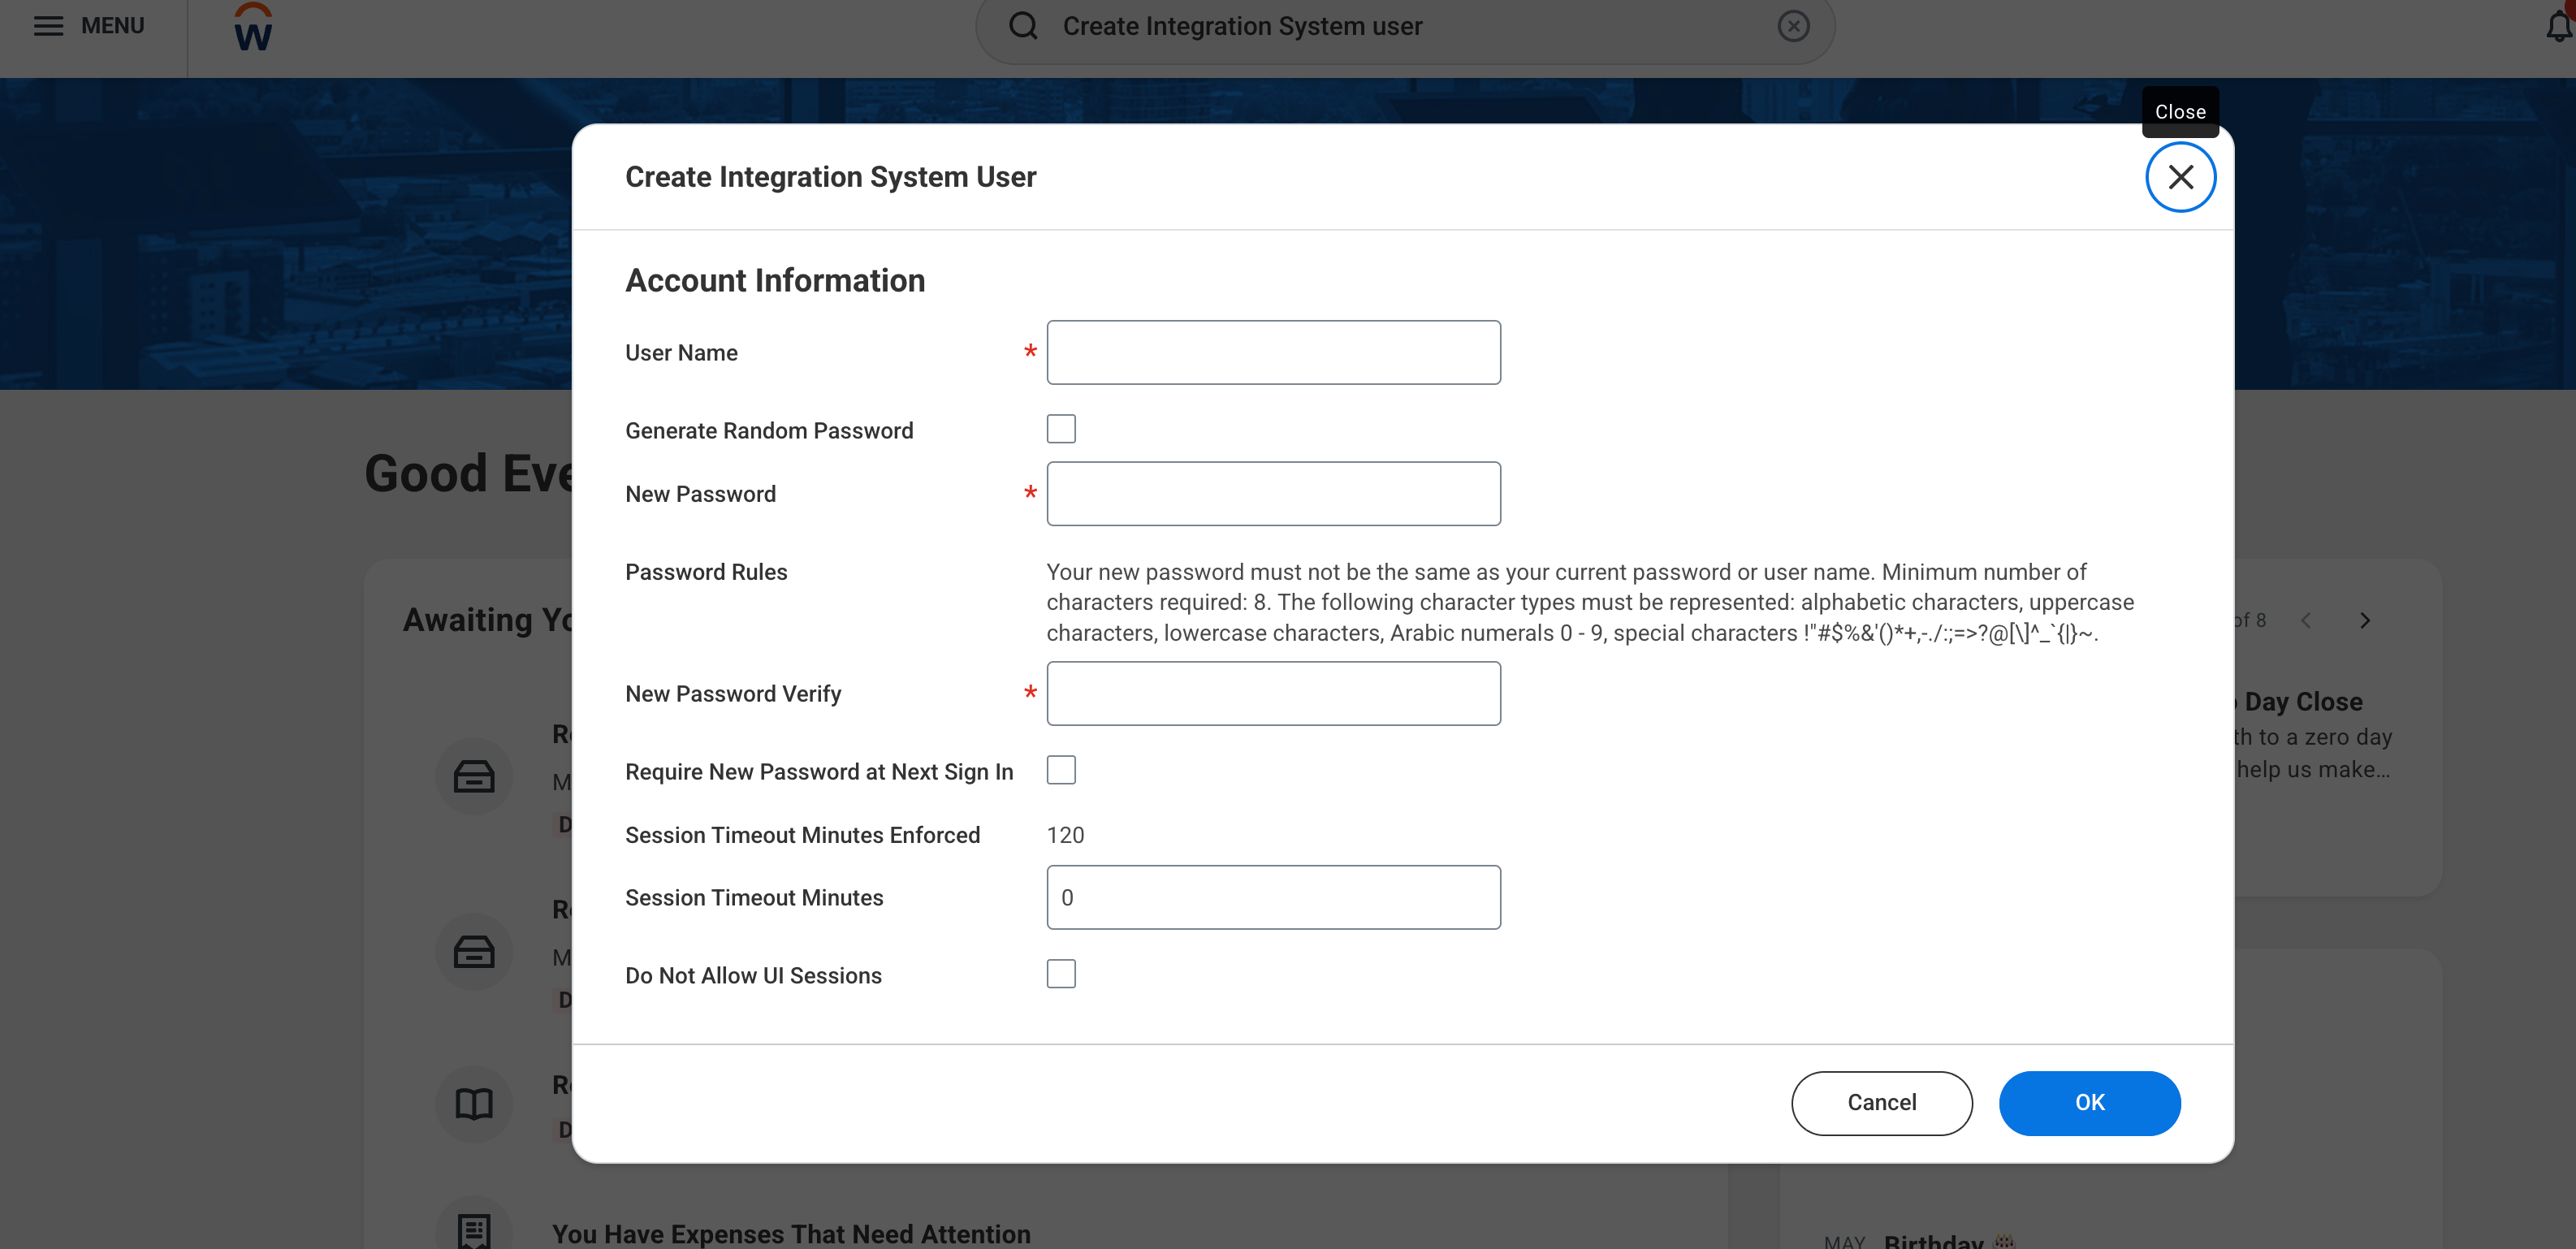
Create integration system user
- In the search bar, search for
Create integration system user. -
In the Create integration system userdialog:
- Enter Username.
- Set Password.
- Set Session timeoutto
0. - Select Do not allow UI sessionscheckbox for enhanced security.
-
Click Ok.
Create integration system user The created user details are displayed. You can note down the username and password for later use.

Created user details
Create integration security group
- In the search bar, search for
Create security group. -
In the Create security groupdialog window:
- Select Typeas Integration system security group (Unconstrained).
- Enter a Name.
-
Click Ok.
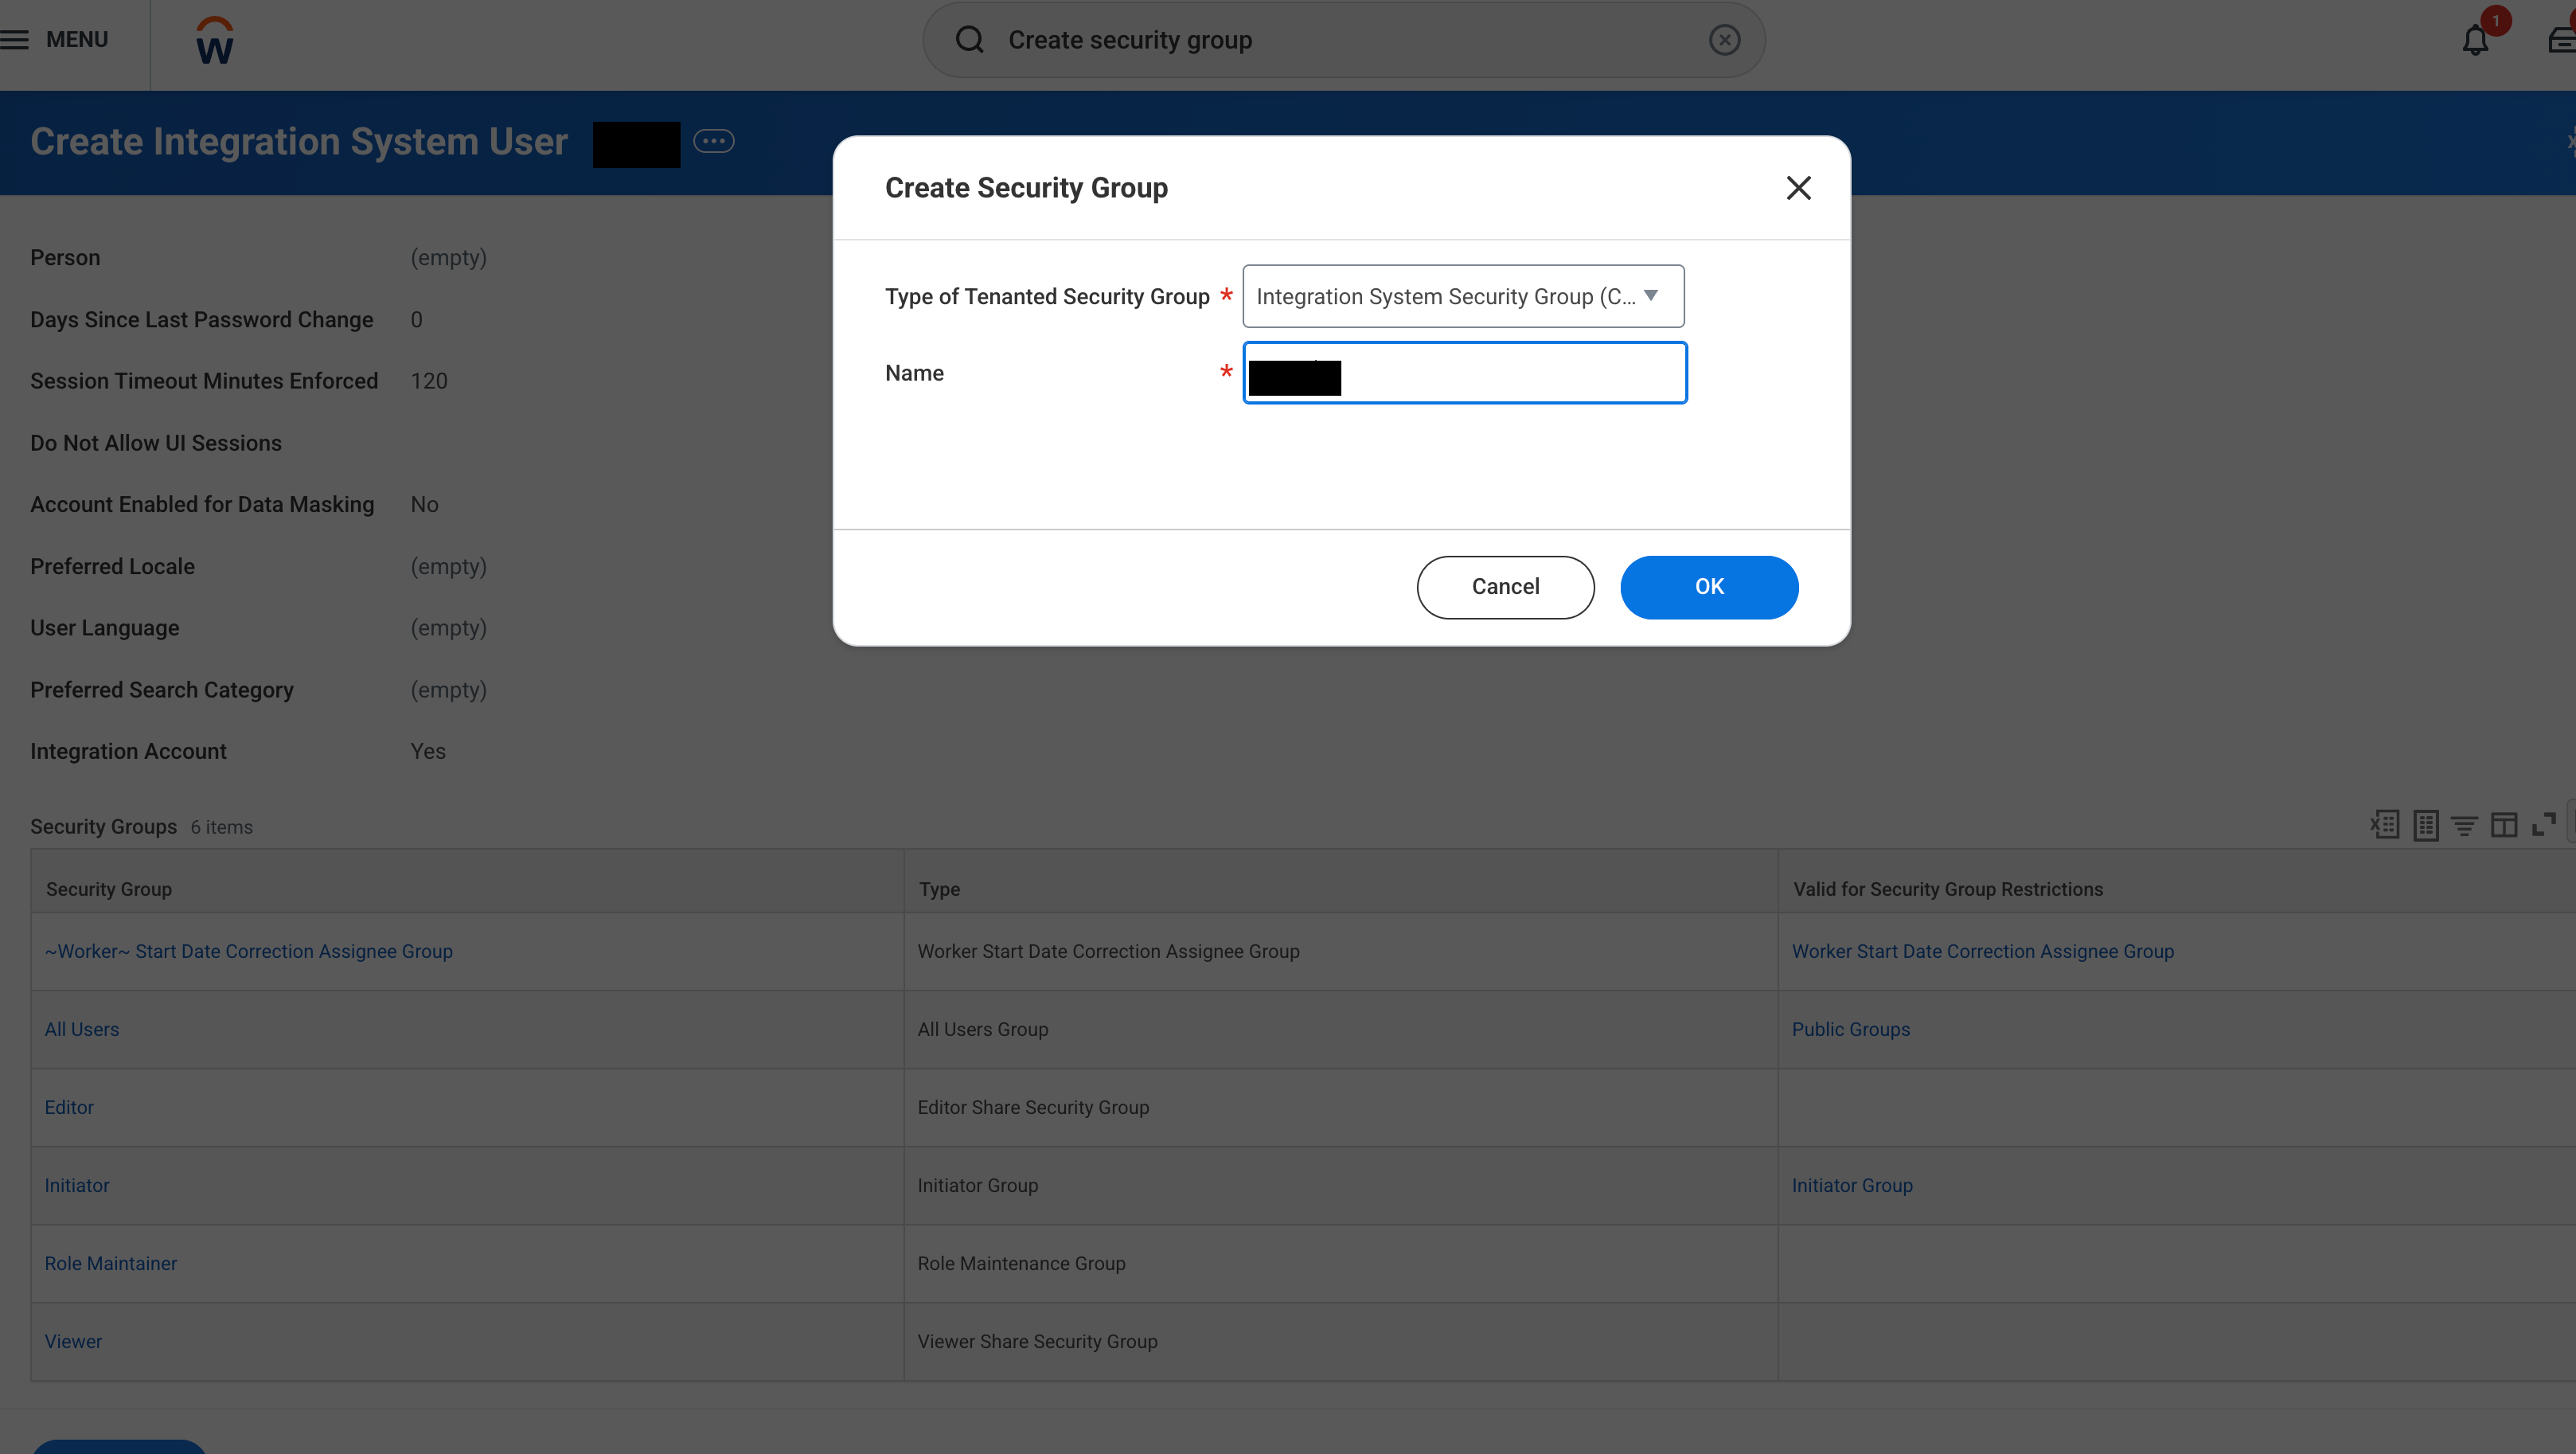
Create security group
-
In the Edit integration system security group (Unconstrained)window:
- The security group name entered in the previous step appears in the Namefield.
- Add comments.
- In the Integration System Usersfield, add the username you created in the Create integration system user section.
- Click Ok.
-
Click Done. You can note down the security group name for later use.
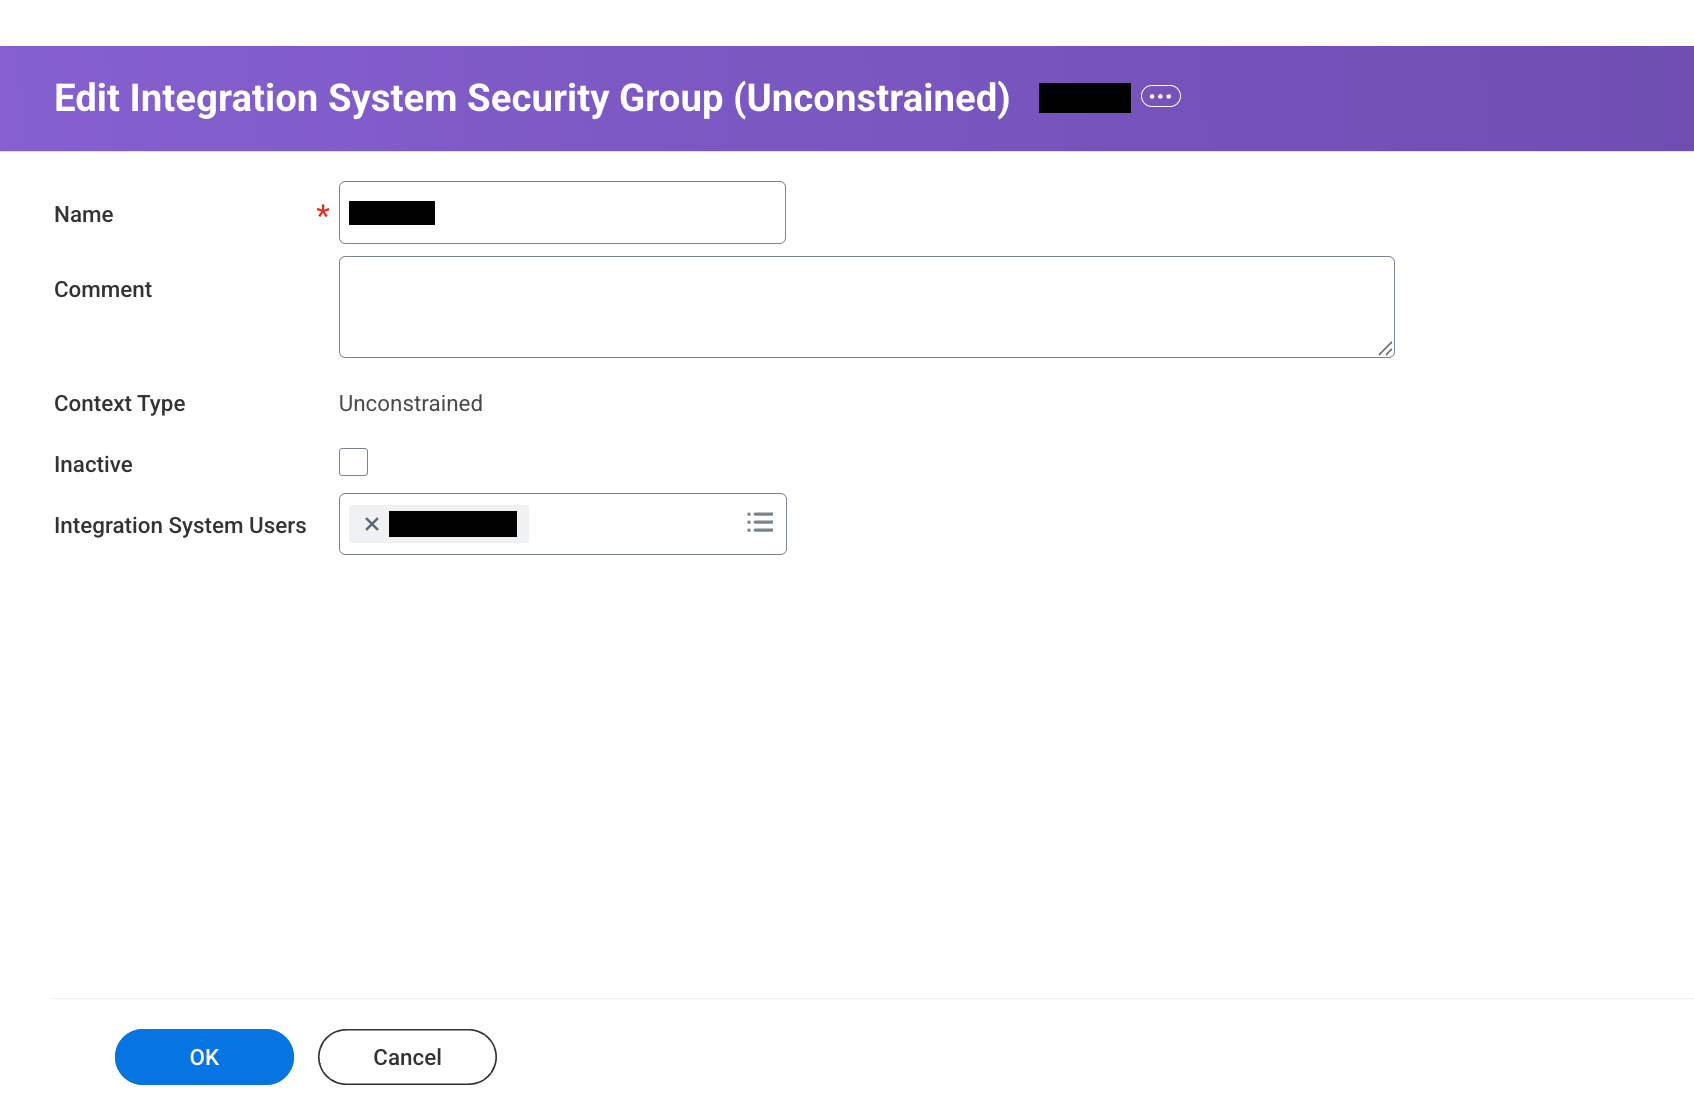
Edit integration system security group
Grant domain access
- In the search bar, search for
Maintain permission for security group. -
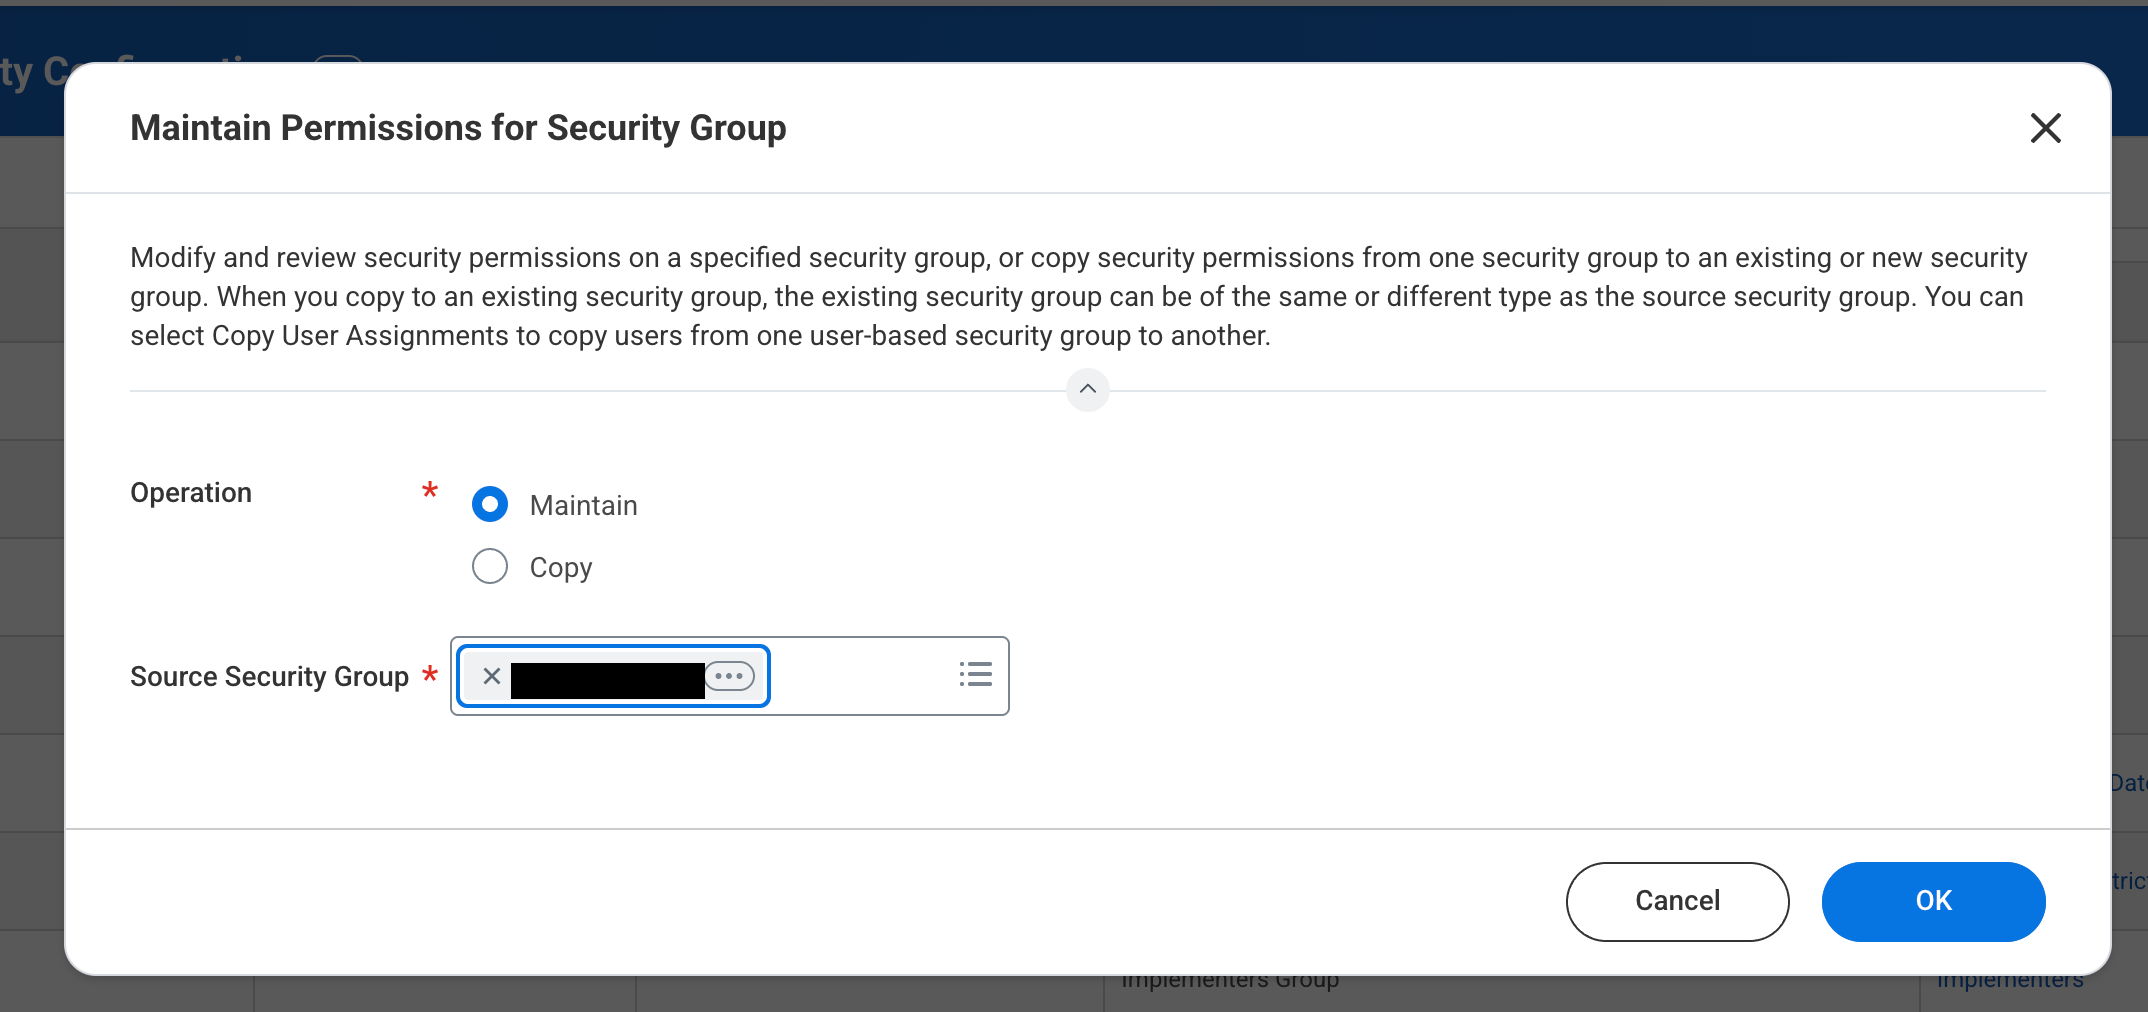
In the Maintain permission for security groupdialog window:
- Set Operationas Maintain.
- In the Source security groupfield, select the security group name you created in the Create integration security group section.
-
Click Ok.
Edit the security group
-
In the Maintain permission for security grouppage:
- Click the ** ** icon under Domain security policy permissions.
- Add the following permissions for Domain security policy permissions:
-
View and Modify-
Workday Query Language -
WQL for Workday Extend
-
-
View Only-
HCM All Organizations -
Indexed Data Source: Positions -
Manage: Company -
Manage: Cost Center -
Manage: Custom Organization -
Manage: Region -
Manage: Supervisory Organization -
Person Data: Work Email -
Reports: Organization -
Security Administration -
Set Up: Compensation Guidelines -
Set Up: Organization -
Set Up: Payroll - Pay Group Specific -
Worker Data: Active and Terminated Workers -
Worker Data: Compensation Grade -
Worker Data: Current Job Profile Information -
Worker Data: Current Management Level Information -
Worker Data: Current Staffing Information -
Worker Data: Headcount Reports -
Worker Data: Public Worker Reports -
Worker Data: Work Shifts -
Workday Accounts
-
-
Get Only-
Reports: Organization -
Worker Data: Public Worker Reports
-
-
-
Click Ok.
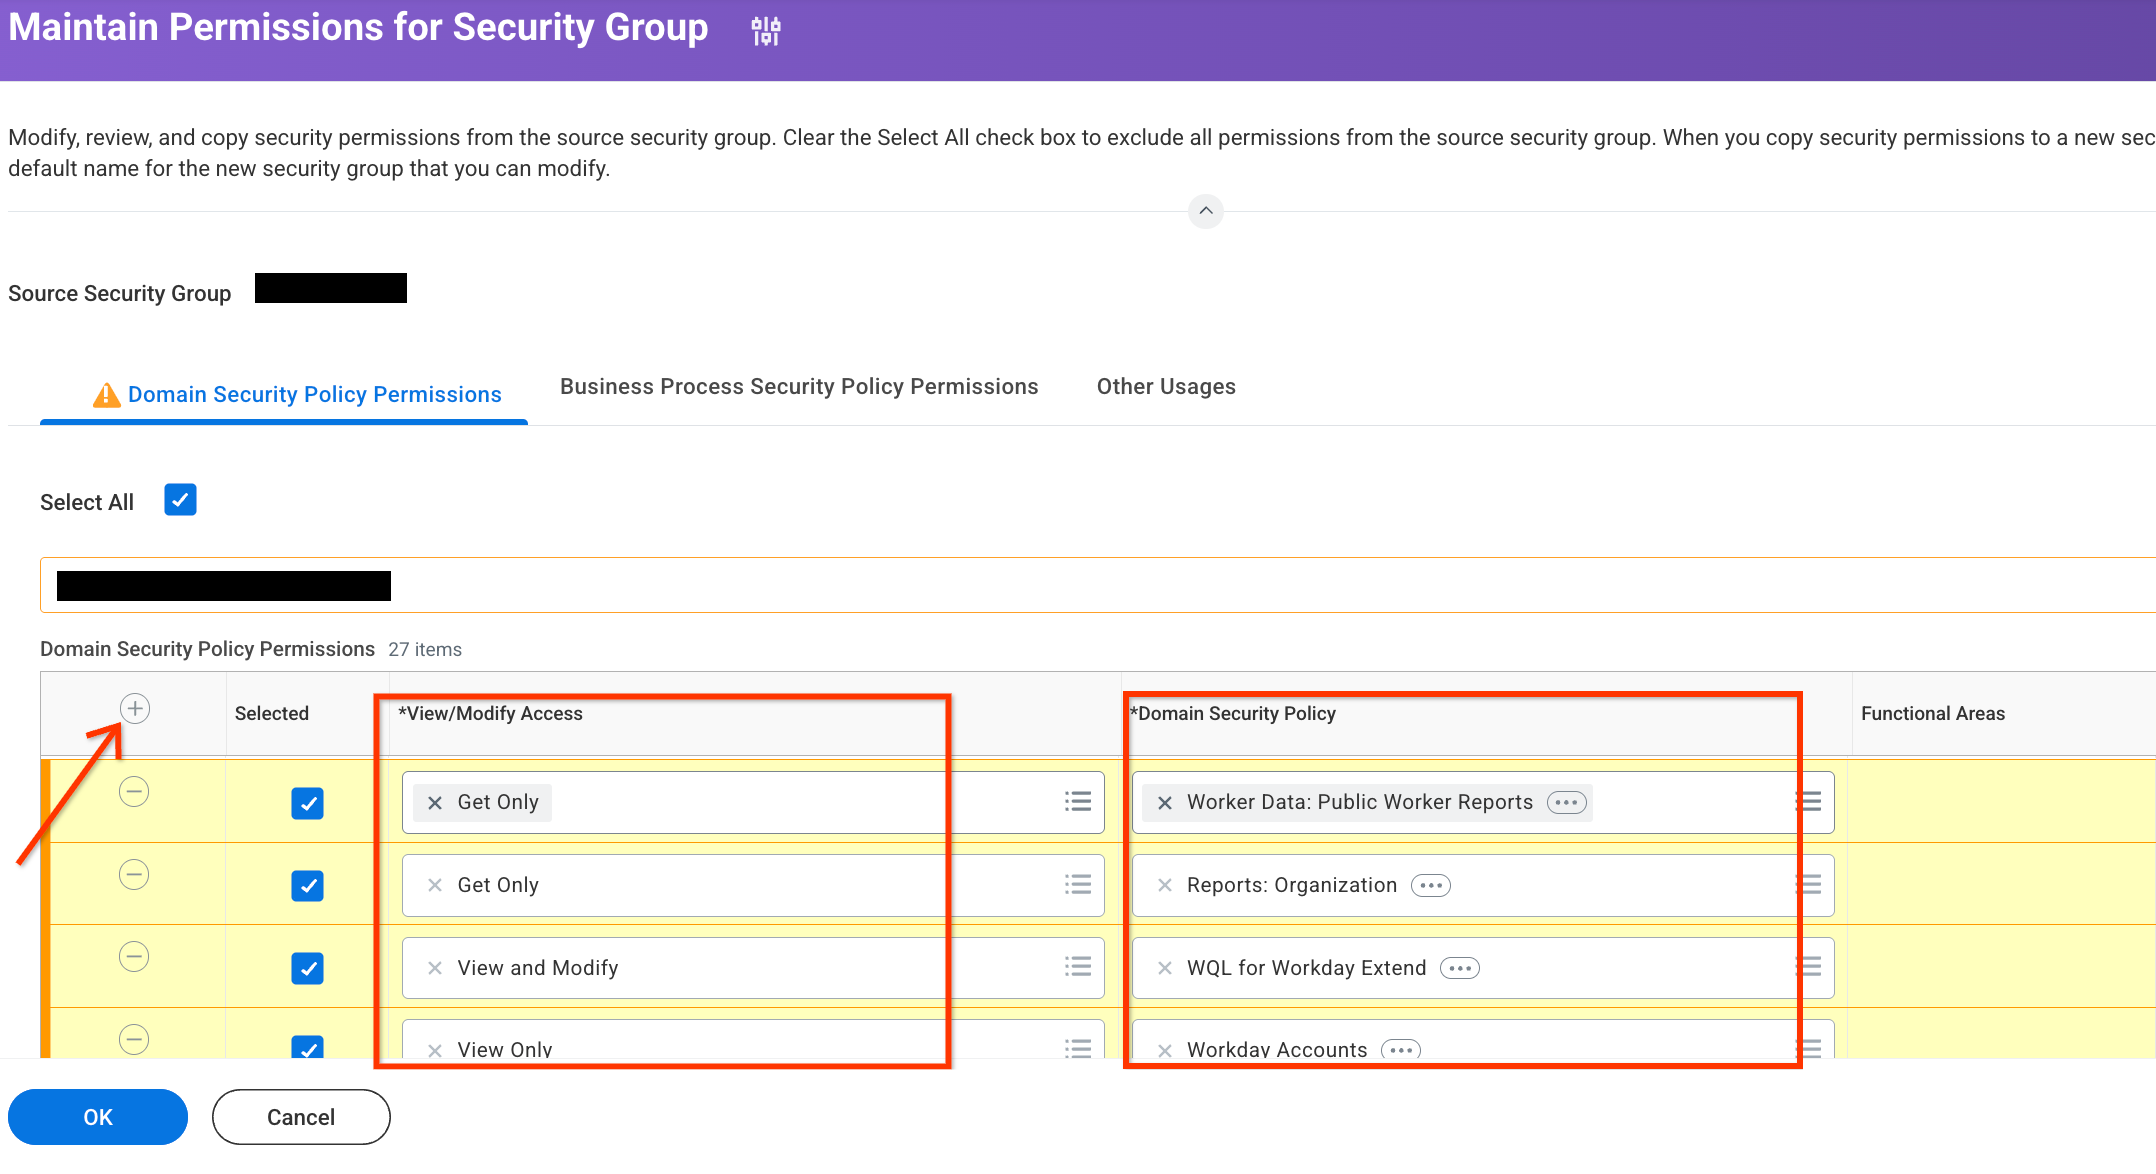
Maintain permissions for security group -
Click Done.
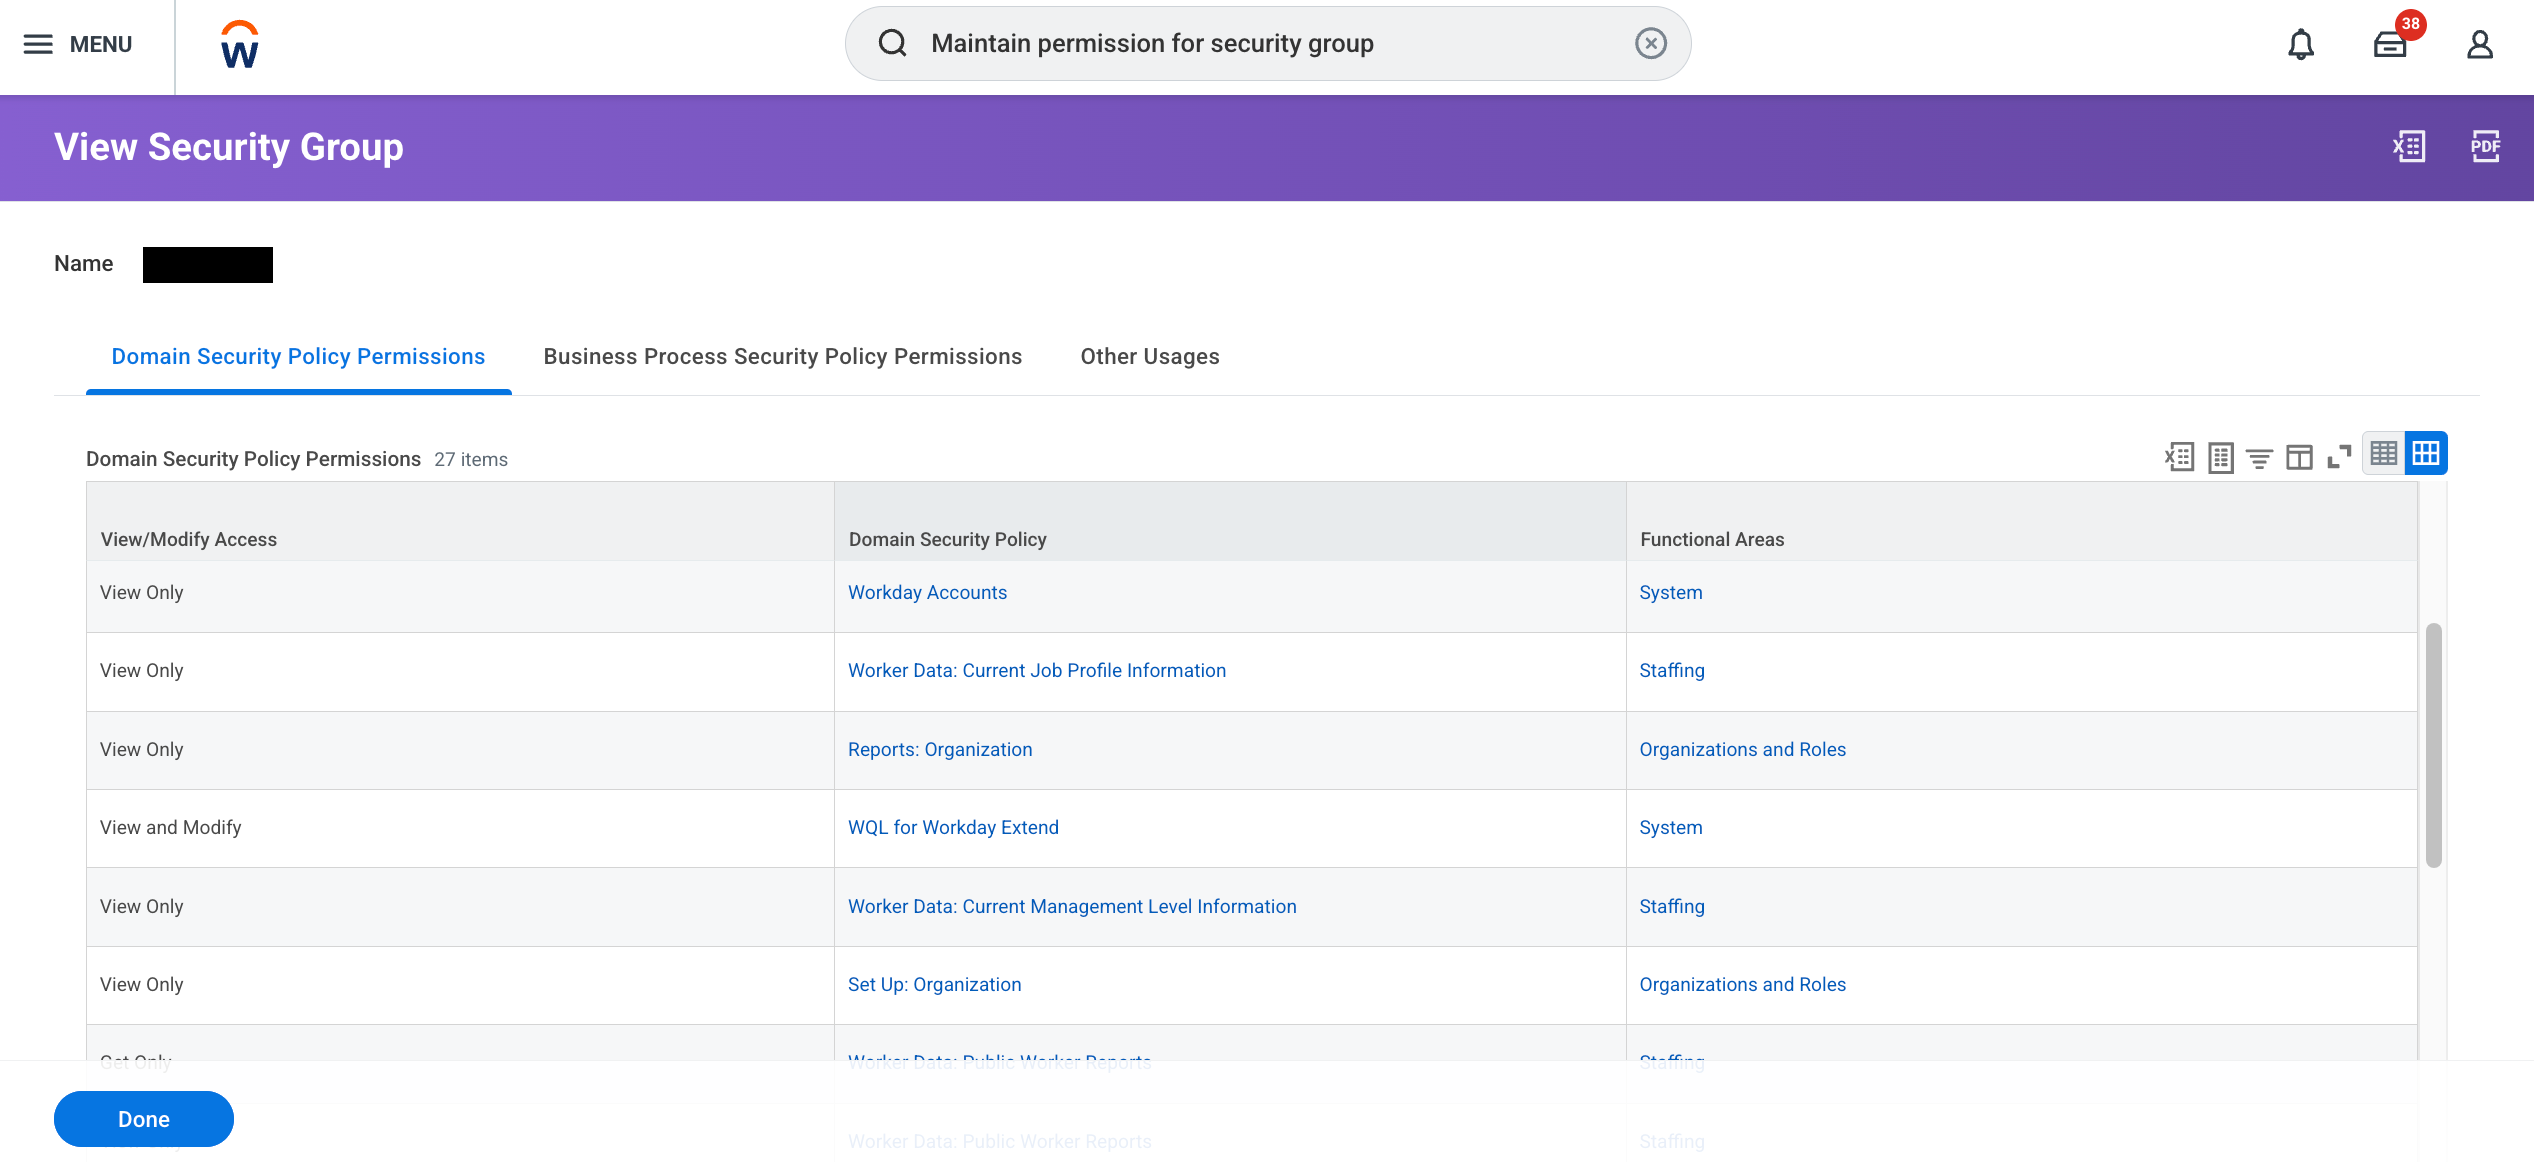
View security group -
Repeat the search for Maintain permission for security group, verify that the roles and policies are added, and click Ok.
Maintain permissions for security group dialog
Add a security group for the integration system user
- In the search bar, search for
Integration system user security configuration. -
In the Integration system user security configurationpage:
-
Search for the user using filters. For Filter conditionselect is, and enter the username you created in the Create integration system user section for Value.
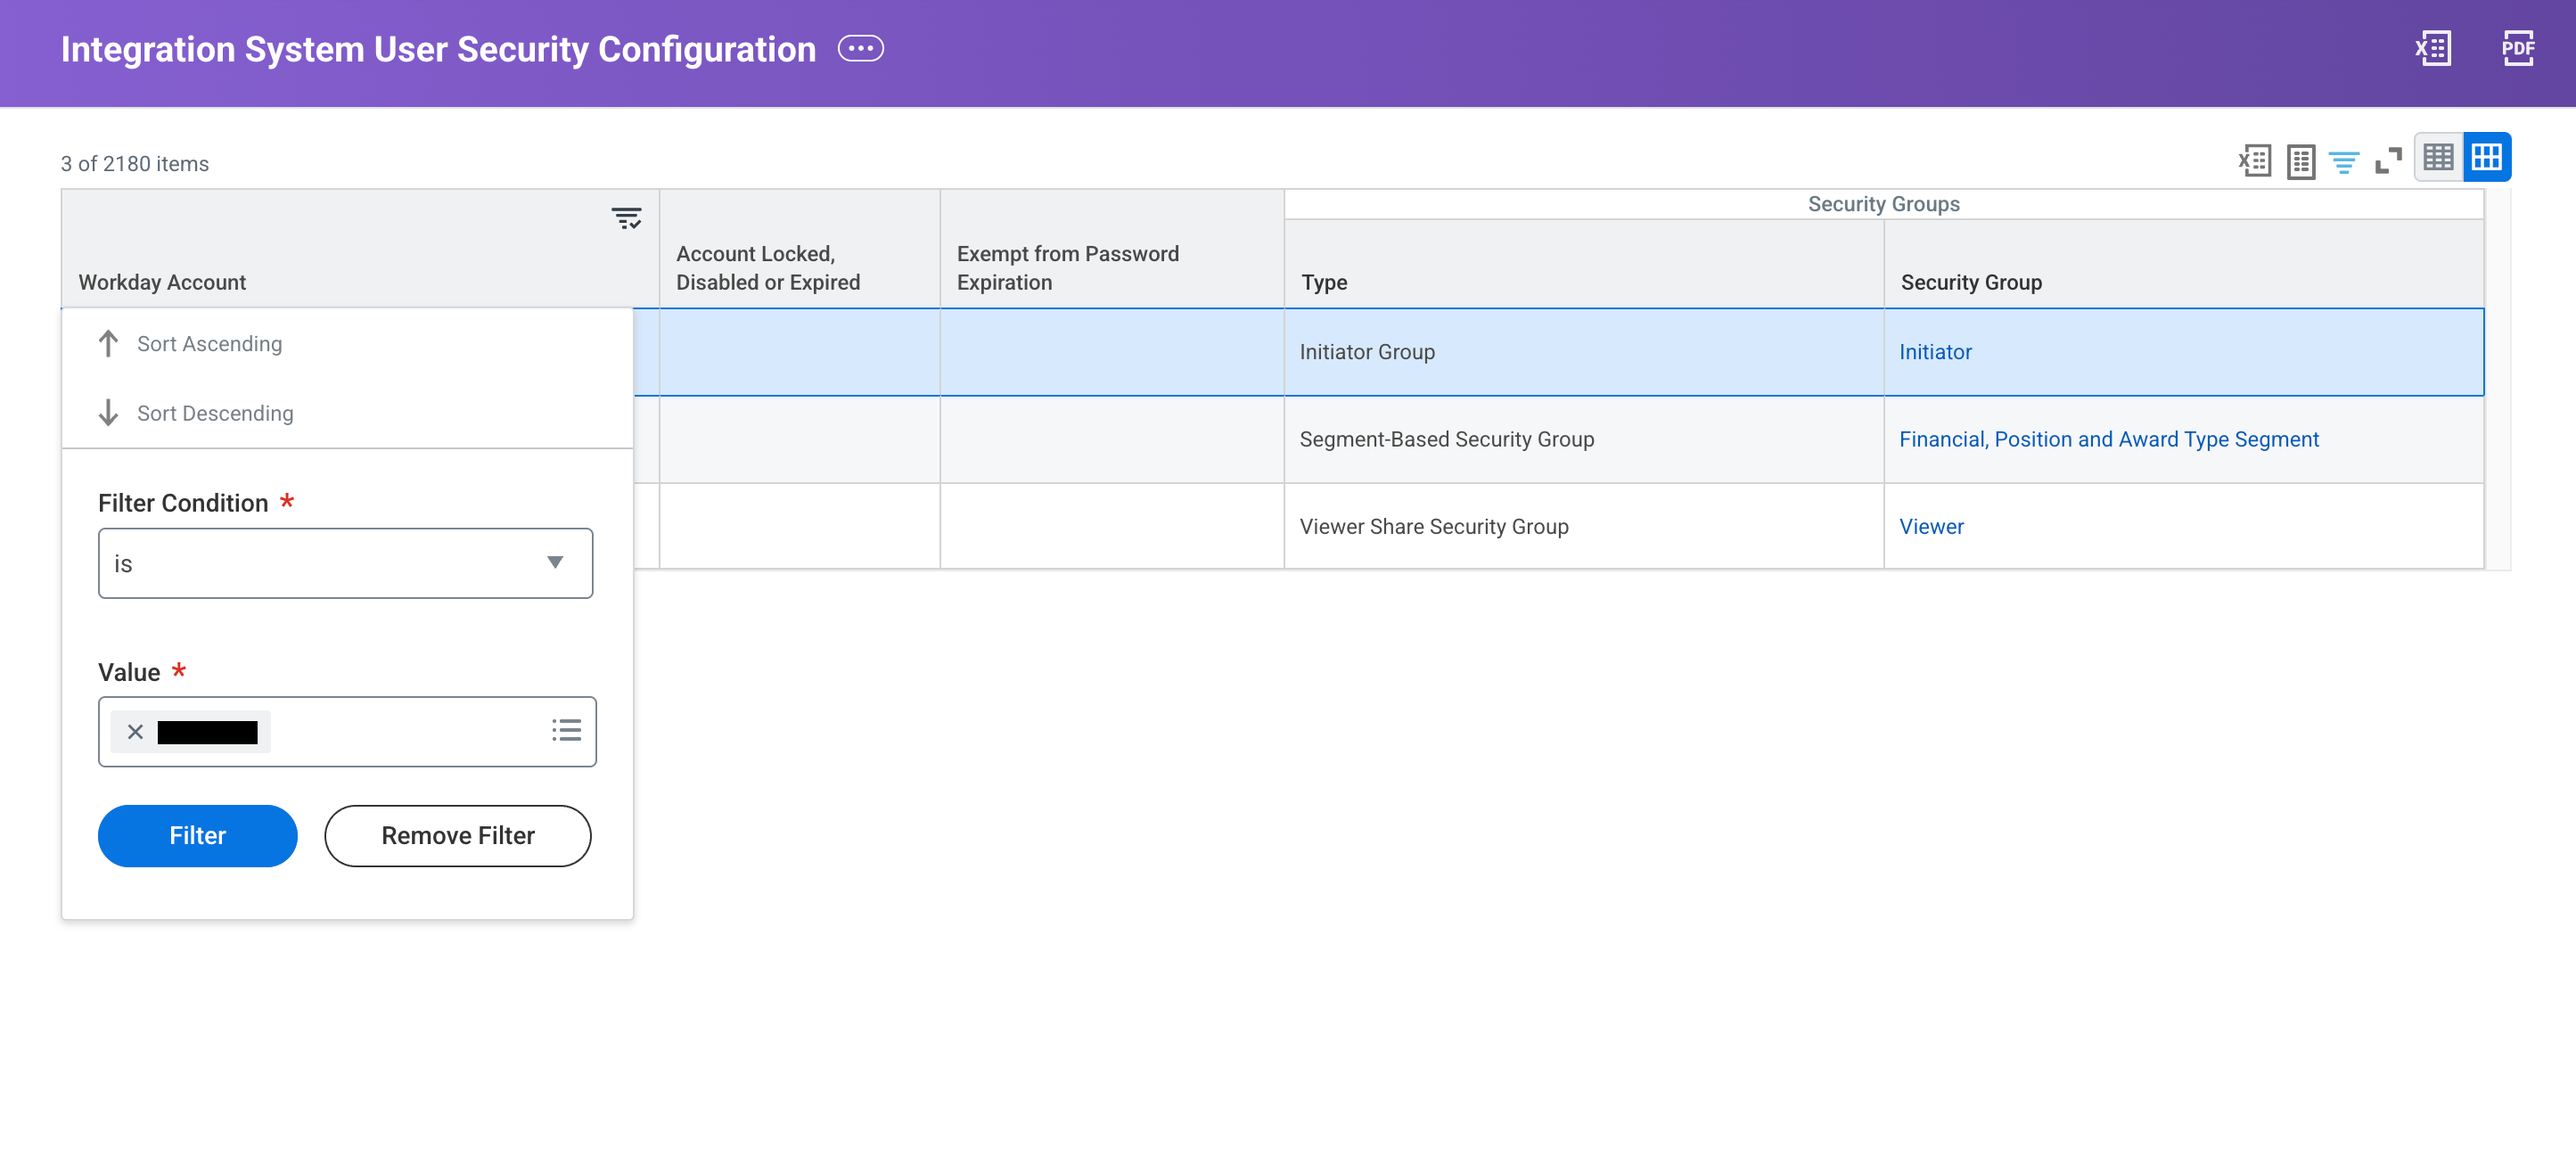
Select user -
Click the three dots (...)next to the username.
-
Select Security Profile > Assign integration system security groups .
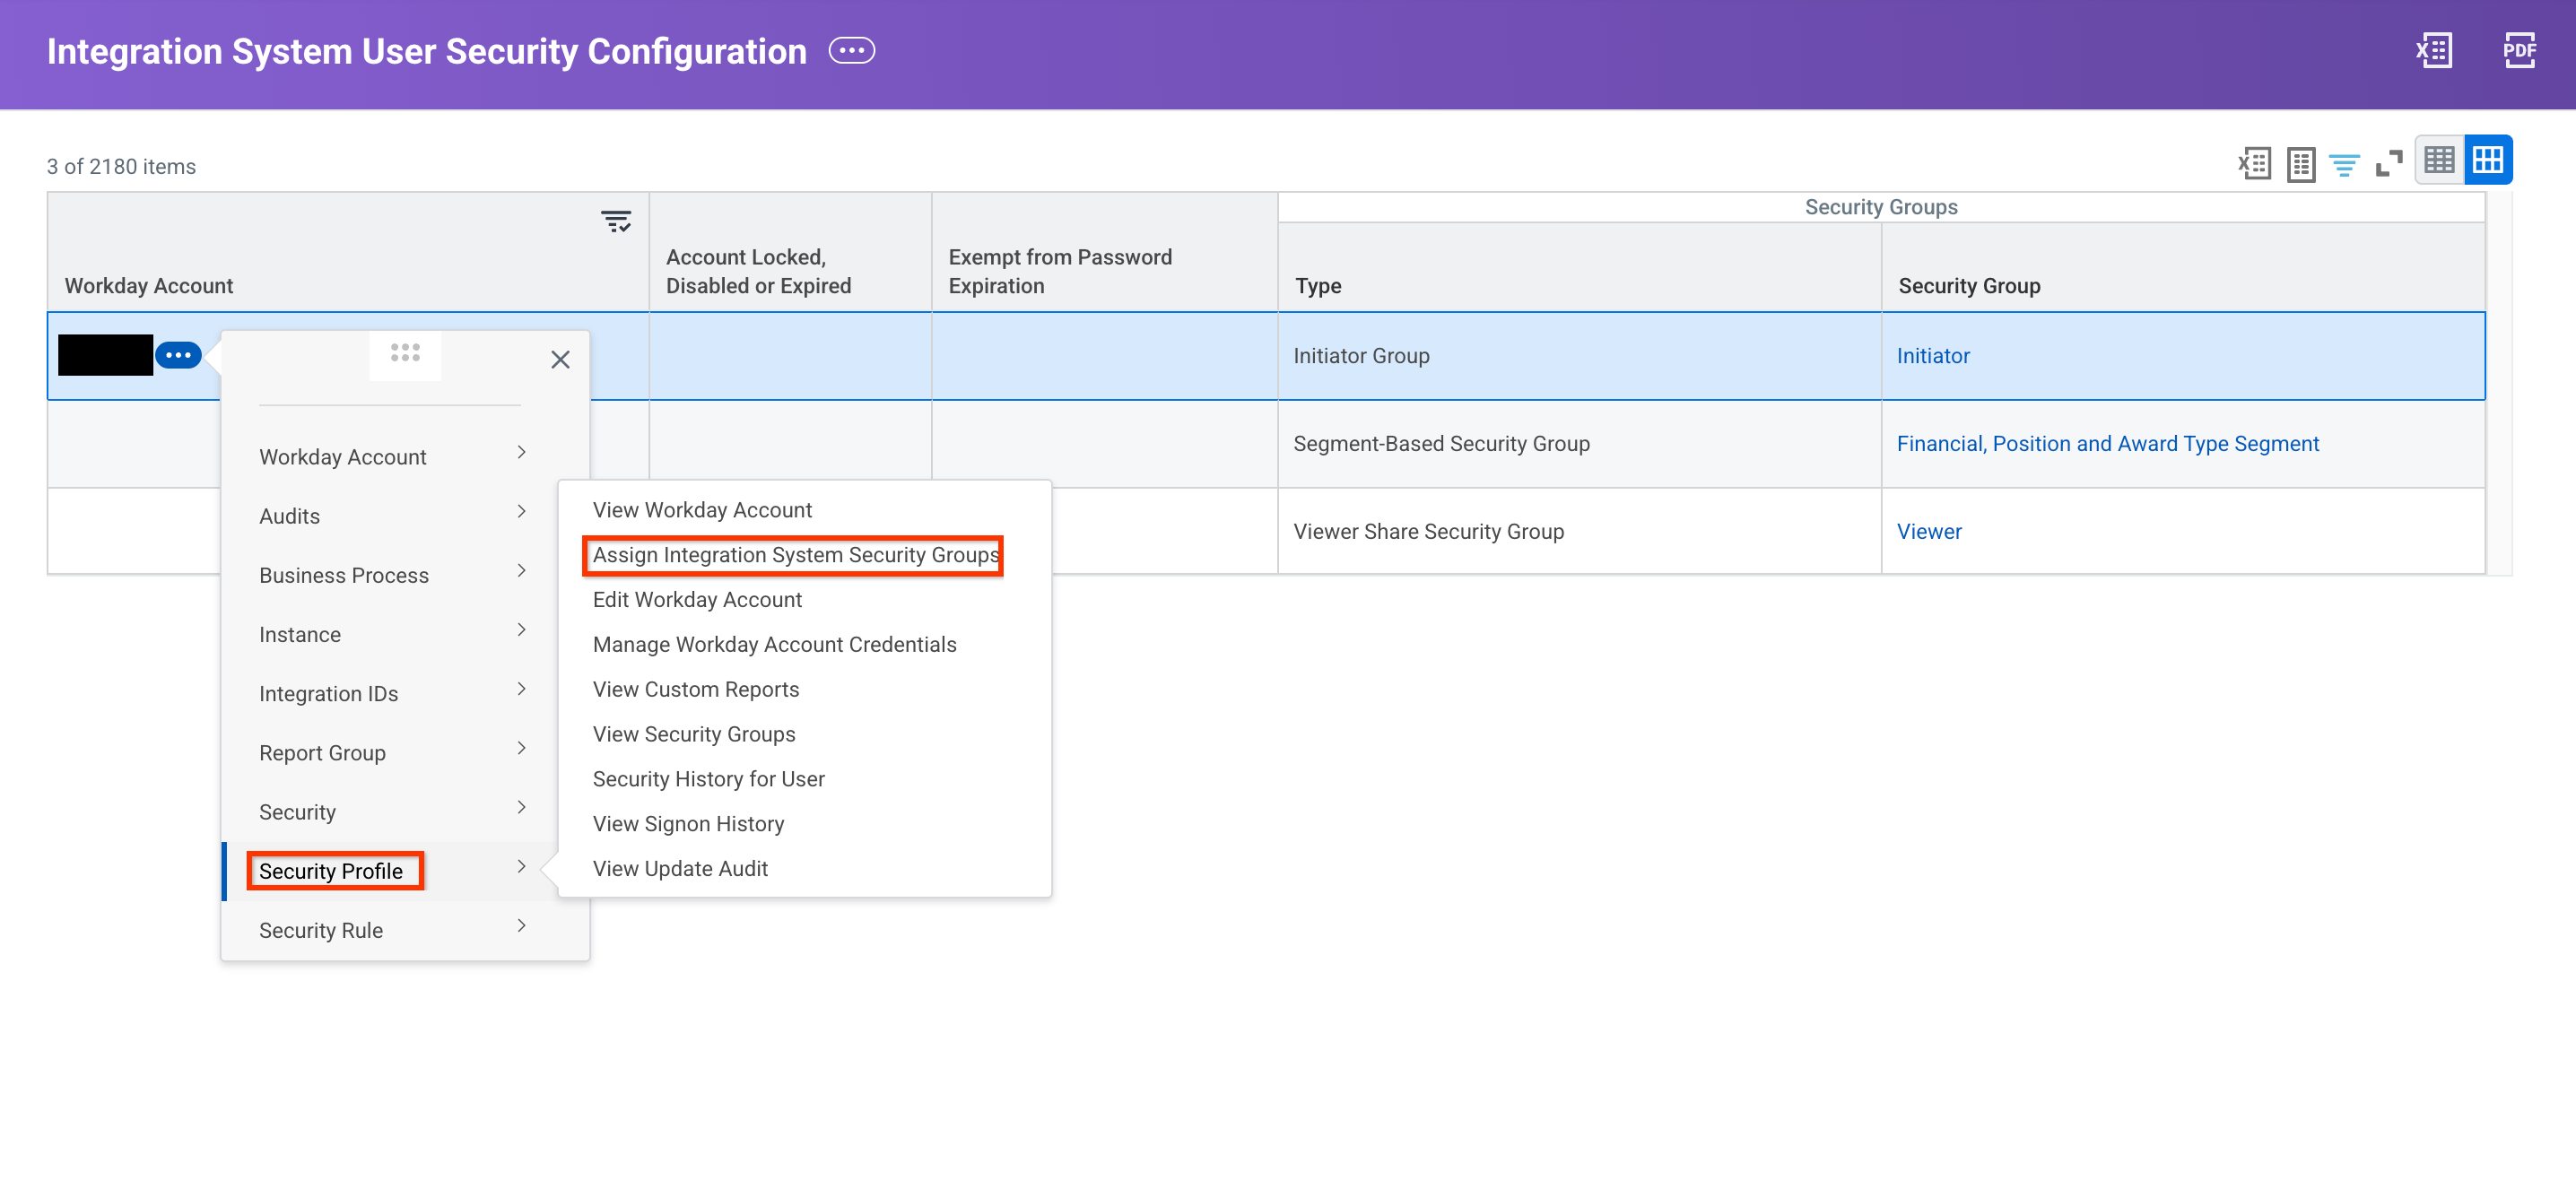
Assign integration system security groups -
In the Assign integration system security groups for integration system userdialog, select the security group name you created in the Create integration security group section.
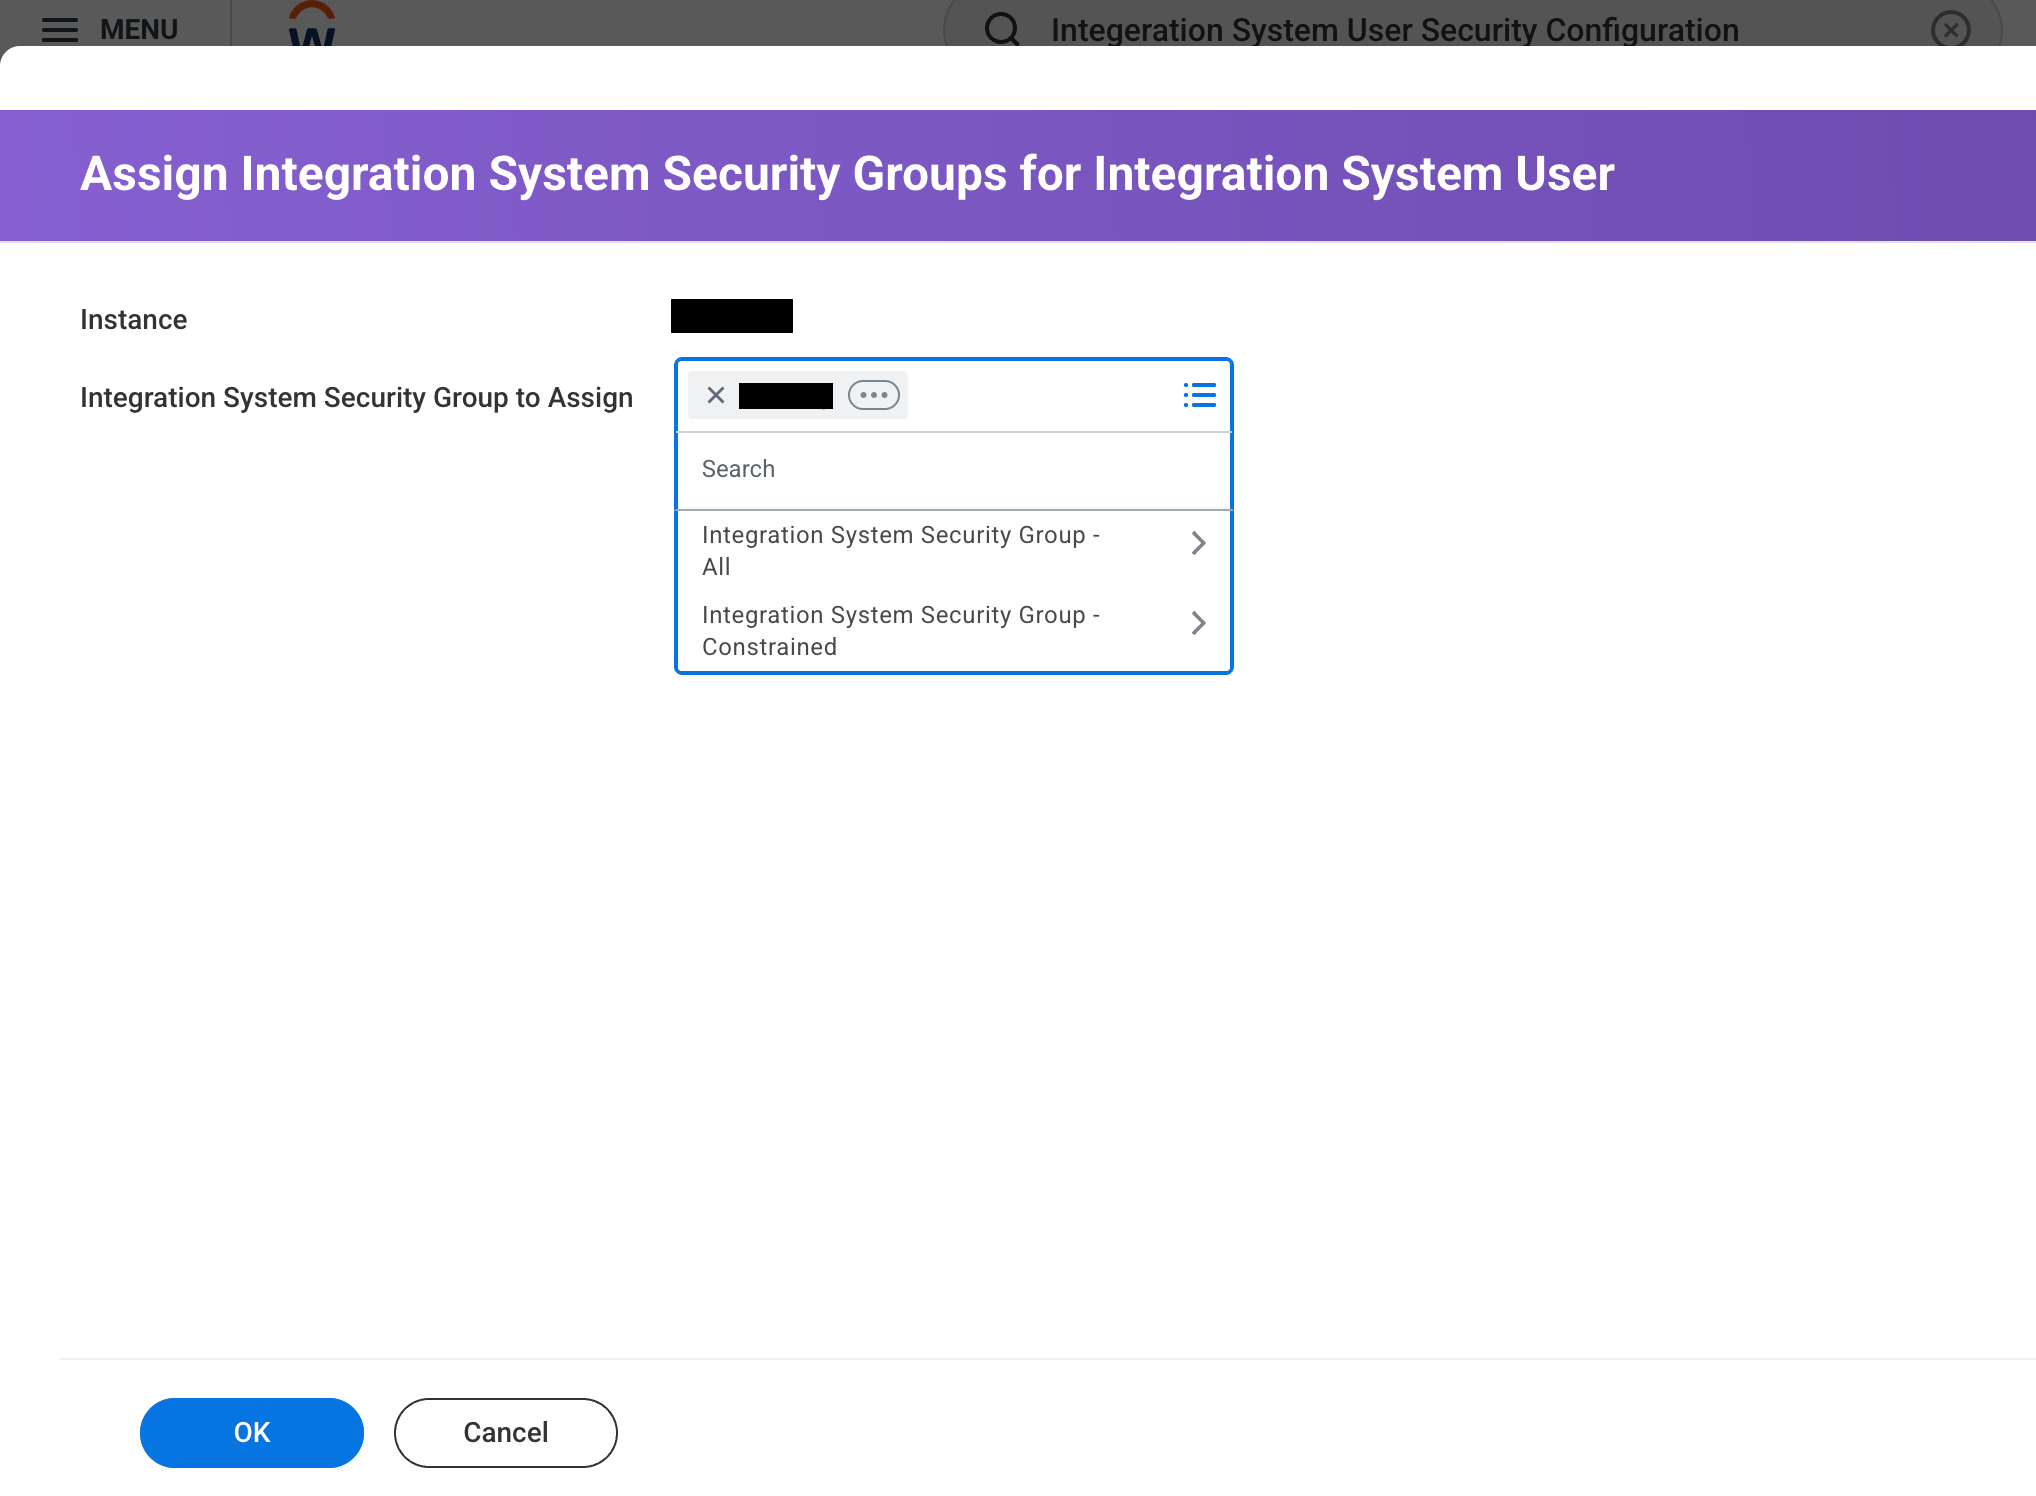
Select security group -
Click Ok.
-
Click Done.
-
Activate pending security policy changes
- In the search bar, search for
Activate pending security policy changes. -
In the Activate pending policy changespage:
- Add Comments.
-
Click Ok.
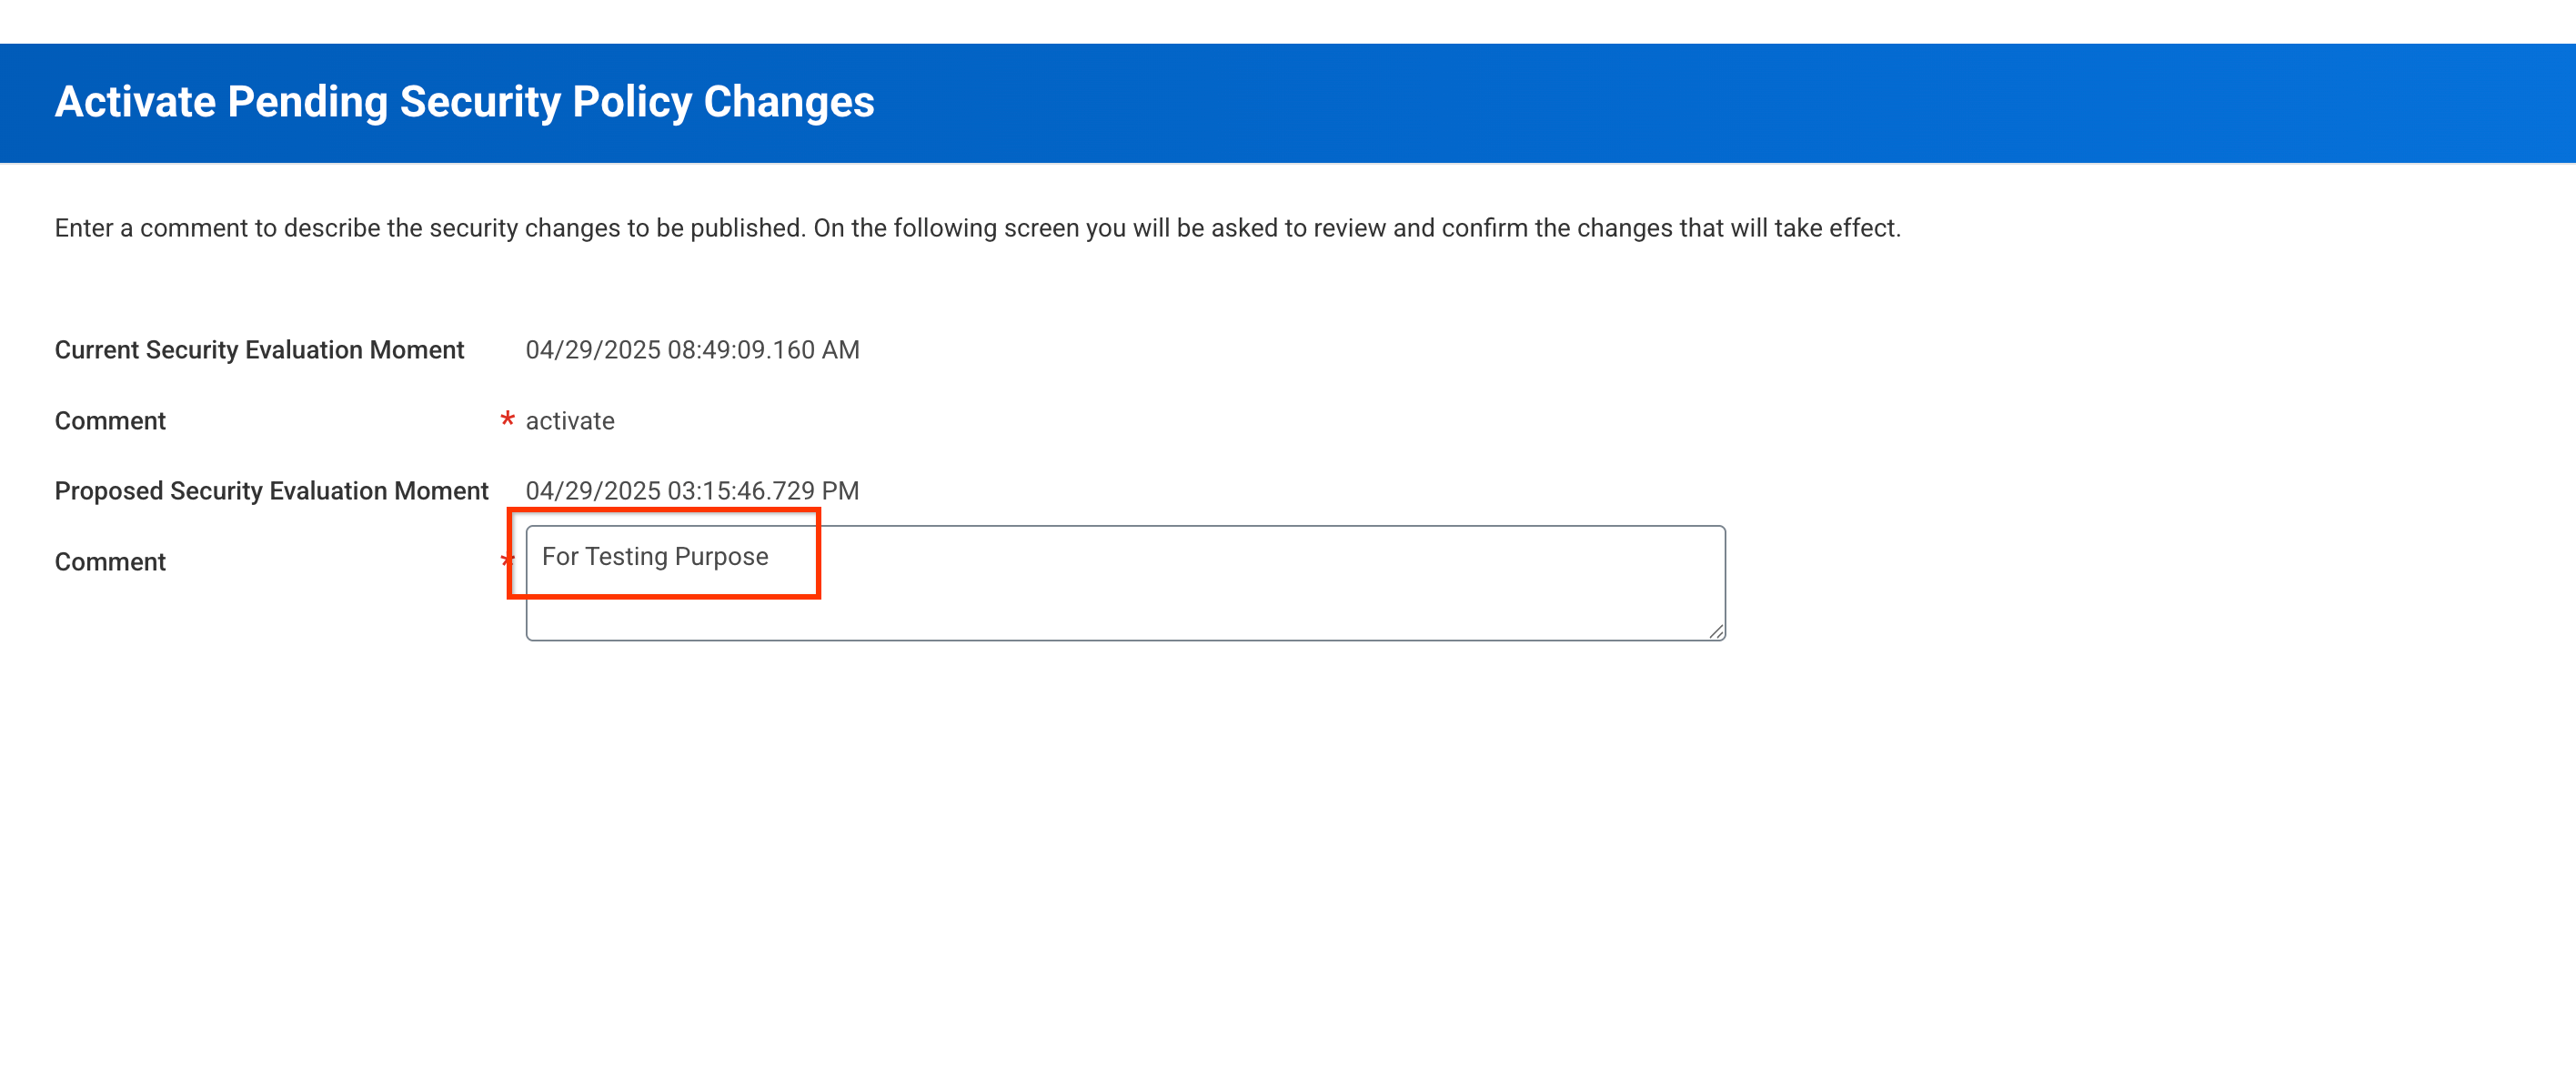
Activate pending changes
-
Review the changes on the Activate pending security policy changespage.
-
Select Confirmcheckbox.
-
Click Ok.
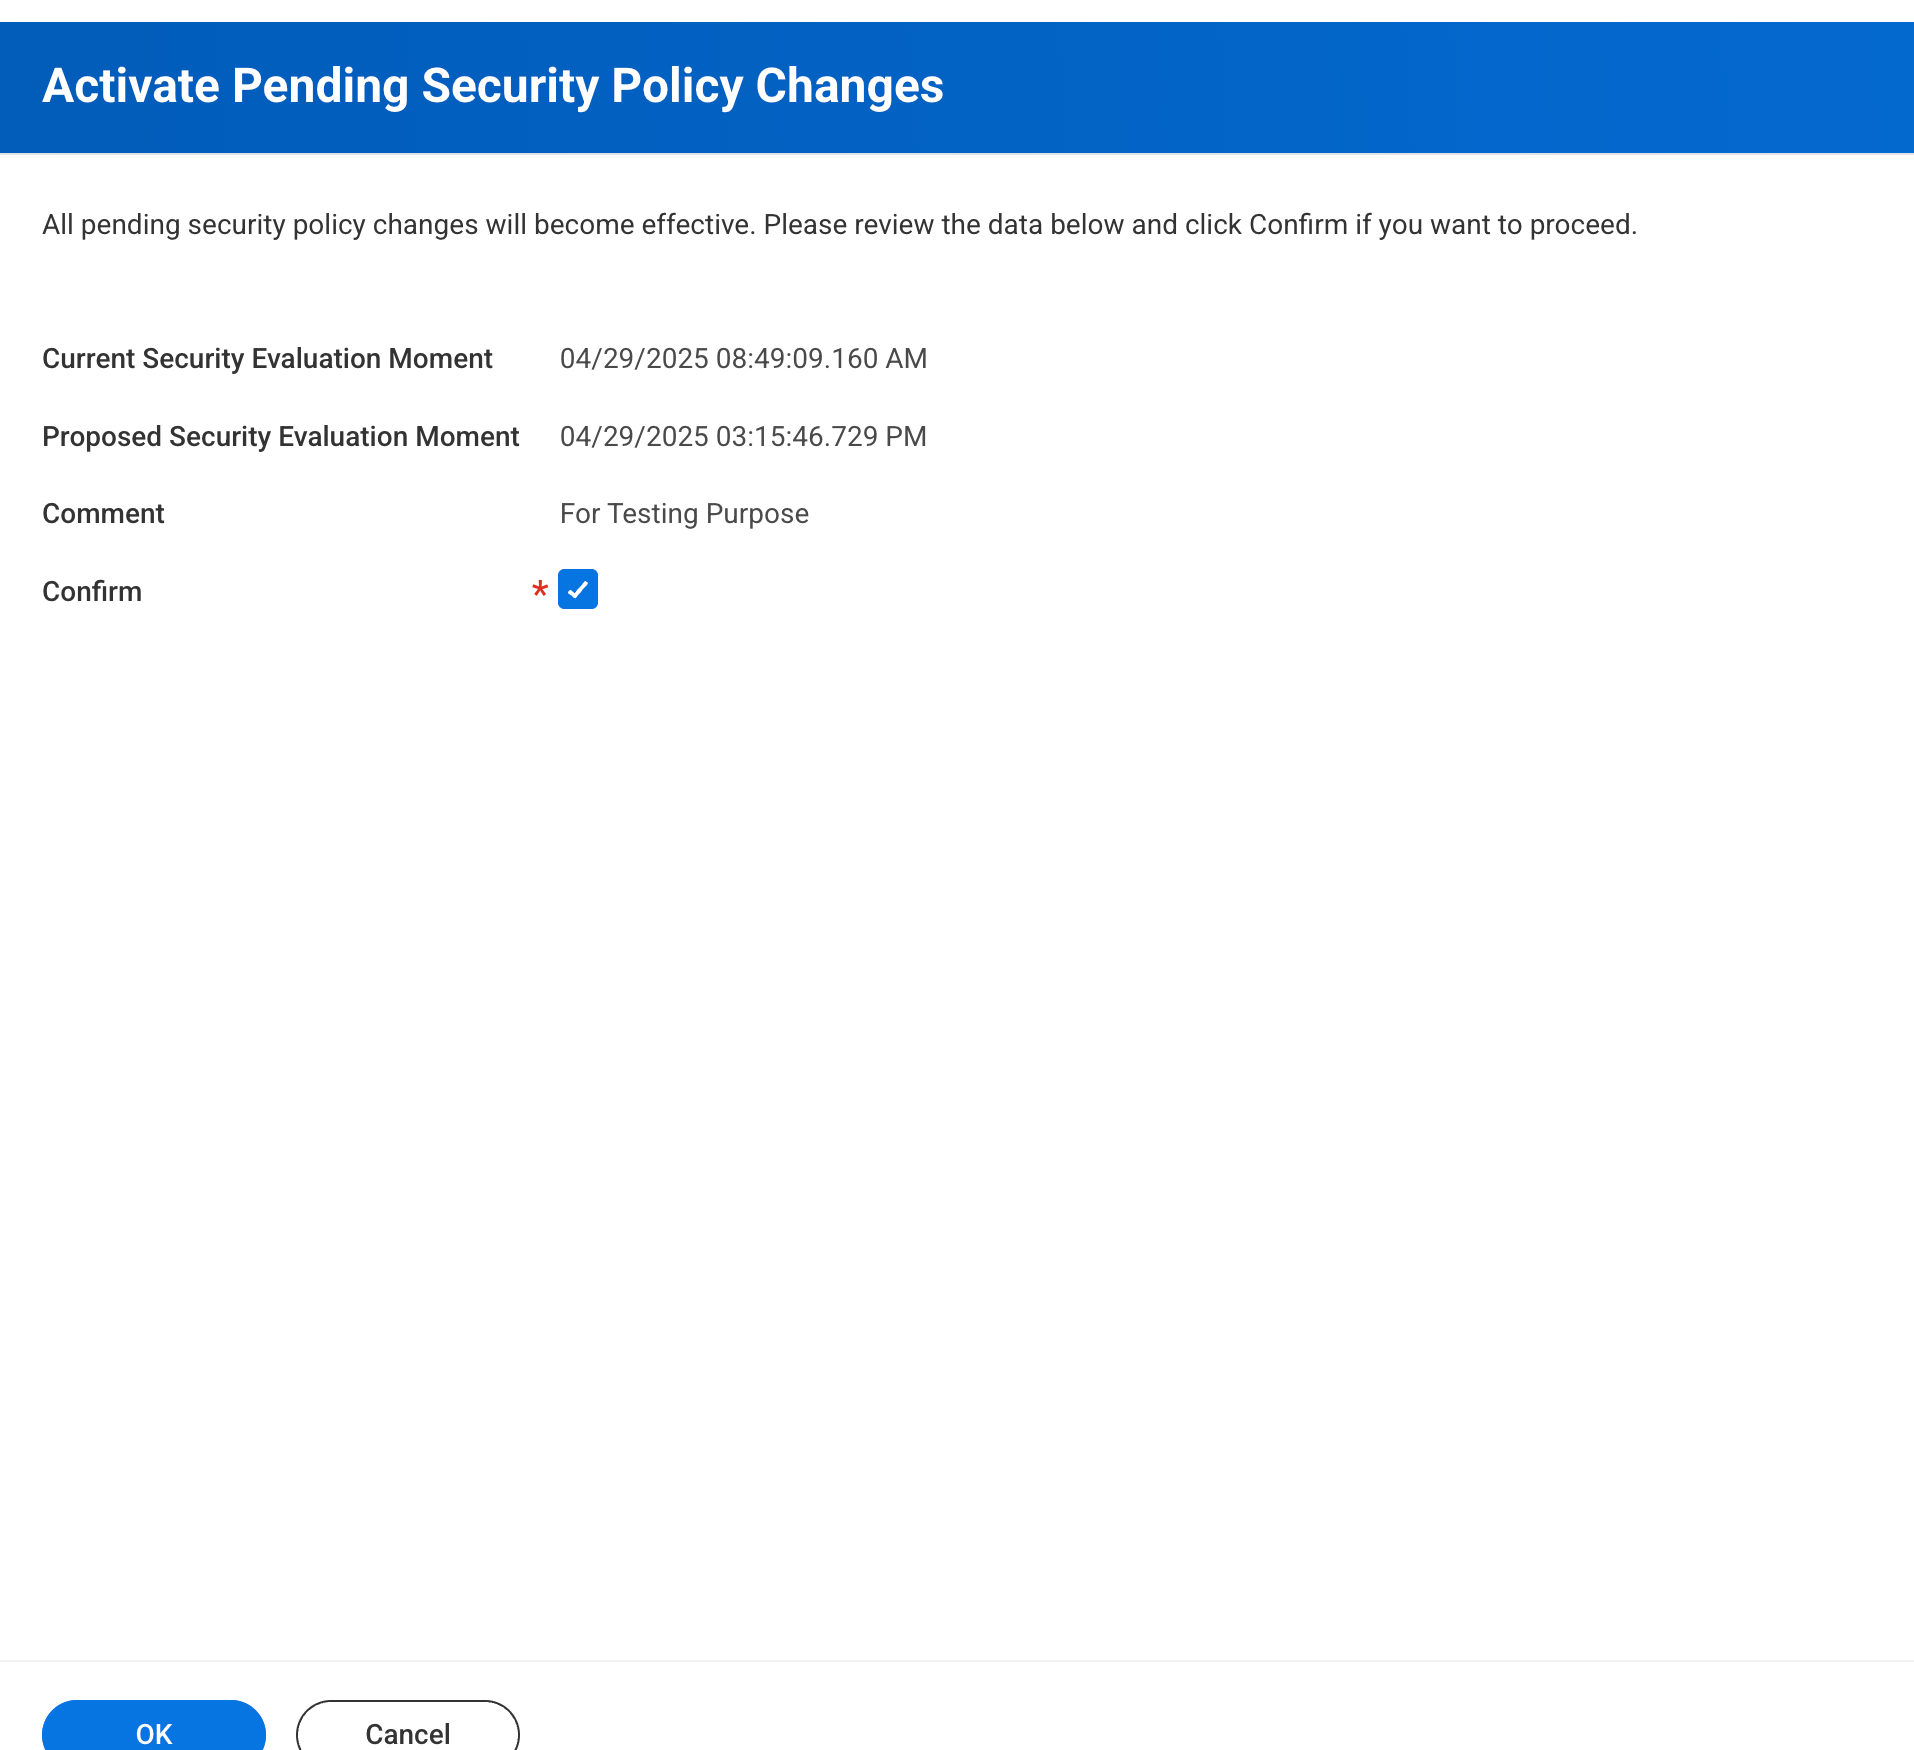
Activate policy changes The View security timestamppage is displayed.
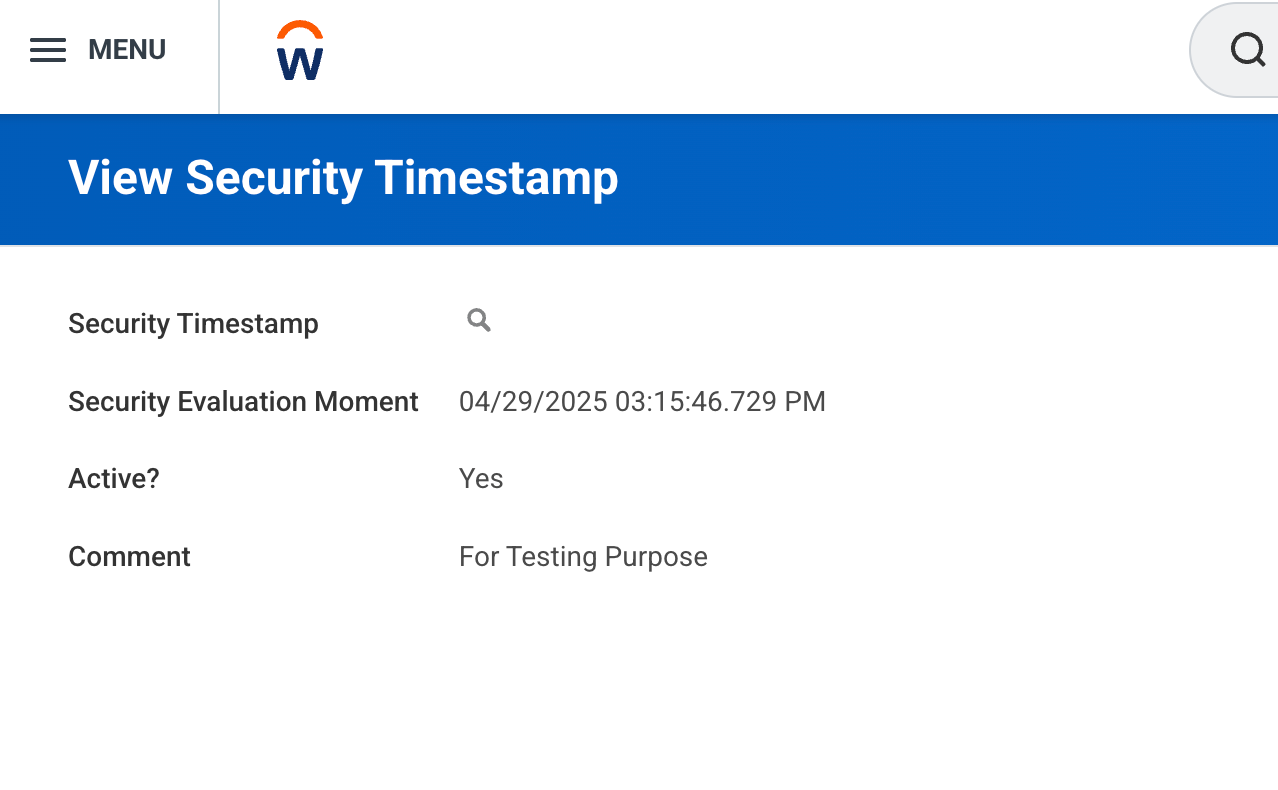
Security timestamp
Generate refresh token
- In the search bar, search for
View API clients. - Navigate to API clients for integrationstab.
- Search for the API client using filters. For Filter conditionselect is, and enter the API client name you created in the Register API client in Workday section for Value.
- Click the three dots (...)next to the API client name and select API client> Manage refresh token for integration.
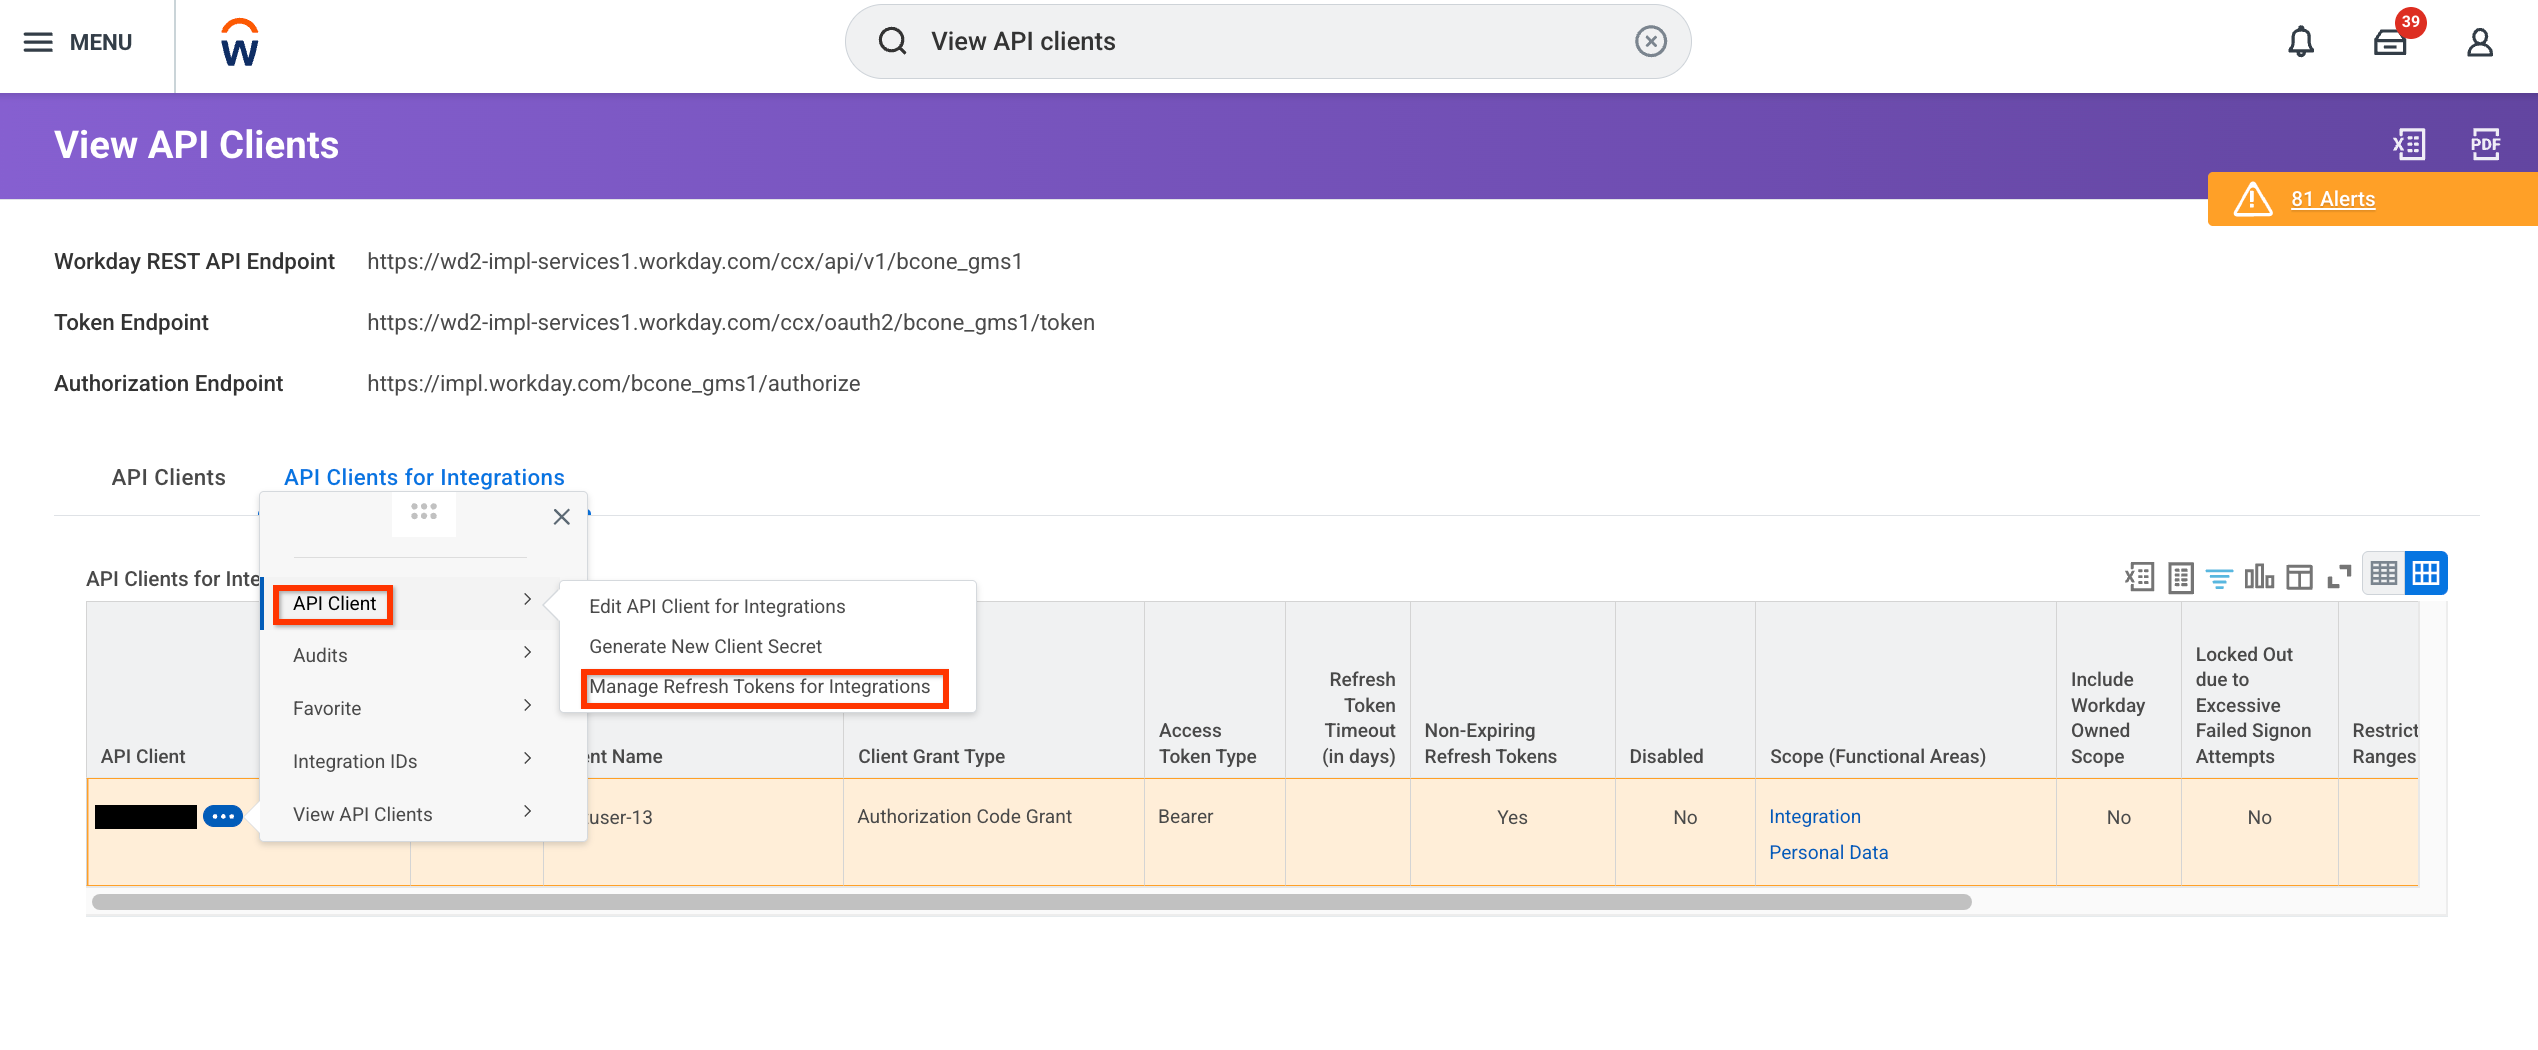
Manage refresh token for integration -
In the Manage refresh token for integrationdialog:
- In the Workday account userfield, select the username you created in the Create integration system user section.
-
Click Ok.
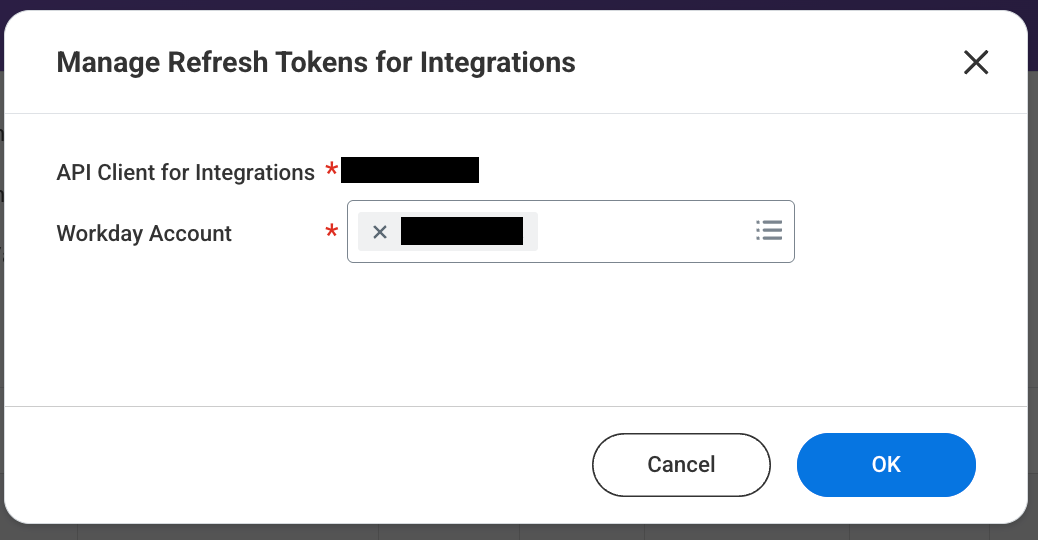
Select the Workday account user
-
On the Delete or regenerate refresh tokenpage:
- Select Generate new refresh tokencheckbox.
-
Click Ok.
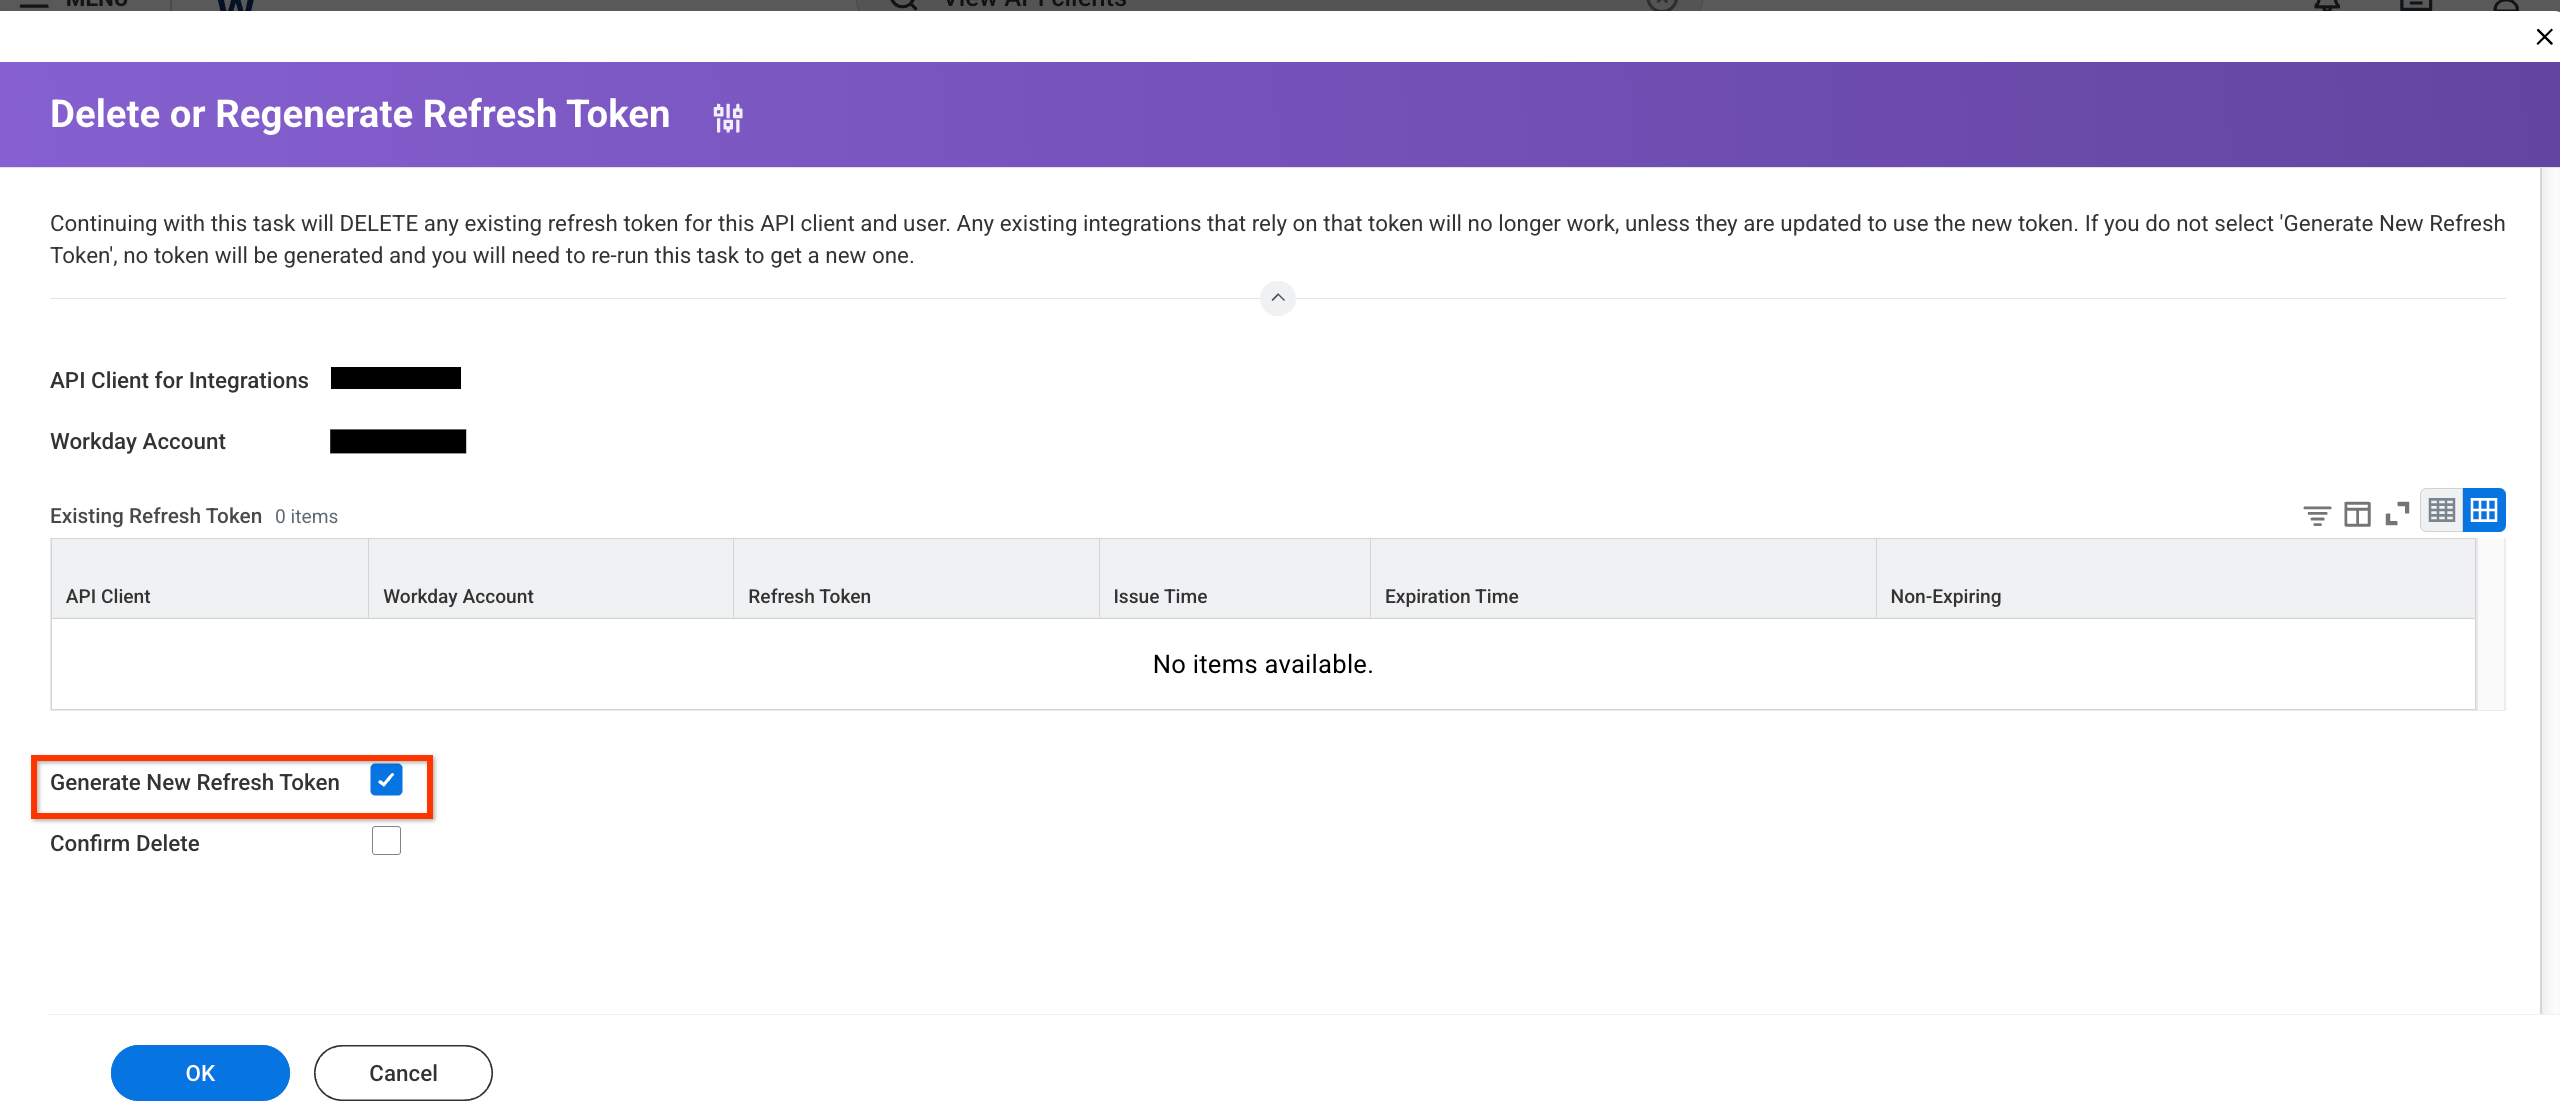
Select generate new refresh token
-
On the Successfully regenerated refresh tokenpage:
- Copy the Refresh tokenfor later use.
-
Click Done.
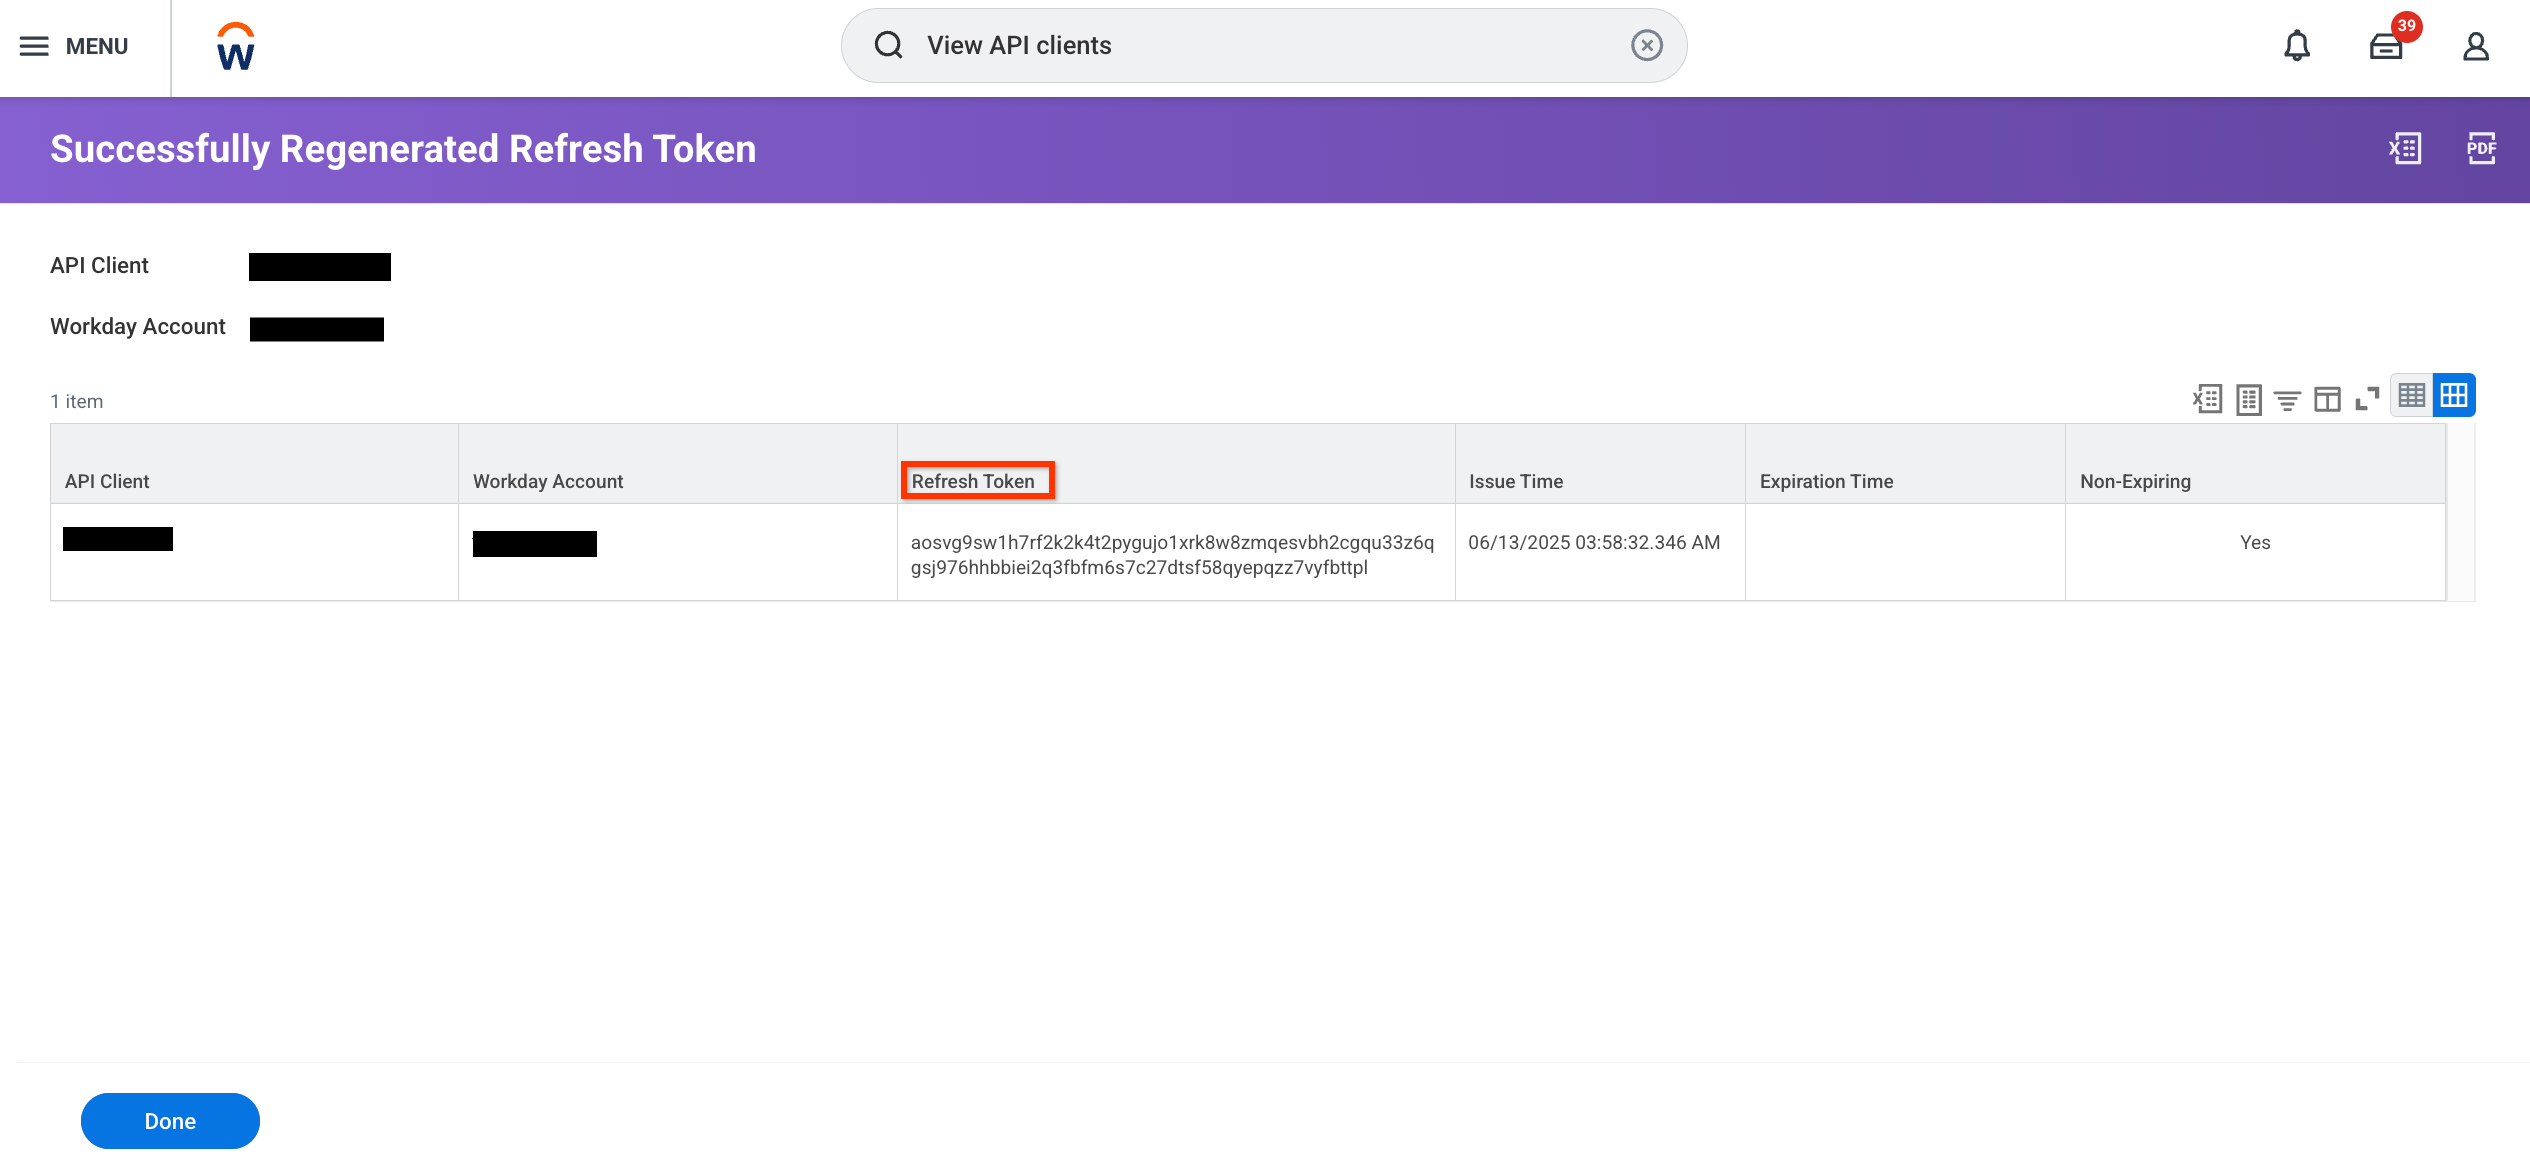
Successfully regenerated refresh token
Create a Workday datastore
Console
To use the Google Cloud console to sync data from Workday to Agentspace , follow these steps:
-
In the Google Cloud console, go to the Agentspacepage.
-
In the navigation menu, click Data stores.
-
Click Create data store.
-
On the Select a data sourcepage, scroll or search for Workdayto connect your third-party source.
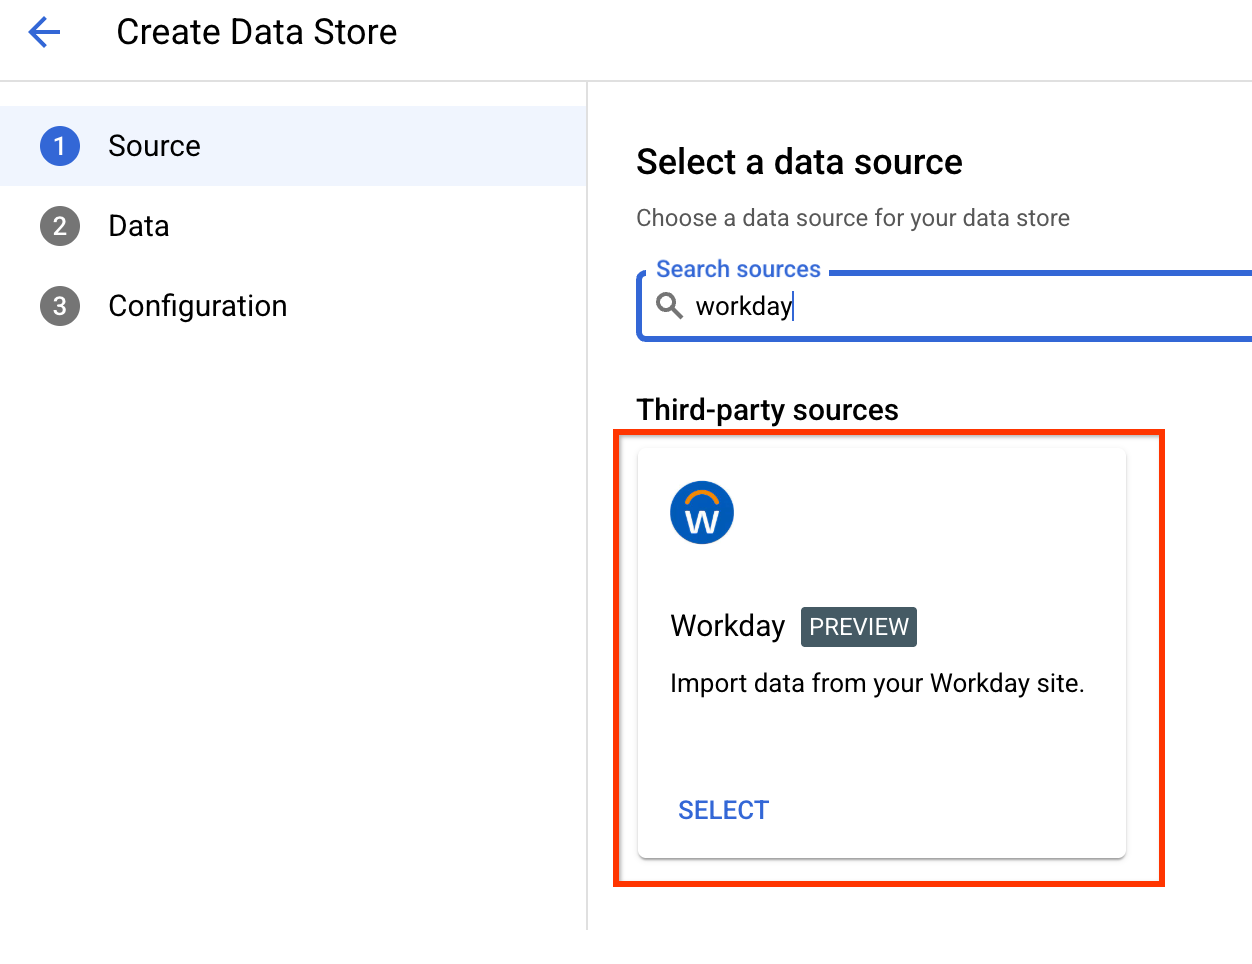
Select data source -
Enter the required authentication details:
- Client ID
- Client secret
- Refresh token
-
Click Continue.
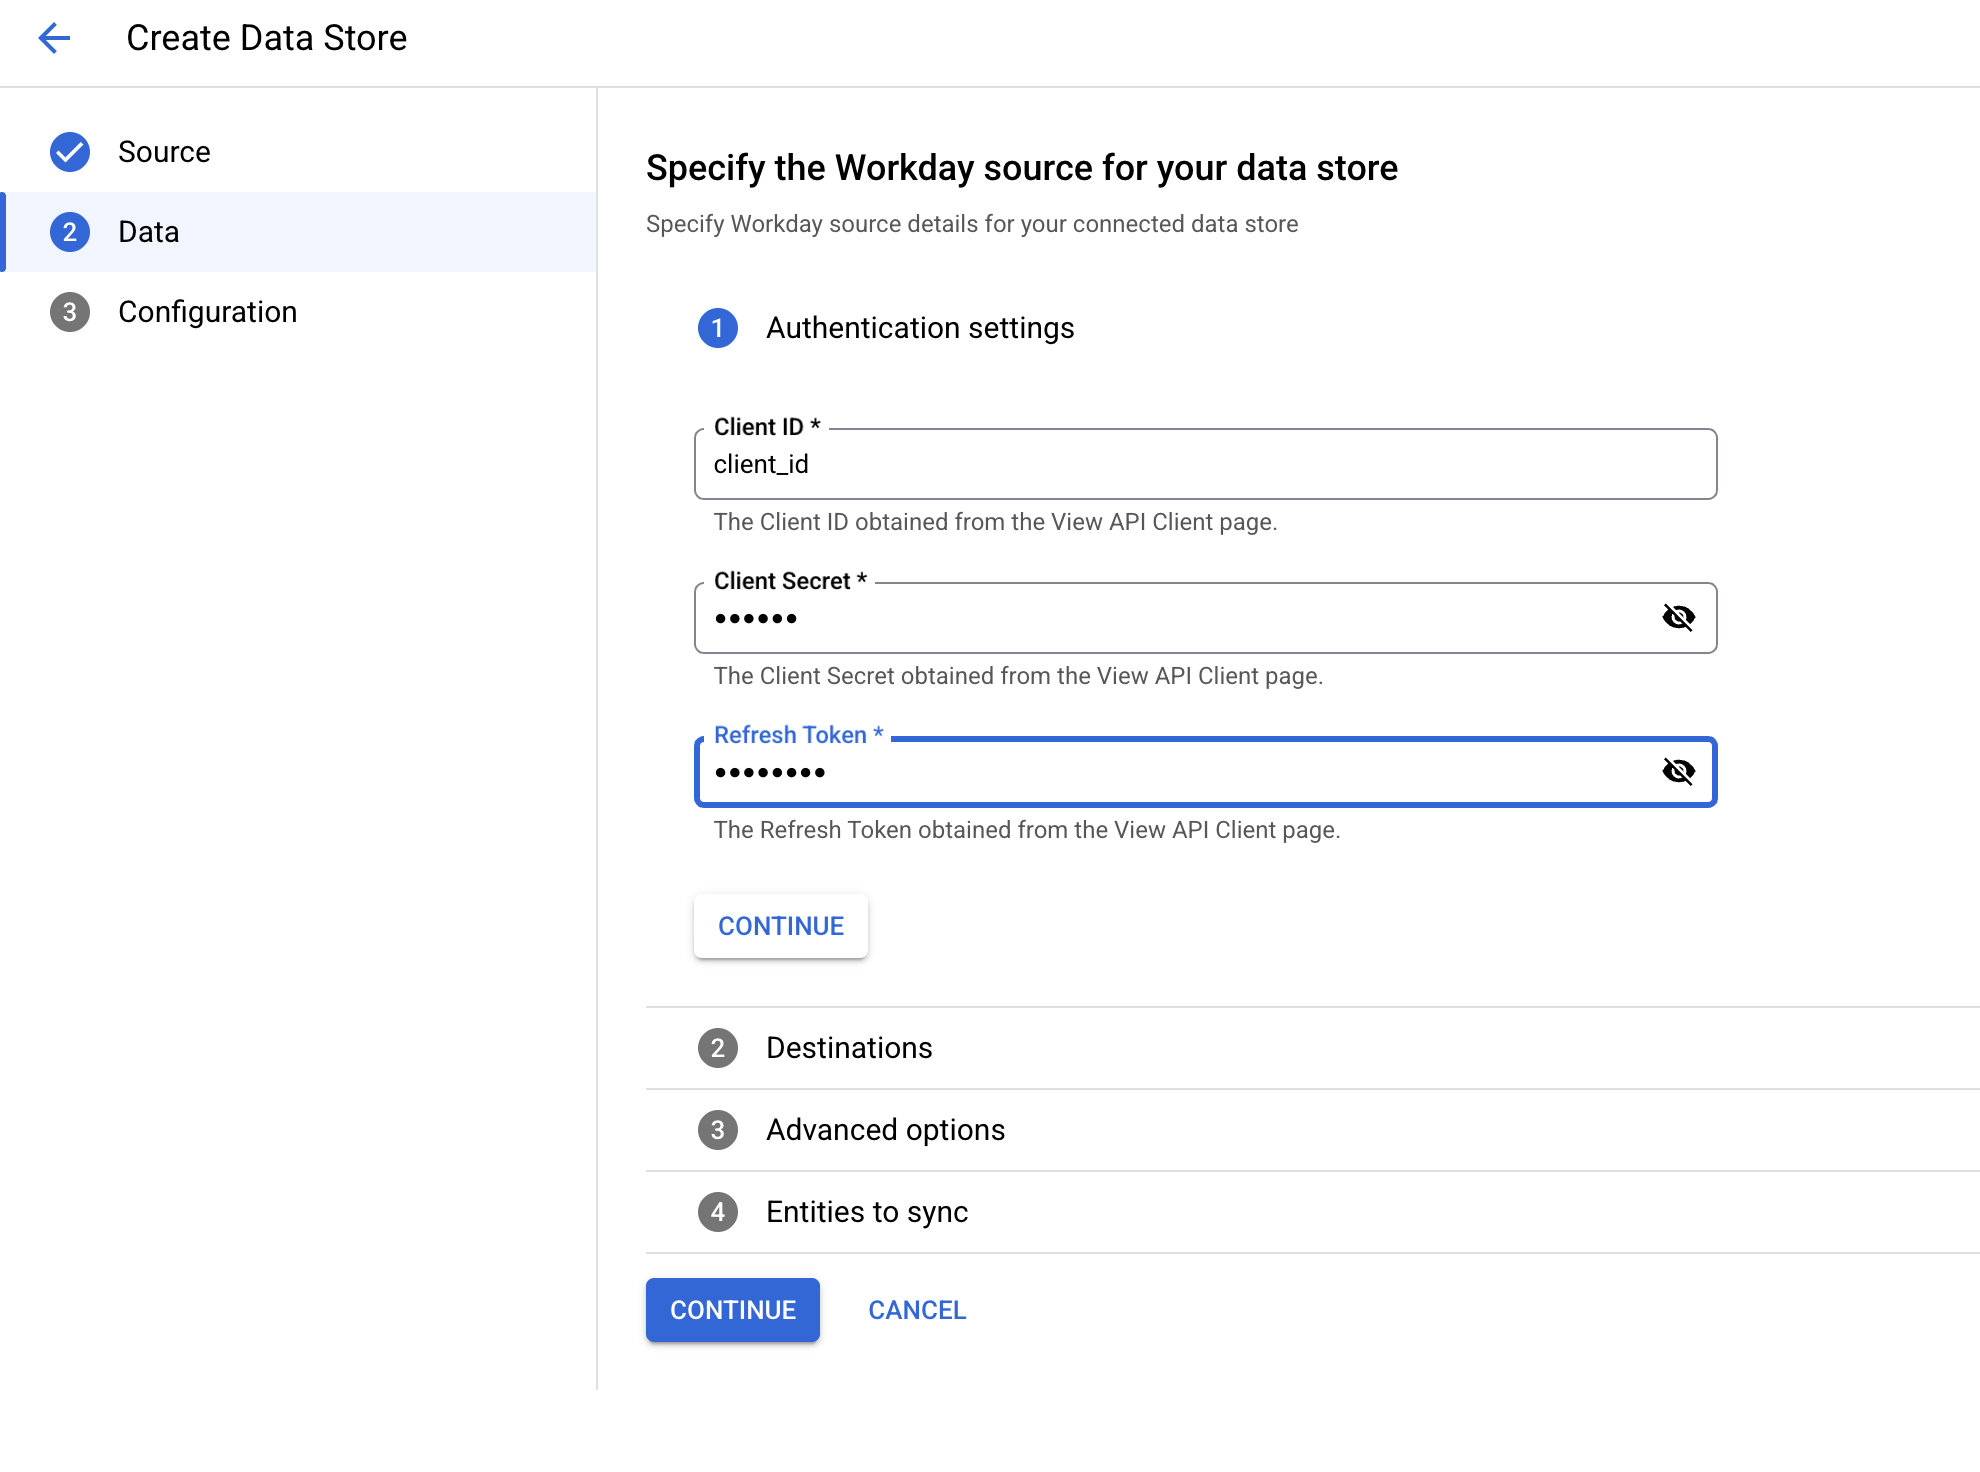
Enter authentication details -
Under Destinations, in the Base URLfield, enter the REST API endpoint URL, for example:
https://wd5-impl-serrvices1.workday.com. -
Click Continue.
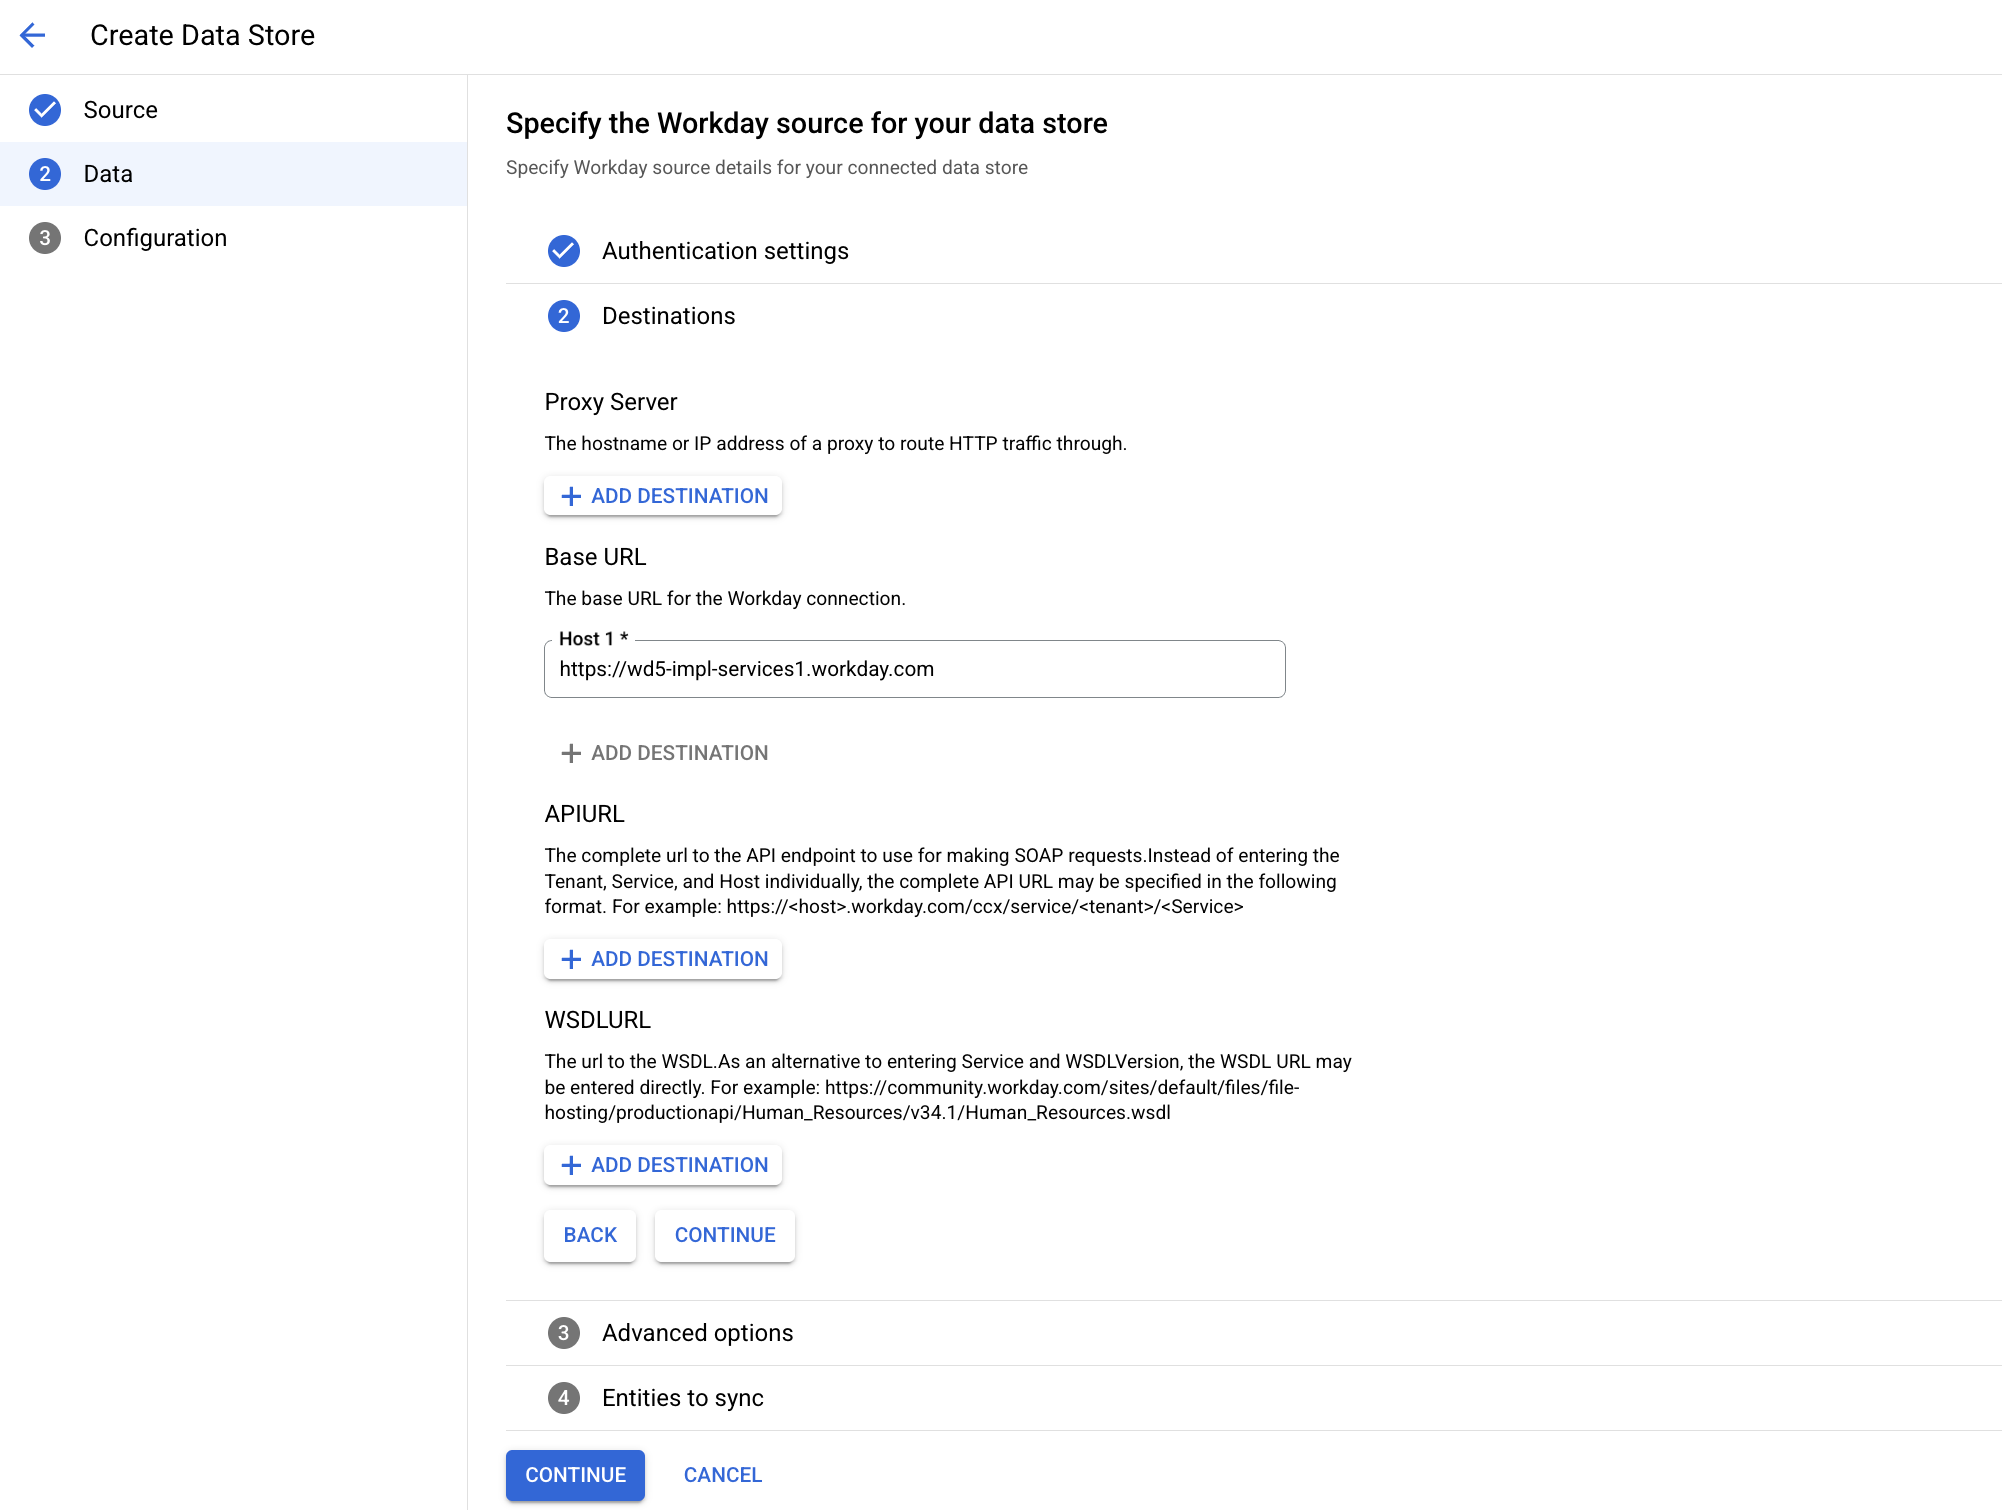
Enter URLs 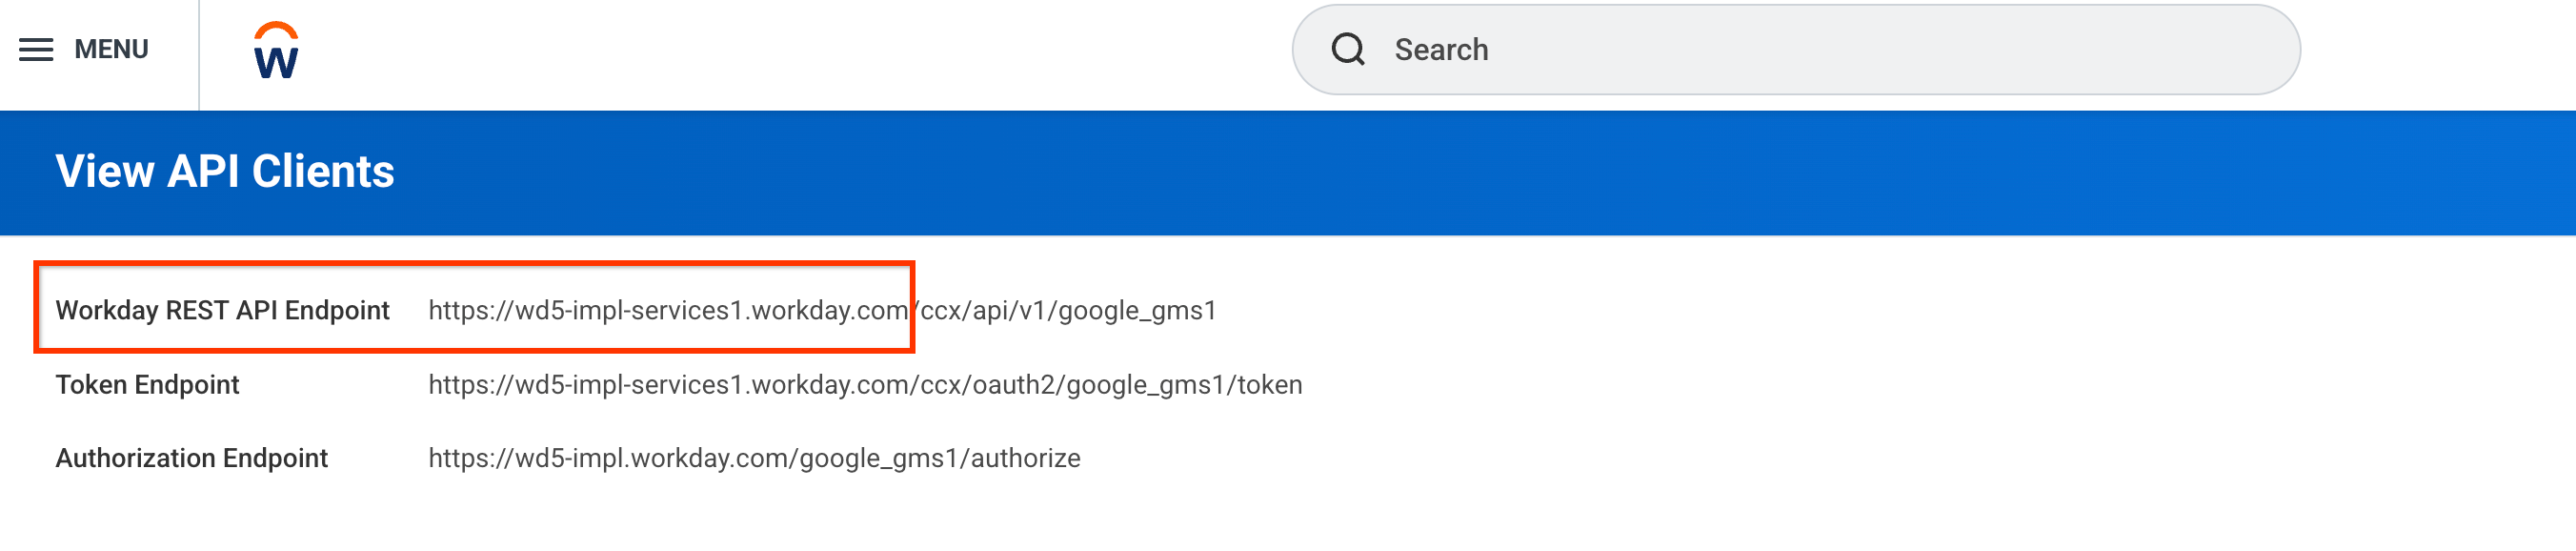
Workday REST API -
Under Advanced options, enter the Tenantand Base Web URL.
For example:
- Tenant:
google_gms1 - Base Web URL:
https://wd5-impl.workday.com
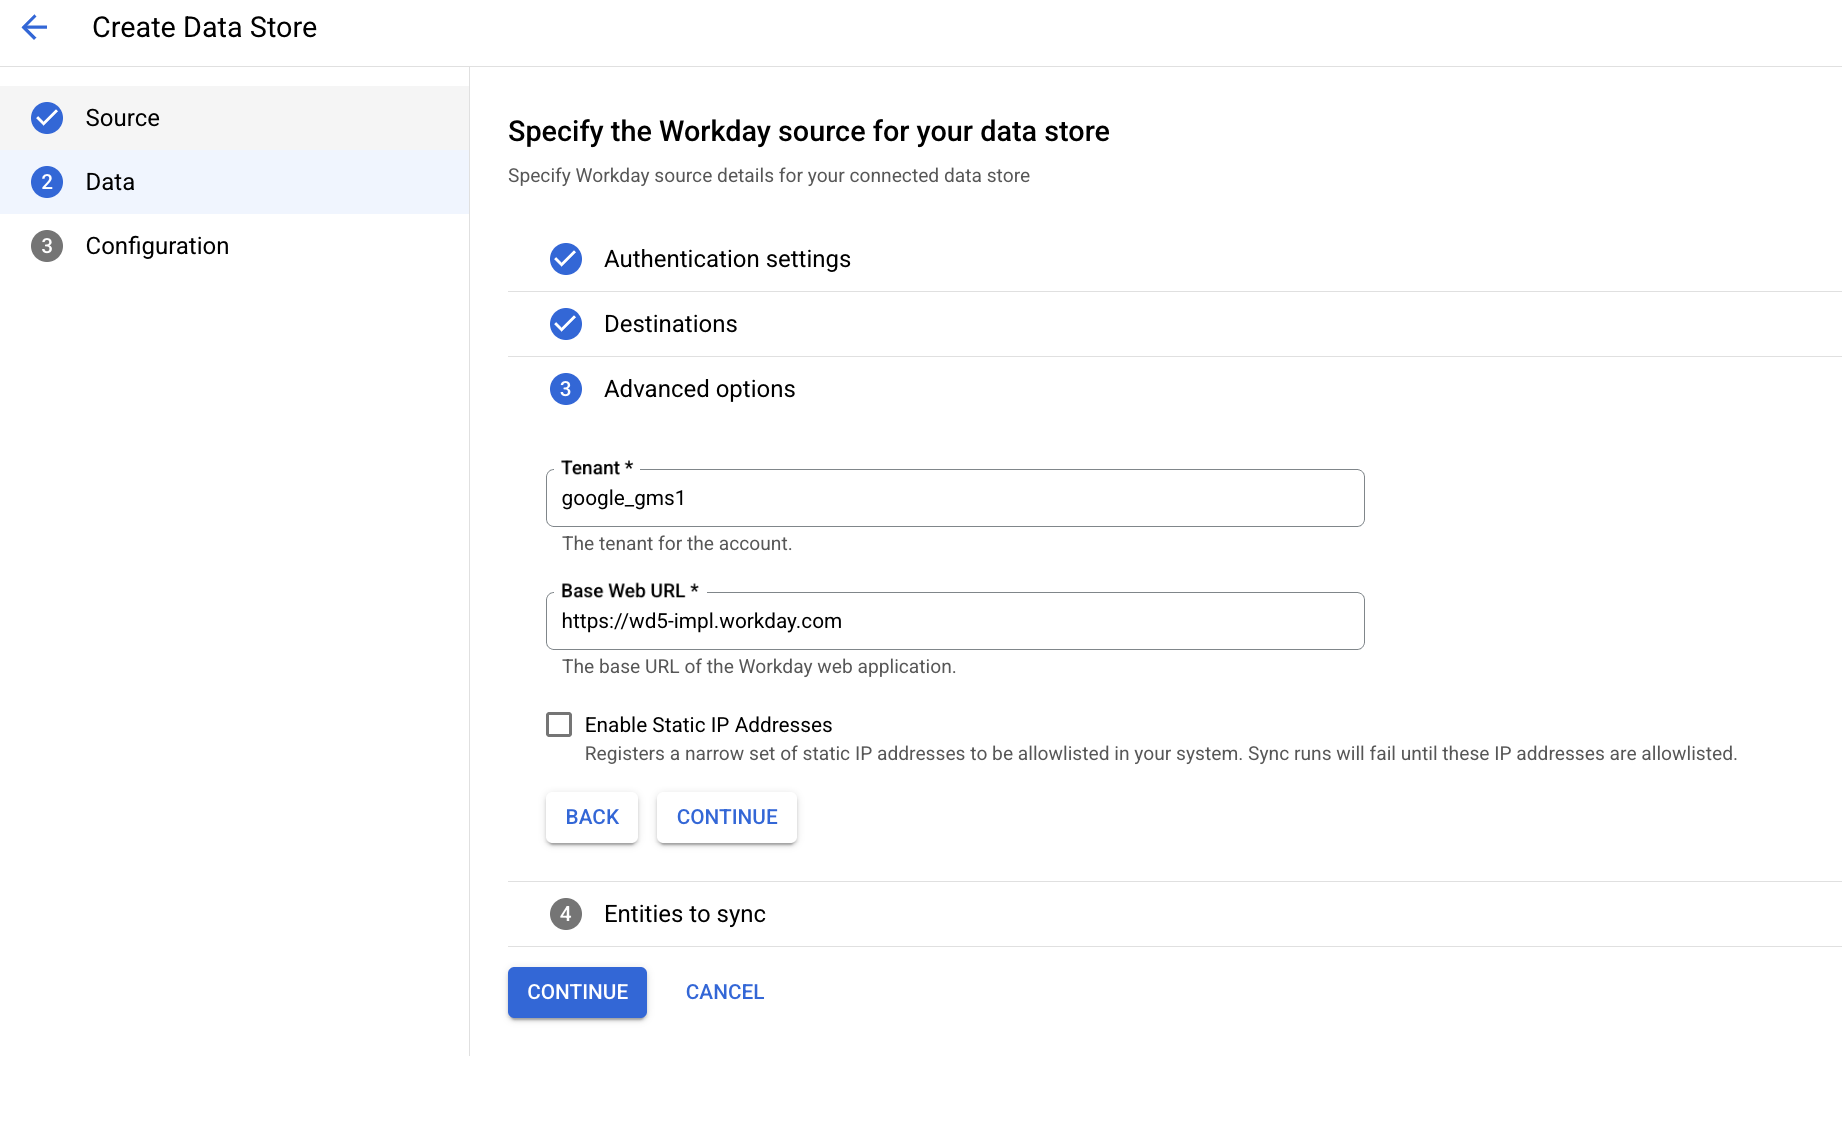
Enter Workday tenant 
Enter the base URL - Tenant:
-
Select which entities to sync.
-
Select a synchronization frequency and click Continue.
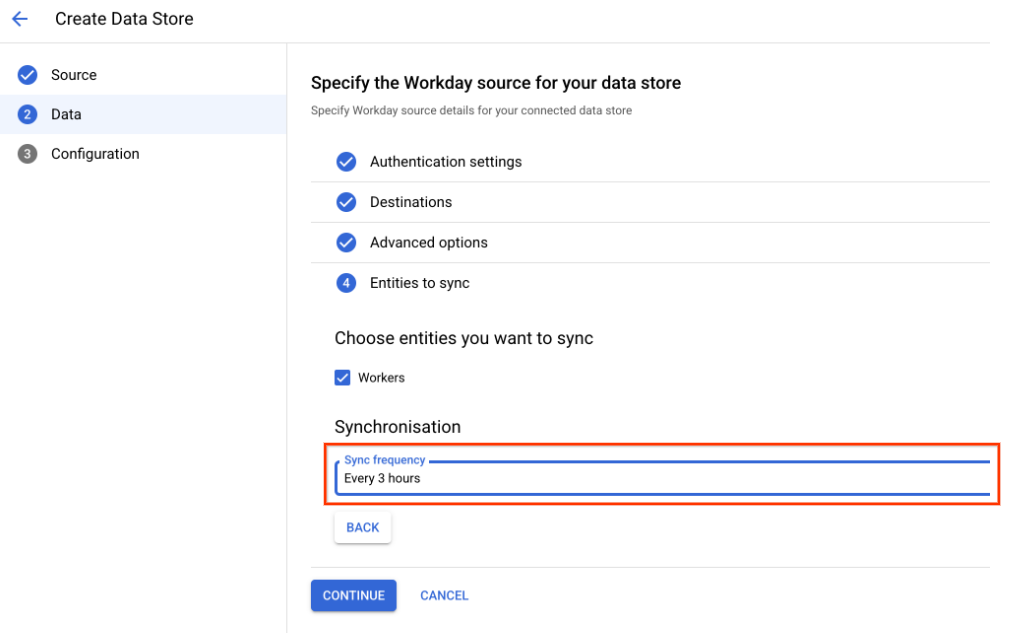
Sync frequency -
Select a region for your datastore.
-
Enter a name for your data connector.
-
Click Create. Agentspace creates your datastore and displays your data stores on the Data storespage.
-
To check the status of your ingestion, go to the Data storespage and click your connector name to see details about it on its Datapage. The Connector statechanges from Creatingto Runningwhen it starts synchronizing data. When ingestion is complete, the state changes to Activeto indicate that the connection to your data source is set up and awaiting the next scheduled synchronization.
Depending on the size of your data, ingestion can take several minutes or several hours.
Next steps
-
To attach your data store to an app, create an app and select your data store following the steps in Create an app .
-
To preview how your search results appear after your app and data store are set up, see Preview search results . If you used third-party access control, see Preview results for apps with third-party access control .
-
To enable alerts for the data store, see Configure alerts for third-party data stores .