-
1
Android Auto 接続USBケーブルには注意!
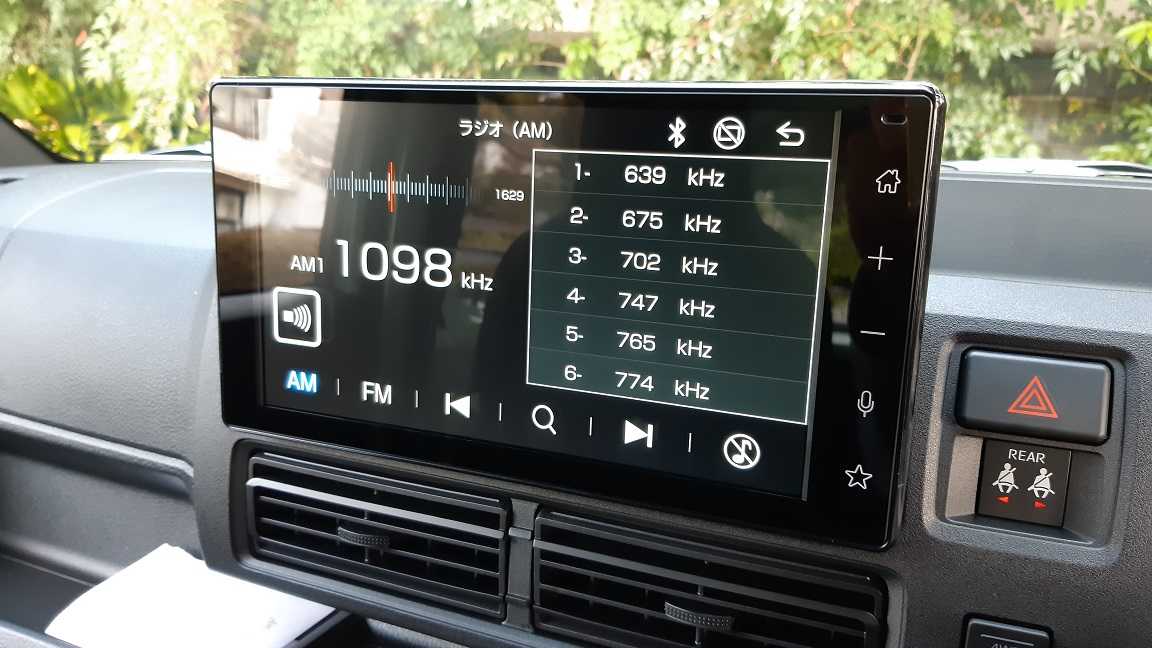
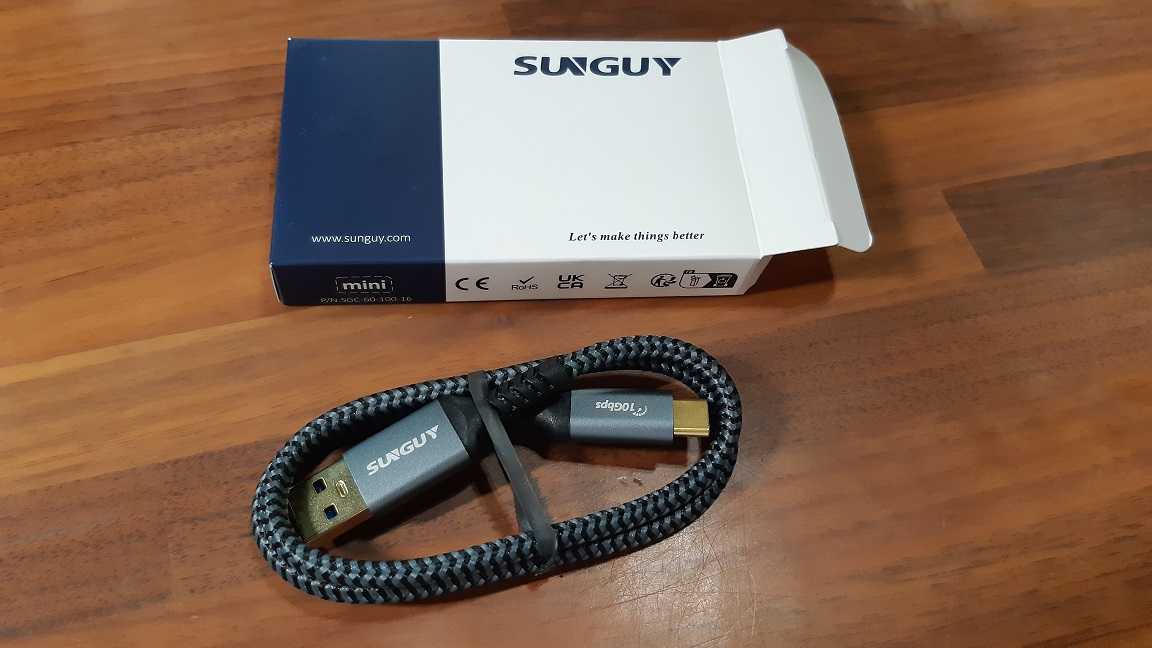
ハイゼットカーゴは、走行距離がまだ20kmほどだ。乗るたびに、「新車の匂いはいいなぁー」と。ハイゼットカーゴにはカーナビは付けずに、ディスプレイオーディオというのを付けた。ディスプレイオーディオって知ってる?わしもよく知らなかったんです。これでーす。ハイゼットカーゴのパンフレットを見ているとメーカーオプションとして載っている。6.8インチと9インチがあったので、大きい画面の9インチを付けた。このオプションは10万円ほどだ。通常のカーナビを付けようと思うと、15万円~30万円ほどになるんじゃなかろうか。ピンキリなんで、どれを選ぶかによるでしょうが。今のわしは、カーナビが必要になることは滅多にないので、そんな滅多に使わないものに30万円も出す勇気はないのであーる。ディスプレイオーディオはカーナビではない。しかし、ディスプレイオーディオはスマホと連携(接続)して使うことによりその威力が増す。スマホ内の音楽を聴いたり、電話かけたり等々。さらに、Android Auto というスマホアプリによりカーナビになるのであーる!(iPhone使っている場合は、CarPlayというアプリらしい)音楽を聴くだけなら、bluetooth接続だけでよいのだが、android auto を使うにはUSBケーブルでスマホとディスプレイオーディオをつなぐ必要があるようだ。ということで、接続してみましょうかと。ディスプレイオーディオのUSBの接続口は下の方にあります。HDMIの口とUSBの口があります、黄色い矢印の方がUSB接続口ですね。で、準備していたUSBケーブルでつなぎましょう。接続するとスマホの android auto が自動で起動し、ディスプレイオーディオに接続しようとします。正常に接続完了すると、黄色い丸のとこの「Android Auto」がアクティブになるらしいのです。つないだ直後は、スマホでandroid autoが起動して、ディスプレイオーディオの方も「Android Auto」がアクティブになるのですが、スマホで「開始する」をタッチしたり、ディスプレイオーディオの方のアクティブになった「Android Auto」をポチっとすると、エラーになってしまうのだ。ディスプレイオーディオの方は、「安全なところに止めて、スマホと接続してください」のようなメッセージが表示されて「Android Auto」ボタンはDisable状態に戻ってしまうのだ。スマホの方も何かエラーと出て終わってしまう。で、ケーブルを抜き差ししてみたり、スマホ再起動してみたり、色々とやってみたがだめだ。。終了。。夜、ネットで調べ始める。iphoneの方はCarPlayでの接続で問題はあまり無さそうだった。しかし、わしの使っているandroidスマホの方は、つながらない問題が散見された。げぇ、嫌な感じだなぁー。スマホの更新とかずーっとやってなかったのでやってみる。スマホのOS(android)のバージョンは8から10へ上がったような。Android Autoアプリは、スマホのOSが10からはOSに組み込まれているので別途インストールは必要ないらしい。なのでPlayストアでAndroid Autoをインストールしようとしても「更新」ボタンしか表示されないようになっている。調べていくと、繋がらない原因として、USBケーブルに問題があったケースが多い気がする。たまたま、このケーブルはダメだったというレベルではなくて、5本あったケーブルの内、繋がったのは1本だけだったというような確率でつながらないようなのだ。で、youtubeでうまくつながったケーブルを紹介していたので、とりあえずわしもポチっとした。これです。赤い矢印のところを見てもらうと、「Android Auto対応」って書いてある!そもそも、「Android Auto対応」ってどういうことや??意味が分からない。。これが届くのが土曜日だって。。とにかく、ケーブルの品質が大切だということらしい。簡単にノイズとかが入るとダメとか、長いとダメとか。とりあえず、別のケーブルで試してみることにした。家の中にある、USB typeA --- USB typeC のケーブルを集めてみた。ありました。右側の赤いケーブルは、納車前に事前準備として買っていたもので2mもある。試すには、夜の暗い中、車に乗り込んでエンジン掛けて1本づつ試していくのだ。結果、、すべてダメ。。つながらない。また部屋に戻って、調べる、調べる。以下のような記述を見つけた。---------------------------------------USB 3.0 から USB タイプ C またはマイクロへの接続は問題なく動作します。付属のOEM製品は使用しないでください。USB 2.0です。または、USB 3.0 または 3.1 を使用するポータブル SSD ケーブルを用意することもできます。現在、ケーブルを変更したので問題はありません。私が言っているケーブルにはITに青いマークが付いている必要があり、通常のOEM充電ケーブルよりも太くなっています。 ---------------------------------------ん? 3.0なら繋がるってこと?android autoのページとかでは USB 2.0で繋がるって書いてあるんだけどなぁー。で、わしの試したケーブルの口を見る。接続口の中の白いのや黒いのは、USB 2.0 なのだ。つまり、すべてが USB 2.0 だったと。。家の中には、USB typeA --- USB typeA のケーブルではUSB 3.0もあったが、スマホ側につなぐtypeCのものは2.0しか持っていなかった。Amazonで注文したものも USB3.1だ。こうなってくると原因は、USB2.0規格のケーブルはダメなんじゃないかという気がしてくる。だとすると、気になるのがスマホ側のUSBの接続口だ。わしのスマホの仕様をネットで調べてみると、USB 2.0 だった。。え、まじか。車のディスプレイオーディオの方の接続口を見てくると、こちらもUSB2.0っぽいなぁー。口の中が白いのだ。じゃあ、間だけUSB 3.0 にしたってダメなんじゃないのか?えー、スマホ買いなおさないといけないのかぁーーー。どうせ買いなおすなら、iphoneの方がちゃんとつながりそうだしなぁー。しかし、iphone は高い!そんなモヤモヤ状態で、土曜にケーブルが届くまで待つことができなかった、わし。本日、お昼にちょいとヤマダ電機へ。スマホ関連のコーナーでケーブルを見たが、すべてUSB2.0みたい、がーーん。あ、いつものようにパソコンコーナーの方のUSBケーブルコーナーへ行く。お、こちらには3.0のがあるぞ!これを買った。USB 3.1 0.5mだ。この正規認証品と書いてあるものを買った。同じ3.1で同じようなケースに入っているが、この「正規認証品」マークが無いものもあったのだ。とにかく伝送品質が大事なんだろうから。2千円ほどした。USB3.0は、接続口の中が青いので、これで見分けることもできる。ところが、スマホ側につなぐtypeCの口の方は見ただけでは識別できないようだ。USBマークでは、5Gbps等の速度が入っていれば3.0以上ということになる。わしが買ったのは、3.1の10Gbpsの伝送速度のものということだ。さっそくこのケーブルでスマホとディスプレイオーディオを繋いでみた。エラーが出た。。以下のように「Android Auto」はイネーブルにならない。しばらく待ってもディスエイブルのままだ。あれ? 昨日までのエラーと内容が変わっているぞ!何やら、セキュリティーがどうのこうのと言っている。時刻を合わせろとか言っているが、時刻はスマホと同じで合っている。いろいろやっていると、「google play 開発者サービス」をインストールしろと。何それ?と思いながら、playストアからこれを探してインストール。念のためAndroid Autoも更新。さらに、スマホも再起動してみた。それで再度、接続と。お! なんかさっきより先に進んだようなと思っていたら。「Android Auto」がイネーブルになった。しばらく待ってみたが、エラーも出ずにこのままの状態で留まっているぞ。「Android Auto」ボタンをタップすると、おぉぉぉーーーー! きたぁーーーー、出たぞぉぉーー!!苦労が報われた瞬間である。「OK ガーミン!」。。。あ、間違えた、「OK、グーグル!」「別府市役所!」お、認識して何か言っているな。すると、おおー、ナビが始まったぞ!「Android Auto」接続時のメニューというかダッシュボードというか、こんなんですゎ。マップをタップすると、さっきの地図画面になります。見慣れたグーグルマップの地図です。拡大・縮小は指でピンチアウト・インでスムーズに行えます。これは、快適だ。実際のナビの印象は、そりゃーカーナビ製品に比べればかなり劣っていると思う。カーナビは親切丁寧だし、表示が分かりやすい、やはり1日の長はあるって感じ。なんとなく分かればいいと割り切れば、これもありだと思う。それに、現在はこのレベルでも、5年、10年後にどれくらい進化しているか分からないしね。スマホだとその進化を常にダウンロードして享受できるのがいいのだ。カーナビだと地図のアップデートくらいしかできないのかな。ま、カーナビは完成度が高いからそれでいいのかもね。今回の経験からAndroid Auto の接続では、USB 3.0 以上の高品質ケーブルを使うこと!!が教訓だな。もし、同じような環境の方がいたら、何かの参考になればと思います。え? 土曜日にもう一本ケーブル届くんだろって?ええ、スペア、スペア、何本あっても困るもんじゃないしね、ケーブルは。あ、そうそう、Android Autoで接続しているときに、スマホの音楽を聴こうとしたらbluetooth接続ができなくて聴けなかったんだが、これは仕様なのか? なんかやり方があるのか?ディスプレイオーディオ側のラジオとかはAndroid Auto接続中も普通に聴けた。そういえば、納車のときに、「iphoneですか?」って聞かれたなぁ、そのときはただ「Androidですよ」って答えた。もしかしたら、接続がうまくできないかもしれないと思っていたのかもしれないな。「うまく、接続できないんですけどぉーー」ってディーラーに持ってこられても、ディーラーさんも中々難しいしいよね、こういう問題の対処は。専門外だろうしね。でも、ディスプレイオーディオはメーカーオプションだからねぇー、分からないとは言えないよねぇー。iphoneの方が問題が出にくいのは機種がアップル製のしかないからだとも。androidの方は、サムスン、シャープ、ソニー、等々が色々な機種を出しているので、それらすべてで問題なく動くようにするのは中々大変なのかもしれない。このケーブル問題を回避するために、無線で接続してAndroid Autoを使う方法もyoutubeに上がっていた。ただ、わしのandroidのバージョンではできないような感じがした。カーナビなら、地図が出るだけにここまで苦労することもないのだろうが、わしはディスプレイオーディオにしてよかったかなと。こういう面倒なことが嫌な人は、カーナビにした方が幸せだと思う。--にほんブログ村
2023.02.09
閲覧総数 33372
-
2
Android Auto 接続ケーブル その2。 2023/02/12
土曜日に、先日Amazonで注文していたUSBケーブルが届いた。先日のブログで書いたUSBケーブルですね。これです。SUNGUYって中華メーカーですかね。ケーブルは太くてしっかりしています。いかにも伝送品質もよさげな感じです。ということで、日曜日にちょいと車のディスプレイオーディオとスマホの接続をと。既に、ELECOMのケーブルでAndroid Autoは使えるようになっているので、予備として確認ですね。うーん、これ、ゴミですかね。。うんともすんとも言わないんです、接続しても。スマホとの接続箇所をグッと押し込んでみると、充電が開始された。が、Android Autoの接続はまったく認識しない。。幾度も差し直したりしたが、結果は変わらず。部屋で、パソコンと接続してみたが、これも強く押し込んでやっと充電が開始されるという始末。PC側はスマホを認識しないので、PCとスマホでファイルのやり取りもできない。。なんなんだ、このケーブルは。。たまたま外れのケーブルだったのか?みんなちゃんと使えてるのか? データ転送すらできない、単なる充電ケーブル、それも短いし。捨てたくなるな。話を変えようね、このケーブル見てると気分悪くなるから。ちょいとAndroid Auto の画面例をいくつか撮ったので。グーグルマップなので写真での表示もできますよ。ナビでの経路オプションは、これくらいしか選択肢はないみたい。。あ、そうそう、Android Autoで接続しているときでも音楽が聴けるようになりました。Android Auto に対応したプレイヤーアプリをインストールする必要があったようです。わしが入れていたのはOnkyoのアプリだったのですが、これが対応していなかったようです。ということで、Pulserというアプリを入れました。歌手名が文字化けしてますけど。。ま、無料アプリなんで。でも、曲の画像なんかも出ますねぇー。このアプリ、使いやすくていいかもです。スマホはアプリをばんばん入れて使うもんなのでしょうが、わし、あんまりアプリとか入れてないんですよ、どうもこの何も気にせずにどんどんアプリを入れる感覚に慣れなくてねぇー、じじぃは。自分のパソコンも、なんでもかんでもアプリをインストールなんてしませんからね。インストールを嫌うから、Webアプリがこれだけ増えたと思うのだが、スマホはそんなこと知ったことかという勢いでアプリをインストールしまくりですね。ま、今後は、Android Auto対応で便利なアプリがあればインストールしていきそうだな、わしも。--にほんブログ村
2023.02.12
閲覧総数 1752
-
3
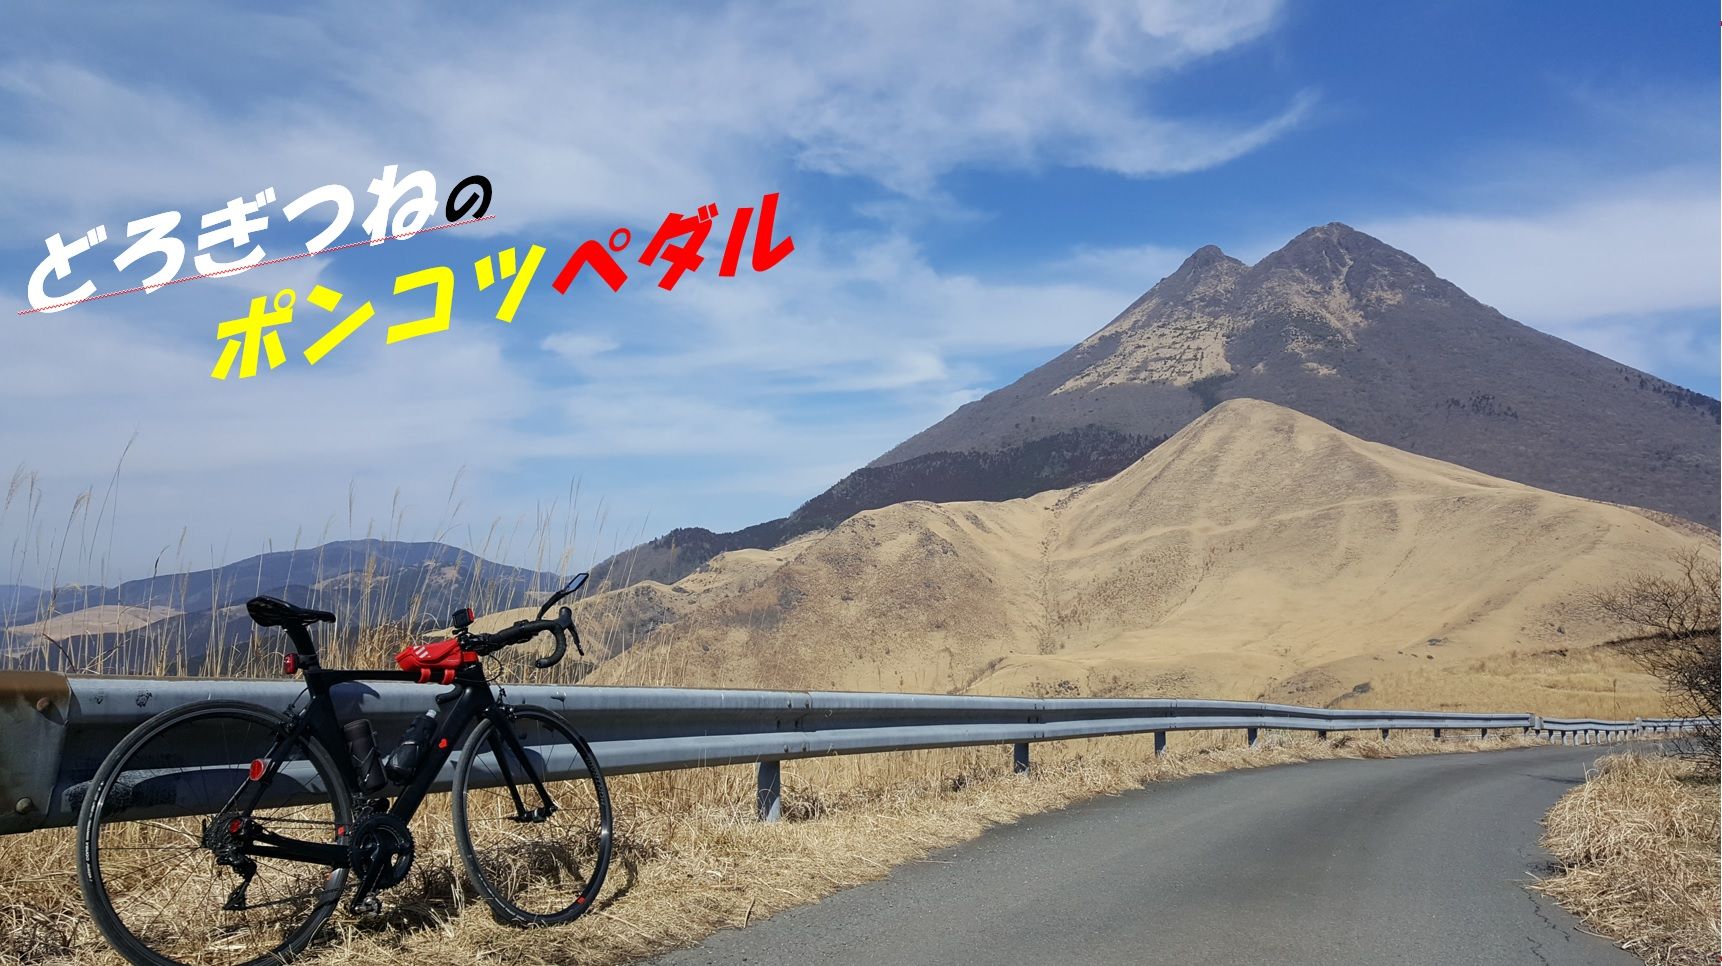
ぐるっと由布岳。ペダルエクステンダーはどうだった!? 2024/02/11
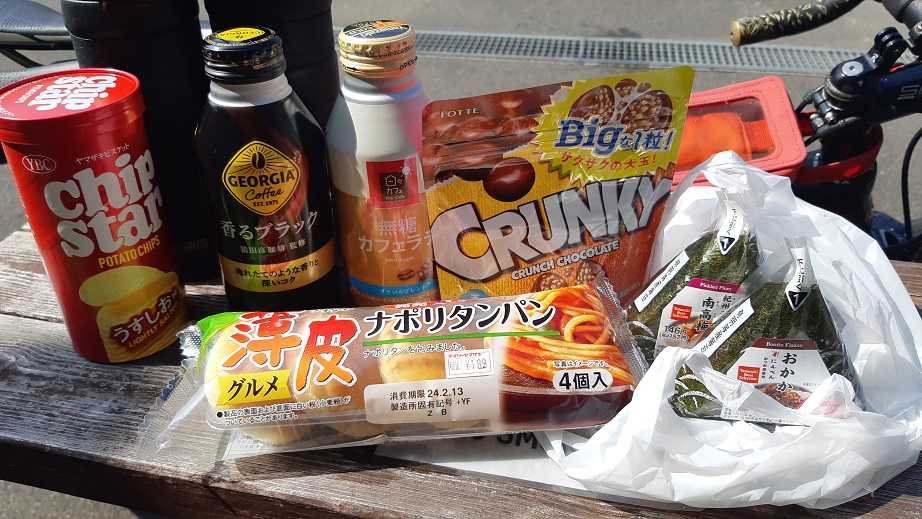
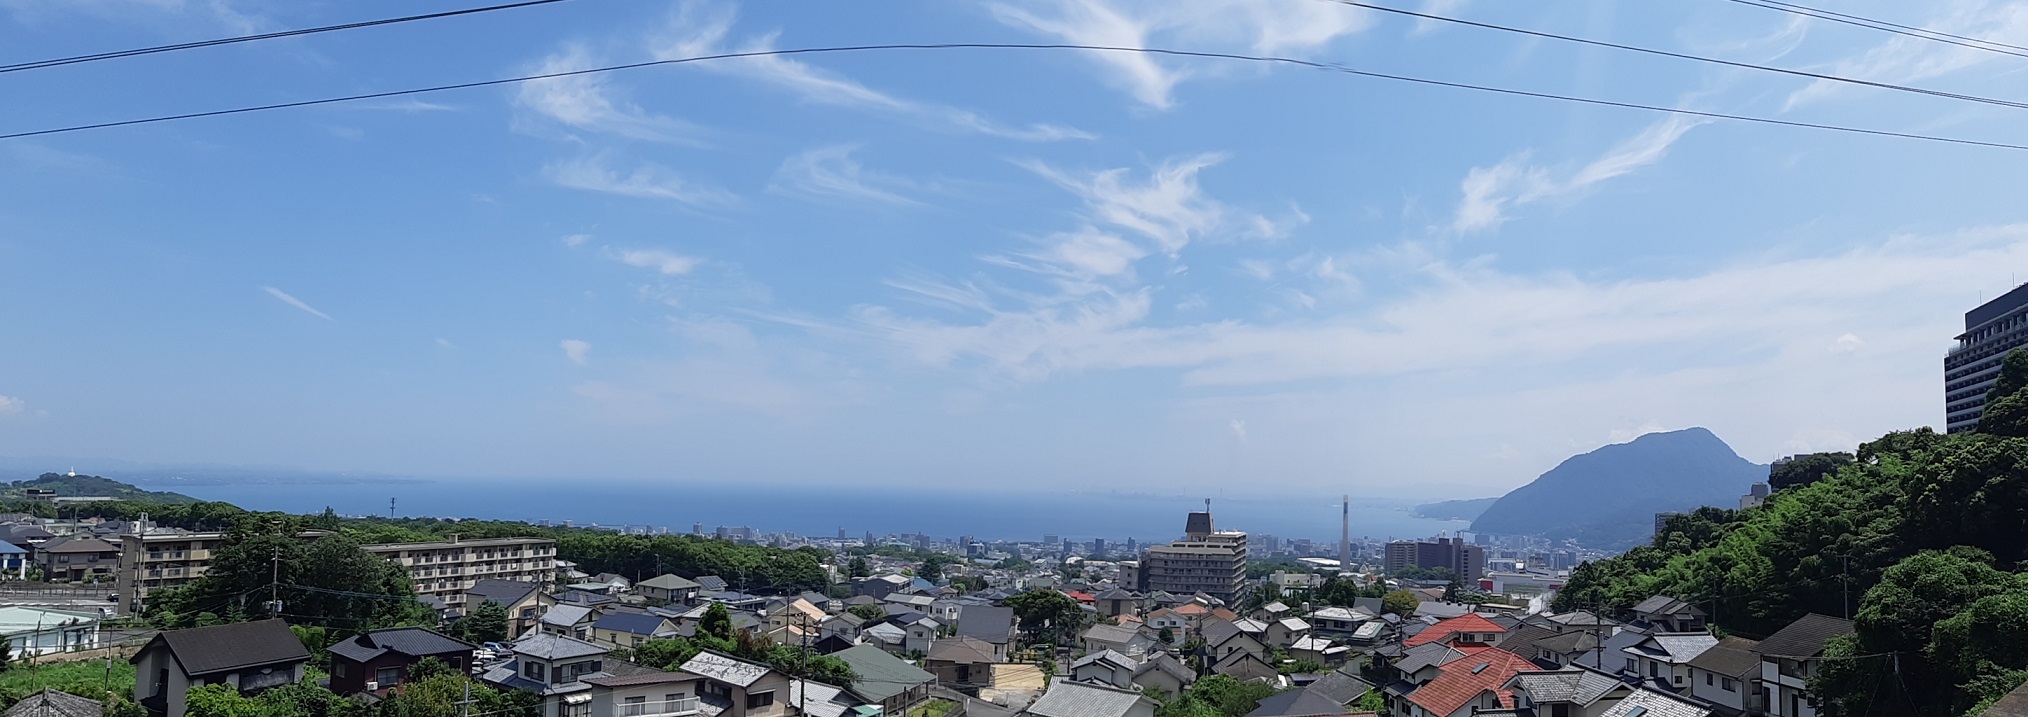
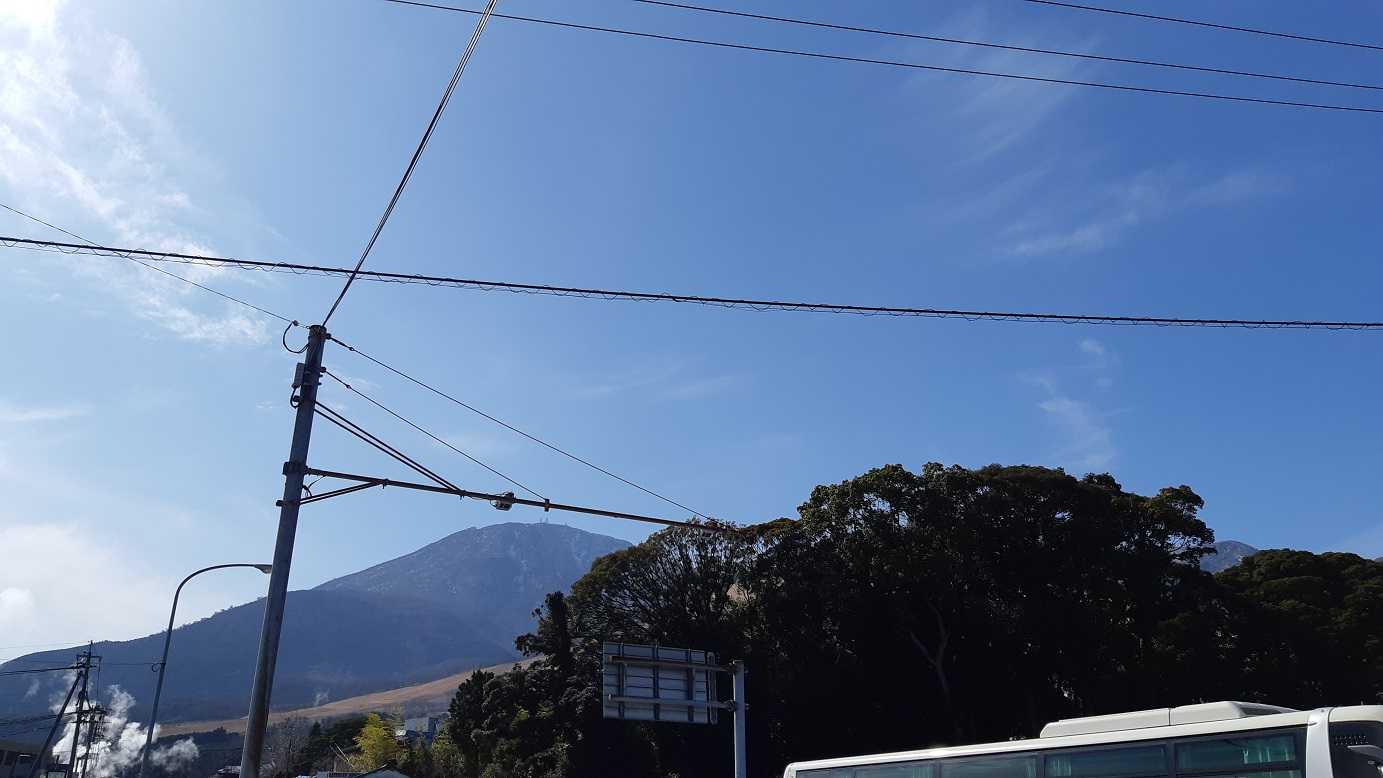
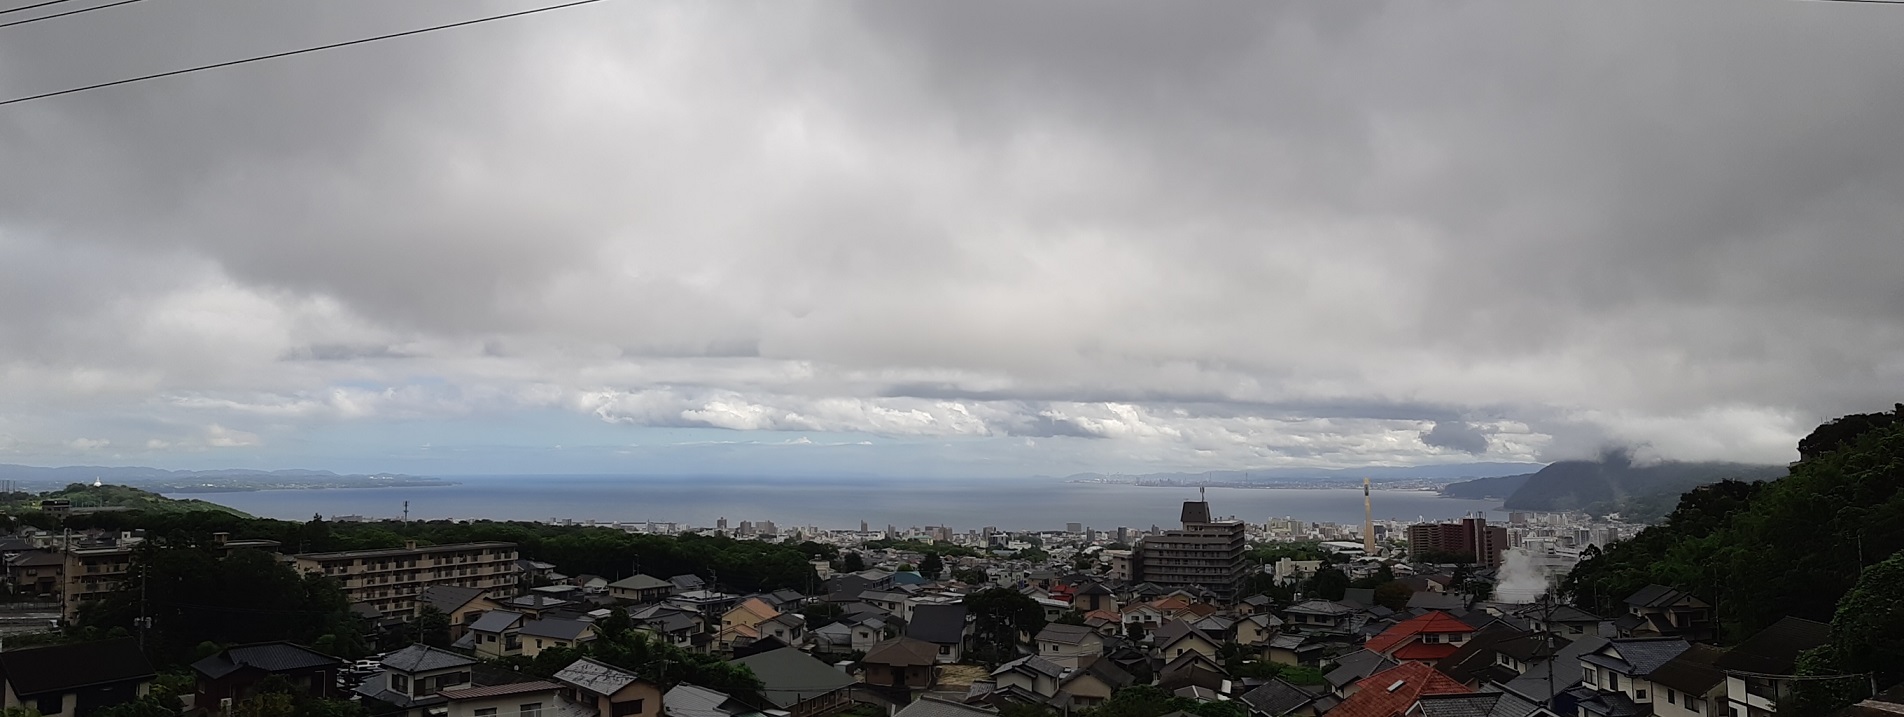
さてさて、先日取り付けたペダルエクステンダー、それを味わいに行きましょう。味わうには、平地に行ってもしょうがないので、やっぱ山だねぇー。坊主地獄先交差点まで登って、いつものコンビニ。本日の買い出し。薄皮ナポリタン! なーんか気になって買ってみた。中々の拡張だぞ、片側20mmって。ここまで登ってきた感触は?広がったというのは分かるのだが、あくまで比較としてね。最初からこれが付いていたらどうか? なんの疑問もなく乗っていたと思う。ま、ここまでは足慣らし、足慣らし。では、次へ登りましょう。2週間ぶりなので、まずはペダリングを思い出しながら、ヨイショヨイショと登る。既に変化に気が付いていた。今までは、特に意識しないと足の小指側で踏んでることが多いのだが、ペダルエクステンダーを付けたらね、何の意識もしないのに母指球で踏んでいるんだな。トルクが掛けやすいか?そんな気もするが、まだ何とも言えないなぁー。回し難いのか?うーむ、そんな気もするが、ま、慣れの問題もあるので何とも。ダンシングもしてみた。まだ違いがよくわからない。そんな感じで、十文字原にとうちゃーく。本日の十文字原。今日は、ちょっと霞んでます。少し暖かいからかな。では、次へ登ります。ダンシングで気が付いたことがあった。割と大きめに体を振ったり、逆に自転車を振ったりしたんだけど、意外と安定感がある。安定感というか、不安が無いと言った方がよいかも。やはり足幅が広くなると安定するんだと思った。ただ、この20mmが適切かと言われれば、まだわからない。しかし、これも慣れの問題かもしれないしな。本日の別府霊園からの由布岳。塚原高原へ向かう途中。塚原高原へ向かう道で、激坂コースを登った。いつもは、最後はもうダンシングしないと無理ぃーーと言ってダンシングしているのだが、今日はね、なんか最後までシッティングで登れた。そして、うりゃゃゃーー、おりゃゃゃーーという感じでもなかった。そのときは、自分の脚力がついたのかと思ったが、すぐに気が付いた。あ! ペダルエクステンダーの効果か!?スタンスが広いとやはり、エイッと踏ん張りやすいのだろうか。塚原高原にとうちゃーく。お馬さんは、1頭だけなんとか見れました。さ、次へ行きますか。で、今日はエコーラインには行かずに、矢印の方へ行きます。ほら、いい眺めでしょ。ここは、車も少なくいいコースです。由布岳ズーム。由布岳ズームアウト。さらに、ズームアウト。ちょいと休憩っと。はい、ドッカーーーーンと下りましょう。由布岳の方向が少しづつ変化していきますね。2月の山ですが、今日はそこまで冷えないかな。脚は特に膝が痛いとかは今のところないみたい。ここは、自衛隊の重い車とかが走るからなのか、アスファルトではなくコンクリートなんです。コンクリートの路面の方が固いんだけど、固い方がチャリ子の乗り心地の良さを実感できるのです。カーボンホイールなのか、チューブレスだからなのか、なーんかとても乗り味がよくなるんです。よくなるというか、よいのを感じられるんですよ、なぜだか。由布岳サイコーって感じ。ちょいと休憩。そうそう、おろしたてのドイターリュックです。由布岳の山頂には雪がありますが、今日走って来た道には雪は無かったです。ゆふいん駅へとうちゃこ。観光客いっぱいですゎ。ななつ星ではなかった。。大分方面へ下ってから帰ろうかとも考えたが、やはり今日は登りで試す!ところで、このナポリタンパン。うまいっす! ちょうどいい味付けで、パンと合うように作ってる。これは、定番商品にして欲しいかもな。狭霧台目指して登ってます。狭霧台展望所のとうちゃーーーく。もう、脚の疲労感がね、結構ね、きてるかな。さっき左足の内腿が攣りそうになった。ま、これはたぶん水分の補給不足だと思う。でもやはり、かなり疲れた感が。。もうすぐ日暮れだし。で、今日はもう無理って決めていたのだが、やはりちょいと試しに登ってみるかと。最後の一登りのとこ。うむ、意外と難なく登れたぞ!本日の由布岳。人生の夕暮れも感じながら、帰りましょ。本日は、57kmほど。獲得標高は、1380mほど。本日のコースはこんなんです。コースプロフィールはこんなんです。トレーニング効果は、ガーミンはこう言っています。おお、ハードだって。そりゃ、疲れるわな。ペダルエクステンダーの効果は、やはりあったと言わざるを得ないかな。微調整としては、シューズのクリートを今と逆にペダル幅が狭くなる方に変えてみて、5mm程度内側になるようにしてみようかなと。ペダルエクステンダーが無かったら、今日の最後の一登りは諦めていたと思うんだな。獲得標高が1400m弱だと、さすがに体がバリバリ言ってるゎ。ちなみに、風呂で左脚の内腿がまた攣りそうになってビビったぞ。あー、怖かった。--にほんブログ村
2024.02.11
閲覧総数 113
-
4
ハンドル落差の威力。 2024/08/12
今日はかろうじて午前中に出発。堀田CTB前まで登ってます。先日、暑さに慣れたとか言ってましたが、慣れてませんでした。暑い!この前はたぶん湿度とかが低かったんだと思われます。まだまだ夏ですゎ。いつものコンビニで本日の買い出し。まずは、ガリガリ君で冷えましょう。昨日、またハンドルを下げたんです、スペーサー一個分。サドルとハンドルの落差は、4cm程度です。これくらいの落差だと写真の角度によってはあまり落差が分かりづらいかもですね。10年近くロードバイクに乗ってますが、今まで落差についてはあまり気にしたことがなかったです。前傾したけりゃ、肘を曲げたらいいだけじゃないかと思ってたからなぁー。でも、やはり形というのは重要なんじゃないかと、最近思ったりしてるんです。暑い中、登ってますゎ。ハンドルを下げたけど、今回もほとんど違和感ないっすよ。ただ、サドルが前上がりになってるので、ちょっと当たる感じがあって素直に前傾はしていないかも。城島高原にとうちゃく。本日の由布岳。ボトルの麦茶を補充です。暑さでボーっとしてるので、気付けのカボス!ここで、サドルの角度を少しいじる、前上がりになっているのを少しだけ前側を下げた。このサドルの前側を少し下げたのが効果があった。すんなりと自然に前傾できているような感触がある。サドル前側のつっかえが取れたような感じです。そしてこの副次的効果がね、いいんだゎ。ペダルへのトルクというか体重の乗りがよくなった!なんかね、ハンドルが高いときに肘を曲げて前傾を深くしたときと、ハンドルを下げて自然に前傾が深くなった場合では、後者の方がペダルに体重が乗る感触があるんだゎ。なんとなくだが、骨盤の倒れ方が違うのかもしれないなぁーと。そんなことを味わいながら、もうすぐ由布岳登山口。登山口を通過して、本日の由布岳。夏のゆふいん盆地。今日は湯布院側へ下る予定です。見えている道を下りますよー。絶景コースの下りです。下から仰ぎ見る由布岳。そして、暑い。ラストコンビニで買い出し。おにぎり合計が350円以上だと麦茶無料になった! ラッキー。湯布院からの登りでは、ハンドル落差の効果は実感できてます。やはり体重の乗りがいい、一枚重めのギアでいけそうだ。水分峠にとうちゃく。やまなみハイウェイをさらに進みます。はい、とうちゃこ。ここです、蛇越展望所の下のところです。わたしの特等席です。私がここに座って景色を見ているので、通りすぎる車が一瞬ゆっくりになって「何がある?」みたいな感じになるんだなぁー、何もないのにねぇー。ものすごい絶景なのか?って思うんですかね。絶景を見ながら、おにぎりタイム。赤ヘルと由布岳。さてと、やりますか、スマホ斜めってますけど。。えい!おおー、出た、革サドル!シェーでふらつくわし。今日はね、三戦(サンチン)立ちからの~。正拳突きの引き。今日のハンドルの落差をイメージで表現すると、こんな感じかな、前屈立ち下段払い。え? 全然伝わらないって?うーんと、これ以上腰が落ちない、、猫足立ち。はい、あちらが由布岳です。盆踊りではありません、膝蹴りの図。膝蹴りが精いっぱいです、上段廻し蹴りをする柔軟性も筋力もないみたいです。ふー、さてと帰りますか。湯布院へ向けて下ってまーす。道の駅ゆふいんでトイレ休憩と。麦茶補充をしたけど、これも飲んでみたい!と。さ、ラストの300mアップです。ちょうど夕暮れ時になってました。ちょうど沈んでゆくところでした。夕日を浴びる由布岳。狭霧台展望所にとうちゃく。あー、沈んでゆくぅーー。狭霧台を出発して、登っている途中でふと振り返ると、もうなごり夕焼けになってました。由布岳登山口を通過して、後は下って帰るだけと。本日は、70kmほど。獲得標高は、1425mほど。本日のコースはこんなんです。コースプロフィールはこんなんです。トレーニング効果は、ガーミンはこう言ってます。今日も城島高原からの下りで、鹿さんを2頭ほど見た。先日も別府霊園への登りで、鹿さん親子4頭を見た。自転車でも、鹿さんはびっくりして林の中へ逃げてしまいます。びっくりしているのはこっちも一緒なんだけどね。あれが、熊だったら、こわいねぇー。北海道の人とかはそういうこともあるんだろうねぇー、こわいゎー。下りだったらいいけど、登りだったら熊から逃げきれる自信ないなぁー。え? 登りでも逃げるときは下ればいいだろ!って?た、確かに。ま、慣性の法則だよ、登っていたら登り続けようとするんだよ人間は。にほんブログ村
2024.08.12
閲覧総数 148
-
5
Newヘルメットでライド。 2023/02/05
本日は、別大毎日マラソンの日だ。なので、私のいつもの出発時刻であるお昼頃は、別大サイクリングロードは走れない。ということで、今日は山とするか。とりあえず、坊主地獄先交差点まで登る。日差しがあり、今日は10℃くらいまで上がるらしいので、登っていると汗をかくほどなので寒くはない。坊主地獄先交差点にとうちゃく。参考タイムは、18分52秒ほど。途中で、ジョギングしている若者がいたんだよ。抜けない。。差がまったく縮まらない。坂だと、勝てないのか。。そんな屈辱を味わいながら。いつものコンビニで本日の買い出し。苦い思いを甘いあんこで誤魔化す。さてと、次へ登りましょう。十文字原へとうちゃーく。気持ちいい空と雲です。本日の十文字原。別大毎日マラソンは、ずーと海沿いを走るコースなんです。箱根駅伝は山コースがあるけど、マラソンって山コースとかって無いよなぁー。そんなコース作っても誰も参加しないからなのかな。さてと、次へ登りまーす。ちょっと下りの区間があるんだけど、あれ、頭がなんか冷たい気がするなぁーと。ま、すぐに登りになるので気にならなくなる。本日の別府霊園からの由布岳。ゾウさんにご挨拶と。つま先の裏にはホッカイロを貼っているが、上半身はだんだんと寒くなる。下って下って、明礬温泉のとこ。今日はおニューのヘルメットなのだが、やはり下りでスピードが出ると、頭が寒いぞ!今までのヘルメットでそんなことを感じたことがなかったのでちょいとびっくりしているのだ。坊主地獄先交差点からは、堀田CTBの方へ登って、今日は杉乃井ホテルの方を下ろうかと。これ、新しくできた新館みたいだが、最初はマンションかと思った。ここにもまた新館を建てているのかな。下りの途中でちょいと休憩と。おニューのヘルメット、横から見るとこんな感じでカッコイイ。で、後ろからだとこんなのだが、このヘルメットを被ると、そうキノコ頭になるんだゎ。。前のKASKのモヒートはそんなことなかったと思うのだが。だが、前からもよく見ていると、この横の膨らみとかこの隙間の多さが、あの下りでの頭の冷感の原因ではないかと思える。ヘルメット内のエアフローとかが進化しているのかもね。冬なので頭が寒いとかって言ってるけど、これは夏なら快適なのだろう。寒けりゃサイクルキャップを被れってことなんだろうな。さてと、帰りましょうか。まだまだ下りまーす。別府公園に帰還。夕方になってくると、すぐに空気が冷たくなってきている気がする。本日は、34kmほど。獲得標高は、844mほど。本日のコースはこんなんです。コースプロファイルはこんなんです。トレーニング効果は、ガーミンはこう言っています。先日納車された車は、ディーラーから家まで乗って帰ってから、まだ乗ってないです。やはり、自転車ライドを優先してしまうなぁ。。あ、そうか、チャリ子を積んでどっかに行って走るってのもありか!チャリ子の固定の仕方とかは後で考えればいいか、まずは新しい遊び方で遊ぶことだな。そういえば、車に自転車を積んできて、そこから自転車に乗ってる人をよく見かける場所があった。真似してみるか。田ノ浦ビーチ。。やっぱ近すぎるわな。てなことを考え出すと、グーグルマップ見ながら悩みだして、迷宮入りというパターンが多い。ま、悩むほどの遊びを持っているっていいことじゃないか!そういうことにしておこう。--にほんブログ村
2023.02.05
閲覧総数 773
-
6
ペダルスペーサーでプラス4mm 。 2024/03/01
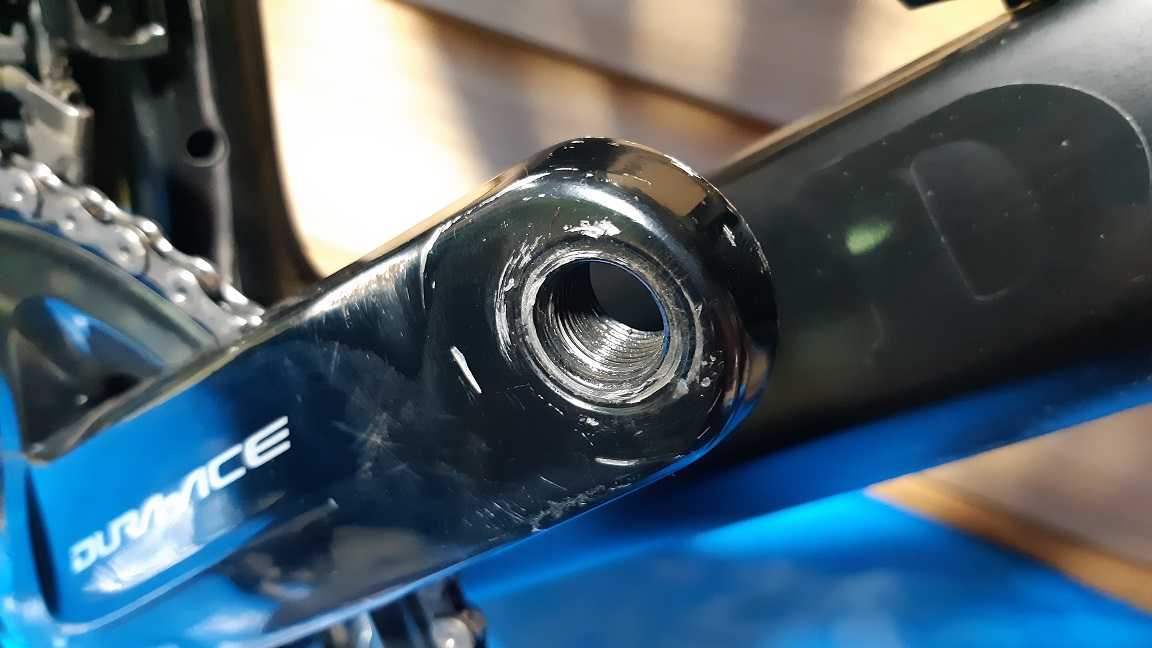
昨日届いたペダルスペーサー。ちょいと取り付けておきますか。うーーん、エイッ!!力の掛け方のコツを覚えたので難なく外れた。わしの雑な付け外しで、傷だらけになったDURA-ACEのクランク。ペダルエクステンダーが付いているので、クランクから外すにはスパナが必要なのだ。そして、届いたペダルスペーサーを2枚用意する。2mm厚のスペーサーをまず1枚嵌めてみる。さらにもう一枚嵌めてみる。これをクランクに、まずは手で締める。ペダルスペーサー2枚で、4mm厚だ。スパナで締めこんだ後。これで約20mmの拡張となりました。16mm, 18mm, 20mm とスペーサーの数で調整できることになる。枚数を増やせば、22mm, 24mm とかにもできそうだが、その場合はクランクと結合するネジの部分がどんどん短くなっていくので強度が不安になってくるんだな。なので、2枚までが現実的ところだろ思う。反対側のペダルにも同じくスペーサー2枚を間に入れる。くるくると装着。グイグイっと締めこんで完成!このスペーサーはDixna(ディズナ)というメーカー?ブランド?の製品です。東京サンエスという会社で、ハンドルとかも作っている会社だね。幅の狭いハンドルとかも作ってたりするんだよ。こうやって少しずつわしの身体に合うようにフィッテイングしていく。合ってる、合ってないがすぐに分かればいいのだが、暫く乗ってみないと分からないんだなわしは。ま、次に乗るのが楽しみだ。バイバーイ!にほんブログ村
2024.03.01
閲覧総数 205
-
7
5時に夢中じゃなくて、五里霧中か。 2024/09/16
敬老の日に、じじぃはダジャレに無我夢中か。。今日はね、真子ちゃんベストとキョンキョンベストをスマホに入れてきた!若い人は知らないかな、石野真子と小泉今日子だ。昨日、amazonで買ってダウンロードしたのだ。今日はこの二人の往年のアイドルがわしの背中を押してくれるだろう。それにしても、蒸し暑い!晴れマークだったのに、なーんじゃろなぁーこの天気。うっ! 山が見えない。。湿度が高いのだろう、汗が飛ばないから、滴り落ちる汗がすごい。とりあえずいつものコンビニ。重たい自転車の進め方はまだまだ掴めない。本日の買い出し。高速の情報では、キリで走行注意と出ている。ちなみに、別府・湯布院間の高速道路はキリでの通行止め回数が日本一だって知ってた?城島高原方面への登り、、真っ白だな、そしてポツポツと雨が。。反対方向へ向かうことにしました。海の方は晴れているように見えます。今日はそっちにするかなぁー。と言いつつ、こっちへ登り始めました。真子ちゃんが背中を押してますねぇー確実に。霧が出てきましたねぇー。でも、何か幻想的な雰囲気もありーので、雨が降らないならいいのかも。十文字原演習場のとこ、視界50mってとこかなぁー。十文字原展望台へ行ってみましょう。はい、十文字原展望台へとうちゃく。へい、何も見えませんね。どうしたものかと思案、、それでも結局登ることに。別府霊園のとこまで登ると、塚原高原や湯布院の方は晴れてるような。左側からキリがどんどん流れ込んでいるのが分かります。ゾウさんと記念撮影してから、別府霊園の自販機でちょいと休憩。さて、今度は、キョンキョンに背中を押してもらいましょうねと。下りながら、こっちへ来た。ん? 事故かな?こっちへ進んでいます。またキリですな。経塚山の方へ登ります。だって、キョンキョンの歌もテンション上がるんだもーーん。ポケットパーク日出へ来た。ほぼ見えませんね。。辛うじて、海の方が少し見えてます。が、これもすぐに見えなくなりました。山の方は全く見えません。しょうがないので、チャリ子のバックショットでも。やはり、今風の三角のサドルバッグよりも、いい雰囲気を醸し出しているんじゃなぁーーい。自画自賛です。キャラダイス バーレイのアップでも。経塚山へ向けて登ります。また霧の中へですね。経塚山の山頂へは登らずに、経塚テラスのとこへ。ここからも、何も見えませんです、はい。ちょいと下ってくると、ありゃま、晴れてるねぇー。山の方でも、こんな空も見えたりと、訳が分からないっすね。で、いつものAPU坂へ行く方へ来た。霧も中々いいよね。山の方も、いい感じだ。こうやってみると、APU大学も凄いところに建ってるねぇー。で、APU坂を登るわし。経塚山の霧もすっかり晴れたようだ。ゴール、ちょいと休憩と。あれ、ここでも事故かな。帰りに再度、十文字原展望台へ寄ってみた。月がね、大きいの、今日は。何やら、明日は中秋の名月とかなんとか。こっち側は夕焼けですね。本日は、54kmほど。獲得標高は、1311mほど。本日のコースはこんなんです。コースプロフィールはこんなんです。トレーニング効果は、ガーミンはこう言ってます。ところでさ、JR九州が月一でやっている大分-佐伯間のサイクルトレイン、気が付いたら出発時刻が朝早くなってるじゃぁーーーん!9時過ぎの出発だったのが、7時ごろに変わってた!帰りの佐伯発は16時で変更なし、それでも7時間ライドくらいの予定は組めるようになったようだ。ただね、7時に大分駅だと、わしは5時半くらいには出ないといけないのかな。そうすると、何時に起きればいいのかな、、うーーん、無理だねぇー。佐伯発を16時から19時にする案は出なかったのかなぁー。。チャリダーは早起きが多いとかって刷り込まれたのかもな。そんな早起きチャリダーは、サイクルトレインなんて乗らないって!!もっとゆるーーーいチャリダーを狙わないとね。あーー、伊勢海老食べたーーい。にほんブログ村
2024.09.16
閲覧総数 41
-
8
ペダリング9 -- 腰で回す --
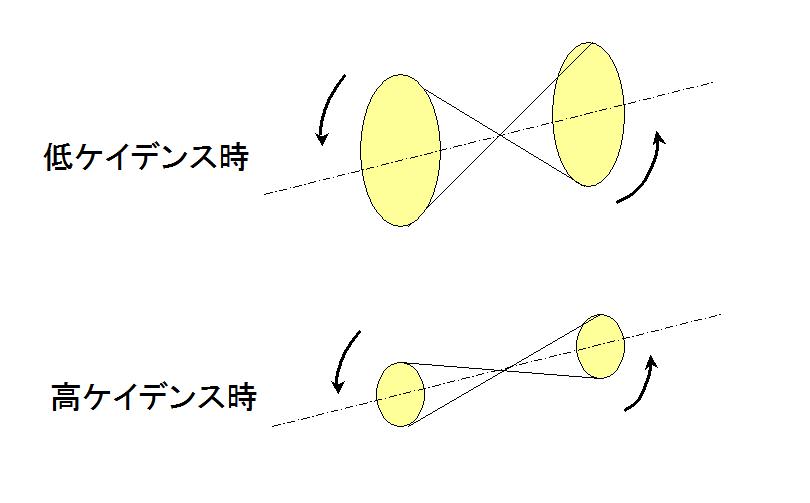
最近、あるイメージを持ってペダリングしています。タイトルに書いてある通り「腰で回す」です。太腿の外側で、骨盤との付根の辺りに少し飛び出している骨があります。これを大転子(だいてんし)と言うらしいです。この左右の大転子が一本の棒で繋がれているようにイメージします。この棒の両側を円軌道を描くように回すようなイメージです。棒の両端が描く円は、低ケイデンスで高トルクが必要なほど、大きな円となります。逆に、低トルクで高ケイデンスが必要なほど、小さな円となります。高ケイデンスの場合に小さい円を描くイメージは、お尻が跳ねるのを抑制することができるように思います。へたくそな図を描いてみました。。これは円の半径をクランク長と考えると、クランクが長いほどトルクは掛けやすくなり、クランクが短いほど高ケイデンスに向いているのと同じようにイメージできます。左右の大転子をペダルと見なし、可変長のクランクが付いていると考えると分かりやすいかもしれません。この腰の仮想クランクを回すことにより現実の自転車のクランクは勝手に回ると考えるんです。この腰で回すイメージでペダリングを行うと、自然と引き足を使える感覚があります。かといって引き足重視の感じではなく、パワーの50%を踏むとき、残り50%は引き足側で使っているという感覚です。登りでは70%-30%と踏む側重視というふうに状況に応じて変えられます。踏むときは、大転子をサドルに押し付けるような、あるいは足が2時から3時辺りで大転子を押し込むようなイメージで踏むと、膝の曲げが浅いところから伸ばしきるまでの一番力が出るところをうまく使えているのではないかと思えます。この場合も意識しているのは腰周りのみで太腿前面に意識的に力を入れているわけではありません。これは平地で感じた、ケツで踏むという感覚と同じじゃないかと思いました。そして、太腿は指揮棒を振る感覚に近くなっていくんです。登り勾配がきつくなってきたときは、踏み込み時に、膝をフレームに擦るようにして若干だが自転車を左右に傾けた方が、踏み込む力が真っ直ぐにペダルに掛かっている感じがし、実際、その方が坂でもスピードが上がっていました。これは、腰で回す云々ではなくて、ペダルへの荷重の掛け方の問題なのかもしれません。ペダリングカテゴリーで書いてきた、「股関節で指揮棒を振る」、「ケツで踏む」、「腰骨で引く」等のイメージはここに来て、一段抽象化された、あるいはメタ的イメージとしての「腰で回す」というイメージへ統合、収斂されてきたのではないだろうかと思えてしまいます。今まで試行錯誤してきたイメージは、的を得たとは言えないが、的外れとまでは言えないのではないかと感じています。今後も不完全を自覚しつつ、ペダリングの上達を考えて実践あるのみです。銭瓶峠23分男の独り言。--にほんブログ村
2016.01.05
閲覧総数 2763
-
9
プレッシャーアンカーって?? 2024/06/23
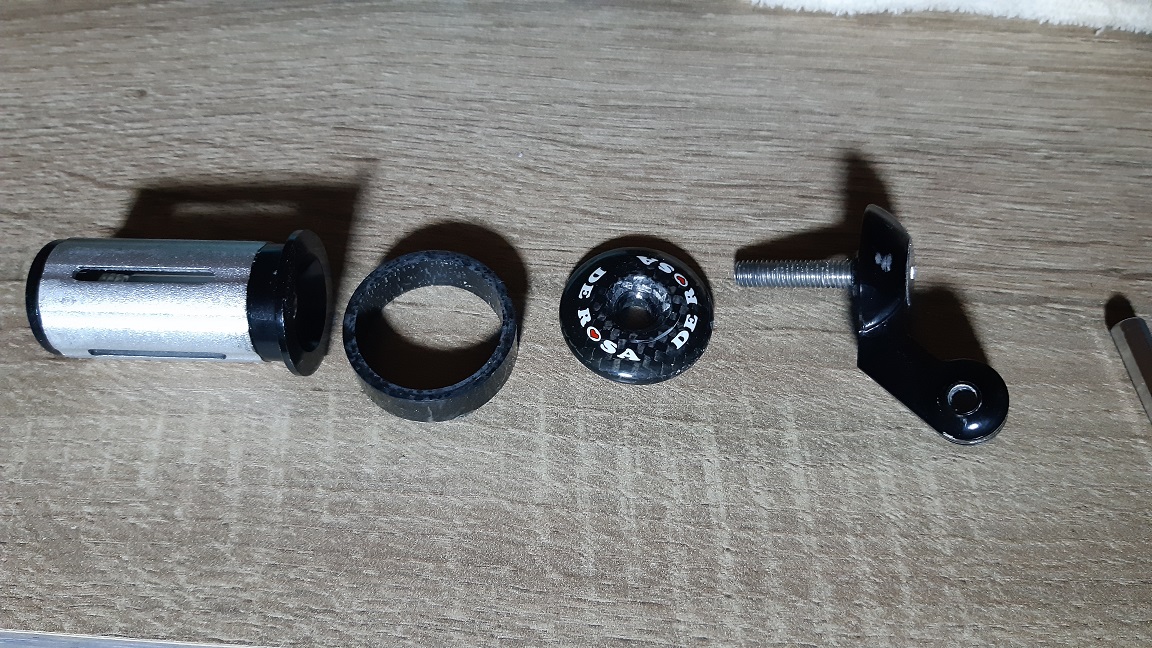
雨、雨ですな。ということで、飽きもせず家の中でサドル調整をやってます。このとき初めて固定ローラー台というものがあれば便利だろうなぁーと気が付きました。当初のサドル位置は見る影もなく、サドル高さは1cm以上低くなっています。。で、サドルが1cm低くなったということは、それに合わせてハンドルも1cm下げないとフォームが崩れますよね、ということでハンドルを下げようかと!やったことあんの?いーへ、ありませぇーーーん。大丈夫か?昔、ショップの店長も「簡単だよ」って言ってた記憶がある。とか言っている間にとりあえず外してしまった。なんかね、中から銀色の筒みたいなの(左端のやつ)も出て来た、なんじゃろねぇー。この中に入っていたんだよ、腹籠りか? 中に仏像とかが入っているのかも!?ステムの下にはスペーサーが4個入っている。1個の高さが1cm程度なので、これを1個外せばハンドルが1cm下がることになる!でね、ステムを締めているボルトを緩めているとね、パラパラと塩が落ちて来る。そう、わしの汗の結晶なのじゃ。うーーんしょっと、ステムをコラムから取り外した。この丸い柱みたいなのがコラムというもので、これに前輪を固定するフロントフォークが付いている。ステムを外した状態から。下から4番目のスペーサーを抜く。スペーサーが3個になりました。スペーサーが3個の状態で、その上にステムを取り付けます。外した4番目のスペーサーはステムの上に移動します。ここで、先ほど中から出て来た仏像入れを戻します。なにやら、これはプレッシャーアンカーとか、プレッシャープラグとか、プレッシャーアンカープラグとかって呼ばれているものらしいです。プレッシャーアンカーはスポッと中に入ってこのようにネジの付いたフタで止まっています。元々一番上にあった5番目のスペーサーを載せます。ヘッドキャップを付けて。最後はアクションカメラ用マウントも一緒にネジで固定します。ま、今はアクションカメラは壊れて使っていないので、このマウントはいらないかもな。はい、ステムの位置が1cm下がりましたよ!変更前は、④と⑤の間にステムが入っていました。意外と簡単だったなぁー。では、ボルトを締めましょうねと、以下のような順番で締めた。最後のヘッドキャップのネジを締めているとき、なんか空回りしているような気がしたが途中から固くなって締まったようだ。後で判明するのだが、この締める順番が既に間違っていた。(初心者あるあるらしい)で、完了したと思っていたらね、フレームとフォークのつなぎ目のとこがね、ガタガタ言うのよ。あれ? これって最初からこうなんだっけ??うーーん、最初がどうだったかが分からないゎ。。わしのせいでガタガタになったのか??しばらく、ガタガタやっていると、やはりこれはまずいんじゃないだろうかと思い始める。ネットで調べてみる。あ、やっぱダメみたいよ、これ。ヘッドキャップを止めるネジを締めると、ここが密着してガタガタ言わなくなるらしいのだ。そうなんだ。では、もう少しきつーーく締めてと。ガタガタは直らない。。そもそもどういう構造になっているのか分からないので、まずはそこから調べてみるかと。色々調べて、やっとまともな解説動画に辿り着いた。そこに、先ほどの仏像入れことプレッシャーアンカーについても解説がされていた。このプレッシャーアンカーの解説なしの動画が多いので消化不良が続くのである。このプレッシャーアンカーが何をするものなのかをちゃんと知る必要がある。プレッシャーアンカーという名からも想像できるように、コラムの中でこの銀色の側面が外側に広がってコラムに押し付けられてコラムと一体化するというものである。プレッシャーアンカーを上からみると、六角レンチで締められるようになっていて、さらにその下にネジ穴も見えているのがわかるだろうか。6角レンチで右側に回すと側面が広がるようになっている。ただね、スポッと緩く入る状態で六角レンチで締めてもクルクル回るだけで一向に固定されないのだ。取り出して構造を見たり、色々やってみて、なんとかやり方が分かった。まず、コラムにギリギリで入るくらいにプレッシャーアンカーを広がった状態にしておくこと。それをコラムに押し込んで、その状態で六角レンチで締め始めると手応えのある締まり方になる。そうなればそのまま締めていけばOKだ。ここはある程度きつく締める。但しコラムはカーボンなので割ったりしないようにね。トルクレンチで締めた方がいいのだが、トルクレンチを出すのが面倒だったので感覚で締めた。これで、コラムとプレッシャーアンカーが一体化したことになる。このプレッシャーアンカーにあるネジ穴にトップキャップからネジを通して締め上げることにより、コラムを引き上げてフレームと密着させるのである。これを理解していれば、どの順番でボルトを締めるのか、どこをガッチリと締める必要があるのかというのが自ずと分かるっていうものだ。このプレッシャーアンカーというのはカーボンフォーク(コラムまでカーボンのもの)にだけ使われるものらしいのだ、鉄のフォークとかはこういう問題はほぼ起きない仕組みらしいのだ。プレッシャーアンカーを押し込んだ状態。真横から見るとこんなんです。6角レンチでプレッシャーアンカーをコラムに圧着させます。この時点ではステムをコラムに締め付けるボルト(左右2ヵ所)は緩いままです。ヘッドキャップを被せます。ネジを締めてヘッドキャップを固定するというのは、見かけ上の説明です。このネジを締めるとコラムが引き上げられて、フォークとフレームが密着してがたつきを無くします。なので、このときフォークを手で持ってフレームと真っすぐに密着した状態にしてからネジを締めるようにするとうまくできます。最後は、ハンドルとタイヤが真っすぐになるようにしてから、ステムを2ヵ所のボルトで締めます。2ヵ所は、ちょっとずつ交互に締めます。(上下の締める箇所が均等に締まるように)ここも本来はトルクレンチで締めた方がよいです。このときステムがカーボンのコラムを締め付けていくわけですが、その位置のコラムの中にはプレッシャーアンカーが入っているのでカーボンコラムが潰されないように補強している役割もあるとか。というわけで、何とかハンドルを下げることが出来ました。これでまた一つメンテの方法をマスターできました、よかったよかった。プレッシャーアンカーの問題点は、ヘッドキャプを外したときにプレッシャーアンカーがすぽっと抜けたことですね、ヘッドキャップを外しただけならプレッシャーアンカーがちゃんと固定されていたままなら今回のようにガタつきは発生しなかったと思うのですが、なんではずれたんだろう?プレッシャーアンカーが一度外れてしまうと、上記の仕組みを把握していないとちゃんと組み戻すことが出来ないんじゃないかな。え? ところでサドルはちゃんと調整できたのかって?うーーーん、わかりません。。長い旅になりそうです。にほんブログ村
2024.06.23
閲覧総数 185
-
10
タイヤのこぶ現象をショップへ報告へ 2021/04/25
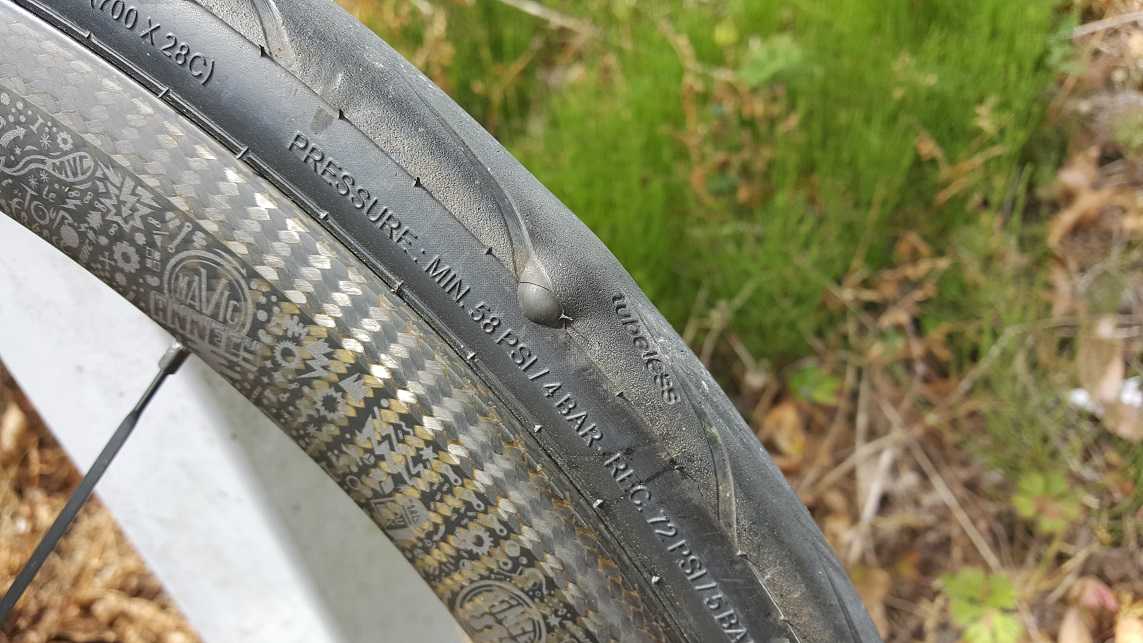
昨日のタイヤのこぶ現象をネットで調べてみたが、今一つ要領を得ない。ま、明日ショップへ行って見てもらおうと。昨日の復習です。タイヤにこぶができていたことに偶然気が付く。そのまま走っていたら、こぶがしぼんだ?タイヤの空気圧はまったく減っていない。この後、70kmほど走行して帰ったが、まったく問題はなかった。一夜明けて、本日の朝、タイヤを再度確認してみる。昨日のこぶの箇所、シーラントらしき液体が滲んで固まっているように見える。空気圧の減りは、問題の無い前輪の空気圧よりちょと高いくらいなので普段と同じようである。で、ふと、タイヤの中心部分の表面に何か濡れたような痕跡があるのに気が付いた。ここにも、さらに他にもあって、10ヶ所くらいあったかな。これは、タイヤが危険な状態なんじゃなかろうかと。ショップまで走ったら、これらの痕跡が消えると思いスマホで写真を撮っておく。うーむ、こりゃー、タイヤ交換だろうなぁーと。ついでに、ブレーキ鳴き対策としてブレーキシューの交換もしてみようかなぁー。午後2時過ぎ頃に出発。とりあえず、田ノ浦ビーチで空のボトルに麦茶を買う。今日もいい天気だゎー。サイクルショップ ロッポへとうちゃく。先客が二人いたので、わしは3番目ですな。わしの番が来た。昨日の現象と今朝の現象をスマホの写真を見せながら店長に説明した。「大丈夫、このまま乗ってても大丈夫」と。「この現象は、MAVICも認識しているケースなので、新しいタイヤを取り寄せるまで、このまま乗ってても問題ないよ」と。あ、そうなんだぁーと、少しホッとした。これは、パンクでは無いらしい。タイヤは、何層にも積層されて作られているようで、その一番上の薄皮みたいな層が剥離して、そこにシーラントが内部から入ってこぶみたいに膨れたらしい。走っているうちに何かに当たり、こぶが破れてしぼんだということらしい。タイヤが積層して作られているので、内部に小さい洞窟みたいな隙間が出来てしまうらしく、何かの原因で一番上の層が剥離して、その部分に小さな洞窟を通ってシーラントが入るとこぶのように膨らんでしまうらしいのだ。で、隙間はシーラントで埋められるので空気は抜けないということになるらしい。タイヤ中央部の小さな丸い染みも、同様の現象で、たぶん接地する部分なのですぐに潰れてしまうので、昨日は気が付かなったのかもしれない。今週中にはタイヤは届くそうなので、飯田高原コースへ行くときには新しいタイヤで行けそうだ。ブレーキ鳴きのパターンが分ってきたので、それを説明して、ブレーキシューを変えたら鳴き止むかどうか聞いてみた。同じようなケースで、シューを変えて鳴き止むこともあり、割と鳴き止むことが多いシューもあるとのことだった。ただ、シュー、ホイール、フレーム、ブレーキ、熱等が関係して振動を起こして鳴くので、このシューに変えれば必ず鳴き止むとは言えないと。結局は、自分の自転車でシューを変えて走ってみないと分からないと。ホイール、ブレーキ、シューがカンパで揃えられていても鳴きまくったケースもあったが、別メーカーのシューに変えたら鳴き止んだこともあるらしい。なので、どうしても我慢できないというのでなければ、今のシューがすり減って交換のタイミグが来た時に別メーカーのものにしてみるというのがいいのではないかと提案してくれた。うん、そうしようっと。ショップを出て、軽くお散歩ライドでもしていこうと。堤防の上から撮影じゃ。あっちへ行ってみましょう。ほー、工場地帯が見える位置に来た。ちょっと古めかしくていいねぇー。これを真っ直ぐに行けるのかな。あ、なんか行けそうだぞ。たまに来る大分川の土手に通じていましたゎー。後はふらふらと帰路に着いて、田ノ浦ビーチに寄る。本日の田ノ浦ビーチ。あのね、強風になってきましたゎ。帰るときは爆風向かい風でしたとさ。本日は、29kmほど。獲得標高は、108mほど。本日のコースはこんなんです。コースプロファイルはこんなんです。達成感の無いコースプロファイル。。トレーニング効果は、ガーミンはこう言ってます。スキー場のコブを初めて見たときもびっくりしたが、タイヤのコブもそれ以上に驚いたのであった。--にほんブログ村
2021.04.25
閲覧総数 658
-
11
チューブレスタイヤのビードを外す必殺技 2021/05/12
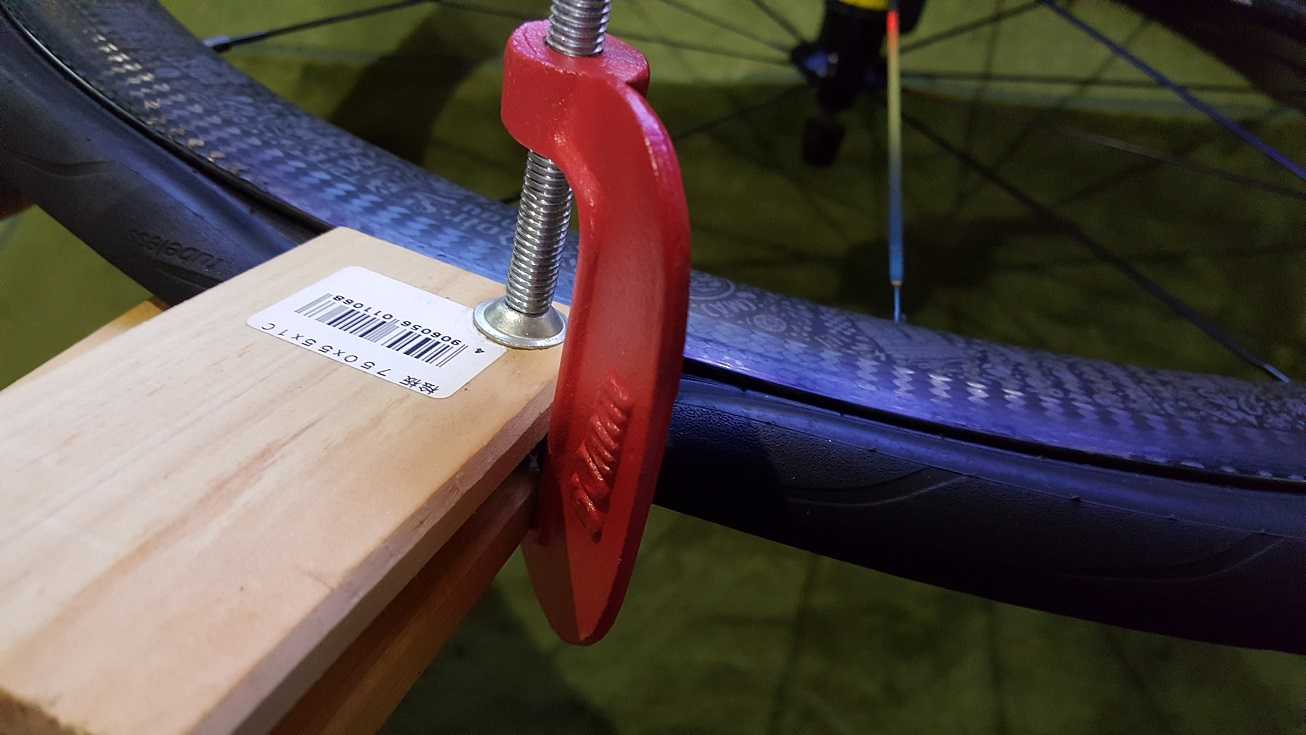
パンク修理をしたチューブレスタイヤをホイールに装着し、シーラントを入れない状態で一晩置いたみた結果、1.0気圧ほど空気が漏れていた。シーラントが入った正常な状態のときは、一晩で0.1気圧程度の下がり方だった。パンク修理した箇所から漏れてはいないと思うが、そうすると、タイヤとリムの間の気密性が少し甘いのではないかということになる。なぜそう思うかというと、タイヤのビード部分に張り付いていたシーラントのカス(ゴム状になったもの)を取り除かずにそのまま装着していたからである。ビードとリムは、気密性を保つためにピッタリとくっつく必要があるので、両方とも綺麗にしておくのがよいのだろう。ま、シーラントを入れれば、その辺りも塞いでくれるのだろうが、シーラント無しでも漏れないようにしておくのが本来だろう。ということで、再度タイヤを外すことにした。が、昨日は手で外したビードが、外れない、うりゃーとやっても外れない。手の平の部分で体重をかけてもダメだ。マイナスドライバーとかでこじろうかと思ったが、大切なカーボンホイールだ、やめた。万事休す。ネットに頼る。タイヤを足で踏んで、踏んだ反対側を手で持って引き上げるというのがあった。早速やってみる。全然ダメだった。しかし、この方法はなんとなく、画期的な気がして気になる。さらに、ネットで検索。見つけた!マネしてやってみた。板切れ2枚でタイヤを挟んで、クランプで強力に固定する。あくまで、タイヤだけを挟むんですよ、大切なカーボンホイールは挟まないようにね。この板切れを足で踏んで固定してから、ホイールの反対側を手で持ち上げるのだ。ほとんど力を入れない感じで、ただ持ち上げたら、ビードが外れたような。え、うそっ、マジで。見てみると、あっさりとビードが外れていた。一か所が外れると、残りの部分は手で簡単にはずれる。もう一方のビードも同様にすればいいのかと思ったが、手でやってみると少し力はいるが外れた。すごい技だな。このクランプは、100円ショップで買ったんじゃなかったかな、板切れもホームセンターにある。数百円で出来る必殺技ツールだ。で、外したタイヤを見ると、見事にシーラントのカスがビード回りにこびりついている。これをね、コツコツと爪で削ぎ取っていく。根気のいる作業ですゎ。こんなの、ショップでもやってくれないんじゃないだろうか。新しいタイヤ買えやっ!って言われそうだな。コツコツやって、もうこの辺でいいだろっ!こんなもんでいいだろ。ビード以外の部分は水洗い程度で、こんな風に残ったままです。こんなところは気密性には関係ないだろということで、無駄なことはしません。というか、そんな気力はありません。ということで、今度はタイヤをホイールへ嵌めなければなりません。ビードを中央部分に落としていることをよく確認して、最後に嵌めるのは空気バルブのあるところになるように注意しながら、最後はタイヤレバーを2本使いながら、なんとか装着!ここまで来れば、後は空気を入れながらビードを上げるだけだな。2気圧程度までは、ゆっくりとポンピングしてもタイヤが膨らんでくる。そこからは、ゆっくりやっていると空気が隙間から漏れる音がして、気圧は上がっていかない。なので、漏れる以上のエアを送り込む必要があるので、頑張って高速でポンピングする。すると少しずつ気圧が上がっていき、4気圧程になってくると空気漏れの音がピタッと止まる。そうなると、またゆっくりしたポンピングでも気圧は上がっていく。6気圧超まで入れた。一旦、空気を全部抜いて、ビードが上がったのかを目で確認してみた。ビードは上がったようだった。ビードが上がった状態では、ゆっくりとポンピングしても普通に気圧が上がっていく。デジタル空気圧計で、5.5気圧に調整して、はい完成でーす。シーラントの入っていないこの状態で、また一晩放置してみます。ま、今度は空気圧が下がっていようがいまいが、シーラントを入れますけどね。え? で、その必殺技ツールをリュックに入れてライドするのかって?ライド中は、タイヤを外さなくてもよい応急処置方法を3つくらい用意しておけば大丈夫なんじゃなかろうかと考えているのだが、その3つが何なのかは、まだ分からない。--にほんブログ村
2021.05.12
閲覧総数 3833