2018年01月の記事
全9件 (9件中 1-9件目)
1
-
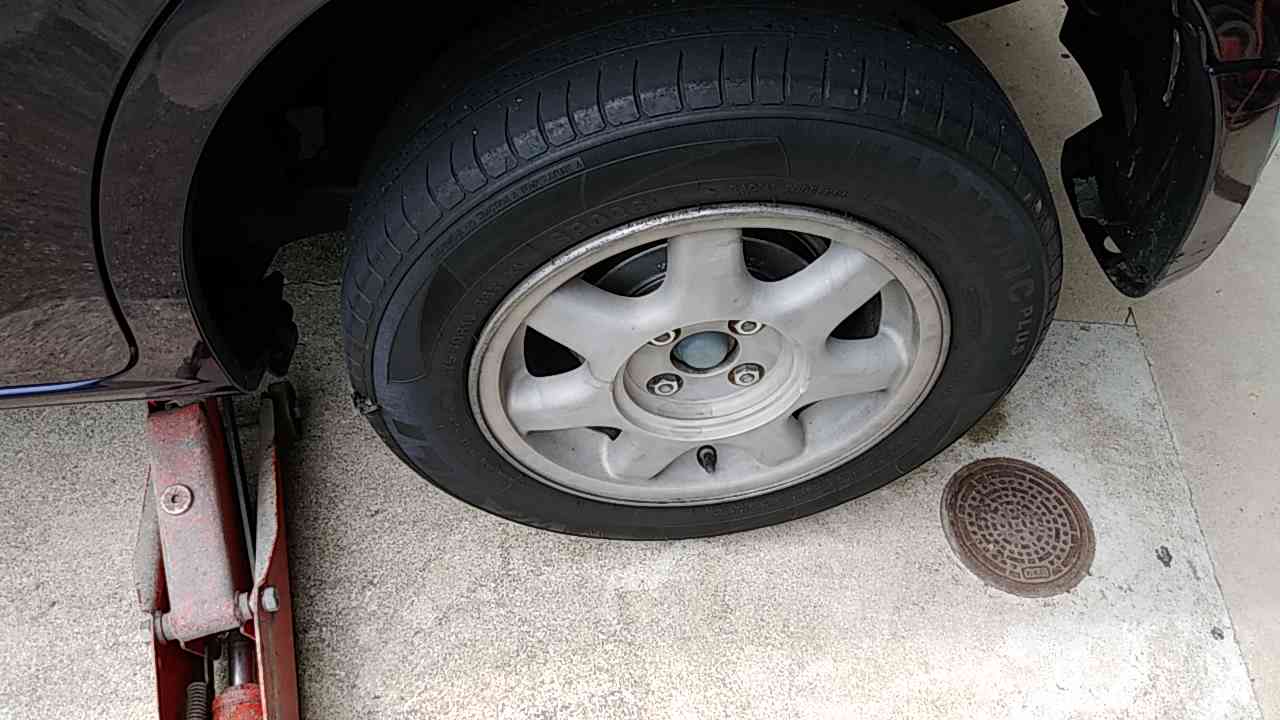
残念なクラッチワイヤ
エンジンのピストン、シリンダーとスパークの確認、キャブの修理と、少しずつエンジン始動に漕ぎ着けて行くのだが、次はクラッチだ。ハンドルにクラッチレバーを嵌めてクラッチが動くがどうか確かめようとしたら、ホルダーとレバーを留めるネジが抜け落ちていた。この部分のネジは普通のネジと異なりレバーの厚み分だけネジ山が無く太くなっている特殊なネジとなっているので、通常の10ミリネジは使用出来ない。これではレバーを握ることもできないので、何とかせねば。古いストックネジの箱を漁ると、プラ部品などを留める時にネジに被せるカラーが出て来た。10ミリネジにピッタリであるが、ホルダーの取り付け穴には僅かであるが大きくて嵌まらない。ホルダーの穴をドリルで広げれば簡単なのだが、アルミのホルダーはなるべく加工したくないので、カラーを削る事にした。しかし、円筒形のカラーの外側だけ均一に削る事は難しいので、どうしようかと考えた。カラーに長いボルトを挿してベンチグラインダーでカラーを回転させながら削ってみたらどうだろうかと思ってやってみたら上手く行った。これでやっとレバーの取り付けができる。クラッチレバーを取り付け握ってみるがビクとも動かない。クラッチが張りついているのだろうか?それではと、エンジン側のクラッチレバーを引っ張ってみたら、動いたので、ワイヤの固着だ。ワイヤを外して確かめようと、ゴムのホルダーカバーを外したら何と!真っ赤に錆びて殆ど風化してしまっているケーブルアジャスターが目に飛び込んで来た。アジャスターに刻まれているネジ山は無くなっている始末である。ワイヤにもサビが見える。それでもサビの塊のようなアジャスターを力業で回してワイヤを外したのだが。全体に固着しているようで、どんなに引っ張ってもビクともしない。オイルに漬け込んで何とか動くようにしたとしても、最早ケーブルの呈を為していないので、これはどうにも使えないとの結論に達して諦めた。キックした限りでは、ギアは入っていないようなので、クラッチが動かなくてもエンジンは掛ける事が出来るだろう。ブレーキ側ホルダボルトとストックの10ミリボルトとカラーベンチグラインダーでカラーを削るブレーキ側ホルダボルトと削ったカラーを取り付けたボルト加工後ホルダに嵌めたボルトワイヤアジャスターのサビワイヤ調節のサビ
2018.01.31
コメント(0)
-
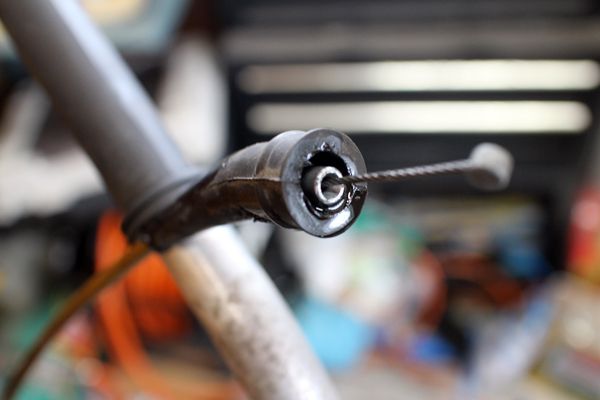
スロットルワイヤ
スパークもあった。キャブも何とかなった。次は、スロットルワイヤだ。欠品の多いバイクであるが、スロットルホルダーとワイヤは付いていた。スロットルパイプはモンキー用があったので流用してみら丁度良い。こんな物はどのバイクも殆ど同じだろう。 キャブを取り付ける前にスロットルホルダーを組み立てて、スロットルを捻ってみたら、1cm程しか動かない。再びバラしてワイヤを引っ張ってみたが殆ど動かない。どうやらワイヤチューブの中でワイヤが錆びているのだろうと予想して、オイル差しでエンジンオイルを少しずつ注入して一晩置いてみた。翌朝、もう大丈夫だろうとワイヤを引っ張ってみたが、昨日と同じ殆ど動かない。これは異な事。サビが激し過ぎるのか…。それにしてもワイヤチューブの外観は汚いが、見える範囲のワイヤはサビも無く綺麗だ。どうしてだ…。TYのスロットルワイヤは途中からキャブに行くワイヤとオイルポンプに行くワイヤが分岐しているので、その分岐点が怪しいと思い、分岐キャップを外して中を確認したが、オイルで湿ったサビの無いワイヤが見えるだけで異常は見当たらない。もしかして、オイルポンプ?早速オイルポンプを確認すべく、クランクケース右側前のカバーを開けようと思ったのだが、この時代のボルトはご多分に漏れず頭がプラスネジとなっているので、ショックドライバーの出番となる。3本で留められているのだが、一番上の1本に手を焼いた。外してみるとネジの中央部が激しく錆びていた。カバーを外してビックリ。オイルがドバッと100ccほど出て来た。この部分にオイルが溜まる事は無いと思うのだが、オイルポンプの破損だろうか。スロットルから来ているワイヤを調べてみると、サビは無く綺麗だが、ポンプを動かすプーリーが固着して全く動かない。従ってワイヤも動かないのだ。スロットルが動かない原因はここだったのか。プーリーが動かない事にはワイヤが外せないので、オイルポンプを取り外すしかない。オイルポンプは2本のビスで固定されているだけなので、簡単に外せると思いきや、外れそうで外れない。辛抱強く引っ張ったり、ビスを外した辺りを優しくドライバーでこじったりしていたら何とが外せた。クランクケース側には螺旋を切ったロッドが出ており、ガスケットまで付いていたので外しにくい事が後で分かった。外したオイルポンプはプーリーを力を込めた手で回してみたら、何とか回ったのだが、明らかに固着している。面倒そうなポンプの分解は後回しだ。外したオイルポンプカバーをよく見てみると、石か何かにぶつけたのだろうと思われる傷が内側まで貫通しており、アルミパテで汚い補修の跡があったので、前述のクイックウエルドを表裏に盛って、硬化後に美しく研磨する事にする。カバーにはガスケットが付いていたので、ケース内は少しはオイルが漏れたりするのであろうか。オイルポンプのワイヤを外してみたら、何も無かったようにスロットルが回る。途中にあるワイヤ調節ネジ錆びていて回らないが、固着も無いようなので、スロットルワイヤは使用出来そうである。サビは無さそうだが動かないスロットルワイヤオイルが溜まっていたポンプケース内ポンプケース内から排出されたオイルポンプケース内に残った何かの堆積物動かないオイルポンプ取り外したオイルポンプ割れの荒治療が為されているケースの表側ヒビが入ったままになっているケースの内側
2018.01.29
コメント(0)
-
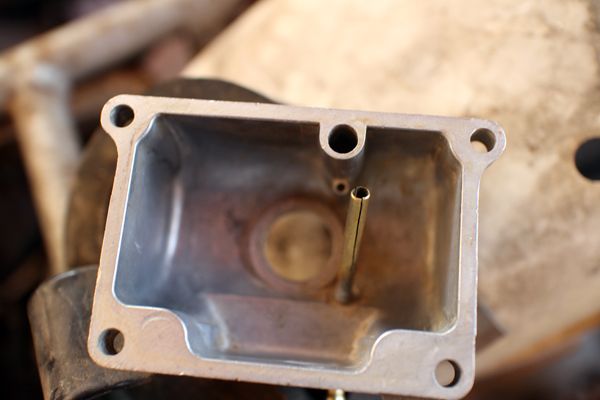
キャブレターの悲劇2
壊れたチョークを折角直したのに、新たな破損箇所が見つかった。フロートチャンバーのドレン通路に繋がる真鍮製のオーバーフローパイプが、あろう事か真っ二つに割れているのである。細いパイプとは言え、キャブの中にあるので、外からの力が加わる事は無いのに何故に割れる。しかも、パイプがものの見事に真っ二つになると言うことは、半円状の物をくっつけてパイプ状にしているのか、それにしては、ハンダの跡などが見当たらない。大きな工業用鋼管を作るのなら話しは分かるが、径が3ミリにもみたないような細いパイプをそのような作り方はしないであろう。オーバーフローパイプはキャブ内の油面が上がり過ぎるとこのパイプからガソリンが排出される役割を果たしているので、割れたままにして置く訳には行かない。何とかせねば…。手持ちの真鍮のパイプで代用しようにも、割れたパイプはフロートチャンバーに圧入されているので、抜く事もできない。次の手は割れた部分を両側からハンダ付けする手であるが、物が細い上に、割れが長く、しかも両側なので、非常に難しそうなので却下。次の手は割れたパイプの径より僅かに大きな内径のパイプを被せてしまうのだ。これが一番簡単そうなので手持ちのパイプを探してみたら、4ミリ径/肉厚0.5ミリのアルミパイプがあった。割れを押さえながら、被せてみると、ギリギリだが何とか嵌まる事が分かった。オーバーフローパイプの長さに合わせて金鋸で切断する。後は、フロートチャンバーに当たる部分を塞ぐだけだが、これが難しい。フロートチャンバーはアルミ、パイプもアルミ、アルミ同士をくっつけるにはハンダは使えないので、他の方法となる。金属接着剤は耐油性がないのでこれも使えない。残るはアルミパテのような接合剤だ。よく、アルミのレバーを折った時に使用しているのを見た事があるので、調べてみたら、amazonで並行輸入のクイックウエルドなる物が売られていた。2液を混ぜ合わせるタイプで、金属なら何でも接着でき、硬化すると、研磨や穴開けも可能、しかも耐油性にも優れており、25年間保証となっているので、死ぬまで大丈夫だ。同じ製品で普通タイプと速乾タイプがあったが、普通は硬化時間が数十分掛かるようなので、50円ほど高いが数分で硬化する速乾にした。amazonのプライム会員になったので、送料無料となり、1138円で手に入れる事ができた。割れが見つかったオーバーフローパイプ強力金属接合剤/クイックウエルド割れたオーバーフローパイプにアルミパイプを被せるクイックウエルドでアルミパイプとフロートチャンバーを接合欠けが見つかったスロットルバルブ内部のパーツの組み立てが終わったキャブフロートチャンバーの底のボルトを外すとメインジェットが交換できる洗浄、組み立てが完了したキャブ1洗浄、組み立てが完了したキャブ2
2018.01.27
コメント(2)
-
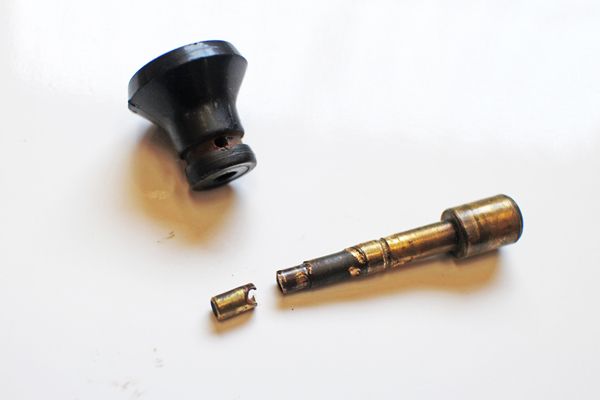
キャブレターの悲劇
ご多分に漏れずキャブレターの状態も良くない。外観を見れば中は大体想像が付く、開けてみると予想通り酷い汚れだった。取り敢えず全てバラして洗浄を行ったのだが、チョークがどうしても動かない。仕方が無いのでペンチでノブを掴んで引っ張ったら、プラのノブの根元から呆気なくピストンのロッドが折れた。やってもうた…。精密部品なので慎重にやらねばならないのに、ペンチのような豪腕ツールを使ったばっかりに取り返しの付かない事になってしまったのだ。もう今日は止めだ。娘が持って帰ったラム酒をラッパ飲みして寝てやる。と短気を起こしそうになったが、思い止まって修理策を考えてみる。チョークの本体は真鍮製でノブに嵌まる部分は4ミリ径程に細くなっており、ノブの側面に開いた穴に合わせてチョークロッドに穴が開けられ、割ピンでノブに固定されていたのだが、ペンチで強引に引っ張ったために、ロッドの穴が破断したのだ。錆びた割ピンを抜いて、ノブから破断したロッドの先を取り出す。このままではロッドが短すぎてノブの装着は不能なので、ロッドを延長する必要がある。思いついた策は、ロッドの先に3ミリのネジを切り、それに合うように3ミリの内ネジを切ったパイプを差し込み、ノブの割ピン穴に合わせてパイプに穴を開け、割ピンを通して留めるという塩梅だ。よしよし、対策案が固まった。直ぐにカブに跨がりホームセンターに走る。お目当ては内側にネジが切れる肉厚の内径3ミリ未満のパイプだ。パイプ売り場にはステンレス、真鍮、銅、アルミのパイプがあったが、内側にネジを切れるような肉厚パイプはアルミ製の1品のみ。外径5ミリ、肉厚1ミリ、長さ1mしかも、内径約3ミリと丁度良い。念のためにポケットからM3のタップを取り出し、パイプに突っ込んでみると、先が少し入って止まる。これなら内ネジが切れそうだ。297円の会計を済ませ、ついでに貰ったビニール紐で1mのパイプをカブの車体にくくり付け喜び勇んで帰途につく。早速、パイプを金鋸で3cm程切断して、万力に挟んで内側に3ミリのタップを切る。アルミなのでサクサク切れる。タップを抜いて覗いてみると綺麗にネジが切れているのが確認できた。次はチョークロッドの先にダイスで3ミリのネジを切るだけだ。幸い真鍮なので、簡単に切れるだろうと思いきや、全く切れない。何故だ?老眼の目を細めてよく見てみると、ロッドの先から1cm程でティパー状に太くなっているのだ。これではダイスが支えてネジを切り込む事は出来ない。ベンチグラインダーでティパー状の部分を削ってみたが上手く行かない。困った。どないしよう。やっぱりラム酒を飲んで寝ちまおうか…。しかし、未練がましく更に考える。脳のシワが無くなった頭でキャブに関する過去の記憶を思い起こしながら辿って行くと、TLM50の壊れたキャブの事が思い出された。確かあのキャブもチョークが壊れていたような、いないような。ハッキリはしないが、保管場所は覚えていたので取り出してみると、2つある内の1つのキャブにチョークが付いていない。壊れたキャブと一緒にチョークも出て来た。ロッドの長さは違うものの、キャブ内に入るピストン部分は良く似ている。TYのキャブにピストンを突っ込んでみると、何と!ピッタリ嵌まる。TYはミクニ、TLは不明だがミクニかも知れない。それならばこの辺りの作りは同じなのが納得が行く。助かった。これで何とかなる。TLのロッドは長いのに加え、先や途中に膨らみがあるが、先は金鋸で切ってしまえば良いし、膨らみはベンチグラインダーで削ってしまえば良いのである。早速作業を行い、ロッドの先にノブを嵌めて、割ピンの穴から1ミリのドリルを突っ込みロッドに穴開けを行う。真鍮なので細いドリルでも折ることなく貫通できた。後は新品の割ピンで留めて完成である。ノブを押し引きして動きを確かめたが、違和感は無い。チョークがやっと直った。パイプ連結作戦は徒労に終わったが、出費が297円で済んだので良しとしよう。パイプはまた何かに使えるだろう。いや、死ぬまで使う事が無いかも知れない。フロートチャンバー取り付けビス4本の内サビが酷い物2本をTLの壊れたキャブのビスを交換して、アイドルスクリューの激しい赤サビはナイロンディスクで磨き上げ、黒サビ転換剤を塗っておいた。最後にもう一度通路の洗浄を行いキャブの修理は終わりにしようとした時に、更なる破損箇所を見つけてしまった…。もうラム酒を飲むしかない。ノブの中で折れてしまったチョークホームセンターで買ってきた5×1.0×1mのアルミパイプ肉厚アルミパイプの断面タップで内ネジ作製TLM50のチョークピストンと折れたピストンロッドに穴開け加工割ピン挿入加工が終わったチョークキャブに装着して動きを確かめたチョークサビサビのアイドルスクリュー
2018.01.25
コメント(0)
-
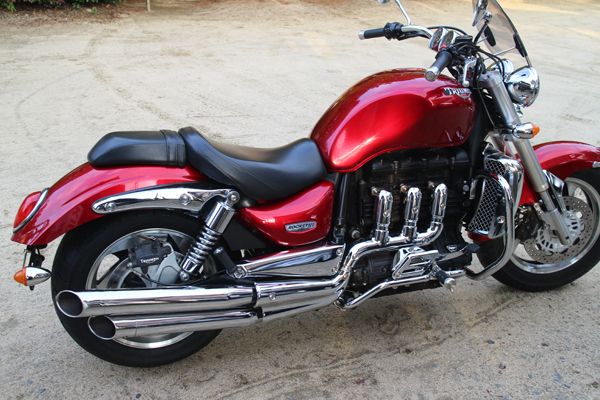
ロケット3がやって来た
日曜日の夕刻、何やら聞き覚えのある大排気量車の音が聞こえて来た。ガチャガチャと五月蠅い音は聞き覚えがある。ディアベルだ。それともう一台ディアベルほど音は大きくないが間違いなく大排気量車だ。外に出てみると、ディアベルと赤い大型バイクが駐まっていた。トライアンフのRocket Ⅲだ。第一印象は「でかい」。中古だがメッキパーツもタンクを始めとする外装もピカピカで新車のようだ。このバイク、最初に見た人は必ず「何ccですか。」と聞くそうである。それ程存在感がある。それもその筈、市販のバイクでは最大排気量の2300cc。ハーレーも真っ青だ。世界最大排気量のバイクはハーレーと思っている人は多いと思うが、実はイギリスが誇るトライアンフなのである。これがまたシリンダブロックが四輪のような形で、絶妙な3気筒エンジンを縦に搭載するので、当然シャフトドライブだ。見せ所はエンジンから右側に3本揃って突き出るメッキガード付きのエキパイに、25ℓの末広がりに膨らんだ巨大タンクと超大型ラジエターだ。見る者を圧巻する佇まいはまさに王者の風格である。低速から体が置いて行かれるような強烈な加速を味わえるという事であるが、乗車姿勢はアメリカンなので、ハーレーとは味付けが異なるツアーラーとしては面白いかも知れない。ただ、車重があるので、峠道をヒラリヒラリと言う訳には行かないだろう。今度のツーリングには是非ご一緒したいが、高速はスクリーンも付けたRocket Ⅲが一番快適で、V7ドンキーは苦戦を強いられる事になるだろう。
2018.01.23
コメント(0)
-
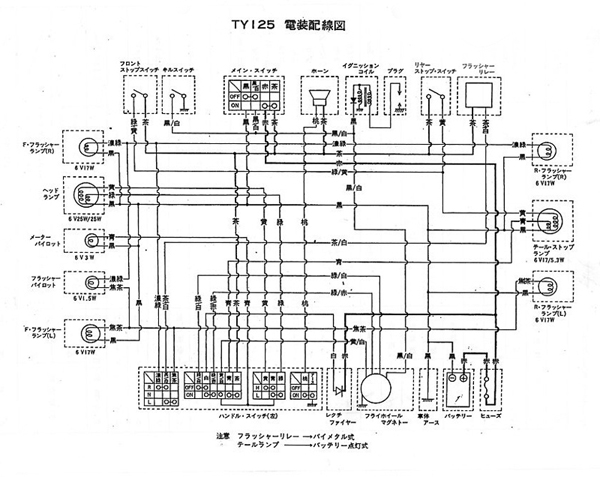
点火の確認
チャンバーも付いた事だし、プラグのスパークを確認するべく電気系の確認を行う事にした。欠品部品が山のようにあるTYだが、イグニッションコイルとプラグコード、キルスイッチだけは付いている。恐らくトライアルをするために必要のない電気系は全て外してしまったのだろう。マグネトーから出た配線のカプラーにイグニッションコイルに延びる配線が1本だけ挿してあるので、間違いは無いだろうが、念のためにネットで配線図を探す。最近は便利になった。ネットのお蔭でこんな物まで即時に手に入れる事が出来る世の中になったのは有り難い。ダウンロードした配線図を見てみると、マグネトーから出ている配線は黒/白(イグニッションコイル)、緑/白(ハンドルスイッチ)、緑/赤(ハンドルスイッチ・ニュートラルスイッチ?)、黄/白(ハンドルスイッチ)の4本だ。現車は黒/白ではなく黒のようにみえるが、イグニッションコイルへの配線は間違いないようだ。長い間動かせていないエンジンなので、プラグを外し、プラグホールからオイルを垂らして置く。プラグコードにプラグを挿してエンジンフィンの上に置く。さあ、いよいよキックだ。キックは降りるのだが、125ccにしては異様に重い。ピストンかシリンダーに異常があるのかも知れないので、キックを中止してヘッドを開けて見ることにした。ヘッドを留めている4本のボルトはどれも固く締まっているので、17ミリのソケットレンチのハンドルをプラハンでどつきながらやっと外した。ヘッドを外してみると、そこには大きなピストンが見えた。ゆっくりとキックしてピストンを下げて行くとまだ油分が十分残っているシリンダーの内壁が見えて来た。何と傷一つ無い美しい内壁だ。そうなるとヘッドがカーボンで黒く汚れてはいるが、ピストンも大丈夫だろう。よかった。安心した。それにしてもピストンの径が気になるので、曲尺で計ってみると、何と66ミリだ。TY125のボアとストロークは56ミリ/50ミリ。TY175のボアとストロークは66ミリ/50ミリなので、このエンジンはTY175のエンジンか、或いはTY125をボアアップしたものと分かった。何とラッキーな事だ。 ピストンのクリーニングは後回しにして、取り敢えずヘッドを取り付けて、今度は思い切ってキックをしてみると、プラグから火花が飛んでいるのを確認できた。マグネトーもイグニッションコイルも問題無い。よしよし。これでエンジン始動の光明が見えて来た。TY125の配線図固いヘッドのスタッドボルトを外す意外に綺麗だったシリンダーボアは66ミリの175ccプラグのスパークを確認
2018.01.21
コメント(0)
-
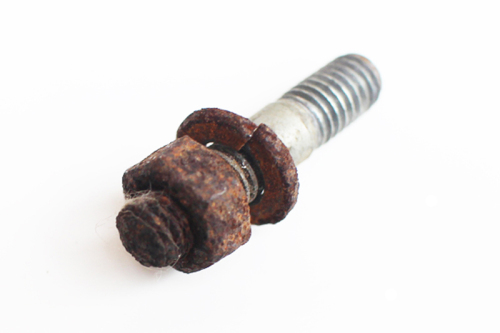
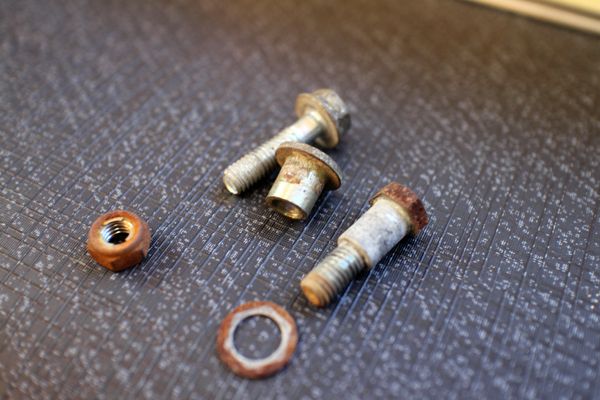
チャンバー取り付け
物はどうあれサイレンサーを手に入れたので、エンジンにチャンバーを取り付けてみることにした。エンジンのスタッドボルトは酷く錆びているが、ナットも付いている。ところがである。右側のナットのサビが酷くボルトから外れないのである。幸いにスタッドボルトの方が緩んだので、ボルトごと取り外してみたら、サビで完全に固着してしまっている。万力に挟んで強引にナットを回してみようと思ったが、挟んだボルトの山が潰れそうなので止めた。次の手はダブルナットだ。錆びたナットにCRCを吹いて、反対側に10ミリのナットを2つ嚙まし、メガネレンチ2本を使ってジワリ、ジワリと錆びたナットを回して行く。一度に力を入れすぎると、スタッドボルトが折れてしまうかも知れないので、締めたり、緩めたりしながら慎重にナットを回し、何とか外す事が出来た。後は、ナットがスムーズに入るように、M6/1.0ピッチのダイスでネジ山を整えてリペア完了である。チャンバーを取り付けるだけで、えらい時間が掛かってしまった。しかし、こんな事は序の口で、もっと難儀な事が待ち構えているに違いない。錆びて動かなくなったナットダブルナットでナットを外す外れたナットとスタッドボルトダイスでスタッドボルトのネジ山を整形エンジンに取り付けたチャンバー
2018.01.19
コメント(0)
-
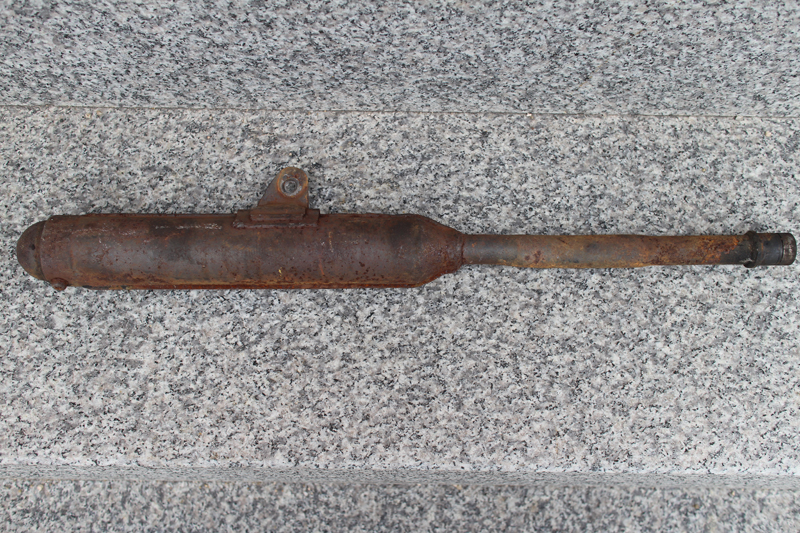
サイレンサー
去年の年末にTY125のチャンバーを貰ったが、サイレンサーが無い。もうクリスマスの時期はとうに終わったのでサンタもやって来なくなった。仕方が無いのでヤフオクを漁っていたら1080円の格安サイレンサーが出ていたので入札した。運良く競合する相手もなく落札することができたのだが、届いたサイレンサーはかなりボロだった。全体にサビがあるのは仕方ないが、取り付けステーのあたりがかなり酷い。せめてもの救いは穴あき箇所が無かった事だろうか。しかし、どのみちサンドブラストでサビ落としをして耐熱塗料を吹くのだから穴さえ開いていなければ問題無い。これで取り敢えずエンジンを始動する準備が1つ整った。サイレンサー表サイレンサー裏排気口部分/ネジは何とか外せそうに見えるサビの一番激しい部分
2018.01.17
コメント(0)
-
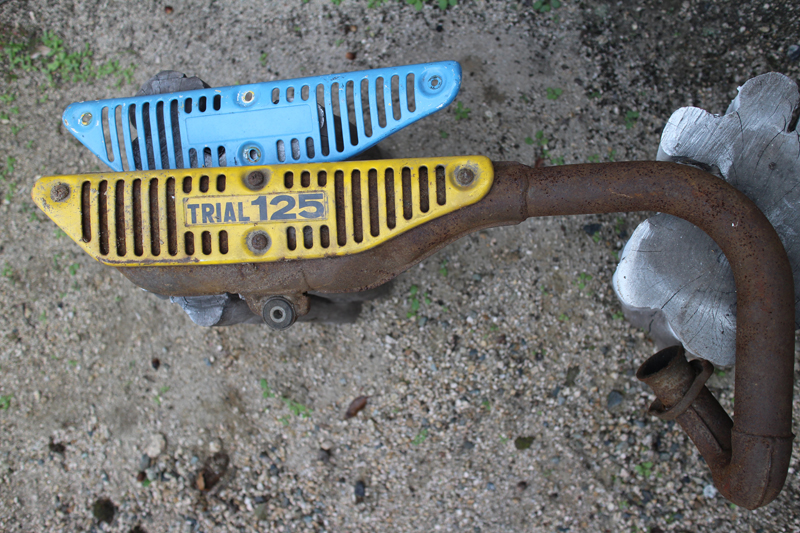
チャンバー&ヒートガード
去年の年末にサイドカバーに続いて、チャンバーとヒートガード2セットを貰った。まずチャンバーを点検してみる。サビはあるものの、凹みは確認出来ない程綺麗だ。トライアルバイクの場合、エンジンから出ているチャンバーの曲がりが一番キツイ所をよくぶつけるので、大抵凹みがあるものである。と、言うことはトライアルはやっていなかったのかも。穴も開いていないのでサビ落としをして耐熱スプレーを吹けば綺麗になるだろう。次はヒートガードだ。チャンバーに付いている黄色のガードはサビがあるものの、「TRIAL125」のステッカーが残っており、凹みもない上物である。ブルーのガードは凹みは無いものの、純正の黄色の上からブルーを吹いているので、ステッカーは剥がされている。こちらも凹みのない上物である。 ヒートガード付きチャンバーと青いヒートガードチャンバーと青いヒートガードの裏側
2018.01.06
コメント(0)
全9件 (9件中 1-9件目)
1