[外回り] カテゴリの記事
全40件 (40件中 1-40件目)
1
-
疲労困憊の、延べ4時間……。
最近、昆虫関節の具合が良いので、一念発起した。(昆虫関節=寒くなると関節がギーギーと鳴く、他人には聞こえないらしいが……。)左肩も、左膝も…、あの腰さえも何故かイイっ……。ここ数日、より寒くなり始めて警戒はしていたのだが、何故か軽快……。そこで、狭くなった我が“白クロ号”の寝床を…、広くする事にした。で、悪戦苦闘の延べ4時間余り…。延べというのは、1日目は汗だくで挫けて途中リタイヤした…。でね、ツナギを着て防虫ネットを被り、長靴&ゴム付き軍手で完全防御して事に挑んでいる。スズメバチとか怖いからね…。厚着をしてないと、服を通して刺されるよ。実際、ハチに襲われる事は無かったけど、ヤブ蚊が防虫ネット帽の周りに集ってた…。ヤツらには、旨そうな試食品に見えたのだろうね…。そんな天敵から守るための厚着なもんだから、秋の日射しでもキツイ…。始めて直ぐに汗だくだけど、なんのこれしきとぐぅあんばり過ぎたのが良く無かった…。気合いだ気合いだ気合いだと、どっかの誰かみたいにぐぅあんばっていると、なんか…、ちょっと変…。周りの景色が、ほんわかホワイトアウト……。落ち着くまで、玄関のタイルの上で足を投げ出して座ってた…。タイルが冷たくて気持ち良い…。完全防護だから、集まってくるヤブ蚊も気にならない…。暫くして、落ち着いた。今日はもう止めようと…、道具も放置したまま這うように家に入る。あ、全身の蚊を払う余裕はありました…。時計を見てみると始めて1時間半……。あのまま頑張っていると、ほんとにヤバかったかも知れない…。玄関で、パンイチまで脱いでヘロヘロ状態で風呂に移動する。シャワーで熱いの温いのを繰り返し、気合いも戻って来た所で身体を拭いてフルスペック(?!)のまま血圧を測ると112~75だった…。血中酸素濃度も94・拍動121…、コレはキツいはずだわ…。この日は食欲も無く、チロルチョコと水分だけ取ってぐでっとしてた。変な頑張り=年寄りの冷や水、ちゅう事やね。して、2日目昨日と同じ完全防護態勢で戦闘開始。ただし、最大の天敵、天気は曇りです。昨日の続きから始めて、2時間越の格闘の末雑草を片付けました…。道具を片付けて居る途中です…、ほら、広くなったよ。もぉぉぉぉっ、スッキリっ。広くなったというか…、スマが小っちゃく見える。元々450は小っちゃいけど…。山のように刈った草も、綺麗に片付けました。あ、正確には裏山に重ねて腐葉土にします。ええ、ゴミで出したりはしません。そ、土に戻すのです。土に戻る物は、ゴミではありません。で、翌日の朝…。ん~………、また、落ち葉というか…、掃いた所が元に戻る予感……。このあと、紅葉が始まり紅葉が地面を赤くするのだけどね…。_/Smart _/_/_/_/_/_/_/_/_/_/_/_/_/_/ぴゅあらいと_/_/_/_/_/_/_/_/_/_/_/_/450K_/_/
2023年11月11日
-
昨日の話の中間部分
昨日の話の中間部分の話です。そ、肉喰う前の話とメロン飲んだ後の話であります。元気良く田舎村を走り出て、平野部を横断し、都会村を横切り、向こうの山まで来ました。で、肉喰う前にDIYの店に寄ったのです。わざわざ向こうの山まで来たのは、こっちの山のDIYショップが大改築してて今は跡形も無くなっています。数年後、リニューアルオープンするまでDIYのために遠征する必要がありまして……。して、この店ハンズマンと言います。こっちの山のDIYショップは、DIYショップとしては老舗です。たしか、DIYと言うジャンルの一般店舗としては、日本初では無かったかと…。元々は街の電器屋さんだっんだけどね…。して、この向こうの山のDIYショップは九州最大だと言われています。兎に角デカイ…。欲しい物を探すときは、店員さんに聞くのが一番早いけど…、ウロウロ迷うのも楽しい…。して、それを見つけ…、安い方を買いました…。ホントはさ、ジャパニーズスタイルを探したんだけど……。今はもう少ないのかね…。う~ん、竹製のが欲しかったんだけど……。でね、上等のヤツはアルミで軽くて使い易そうだったよ…。でも御値段が倍……。御予算の関係で、鉄の重いヤツにしました…。コレって、もしかしたら竹製のヤツは滅茶苦茶高いのかも……。で、買った物は……、これでつ。これ“レーキ”と言うらしい…。うんにゃ、オレ的には“熊の手”だよ。大丈夫かな…、と思いつつ車まで来てみて入れたら、楽に入ったよ。でもね、移動中に車内をひっかくと嫌だから…、ユニクロの買い物袋でカバーしました。グッドアイディアでしょ。じゃ…、今から、肉喰いに行く…。この時、13:20です。このあと3分後には“やっぱり”が有る商業施設の駐車場にいました。赤身400gとスタバのメロンの後、帰宅しまして…。直ぐに剪定を始めます。あたしゃ、園芸の知識なんぞ有りません。知識だけでは無く、興味もありません。だから…、切るときは、後先考えません……。ワッシワッシ切ります。枯れたら枯れたときくさ…。(博多弁訳=枯れたら枯れたで仕方ないね)あはははは…、解る人が見たら悲鳴を上げると思う…。でもさ、邪魔になる前に切っとかなきゃ…。この季節の新緑は強いよ…。ジャングルになる前に、新芽が伸びるのを抑えとかなきゃ…。だから、見てくれよりも実を取るのさっ。だって、ここ、ほっといたらカーポートあかなくなっちゃう…。車庫入れも、車の乗り降りも狭くなっちゃうぅぅぅぅっ。では、剪定で切り落とした物を…、買って帰ったもので掻き集めます。今迄使って居た、携帯用のコンパクトな物に比べ…、大型の物は、掻き集めるのが楽です。でね、コレ…、大は小を兼ねてまして…。狭い所は、この蝶ネジの調節で、熊手の広さを変えられて便利です。アッと言う間に、掻き集め終わりました。次にボロった箒で掃きます。次回アソコに行くときは、箒も新調しよう…。して、ボロってても箒は箒…、スマの寝床も奇麗になりました。コレから、新緑の季節になります。今日剪定した事で、新たな新芽が息を吹きます。そそ、隙間が出来たからね…。邪魔な所は、何度もカットするのだけど…。寒くなるまでに、あと3回は剪定するかな兎にも角にも、運転席側を広くしましたとさっ。_/Smart _/_/_/_/_/_/_/_/_/_/_/_/_/_/ぴゅあらいと_/_/_/_/_/_/_/_/_/_/_/_/450K_/_/
2023年05月14日
-
たまには、良いんじゃない。
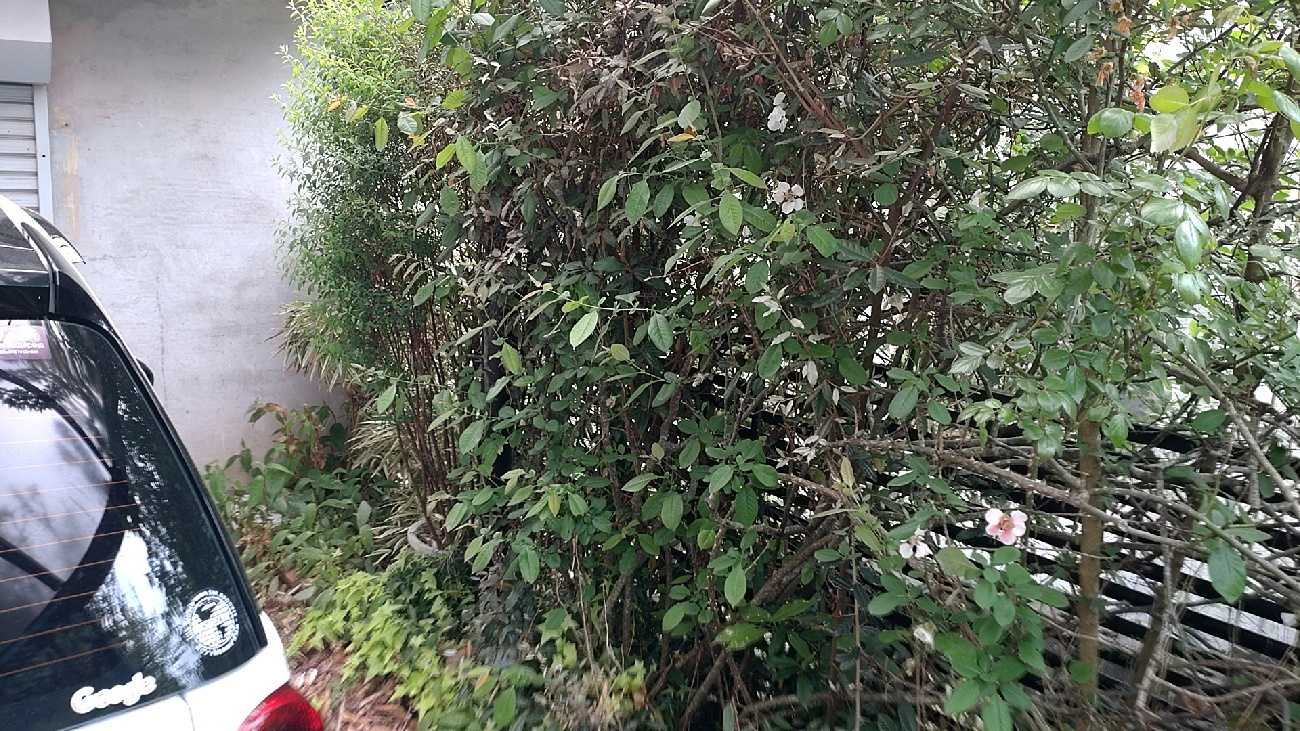
久し振りに、白クリ号の寝床の掃除をしました…。うん、暖かくなって、緑が濃くなって…、寝床が狭くなったからね…。ほらっ…、クリアランスが取りにくくなってきたよ…。掃除を始める前に、剪定から始めます。でね、花が咲いてる…。これは…、心を鬼にしてチョンチョン遣らねば…、ほら、ココだよ。これ、木瓜・ボケの花です。グーグルレンズで…、調べなくても、この花がなにかは…、知ってますぅ…。で、これから伸びるであろう方向を見据えカットしていきました…。ココだけでは無く、車庫全体のクリアランスの見直しです。序でに、乗り込む際の通路も確保。剪定終わりで、蜘蛛の巣駆除剤も忘れずにしなきゃだけど……。(無益な殺生はしたくないから、通路と白クリ号の周りだけ散布してる。)今年、まだ買ってない…。スッキリサッパリ金木犀です。ゲートの上げ下ろしのクリアランス確保も忘れずに…、やりましたよ。助手席側のクリアランスも…、バッチリ。こう言った剪定を、あと2度くらいします。今日新芽を切った関係で、新しく出来た隙間にここぞとばかりに二の矢三の矢と生えてきます。若木の先端をカットする事で、それ以降は伸びなくなるんですけど、横から新芽が出て来ます。て、次は熊手で床掃除…。全てを掻き集めますが…、仕上げは、やっぱ箒っすね…。さ、スッキリサッパリしたよ。うんうん、たまにはこーゆーのもイイやね。 Smart _/_/_/_/_/_/_/_/_/_/ _/_/_/_/ぴゅあらいと_/_/_/_/_/_/_/_/_/_/_/_/BRABUS_/_/
2022年05月12日
-
寝床の大掃除
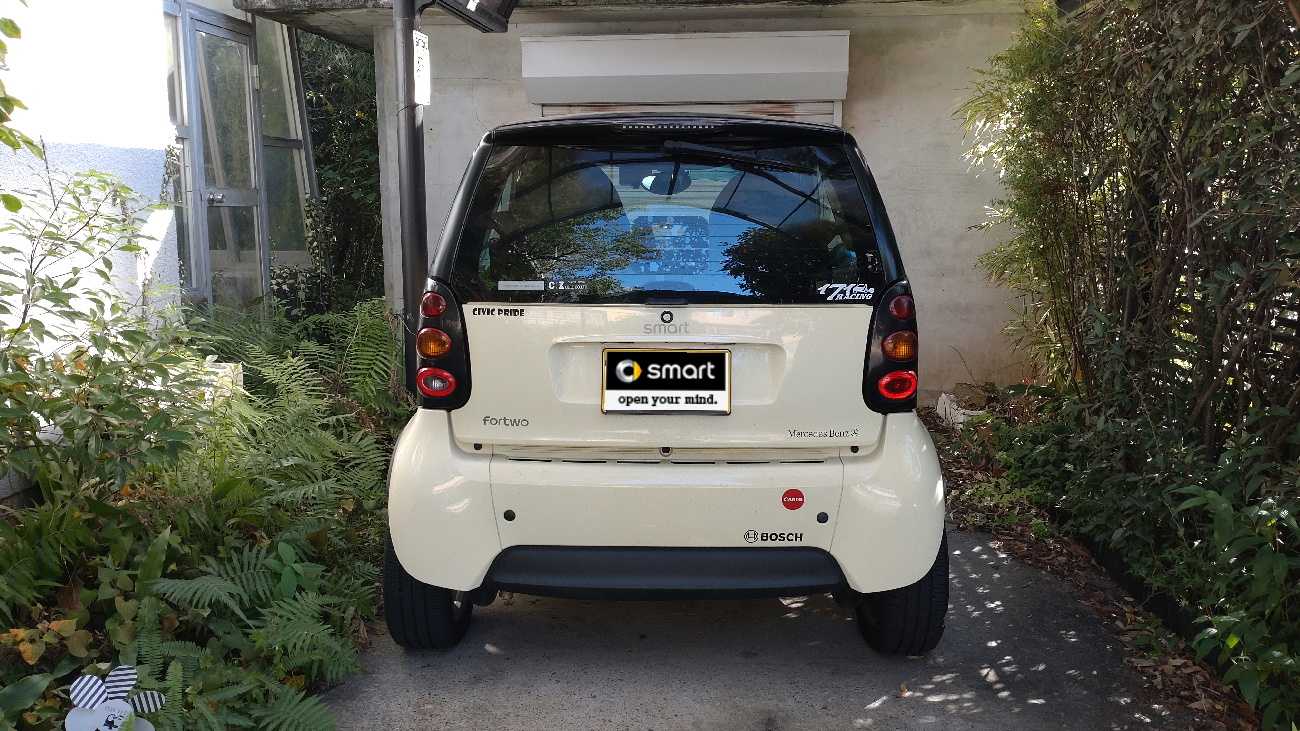
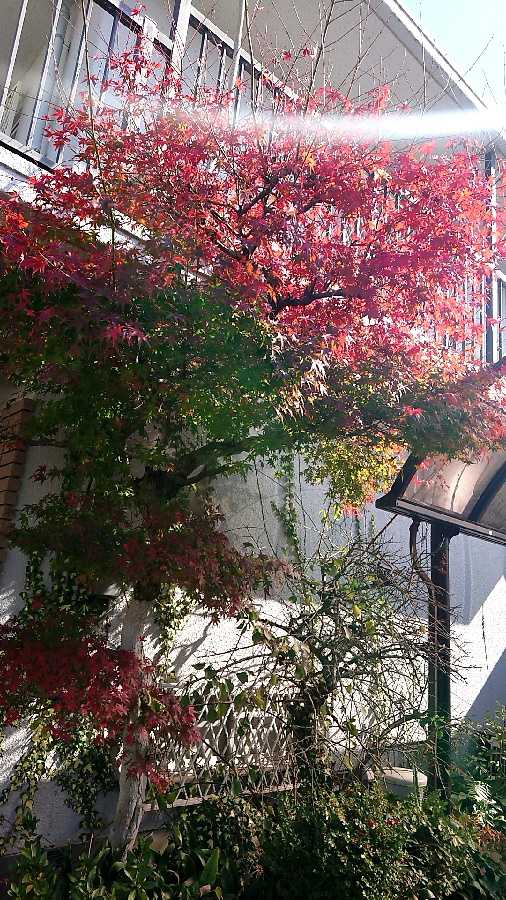
SmartBRABUSの寝床の大掃除をしました。この話は12月20日頃の話です。ええ、随分前の話ですねぇ……。ちなみに、コレを書いている今日は1月14日でつ(^_^;)…。で、我が白クリ号の寝床には、大きな紅葉の木が有ります。タッパは3m位あります。でね、毎年綺麗に真っ赤に染まります。真っ赤に染まると言う事は、落葉樹として散ります…。上の写真の状態が…、こーなって……、こーなるわけで………。散々散ると…、こんな感じになります。雨の日は、ツルッと滑りやすくなったりもします…。して、今からソージします。本来のスペースは…、赤線の部分です。はい、枯れ葉だけでは無く、つゆ草の剪定もしようと思います。一応、道具は揃っています。この熊手、便利だよ。幅を調整出来るので、狭い所にも使えるしね。たたむと小さくなるから、持ち運びも楽に出来るよ。切って(剪定して)熊手でかき集めて…、こんな感じです。助手席側もやって、ここまで約30分……。暑ぅ…、大汗掻いてるよ…。スマ君の進路の邪魔になる、紅葉と白梅の枝も剪定しました。あたしゃ、庭師じゃ無いので通路確保メインでバッサリです。庭師さんが見たら悲鳴を上げそうだけど…、この際、白クリ号の邪魔はさせませぬ。剪定した枝や草花(つゆ草をカットした)は…、掻き集めて、腐葉土にします。ええ、ゴミとして捨てるのは勿体ないです。集めて放置しているだけで、肥料になります。有機物は自然に戻すのが一番ですよ。後で(2~3年後)裏庭に撒きます。仕上げは掃き掃除です。気が付けば、作業を始めて1時間です。庭箒で綺麗に掃くと…、ほらっ…、白クリ号の廻りが…、こんなに…、綺麗に。うちのスマ君の廻りが…、スッキリっ。あ、左の空き缶はゴミではありません。ココにボーリング(井戸)が埋まってるよ、の目印です。でね…、2021年1月7~10日の大寒波で、このボーリングの二次側が破裂しまして……。大噴水……、もぉぉぉ、大変…。半日…、多分12時間以上気が付いて無くて……、ヴァァァ電気代の請求が怖い……。水圧が凄くて、止めるバルブも無いし…。ポンプの電源を引き抜きました……。ん~、難儀なこって…。撤去しようかなぁ…。有事の際の為に取っておくのも策だけど、撤去すると行政の水道代が安くなるよ。変な話だろ。使ってなくても井戸を設置しているだけで、下水道代が発生するのさ。しかも、上水道の基本料金も割高になるんだよ。庭木用のボーリングなのに、下水道代を払えって…、まるでヤクザだよ。庭に撒いた水は、全て地面が吸って1滴も下水道には流れてないよ。抗議したら、ポンプの撤去とボーリングを埋めろってさ…。地下水を吸い上げる装置を没れって、行政の危機管理としてどうなんだろうね。あの時の様な断水は、2度と起こらないと思っているのだろうか……。 Smart _/_/_/_/_/_/_/_/_/_/ _/_/_/_/ぴゅあらいと_/_/_/_/_/_/_/_/_/_/_/_/BRABUS_/_/
2021年01月29日
-

最近の寝処事情
SmartBRABUSの寝床の話です。ええ、うちの白クリ号の寝床というか、寝処の話です。白クリ号の直ぐ近くに、凄く古い楓の木が有りまして。87歳で亡くなった母が、若い頃に植えた木でして引っ越しする度に持ち回る程大事にしていたものです。わたしの記憶に有る限り、この地で3度移植しています。若木の頃は大したことなかったのですが、ココに落ち着く時は2mを超えてましたから業者さんに頼んでました。普通はここ迄しないと思うけど…、ま、それ位大事にしていたと言う事です。で、この楓の木が今年も赤く染まりつつあります。非常に綺麗なので、毎年楽しみにしているのですが…。ちょっと難儀な部分もあります。上の4枚の写真は、11月始め頃……。下の4枚の写真は、11月半ばの物です。既報の写真ですが…、白クリ号のフロントに落ちた、真っ赤な枯れ葉……。で、ココに貯まると、腐ってトリディオン付近のドレン管を詰まらせると言うお話しもしました…。して、11月下旬…、紅葉も、随分散って…、寒々しくなりました。コンクリートの地面には、こんなに枯れ葉が貯まっています。新たに散る分が少なくなった関係で…、ここにも溜まることも少なくなりました。でも、ココはこんな感じ…。ドアの開け閉めで、ザワザワっと動きます。こんもりフカフカに貯まった、赤い葉が綺麗。赤と緑が、絶妙です。12月も半ばに入って、そろそろ掃き掃除しなきゃ…、と、思っています。そーなんです、11~12月は掃いてもキリがないですからね…。しかし…、この赤と緑のコントラストは絶妙ですね。陽光に晒されると、輝いて綺麗です。今の季節にピッタリ。そ、今日のお話は、我が家のクリスマスカラーのお話しでした…。ちなみに、うちは、日蓮宗ですけど……。ええ、選挙の度に親しげに電話してくる、某宗教や某政党とは関係有りません。日本は、憲法で政教分離のハズなんですけどねぇ…、変だよねぇ…。であの人達“もうかる”と書く時、信者って書くのを知っているのだろうか…、要は、その団体の一部の偉い人が儲かる様に出来ている集まりは、宗教と切り離した方がイイと思うのだけど…。宗教法人は渡す側の善意“御布施”レベルの収入でイイと思うよ…。大きな宿泊施設や学校法人を運営しだしたら、それは非課税の宗教法人じゃ無いね。オレ…、あの人達大嫌い…、いや、正確には気持ち悪い…、かな…。生まれた時から、この一派に染まっていると、正しい事は全てその色が着いてるよね。やっぱ、ふつーの感性じゃ無いと思う…。怖いねぇ…、洗脳は…。あたしゃ、宗教は葬祭の時だけだよ…、仲間とつるんでお参りなんて気色悪くてしないよ。 Smart _/_/_/_/_/_/_/_/_/_/ _/_/_/_/ぴゅあらいと_/_/_/_/_/_/_/_/_/_/_/_/BRABUS_/_/
2020年12月25日
-
ニモカの話
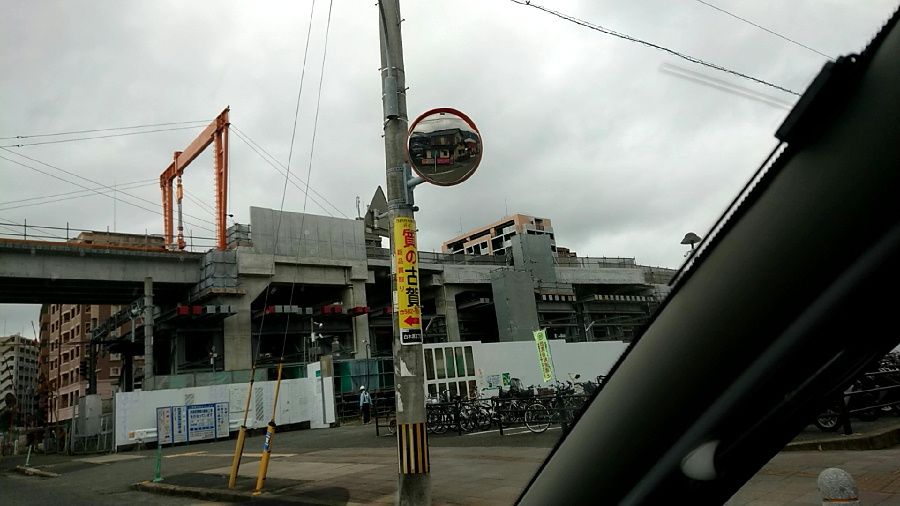
SmartBRABUSをカッ飛ばし、やって来たのは私鉄の地元駅です。今日は、ココに“ニモカ”を作りにやって来ました。“ニモカ”というのは交通系のプリペイドカードの事です。以前、コレは持ってました…。でも、2018年11月の新千歳空港到着以来、見当たらなくなりました…。ん~、エアポートライナーの発券機の前で無くしましたね……。無くしたことに翌年の5月に気が付きます……。間抜けですねぇ……。でね、この時驚いたことに、ニモカが使えなかったのです。(2018/11の話ですよ)信じられない……、北海道ってエッと思うくらい遅れています。北海道内JRでも、未だに電子支払いできない駅がありますし…。新千歳から乗って、小樽までしか交通系カードが使えなかったりします…。(2019/09の話です)ディスルつもりは無いのですが、何もかもが大自然という感じです。で、今日の話は昨日の続きです。公費をふんだんに使って、施設が新しくなりつつある我が地元の“某私鉄”です。あ、皆さん御存知の“某私鉄”です。そそ、昔はプロ野球球団も持っていました。何度もリーグ優勝をしたのに、親会社の経営方針もあって“ライター会社”へ、その後“観光会社”に変わり…、やがて関東の田舎に引っ越しした、猛獣が呼び名の球団を保有していた九州福岡の私鉄です。野球好きの方なら御存知、あの“江川君”が“魔の1日”と言う姑息な手を使って、来るのを徹底的に拒んだ九州の“野武士球団”のもと会社です。ココはほぼ1人勝ちのコングロマリットですね。良くも悪くも、この企業無くして福岡の経済は成り立たないと思います。白クリ号を、駅前の公設駐車場に駐めます。で、ここのパーキング設備は、ちょっと恐怖です。右隅の矢印部分……、恐ろしや~。ごく普通のコインパーは…、こんな感じで、カタパルト装置(空母艦載機射出時のジェット後流遮蔽板)みたいな板が上がってロックします。そそ、ただ逃げ防止板ね。でさ、このタイプに駐める時気を付けるのは、LED保護のために矢印の位置に駐めることです。コレさえ気を付けていれば、スマのアンダーボディを擦るのは線(赤線の感じ)です。だけど、ココのは……、面が上がってきます。一応ゴム貼りはされてますけど…、丁度LED部分に当たると、受け手側が“点”になってしまいます。う~、桑原桑原、げに恐ろしやぁ~。どれ位の力で当たると、ロック機構のセンサーが反応するのか知らんけど…。白クリ号の、このエントランスライトはひとたまりも無いと思う…。と言う事で、急いで用を済ませようと思います。この公設駐車場、20分間無料なのでそれまでに動かせば間に合います。して、歩いて30秒、駅改札です。この駅、今、高架化に伴い大改修工事をしています。なので、改札が3ヶ所あります。その内の、裏改札です。ここで、2000円払って1500円使えるカードを作りました。差額の500円のボッタクリは“デポジット”というカードの実費です。要は、カードだけを作らせないための500円です。一応IC組み込みカードですが実費は50円してないと思います。で、ココでは“記名カード”は作れませんでした。記名カードを作るには別の大きな駅に行くことになりそうです。どう違うのかって…、要はポイントが付かないだけです。ささ、急ごう…、白クリ号の元に、馳せ参じます。一応、上がってないのを確認します。で、精算機にて出庫の手続きを…、これは、動かそうとした時運悪くロック板が上がらないための予防措置です。マジでココのロック板は怖いので、細心の注意を払います。ええ、白クリ号のためには小心者です。“1”番“0”円を、確認しました。これで時間計測は止まっていると思います。やれやれひと安心。よく在る“カタパルト形式”のロック板は乗り上げれば気が付きます。だけど、この形はバックしたり前進したりすると……、きっとスマ君のお腹に鉋がけしちゃうと思う……。あ~恐ろしや。写真のプロパティで解ったことですが、駐車時間は8分間でした…、あたしゃ心配性だねぇ……。12分間も余裕があったよ……。ニモカは近々スターニモカにしようと思います。大きな駅で手続きすると“記名カード”に出来るそうです。じゃ、帰るばい…。田舎道をカッ飛ばし…、帰り道で……、ピリ辛スーパーに寄ります。おややぁ…、いつも見かける…、赤黒スマです。MC01かなぁ…、450かなぁ…、どっちのKかなぁ。何れにしろ、大事に乗られているようなので嬉しくなります…。 Smart _/_/_/_/_/_/_/_/_/_/ _/_/_/_/ぴゅあらいと_/_/_/_/_/_/_/_/_/_/_/_/BRABUS_/_/
2020年07月30日
-

寝床の薔薇
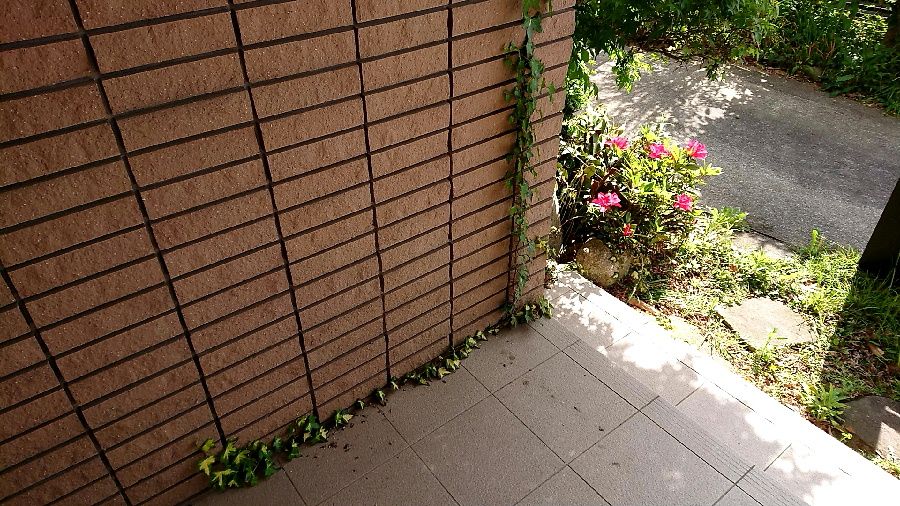
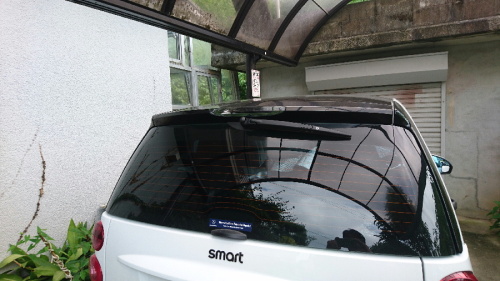
SmartBRABUSの寝床の話です。そそ、寝床の薔薇と言っても、オレの寝床じゃ無いっす。でね、下の写真は5月始めです。アイビーが、ちゃんと根付きました。縦に伸びているのは、もう固定テープを外しています。壁材の煉瓦の穴にしっかり根付きました。いつかきっと、小樽の石蔵の様になってくれると思います。で、白クリ号の寝床です。スマに乗ろうとすると、ドアを開ける右耳の辺りにコレがあります。ん~とぉーっても乗りにくいけどぉ…、流石に剪定する気は起きなくて……。先日の剪定時には、御赦免になっています。他にも幾つか、通路確保剪定の嵐を免れた物がありまして…。いま、次々とほころび始めています。ハッチバックガラスにも…、沢山写ってますねぇ。結構イイ感じに咲きました。でね、気の所為か、濃い色の薔薇より…、ピンクの薔薇の方が臭います。ええ、微かにですがイイ匂いが上回っています。以上、薔薇の香りに包まれた、優雅なうちのスマ君のお話でした…。でね、今月1日月曜日の寝床です。薔薇もほぼ終わり、緑のジャングルのようです。玄関のアイビーも更に伸びて…、更に更に、元気に這い始めました。左の低い方は、テープ固定を始めましたが、右の高い方は放置状態です。ここまで伸びると、自分で這う方向を探し、根付き始めます。自然の息吹というか、植物の生命力の強さというか…、そう言った物を感じます。この煉瓦が、緑一面に成るのはいつだろう…、オレ、生きててそれを見れるやろうか…。“中国ウィルス”の脅威さえ無ければ、絶対見れると思うのだけど……。突然にやってきて、色んな物を奪った、あの国が本当に憎い。本当に、取り返しのつかない事をしでかしてくれたよ。こんな考えをヘイトだなんて、そんなお人好し言ってる場合じゃ無いよ。今のこの現実に起こっている史実は、永遠に忘れては成らない…。“南京大虐殺”だなんて有りもしない話とは大違いなんだ。 Smart _/_/_/_/_/_/_/_/_/_/ _/_/_/_/ぴゅあらいと_/_/_/_/_/_/_/_/_/_/_/_/BRABUS_/_/
2020年06月13日
-
うちのスマ君の寝床の話
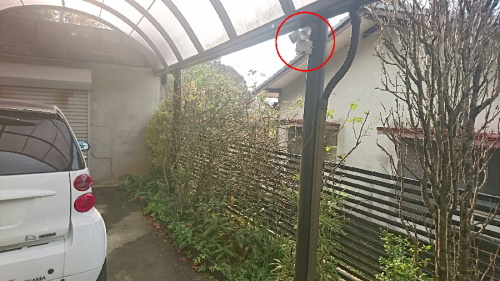
SmartBRABUSの寝床の話です。5月に入ると、日射しも強くなり周りの木々も色濃くなり始めます。去年秋から這わせ始めたアイビー。門柱周りのジャスミン。年々広がっています。咲き始めは真っ白で…、なかなか壮観です。花びらが散ると、赤く見え始めます。白クリ号の、直ぐ横のバラ…、乗り降りできなくなっちゃうので、先日大幅に剪定しました。本来剪定は見栄えを気にしつつやる物なのですが、ここは鬼のように通路優先です。ええ、だからバッサリ……、ね…。で、先日来より気が付いてましたが、やっと交換しました。何をかって?ココです。ココのセンサーライトの電池が切れてます。ガーバーの+ピットを使い、ネジを緩めます…。で、おっとぉ……、忘れてた…、このネジ外れてしまうのだった…。地面に落として、ちょっと慌てました。見失うと困るぅ……。直ぐに見つけて何事も無く…。エネルギー源は、単3アルカリ3本仕立てです。新品3本の…、最後の1本を…、差し込むと、無事フル点灯。点灯確認をした後、明るい場所で消えるのも確認。では、取付ベース部分に…、付け戻します。後は、辺りが暗くなるのを待って…、実証確認をすれば、おっけぇでつ。で、ここで福岡(福岡市近郊都市も含む)の事を蘊蓄します。福岡では、生ゴミは夜出しです。ええ、夕方暗くなって日をまたぐ前までに、各自自宅前や集合住宅の指定場所に出します。朝や昼間に出すのは、ルール違反です。何故なら、烏対策ですからね。野犬は昼夜関係なく出ますし、野良猫も昼夜関係有りません…。(最近野犬は見ませんけど)でも、圧倒的に烏対策として効果絶大です。日本全国、ほぼ朝出しですが、福岡方式はメリットだらけです。まず、自宅前がゴミ出し場所ですから、ルールを守らないと持って行ってくれません。“隣組”で決められた集積場所出しは、不逞の輩がいた場合集積場所直近の方に大変な迷惑が掛かります。匂いの問題も有りますし、衛生面もよく有りません。そこの場所が集積場所だと言うだけで、不動産評価額にも関係してくるとか…。自宅前なら、各自が責任を負う事になります。我が身に降りかかりますから、適当な事も出来ません。で、重要な点がもう1つ。深夜収集なので、交通渋滞が起こり得ません。つまり、収集車もスムースに動けるのです。収集作業される方も、炎天下作業より絶対に楽です。福岡方式、全国から見学研修に来て居るみたいですが、未だ全国普及していませんねぇ。烏の蔓延りは、都市問題なんですけど…。烏の大群は糞害もありますし、住人は忌み嫌うくせにそんな烏に何故かゴミと言う餌を与えています。朝のゴミ出し、本末転倒ですよ。深夜収集は、行政が踏み出す勇気を持つだけなんですけどねぇ…。で、今日は週2回有る生ゴミ出し曜日…、ちゃんと私の体温を感知して点灯しました。夜出勤時に点灯するよう、センサーを玄関ドア方向に向けています。このライトは深夜帰宅した時、車内まで照らしてくれます。よしよし、コレでおっけぇ。で、また忘れた頃に切れるんだよね。前回交換したのはいつだっけかなぁ……。ちなみに、燃えないゴミ・リサイクルゴミ・ペットボトルなどは、月1とか2で集積場所出しです。粗大ゴミは、相当価格の切符を買って対象物に貼付し、自宅まで取りに来て貰います。(切符はコンビニとかで買います)以上、福岡のゴミ事情と、寝床ライトの話でした。 Smart _/_/_/_/_/_/_/_/_/_/ _/_/_/_/ぴゅあらいと_/_/_/_/_/_/_/_/_/_/_/_/BRABUS_/_/
2020年05月18日
-
また撮ってみました。
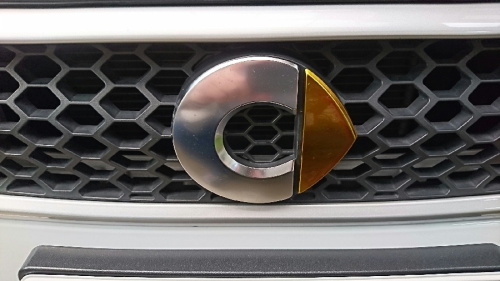
SmartBRABUSの3D写真の話です。前回、3月11日に“無駄遣い感”バージョンをアップしました。https://plaza.rakuten.co.jp/smartforttwomhd/diary/201703110000/無駄遣い感を払拭すべく、そんなモンは“回数で誤魔化せ”バージョンです。ええ、しょーも無くても“数打てば”なんかそのぉ、使い込んだ感で無駄では無くなった気がするでしょ。と言う事で、先ずはこれ。以前、イタリア・スマページでみた、実車のスマ・マークに一目惚れしてパクったスマ・マークです。自分で“C”マークの右“>”部分をエアブラシで着色しました。このマーク、正式には“カンパニーサイン”と言います。イタリアディーラー車に普通にこれがあるって、イタリアってお洒落だねぇ…。で、立体写真です。寄り目で見ると、Cマークが3つに見えます。中央が立体視して居る分で、中央のこれがダブって見える様なら首を傾げてみて下さい。ダブらなくなる位置があります。そこが完全立体視画像(虚像)です。ダブつて見えたのは、個人個人の物を見る時のクセです。首を傾げて見る癖があるのだと思います。2つの同じ画像を交差してみる事で、人の脳は勘違いして虚像を作ります。例えば、沢山並んだ同じ大きさの四角いタイルを寄り目で見ると、タイルが浮き出て見えます。それを利用した物が、立体視写真です。実際は、視差(左右の目の距離)を作っていますのでより立体的に見えると思います。脳を勘違いさせるだけなので、私みたいなアホでも見続ける事での弊害はありません。あ、寄り目で目の筋肉がちょっと痛くなるかも…。でも、適度な運動になって、視力回復に繋がるそうですよ。さて、見方が理解出来たところで、同じ部分をわざと斜めから撮ってみました。3Dは更に立体感が出ると無思います。フロントグリル内、右前のBRABUSマーク。3Dにすると…、こんな感じです。ハニカム部分に奥行きを感じると思います。右前のライト廻り。奥行き感じられますか。スマのアクセントパーツ。立体画像。もう片方、運転席前。立体画像。スマートのグレードマークです。本来の“Exclusive”が浮き出ているのが解りますでしょうか。文字タイプのカンパニーサインです。ハッチバックガラスのグリップとサインの立体感です。グリップは雨天時に手がズルズルになるのが嫌で、RSパーツの物を後付けです。(オリジナルのスマ車には付いてません)黒のサインは、本来の銀色ではお尻のスタイルがぼやけるので、ミッドナイトオレンジ専用のパーツをお取り寄せして交換しました。(オリジナルのBRABUSは車色に拘わらず銀色サインです)次回の3D登場は、何処か景色が良いところで“白クリ号”全体写真を撮ってみようかと思います。では、お粗末様でしたぁ…。
2017年04月19日
-
溜息出ちゃうね…。
SmartBRABUSに乗って、太宰府天満宮へ向かう、直前の話です。ですから、今日の話は2週間以上前の話になります。あ、その前に…、これは、3月27日に郵便局へ行ったときの写真です。小雨がぱらついて、車が汚れるなんて話をしたと思います。PM2.5の所為もあって、粒々状態が若干判ります。で、4月1日です。粉ふき状態が凄いでしょ。途中で窓だけでも拭こうと、乾拭きウエスの端がパノラに触った部分です。コレは、ハイマウントストップランプと一部パノラ(上)です。なんかさ、今から“唐揚げ”でもするのって感じですよね。左がストップランプで、右がパノラミックルーフです。しかし、凄いでしょ。九州博多は、風が強い日は直ぐにこうなっちゃうよ。しかも、洗い流さないと微粉末は取れない……。はぁぁぁぁぁっ、また憂鬱な季節が来たね。お役人様ぁ…、サッサと戦後賠償済ませて、あの国とは縁切りましょうよ。今なを続ける半端ない金額のODA資金で、あの国は乱開発を続けてるよ…。皆さん知ってます??あの国だけが、戦後賠償の受け取りを拒否してるんですよ。(親日の台湾と共に・台湾は親日だから要らないと言ってくれました)日本は払うと言ってるのに、毛沢東さん以来拒否し続けてる…。そのくせ、最近になってODAは戦後補償の一部だとほざく党幹部までいる…。戦後賠償拒否って、ODAを受け続けた方が美味しいからね。難癖付けて骨までしゃぶるつもりだよ。ホント、厚かましい国だと思います…。蛇足ですが、連合国側は日本の敗戦復興のために賠償請求を放棄しています。ところで、米国がやった“ホロコースト”つまり、広島・長崎の“非戦闘市民に対する殺戮”には個人補償はあって然るべきだと思うのですが……。戦後一切触れられてません、勝てばなにしても良い訳ではないのに…。それにしても、日本って、とことんお人好しなんだと思う…。ぶっちゃけ、あの国に対する戦後補償は実質のところ済んでると思います。当時の日本の資産(満州鉄道とか)は官民とも、敗戦と同時に総て没収されましたから、その膨大な資産分で相殺してもお釣りが来ます。終戦当時の通貨価値で換算される訳ですから、21世紀になってまで戦後補償は有り得ません。いっそ、今、健康被害で賠償して貰いましょうよ…。それに、ODA止めた分のお金で、医療改革問題なんて一気に解決しちゃうし、年金資金問題も一蹴出来るよ。消費税なんて取らなくても済むよ。余所の国のために、自国民を犠牲にする事無いよ。あたしゃ、そう、思うがね。
2017年04月17日
-
交換しとこっ、の話。
SmartBRABUSで、先日遅く帰ってきた時に車庫のライトが点きませんでした。ドアを開けると、ルームライトやエントランスライトが点くので降りるのに困る事はありません。だけど、久々に夜間行動をとると点かないのは気になります。それが、コレです。照度計をかんだ人感センサー付のLED2灯ライトです。暗くなって、人の体温に反応します。えっとぉ先日の夜、点かなかったと言うのは正確ではありません。ぼぉぉぉっと点いてました。LEDが白くなる位には点いていたので、ただ単に電池切れかと…。一応、全天候型の防水ライトですから…、電池交換は、ドライバーで開けます。はい、本体ごと取り付けアングルから取ります。矢印は、残置時間の設定です。点灯して10秒間は点いたままです。10秒後1度消えますが、人が居れば又点きます。ありゃま、こんな高級品を使ってたにょねぇ~。きっと安売りの時のだ…。この電池、3本分で店のラーメンが喰えるよ~。電池を抜き差しすると、うっすらと点きました。電池ボックス内部には、液漏れ等有りません綺麗なドライです。では、緊縮財政の折、早速あmぁzぉnの単3に交換です。最後の一本を差した途端、パッと点灯しましたぁ。あっかる~いっ。コレ(安売り電池)で、どれ位保つだろう…。付け戻し作業です。取り付けアングルの凹凸をしっかり確認しつつ…、ネジ留め…、完了しましたっ。(`∇´ゞあとは暗くなって、照射方向の微調整とセンサー方向の微調整をします。ええ、左右の灯体が別々の方向を照らす様に出来、人が来る方向へセンサーを向ける事が出来ます。では、夜を待ちます。で、夜だよ~ん。あと1分で明日だよ~ん。でね、電池交換の時にセンサー部分を触っちゃったみたい。今迄は、玄関を出た途端に点いてたんだけど、近付かないと点かなかった。勿論、設定し直してバッチリ点くよ。やっぱ便利だね。さぁて、次回はいつ頃交換かな…?今度は…、格安電池だから……。
2016年12月16日
-
封印は未だ解けてないのですが……。
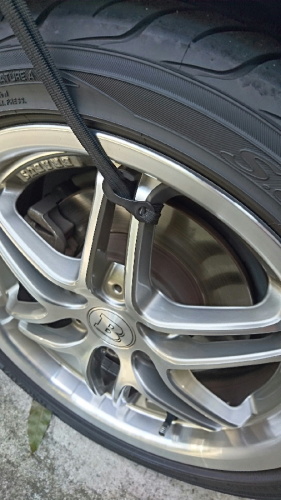
SmartBRABUSの、ハーフカバーを取ります。えっとぉ……、封印は(11月11日現在)未だ解けていません。ホントは、明日まで乗らないつもりだったのですが……。“家人”から、アッシーを仰せ付かりまして…。敬老の精神で、お断りはできませぬ……。時間は未だなのですが、いきなり“駅に着いたよ”なんて事を平気でする人なので……。未だ早いのですが、カバーを取ります。でね、手を汚さない良い方法を考えつきました。ええ、ブレーキダストの件です。前輪のスポーク裏は、結構ダストが溜まっています。そこで、フックを摘まみ……、写真を撮っているので…、ホントは上から下りてきてるゴム紐を片手で引っ張ります。更に、もう片方で引っ張ったフックを外すだけで…、汚れには触らずに取れました。次、後輪です。ここは、ドラムブレーキなので手が汚れる心配は…、さほど有りません。そそ、簡単に取れます。同様に、助手席側の前後も取ります。その後、後部左右から外します。ルーフの上で…、短冊状に、外側が内側に成る様に巻きこみ…、後部から丸めてゆきます。丸め終わると、フロントガラスの上に溜まります。この時まで、ワイパーで押さえていた方が…、風で飛ばなくて良かったです。薄くて軽い素材なので、そよ風程度でもバサバサと動きます。丸めた物が片手でつかめる様になったら、ワイパーを浮かします。ん~、ピッカピッカのままだぜ~。と言うか、あの国からの風が吹いてないからねぇ……。春になってみないと、ホントのカバー効果は解らないねぇ。さて、丸めたカバーの“フロントタグ”を見える様にして…、専用の収納袋に入れます。巾着袋タイプで、カバーと同じマテリアルです。軽いっす。写真用にギュッと持ってますが、実際は小指で充分です。ホンじゃま…、収納袋のまま、車載にするか…、玄関置きにするか…、どっちが良いかなぁ…。こんな事、日本の将来を前に、悩む事じゃ無いけど……。んー、しかし、あの国は何でも銃で解決してきた国だからね。御本人は当選した途端、しおらしく大人しくなってるらしいけど……、運動期間途中に言った言葉は永遠に人々の心に残るよ。イッパイ言い放っちゃったし…。人種差別も公言しちゃったし…、真意が伝わらなかったと言い訳してるけど…、そんな人をトップにしちゃう国だから…。肌の色が違うだけで差別する、或る意味野蛮な国なんだと思う。そういう彼らだって、私に言わせりゃ、白色じゃ無く“赤色”なんだけどね。“人となり”は決して肌の色や貧富の差では無く、そのヒトがやってる事、なんだと思うけどね。今後、同盟国としてのスタンスも気になります。
2016年11月17日
-
2016年夏の予防と対策について (大袈裟なタイトル)
SmartBRABUSの話です。最近毎日乗れてません。通勤で使わなく成っちゃったからね。何度もこのブログで書いたとおり、私、今、プー太郎です。何年も何十年も働き詰めて、やっと自由になれました。組織に支配されず、会社の一コマでは無い快感を味わっています。自由は、元気なうちに手にすべきです。でも、余所様に迷惑を掛けない、経済的な裏打ちがあってこその自由です。だから、若者よ、いっぱい働け、働いて働いて、それから自由を謳歌しろ。働けるうちに働いて、そのご褒美に自由を得るのだ。苦労なくして楽なんかあろうものか…。オレは今迄、色んな物を犠牲にしてきた、だからこれからそれを取り戻す。で、そんな話は置いといて。うちのスマ君の寝床です。梅雨明けした途端、蜘蛛御殿になりそうです。今年の夏は、酷い事になりそうだなぁ……。だって、毎日乗れてないからね。今迄は毎日乗れてたから、蜘蛛の巣がはびこる事は無かったと思う。毎朝車を出す事で、リセットしてた様な物だからね。携帯カメラに蜘蛛の糸は写りにくいけど、枯れ葉が宙に浮いてるでしょ。あたりに蜘蛛が沢山居ます。でね、この夏の予防と対策について、こんな物を“あmぁzぉn”で仕入れました。これシリコンコートをして蜘蛛の巣を張らせないんだって。良いねぇ、早速使ってみます。カーポートの柱です。蜘蛛は車の場合、アンテナと車体の間、ドアミラーの下に巣を作る事はあっても、その他の部分に作る場所はあまり有りません。長期放置すると、アルミホイールのスポークとタイヤハウスの周りや、ワイパーやフロントグリル廻りの空間に作りますが、わが家の場合このカーポートのサッシ部分に作ります。左右の柱の間で作るから、気付かずに車に乗ろうとすると顔に貼り付き衣服に絡みつきます。スプレーすると、ヌメェ~っと光っています。これ、明らかにテフロン加工の感じです。無益な殺生はしたくないし、蜘蛛は益虫でもあります。蜘蛛にはかからない様にスプレーしました。一応殺虫成分が入っているようですが、要は蜘蛛が巣を張れなければ良いのですから。巣の根元にスプレーしたのですけど、巣の糸が滑るのでしょうか、なんか慌てて降りてきました。このあと、カーポートの総てのサッシにスプレーします。特に、今迄一番酷かった部分です。アッと言う間に1本使用しました。でも、安心して下さい。もう一本あります。スプレーは、押し下げ式では無く…、トリガー(引き金)方式で、楽に噴霧作業ができます。はてさて、効果が薄ければもう一本使用しますけど……。今夏の白クリ号の寝床は、快適かな……。暫く様子をみます。
2016年07月23日
-
体温を測ってみました。
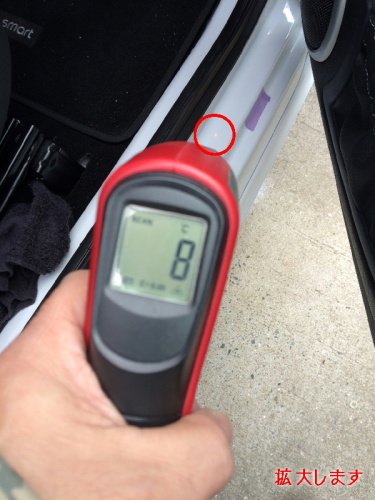
SmartBRABUSの体温を測ってみました。実はある計画があっての事です。先ずはトリディオンの前端近く…、赤いブリップが見えますか?レーザー照射しています。この部分、8度です。次は、トリディオンの後輪近く…、ここも、8度です。ま、この数値は当然かな……、スマ君の活動前の体温です。でも、二度計りしたら…、9度でした。8度というのは、限りなく9度に近い8度なのかも……。最後は、マフラー…。スリットから、直接マフラーをねらって計ります。今度は、赤いブリップがハッキリ見えますね。9度です。トリディオンと同じです。ちなみに、外気温はこの温度計では測れないのですが、コンクリートの温度なら…、7度です。風が強いので、体感的には、もっと低く感じます。しかし、まぁ、この温度じゃカッティングシール貼りは……、出来そうにありません……。そそ、シールを貼りたくてね……。このスマ君の体温ですと、シールは貼れませんねぇ……。風が強いし、埃も貼り込むので無理かなぁ。でも、スマ君の体温を上げる方法はあります。ドライヤーなんて要りません。そそ、運動させれば良いのです。あ…、つまり、エンジン回す事です。では、ちょっくらお買いものに………。10分走行15分駐めて、5分走行10分駐めたあと、更に、15分走行して戻ってきて、体温測定です。前端。後端。後部に廻って…、マフラーをねらって計測です。41度でした。エキパイの排気口は……、50度でした。走行後、車体が暖まればシール貼りができゃしないかとおもったんだけど……、外気が低すぎて駄目みたい……。もう少し暖かくなると、短時間でトリディオンもエンジン熱でかなり温まるのに…。暫くは駄目みたい……。
2016年01月15日
-
新しいタイプの……、の話。
SmartBRABUSで通勤しています。今年4月に転勤になってから、前の職場近くの月極の立駐に置いて、私鉄に乗り継いでいます。ある事情があって、うちのブラ君ニックネーム“白クリ号”を預けている立駐から引っ越すことになりました。今迄、野晒しになることも無く大事に置いていた、立駐にさよならです。で、引っ越し先の手続をするために、自宅近くの私鉄駅前の不動産屋へ行きマシた。ココの不動産屋には駐車場がありません。よって、駅前の市営コインパーに置かざるを得ません。でね、流石田舎です、最初の30分間は無料です。だから、運が良くないと駐めることがで来ません。それでも15分も待てば空きは出ます。ところで、ココのコインパーはうちの白クリ号にとって、未知の駐車場です。ちょこっと“恐怖”であります。(スゲー大袈裟)と、申しますのは……、ロック板はリフター式に箱が押し上げるタイプなんです。結構大きな物が、アンダーボディを押し上げて止まります。タダ駐め防止のために、ここまでするぅ?敷金や契約金は既に前払いしているし、30分かからずに手続は終わると思うけど……。それでも、万一押し上げられた時のために……、エントランスランプを避けて駐めました。とってもとっても気を遣いますぅ……。だって、ほらぁ…、こんなだよ。こんなんが、下から押し上げて止まるんだよ。こんなのの直撃受けたら、エントランスランプは一溜まりも無いと思う……。ミシミシ、パキッ…、とかは悲しすぎるぅ…。結果、タダ駐め防止装置箱のお世話にはならずに済みました。でね、ここはバック駐めが推奨です。運転者が乗り降りで足を引っかけない様に、の措置だと思います。でも、あたしゃ“位置合わせ”のために運転席側に“箱”が来る様に駐めました。やっぱ、ちゃんと視認しながら駐めないとね。コインパーは、この手の“ボックス迫り上げタイプ”では無しに、一旦乗り上げて駐める“カタパルト”方式の方が、我が白クリ号のためには絶対安心です。あ!一番の安心は、ロボットゲートタイプですけど……。以上、今日のお話は、白クリ号にとってチョット恐怖と言うか、鬼門のお話しでした。しかし、市営だけど、今迄ノントラブルなんだろうか…?エアロパーツ車なんて、バリバリッとやりそうだよ。ちなみに、シャコタン車やエアロパーツ車に対する、規制や警告文は見える所にはありませんでした。こう言った物は、探す努力無しで見えていないと拙いと思います。有無を言わさぬ警告の必要があるのに…。気が付く限りないのですから、施設管理者が責任を取ると言う事かな……。
2015年11月30日
-
前略、smartbrabusさま。
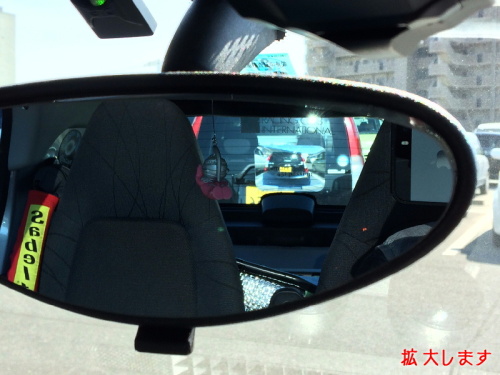
Smartのミラーの話です。今日のお話は、A・ヒッチコックばりに、ミラーショットを多用してお送りします。(滅茶苦茶、大袈裟…。)で、先日コメント欄にカキコがあった、smartbrabusさんのオーダーにお答えしようと思います。我が愛車、グレメタパッション号は、2010年秋モデルです。2010年春モデルの希少在庫はありましたが、秋モデルがモデルチェンジして出ると聞いて、カタログショッピングをしました。あ、正確には、冊子の形のカタログショッピングでは無く、Webショッピングです。ディーラーのオンラインPCの内容を見ただけで、ハンコ押しました。ええ、私、そう言ったイケイケの所があります。後日、実印が要るものを現物を見ないで買ったのは、後にも先にも、これが初めてです。でね、このあと直ぐにルームミラーを購入しました。そそ、デリバリー前でした。当時乗っていた450Kのルームミラーに貼り付けた、凸面ミラーを引っぱがす訳にも生きませんし……。451の基本スタイルは変わらないと聞いたので、先行投資です…。ウインドバイザーも手配していました。2010年秋モデル、発注かけて2ヶ月、待ち続けました。ルームミラーの形は、450と同じだと知っていましたので、この凸面ミラーは450用の物を購入しました。オリジナルミラーとの違いは、広範囲に見えると言う事です。設置角度にもよりますが、オリジナルは2つのシートバックの間しか見えません。上の写真は、カメラマン自身が映り込まぬ角度で撮っていますが、普通に着座すると、助手席ドアーの三角窓から左後方も見えます。ちなみに、これパノラミックルーフ用、バックミラーです。これもカメラマンの写り込み防止で、通常位置ではありませんが、ちゃんと着座すればかなり広範囲に後方が確認出来ます。あ、これは通常は必要ないのでしょうけど、我が家の車庫のポンコツ電動ゲートの開閉確認で付けました。左ドアミラーです。ドアミラーも凸面ミラーにしています。ですから、オリジナルとは見え方が違うと思います…。ドアミラーの車内側取り付け部分に、左側方監視用のレーンミラーとドアミラー内に左後輪付近監視用のインナーミラーを付けています。左後輪付近監視用は、こんな感じに見えます。矢印は、タイヤ止めです。右ドアミラーです。左同様にレーン監視ミラーと、インナーミラーです。右のインナーミラーも、こんな感じに見えています。この日、14日連勤後のお休みを利用して、ご近所の100均の駐車場を利用しての、ブログ写真撮りをしました。ドピーカンの良い天気。5分足らずの撮影タイムでしたが、汗だくになりました……。でね、昨日までのご報告通りのリアハッチに付けたレンズの話を追加します。いてててて、と普通に振り返ると……、(借金の所為では無く、若い頃の怪我で左に首が回りません。)拡大レンズは、こんな感じに見えます。そこを、更に下をのぞき込むように見ると……、ここまで見えます。タッパの高い方なら、更に後方下は見やすいのでは無いでしょうか。ほらっ……、車スペースの白線が、こんな感じに見えてますよ。この拡大レンズ、なかなか使えます、戦力になってますよ。さて、お話しは戻りますが、レーン監視ミラーとインナーミラー。慣れるまでに、時間を要する方はいらっしゃると思います。ですが、付けると大変有効なものだと思います。凝視する必要は無いのです。走行中の前方以外の動体監視という意味で、活用されては如何でしょう。あっ!ソコにある!!と言う情報だけでも、未然に防げる事、多々あると思います。でね、蛇足ですが、本国仕様のドアミラーは“マルチミラー”でした。以前、ED車のプロトタイプに乗った時ですが、左ハンドルの運転席側は、3/1外側だけワイドミラーでレーン監視がしやすいような造りでした。残り3/2はややワイドで、後方が凄く見やすかったのを覚えています。どうして、日本国内仕様は便利なものを無くす方向になるのでしょう……。日本の法律って……、変なの……。
2015年03月30日
-
窒素ガスを入れました。
Smartのタイヤに、窒素ガスを補充しました。ええ、私、ずっと前から窒素ガスユーザーです。実は、2~3日前から右カーブ&右折の度に違和感を感じ始めまして、急に気になり始めました。左カーブ&左折は、余り感じません。なんで???で、久々の早上がりです。明るいうちに帰るのなんて、いつ以来だろう……。迷わずSABに立ち寄りました。スマ君の前足、ガスを入れる前です。コレ左前ですが、右と見た目変わりません。ただ、ちょっとペッタンコかな……。後ろ足です。右後ろの写真ですが、コレも見た目左右での違いはありません。前足と同じで、かなりペッタンコかなと思います。しかし、ホント、ガス補充なんてどれ位振りだろう……。覚えてないよ~。あとで、SABのマイページ見てみよう、会員カードを通しているから購入履歴が残っていると思います。でね、補充4本で500円、前は補充のみはタダだったのにね……。ここのSABケチかぁ~。(ケチかぁ=この場合博多弁でサービスが悪いことです。)レジで支払いを済ませると、ピットへどうぞと案内されます。駐車場に戻りタイヤピットに向かうけど、空いてないじゃん……(-_-;)…。タイヤマンに何所に止めれば良いのって聞くと、すみません、前に止めて下さいとのこと。左前後、右前後の順で入れています。どれ位減っていたか聞きました、前が2.6、後が2.4で左右でバラ付きはありませんでした。とのことです。前回、前は2.9、後は2.8、入れていたと思いますから、全体的にバランス良く減っていると言う事に成ります。冒頭で書きましたが、違和感を感じたというのは、パンクを疑いました。左前が、釘を拾っているのでは無いかと……、スローパンクチャーの症状に似ていたもので……。にしても、右折時の左前の“グニャッ”とした違和感は気持ち悪かったです。コンチネンタルと違って、やっぱりヨコハマは高目に入れること…、なのかな……。上の写真は、充填後に快調に走って帰ったあとの写真です。一見同じ写真の様に見えますが、プロパティを見るとそれぞれ30分の時差がありますから間違いなくビフォアー&アフターです。入れる前の写真と見比べても、然程違いはありませんが快適さは全然違います。もぅ、フットワークが軽くなった感じですね。
2014年02月22日
-
クラフトマンシップ
Smart451パッションに乗って、もうすぐ3年になります。MC01Kの頃からのスマ歴は、7年を過ぎ、足かけ8年です。で、愛車のスマパッションを弄ってみようと思います。あ、不法改造という意味ではありません。たとえば、この車の…、この部分を…、こんな風に、してみようかと…、思ってます。あと、こんな感じもどうかな…。で、こんな手遊びをするには…、ある機械が必要になります。えへへへへ…、買っちゃったぁ…。Aゾンで3万円切ってたので、衝動買いです。前から欲しかった、カッティングマシーンです。ローランドから出てるSV-8と言う、おもちゃみたいなマシーンです。古くは、プロッターと呼ばれていました。現在、主流の家庭用プリンターは、キャノンが世界特許を保持しているインクジェット方式です。インクを沸騰させ、細かい霧状にして紙面に吹き付けてゆきます。この時、インクヘッドは送り出される紙面を往復(安いのは片道)しながらインクをジェット噴射するのです。で、プロッターはペンを使います。ペンですから、インクジェットの様に多色なカラー印刷は出来ません。印刷ヘッドに取り付けられた(数色の)ペンヘッドが、X軸とY軸とに縦横無尽に動き、更に、紙面も往復(動く!!)しながら、機械がペン書きしてゆきます。仕上がった紙面は、精密で綺麗な手書き風です。当然、大がかりな機械でして、設計事務所等の専門事業所にしか有りません。この機械の優れた特技として、ペンヘッドにはカッターの刃が取り付けられます。(専用刃です)そのカッター刃を使うと、印刷物が切り抜き文字とかのシールになるのです。図形もOKですから、ロゴマーク(単色ですが)も可能です。(多単色ならパーツに分けると指定カラーのロゴも可能です)昨今では、そのカット専門のカッティングマシーンが家庭用としてあるのです。そこで、このローランドのカッティングマシーンで手遊びをしようと思っています。同梱のソフトです。アドビのイラストレーターとリンクするソフトが入ってますが…、あたしゃあんな高いソフトは持ってません、だから関係なし、悔しいから無視です。でね、専用のカッティングスタジオというソフトを使います。皆さん、お気づきでしょうか?ローランドのロゴはあの楽器メーカーのローランドです。昔は、キーボードだけの会社だったのに……。でさぁ…、忙しくて箱から出す暇がないよ…。時間があれば、この部分に…、こんな事してみようと、ウズウズしているのだけど…。はぁぁぁぁ…、休みがない…。たまに一日だけの休みだと…、体力回復だけで、手遊びの余裕はないよ…。
2013年10月21日
-
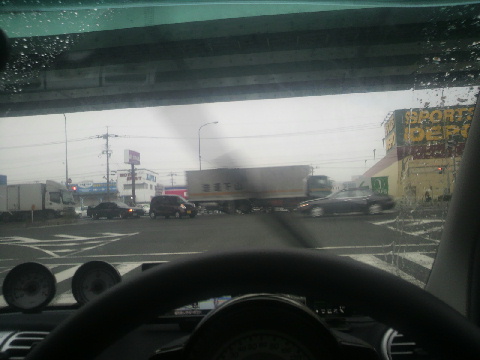
今朝の博多は雨でした。
Smartで通勤しています。今朝の博多は、久々の雨でした。出勤時は車汚しの雨でして、職場に着く9時前には小雨でした。一日中ぐずついた天気でした。で、今日の話は、雨の日にちなんでワイパーの話です。スマートのワイパーは2本とも中央から左右に起ち上がって、両端の窓枠方向へ掃きます。掃き残しはこんな風に、ルームミラーの向こうに逆三角形という感じになります。一般的な複数のブレードが、一方向へ向かって起ち上がるタイプと比べると、視野の掃き残しが少ない、良いシステムだと思います。トヨタNOAHにも乗りますが、助手席側が見にくくて嫌です。慣れもあるかもしれませんが、スマートの両開きタイプが好きですぅ……。ですが…、です。スマート・ジャパンの、スマートのワイパーは日本仕様ではありません。明らかに、左ハンドル用だと思うのです。先ず、助手席前の掃き残しを見て下さい。では、運転席前の掃き残しです。随分違うでしょ。助手席前は、こんなにクリアなのに…、運転席前は広範囲に掃き残しています。あと、5センチ右まで掃いて欲しい……。この掃き残しが気になるぅぅぅぅ…。安全確認は、ちょっと身を乗り出せば良いのですけどね……。外から見ると、掃き残し具合はもっとハッキリ解ります。助手席側です。トリディオンの近くギリまで掃いています。運転席側は…、あと5センチ…、残念…。これはワイパーアームの取り付け位置と言うか、パーツに問題があります。このブレードアームが、上下入れ替われば、掃き残しは飛躍的に改善されると思います。つまり、下側のワイパーが運転席前を掃くから、トリディオンギリまで動かないのです。上側のワイパーは助手席方向へ、ギリギリまで動くのは、スタート地点が下より5センチ上だからです。この景色、左右が入れ替わってりゃ良いのに……。しかしまあ…、一般的な(国産の)ワイパーよりずっとクリアなワイパーなので我慢します…。だけど、右ハンドル用としてのワイパーまで施して、日本仕様車と言うべきじゃないっスかねぇ……。ワイパーアームは左右でデザイン違いだから、やっぱコスト的に無理かな……。だったら、左ハンドル売ってよ~~~。あー、今でも左ハンドルのED試乗車が忘れられないよ……。じぇったいスマは左ハンドルだよ…。
2013年05月20日
-
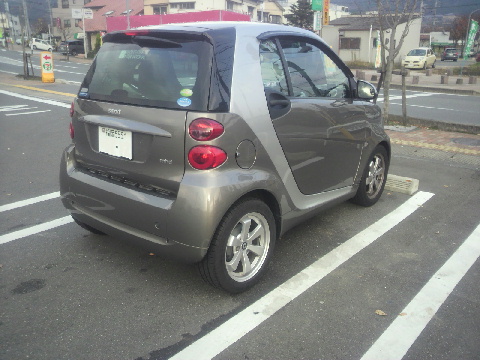
後ろ姿の話
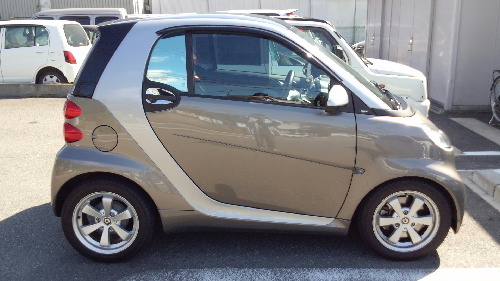
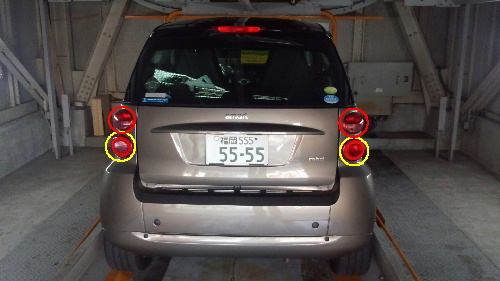
Smartの後ろ姿の話です。気付かれました?スマって、左右非対称なんですよ。左右の赤い丸の上は、尾灯とストップランプで、下半分がウインカーです。コレは左右対称なんですが、下の黄色い丸内は、違っています。左側の透明レンズは、バックランプで、右はバックフォグなんです。このバッグフォグの点灯操作は、ウインカーレバーのつまみを最大に回すことで点灯します。点灯すると、こんな感じです。赤い大きな尾灯、と言った感じです。ちなみに、ランプモジュールはこうなっています。これは、左側のモジュールですが、右側は天地そのままで左右反転です。まず、上段がスモールとストップランプのWフィラメント球。中段がウインカー用のオレンジランプ。下段が左がバックランプで、右がバックフォグ用のランプです。我が愛車は、未だLED化されていません。本国のスマート本社さん。そろそろ純正のLEDランプ発売しませんか?エコストップエンジンも良いけど、こう言ったパーツの省電力化もエコに繋がると思いますよ…。で、引いた絵です。車体がちっちゃいから、お尻もちっちゃいですぅ。立駐のゴンドラにこんなに余裕があります。でもね、高さ的には50ミリの余裕しか有りません。実は、ここの立駐、前入れ前出しになっていて、車を入れるとこのゴンドラがパレットになって、180度回転します。回転する時に持ち上がる様になっていますから、スマのルーフとゴンドラのフレームが約50ミリまで近づきます。初めての入庫の時は、冷や汗物でした。固定されてしまえば、かなり余裕はあるんですけどね。
2012年09月06日
-
ドアの話、2…。
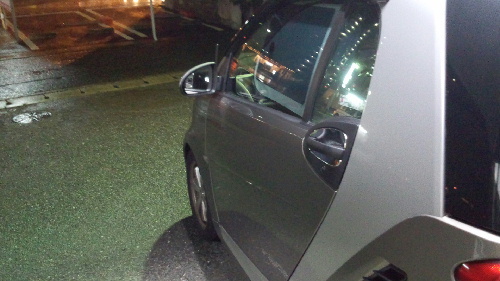
Smartのドアの話です。スマートのドアはとにかくデカイ…。専有面積もさることながら、車体の側面積の比率は3/2がドアと言った感じです。で、あたしゃ身長175センチ・体重は平均以上(^_^;)なんだけど、自宅の駐車場以外ではドアの開閉は、とても気を遣います。U字形に線が引かれている、ゆったりスペースの所はよいのですが、一本線の駐車スペースの所は辛いですねぇ…。特に、助手席の人の乗り降りはひやひやします。閉まったドアから、開くまでを見て下さい。自動ドアでは無いのですが、油断すると中間位置まで一気に開きます。あっと思う位に、ここまで開きます。ここまで開くと、余裕で乗り降りできますが、ここまで開いていると言う事は、隣に車があれば、間違い無くドアこっつんです。通常、下りるときはドアトリムで身体を支えつつ片足ずつ蟹歩きです。ドアパネルがこんなにデカくなければ、無駄な気遣いなのでしょうが…。で、自分だけの時は、左寄りに寄せて止めて、ドアを中間位置まで開けます。中間位置の一度止まる位置から、更に押すと最終的にはここまで開きます。車内清掃以外にここまで開ける事はまず無いと思いますが…。ここまで開くとかなり便利です。両方開け放つと、鳥が羽ばたく感じにも見えてきます。
2012年08月23日
-
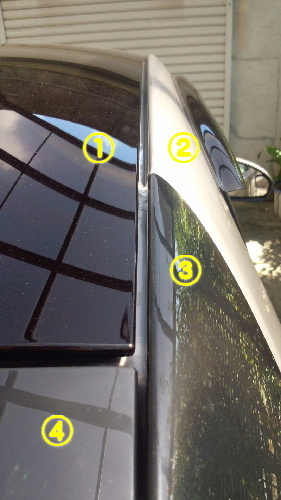
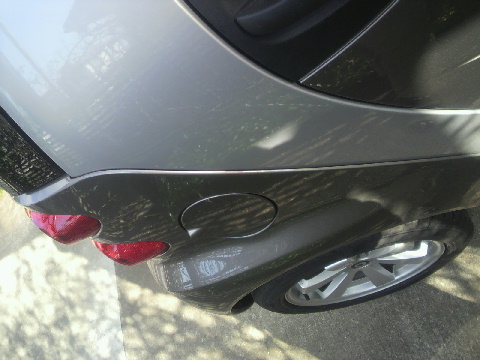
すき間の話
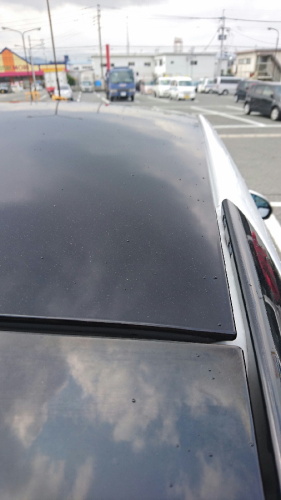
Smartは金属と樹脂とゴムとガラスで出来てます。あ!普通、車はみんなそうですよね。でも、スマ車の場合その割合が、メチャクチャ違います。で、今日はそんなマテリアルの話ではなくて、樹脂パーツが多いとこれだけ隙間だらけなんだぞ、と言う話です。まず、ボディ上(屋根)と横の境目写真。右後方から前方を撮っています。1、パノラミックウインドウという名称の透明の天井。(ポリカーボネイト樹脂)2、トリディオンセーフティセルという名称の、万一の際乗員を守る剛鉄セル構造。3、後部樹脂ボディ。4、ハイマウントストップランプの取り付け部分、ハッチバックのヒンジ部分です。どうです?かなり隙間が有るのが判るでしょう。上の部分の別アングルです。1、2、3、の解説はそのままです。それぞれのパーツが、解り易いくらいに離れています。上の写真より更に、後部です。1、2、3、4、の解説はそのままで、5はハッチバックガラスです。で、特筆すべきは、黄色の矢印。これは、樹脂パーツがトリディオンの金属部分にトルクスでビス留めされている部分です。この隙間、1センチ以上有ります。右後輪の上部分の写真です。2、3は上記と同じ、6は右後輪のタイヤハウスです。なお、黄色の矢印は給油口の蓋です。左下のちらりと赤いのは、右のテールランプです。それぞれ3つのパーツの間に、ご覧の様に隙間が有ります。ちなみに、それぞれは可動部分ではありません。この形で固定されています。下の写真は、右前部です。2、はトリディオンセーフティセルの目視できる最前部。7、は右前輪のタイヤハウス。8、は開けるためには、取り外すボンネット。それぞれに独立したパーツとして、取り付けてあるのが見て取れます。蛇足ですが、黄色の矢印は、パッションラベル、白い矢印は、ワイパーブレードの先端部分。殆どの自家用車の場合、金属モノコックに、板金ボディがスポット溶接で留められています。スマ車の場合、セル構造の金属卵に、それぞれの樹脂パーツがビス留めされているから、こんなに隙間が有るのだと思います。あっ!!隙間隙間とカキコしていますが、雨漏りや隙間風は全くありません。その点はご安心ください。でも、初期のスマ車はフロントガラスの取り付け部分から雨漏りするもの。だったりしますが、流石に451はそのようなことはありません。ちなみに、以前乗っていたMC01Kは、雨漏りしてました。ゴムパッキン古くなってたしねぇ………。今は昔、むかしむかしの思い出話です。ところで、かなり目立つ隙間がある車、珍しいでしょう。普通、固定部分はこんなに隙間無いよね。でもドアとかドアガラスとかの可動部分は、ゴムでしっかりシールドされています。スマ車って、ホント個性的な車です。
2012年08月08日
-

ハッチバックゲートの話。
Smartのハッチバックゲートの話です。エンジンルームの直ぐ上のカーゴスペースを利用するには、ガラスのハッチバックを開けます。で、右の“ヒンジ”はこんな感じ。1番はトリディオンセーフティセルの金属部分。スポット溶接とかではなく、完全溶接の跡が見えます。2番は樹脂のボディ部分、ハイマウントストップランプと並ぶ一体デザインのリア廻りの樹脂ボディ部分です。ココの右下が、別パーツボディの給油口です。銀色の金属部分に、大きなヒンジとガラスドアサッシとが繋がっています。左の“ヒンジ”はこうなっています。銀色の完全溶接部分の3番の蛇腹チューブは、リアワイパーのウォッシャー液用です。ハッチバックのサッシ部分を通って、リアワイパーの取り付け根本部分に繋がっています。右のダンパーです。左のダンパーです。ちっちゃめのガラスハッチバックなのですが、左右2本のダンパーに支えられています。このWダンパーのお陰で、軽々開閉できます。
2012年08月07日
-
フロントライトの話
Smartのフロントライトの話です。Loビームはプロゼクションライトです。上方向に拡散する明かりを、光学系でパキッとカットします。このLoビームは、照射角度調整が付いています。重い荷物をたくさん積んだとき、車体フロントが持ち上がります。その場合にLoビームが上方をを向かないように、下方向に調整できます。更に、車体が軽くなったとき、Loビームが下を向きすぎないよう、上方向にも調整できます。上の黄色の矢印は、ステアリング、左側のウインカー&LoHiビーム切り替えレバー。下の矢印が、Loビーム上下角微調整ダイヤル。Loビーム+フォグランプで、雨天走行時も前方が見やすくなります。Hiビームに切り替えると、+2で4点灯になります。これに、フォグをプラスすると、最強です。我が家は、ド田舎なもんでこの明るさは大変助かっています。LoHi同時点灯は、明るくて大変便利ですね。
2012年07月14日
-

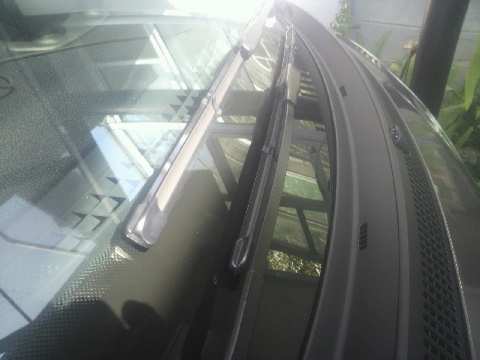
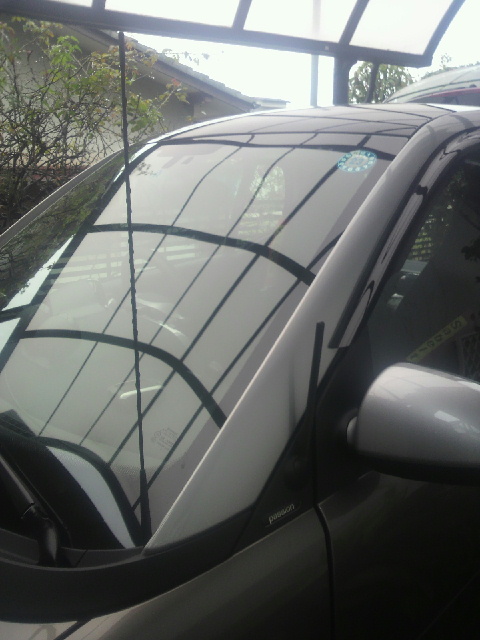
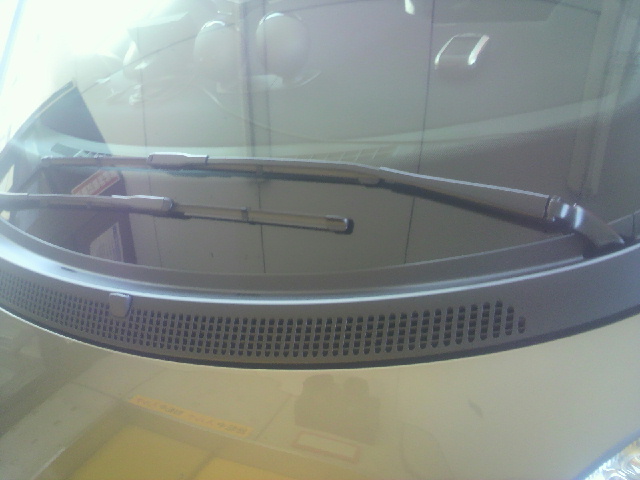
ワイパーの話
Smartのワイパーについてです。7月1日のブログでも少し触れていますが、今日は引き続きワイパーの話です。ワイパーの取り付け部分は、フロントグリル左右の両端にあります。左端部分。右端部分と二段に見えるブレード。動作時は、中央下から左右両端に掃く方式なのですが、小さな車体に大きな窓。この窓を出来るだけまんべんなく掃くために、よく考えられた方式です。ありがちな、助手席方向を掃き残す事もありません。窓枠端から端まで掃いて、掃き残すのは、ルームミラーの向こうだけです。水色の円弧が、ワイパーエリアです。残しているのは逆三角形のエリアだけです。ですから、視界は凄く良好です。蛇足ですが、トリディオンセーフティセルのお陰で、窓枠の左右柱部分がかなり太くできています。ですから、視界という点だけを指摘すれば、国産軽の車体と比較するとその死角は広い方だと思います。(でも太いセル構造のお陰で軽みたいにペチャンコにならない)その分、右左折時は身体を起こし、首を回せば済む事ですが…。話を元に戻します。雨だれの影響で助手席方向の前方が見辛いとかはなく、本当に端から端までクリアな視界なので、スマ車のフロントワイパーは優れものだと思います。またまた蛇足ですが、451の間欠ワイパー、スピードコントロールが付いていません。この点は、ちょっと不便です。もう少し間隔を短くしたい、とか、長くしたいとかが出来ないのです。一定間隔のみなのが残念です。ま、付いてないよりマシだけど…。(Kの時はLoとHiだけだった)あ!車速感知装置は連動しています。(勿論Kには付いてません)間欠モードで停車すると、間欠時間が延びます。低速モードや、高速モードで停車すると、掃く間隔が遅くなります。これは、至極便利。ワイパーブレードの劣化防止のためにも良いみたいです。で、ウォッシャーノズルは3穴です。チビの割には、広い窓だから、隈無く湿らすには3穴は必要だ。と言う事でしょうか。2穴だったKの頃からに比べると、格段の進歩です。
2012年07月12日
-
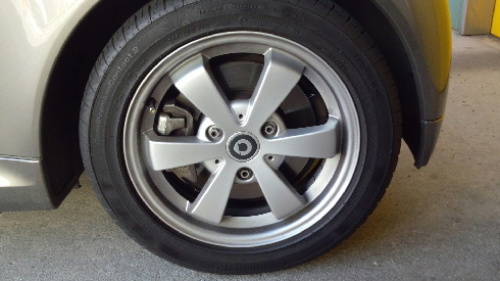
足廻りの話
Smartのタイヤは、メルセデス車定番のコンチネンタルです。大変長持ちします。なんの事はない、コンパウンドが硬くてすり減らない、だけですが…。ゴツゴツした乗り心地なので好きじゃないっす。で、前です。175/55R15 4.5Jです。後です。195/50R15 5.5Jです。そうです。前後でサイズが違うのです。ですから、BSとかで合うタイヤを見つける事は出来ても、前後でブランドが違ったりします。難儀なこって…。でもって、良いなっ!て思うアルミを見つけても、ホイルナットが3穴だから、気に入ったデザインはあっても、使えるアルミはまずありません。ちなみに、このタイヤ、ディーラさんのセットオプションタイヤです。普通にお店で、スマート下さい。と買っても、もう少し細いタイヤになります。あ、でも、燃費を優先される方、そっちの方が良いかも…。
2012年04月08日
-
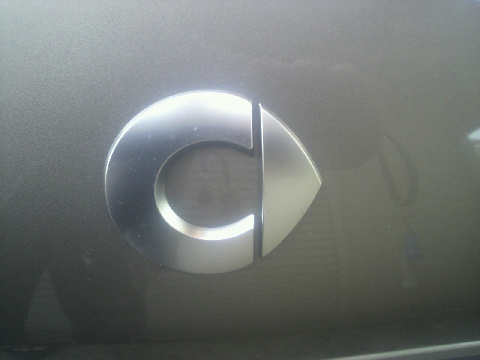
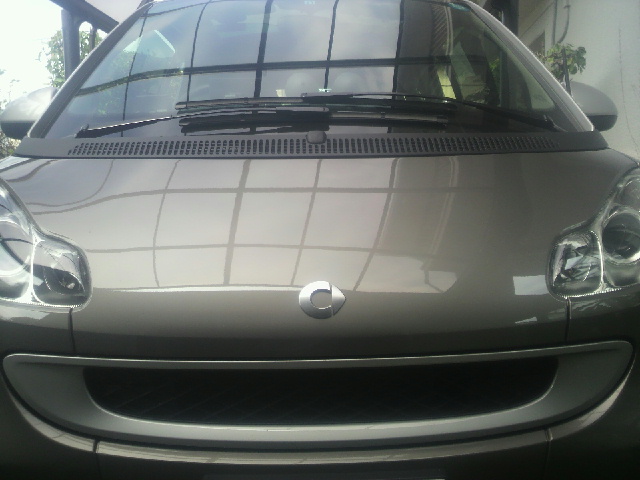
余り目立たない所に有るスマロゴの話
Smartの車外にあるロゴマークは、鼻先とリアエンドにあります。ボンネット中央の“C”マークリアエンドのsmart文字ロゴ上の二つは嫌でも目に入ります。後は、アルミホイールのセンターマークとかも目立ちますね。で、今日の話は、よーく探さないと判らないところのスマロゴです。あ!車内とかではなくて、車外から探すと判るマーク限定の話です。まず、フロントガラスの助手席側。ガラスの製品番号というヤツですかねぇ。アップにしたんですけど、ピントが甘くなりました。ガラスにプリントされたマークはドアガラス、ハッチバックガラスにもあります。次は、外からはとても見つけにくいガラスルーフの製品ロゴです。これは、背が高い人じゃないと外から見つけにくいかもしれませんねぇ。車内からは、インナーカーテンを開けると直ぐに見えます。ルームライトの丁度上くらいの位置にあります。ガラス(ポリカーボーネート樹脂)自体に凸型彫刻されています。この凸型彫刻のせいで、日除け用のミラーコートフィルムが貼りにくいっす。
2012年02月20日
-
駐車スペースの話
Smartの駐車スペースの話です。まず、写真をご覧下さい。前も横も後も、すき間だらけです。前輪なんか、タイヤ止めに当たっていない状態です。こうやって見ると、かなりコンパクトですよね。実際、車幅は少し大きいのですが、全長は軽自動車より短いのです。上の写真は、コンビニの駐車場で撮った物ですが、スペース的には余裕で止まっています。ロボットゲートや警備員の方が居ない駐車場では、軽自動車用のスペースを探して止める努力はしていますが、希に、警備員さんに軽自動車スペースを案内されると、ちょっとムッとするのは我が儘でしょうか…。実際はドアが大きいので、普通車スペースの方が降りやすいです。同乗者が居ないときは、わざと右に曲げて止めたりもます。兎に角、ドアが走ってる様な車なので、右に頭を振ってた方が降りやすいのです。“K”に比べて、ドア自体少し分厚くなってますし車体と比べるとドアの馬鹿でかさは“アメ車”並みかも…。
2011年12月23日
-
すき間の話
Smartの樹脂ボディの話は、何度もカキコしていますが、その特殊な造り故の困った事があります。雨天時に、泥濘道などを走り、直後に洗車などする余裕がないとき、このすき間に、泥が詰まってしまいます。ご覧の様に、かなりのすき間があります。これ、セーフティセルの金属部分と、樹脂ボディ(リアのタイヤハウス部分)との境目なんですけど、洗車時にスポンジが挟まるくらいにすき間が空いています。メンテナンスのときは取り外す様になっていますから、すき間パテなどは使えないのでしょうね。マ、水を流せば綺麗に取れるのですけど、泥の詰まりは気になる事ではあります。
2011年12月06日
-
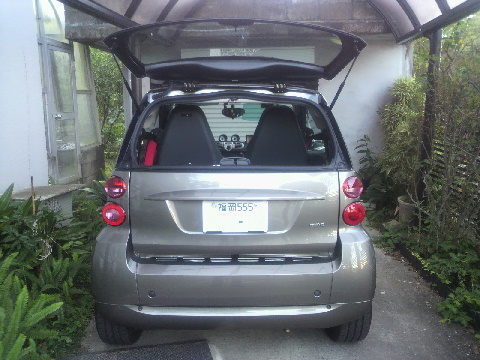
ハッチバックのお話
Smartのおしりは、こんな風に開きます。開けるには、リモコンキーで解錠した後、ナンバープレートの上、ナンバー灯のランプハウスの中央部分を押します。電磁スイッチになっていて、カチャッと言う音と共にガラスが浮きます。で、テールゲートは、左右どちらかのレバーを軽く触るだけで、カチャッという音と共に手前に倒れます。テールゲートレバー左テールゲートレバー右荷物で手がふさがっている事が殆どですので、片側だけで開くのは凄く便利です。開くとこうなります。スマートのマニュアルを見ると、リモコンキーでテールオープンも出来る。みたいな事を書いてありますが、日本仕様では出来ないみたいです。リモコンキーには3っつ押すところがありますが、ひとつ何も機能していません。“K”の頃、このハッチバックは車内の運転席、ダッシュボードの下の方右手をのばさないといけない位置に、リリーススイッチがありました。Newスマは、ナンバープレートのランプハウスにスイッチが付いて、至極便利です。更に、Kの時はテールゲートを開けるためには、両方のレバーを引く必要がありました。もおぅぅぅ、凄い不便でした。今は、片手で軽く触ると開くので、格段に便利です。これ、嬉しい進化です。
2011年11月16日
-
新型ワイパーの話
Smartのワイパーは、昨年秋のモデルチェンジで、全く新しいパーツに変わったのだそうです。今回の一年点検で、不具合が起こる前に、交換予備部品として手配しまして、ディラーさんの工場でも初めての発注と入荷になったそうです。箱の中身です。左右用に分かれています。箱の裏側が取説になっていました。で、このウイング形状はボッシュの物だろうと思うのですが、取り付け部分や先端の処理が、余り見かけない形です。※ボッシュ製品の最新型を理解していないのかもしれませんが…。先端取り付け部分今まで見た事があるのは“U”の字型のクリップパーツだったのですが、クワガタムシの角みたいな、左右からつまむ形の物は初めてです。リアワイパーはちっちゃいだけで、ブレードは出回っている物をカットする事で流用できそうです。しかし、この小さなワイパーアームは、純正しかないと思います。
2011年11月10日
-
リアワイパーの話。
今日は雨、風も強くて傘さだけでは濡れて仕舞いそう…。Smartのリアワイパーはこんな感じです。非常に小さなワイパーです。ブレードの長さは30センチもありません。ウオッシャーノズルはワイパーの回転軸の根本に付いてます。このワイパー、フロントワイパー稼働時に、ギアをバックに入れると、動き始めます。勿論、動かしたい時は、前進中でもレバー操作で動きます。バックギアとの連動機能は、Kの時にはありませんでした。Newスマ君、凄く便利になったと思います。
2011年11月05日
-
ウインカーの話
Smartのウインカーは、最近主流の透明カバータイプです。フロントいちばん端の透明カバーの中が、ウインカーです。オレンジのレンズが見えてます。サイドサイドも同様に、透明レンズの中にオレンジ色のランプが組み込まれています。リア上段の丸の下がウインカーです。ウインカーとストップランプ、尾灯は、左右対称です。下段の車体左がバックランプ、右がバックフォグランプです。ボディデザインとボディカラーに合わせやすいように、色つきウインカーレンズが消えつつあるようですね。ちなみに、純正パーツはLED化はされていません。ハイブリッド・エコカーなのに、この点は時代遅れですね。
2011年10月18日
-
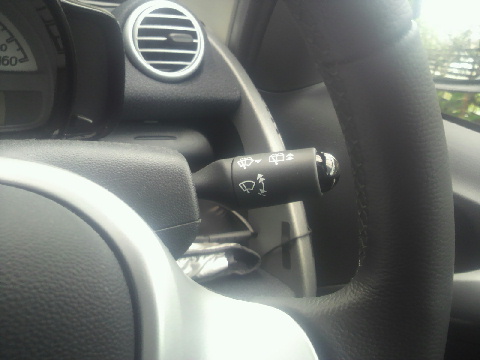
続・続、ワイパーの話。
続・続、ワイパーの話。って言うか、ただ単に小出ししてるだけ???Smartのワイパーレバーはステアリング右側です。と言うのは既報ですが、今日はそこんとこを細かく…。(^_^;)アップにすると、ステアリング軸に対して下方向にレバー部分を倒すと、間欠に、ニュートラルから上方向に、1段目弱・2段目強、の二つです。手前に引くと、フロントウォッシャー液の噴射で、向こうに押すと、リアワイパーの操作です。操作は二つ、リアウォッシャー噴射とワイパーONです。なお、ワイパー動作時は、バックギアーと連動で、リアワイパーも動いてくれます。これ、バック駐車時なんか凄い便利です。“K”の時代には、無かったモードですね。ところで、間欠ワイパーのモードなんですが、間隔のコントロール機能がありません。一定の決められた間隔でしか動作しないのです。これ不便…。スピード感知式で、停車時は高速ワイパーは遅くなり、低速ワイパーはさらに遅くなり、間欠モードは殆ど動かなくなるのは、Kの頃に比べ格段に便利になったのですが、ついでに、間欠ワイパーの動作の微調整が効くようにして欲しかった。
2011年10月15日
-
ワイパーの話2
今朝は久々の雨です。今はしょぼしょぼ降っていますが、本格降りになるそうです。先日もお話ししたように、Smartのワイパーは内側から両外に立ち上がります。窓の中央に、ブレードが立ち上がっていないのでそれと解ると思います。ブレードの形状は、勿論、高速でも浮き上がらないように空力計算されたウイング断面です。左右立ち上がりのお陰で、端から端まで綺麗に掃いてくれます。
2011年10月14日
-
アンテナの話
Smartのオリジナルアンテナは、ロッドアンテナではありません。ですから、不要の際に縮めて収納が出来ません。これ、不便に感じているオーナーの方は多いかと思います。鋼線にシールドをクルクル巻き付けた一本アンテナでして、これが風が強い日に高速を走ろう物なら、風圧でボディを叩く時があります。“K”の時に実際にびっくりした出来事なんですが、幸いウインドゥバイザーを取り付けていた所為で、直接のボディ被害は免れました。下の写真は、オリジナルとディーラーオプションのショートアンテナとの比較です。オリジナルは長さの比較のために、フロントガラスに立てかけています。かなり細長いでしょ。で、下が実装しているディーラーオプションの、ショートアンテナです。“K”の時も付け替えていたのですが、付け替えてからはFMしか入らなくなりました。ネショプの商品の取説にもAMの受信感度が落ちる。と在りましたから、仕方のない事だと思って乗ってました。特に困ったのは、交通情報が入らなくなった事ですね。“K”愛用当時、メーカーやディーラーには、このショートアンテナはありませんでした。で、新規買い換えに際して、アクセサリー型録を見ているとあったので、即決です。ディーラーオプションのショートアンテナは、ちゃんとAMもトラフィック情報も受信できてます。このショートアンテナのお陰で、面倒な“立駐取り外し”もなく、凄く便利です。Smart購入時のオプションアイテムの中で、これは一押しですよぉ。
2011年10月05日
-
メンテナンスの話
連日の雨天で、ウオッシャー液が残り少なくなりました。ウォッシャー液を補充するために、フロントグリルを外します。そう、Smartの場合外すのです。ボンネットを開ける。とかではなく、リリースレバーを使ってごっそりフロントパネルを取り外すのです。こうやって見てみると、スマ君、ナマズ顔ですねぇ。で、外すとこうなります。上の写真は、取り外して内蔵のフックに引っかけて固定したところです。ウォッシャー液タンクや、ラジエターの不凍液タンクは向かって右側部分にあります。見えているタンクの左側が、ウオッシャー液タンクです。取り外した時のパネルの保持フック部分と、飛散防止のベルト(黒)です。樹脂部品ならではの軽業ですねぇ。“K”の頃に比べたら随分メンテナンスも楽になりました。日々進歩ですね。さて、フロントグリルの取り外し方ですが、それはオーナーになったら判ります。
2011年10月04日
-
ワイパーの話
Smartのワイパーは面白い掃き方をします。両外に起き上がりながら、縦の窓枠に垂直平行になるまで掃くのです。これってなかなか視界は良好です。窓枠の端から端まで掃いてくれます。ルームミラーの向こうは逆三角形に掃き残しは有りますが、もともとルームミラーが在る位置は気になりません。国産車ですと運転席の前を基軸に、左から右へ起き上がりながら掃きますよね。車種にもよりますが、左前に大きな三角形の掃き残しが出来ます。雨の夜のギラギラで見辛く怖い思いをした事があると思います。スマートの場合コンパクトボディの割には、フロントウインドウは大きな方だと思います。この大きな窓を余す所無く掃くには、この“観音開き”方式がベストだと思います。ちなみに、ウォッシャー液は3穴で噴射します。
2011年10月03日
-
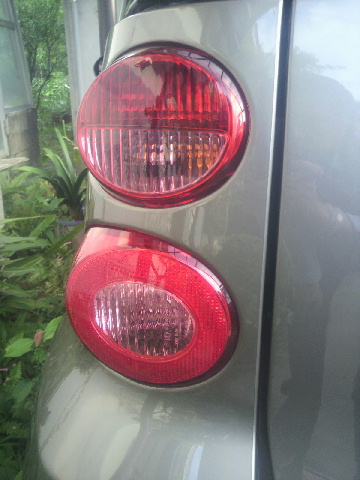
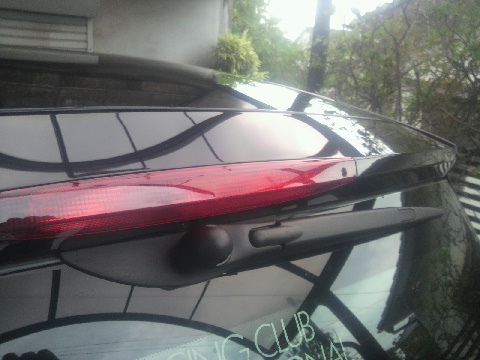
テールランプの話
テールランプの話です。Smartの車両デザインは左右対称ではないところが多々ありますが、テールランプもそうです。バックランプは、左のみ。右の後ろは、バックフォグランプになっているのです。上の段、左右上からストップランプ。その下が、ウインカー。下の段、左がバックランプで、右がバックフォグ。その廻りが左右ともに、車幅灯(尾灯)になっていて、リアウインドウの上には、ハイマウントストップランプがあります。“K”の時は球切れの交換をするのに、リアランプグリルを脱着する必要がありましたが、今のタイプは、トランクルームの内張りが外せるようになっていて、交換が楽になっています。ちなみに、オリジナルはLEDランプではありません。メーカーオプションにも純正LEDはないようです。
2011年10月02日
-
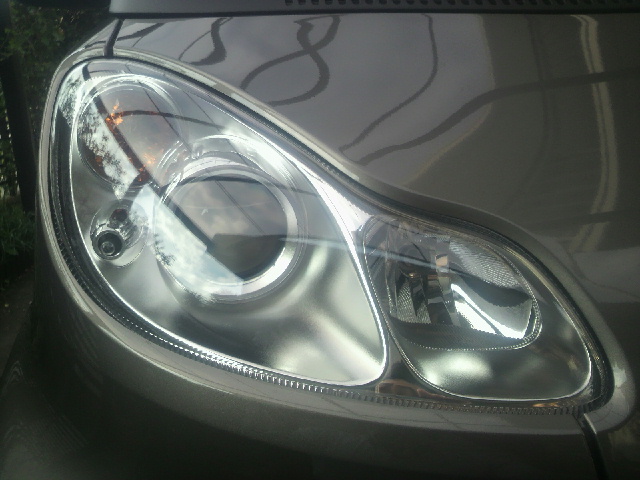
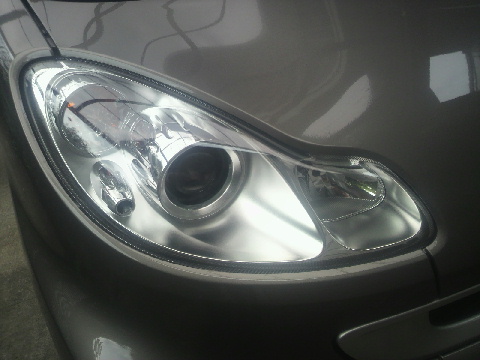
前照灯の話
Smartのライトは、こんな感じです。下向きライトは、プロゼクションレンズになっていて、上方向の明かりをカットします。光学的な事は判りませんが、レンズの切れ目がミソですね。で、実際に出た明かりはこんな感じです。横方向に上へ行く明かりがカットされています。室内の表示はこれです。上方向に4灯点灯になると、こうなります。最近流行のクセノンや高輝度LEDとは違った柔らかい明かりですが、照度的には充分です。室内表示はこうなります。ちなみに、積載重量によってですが、車がヘッドアップします。そう言う時のためのロービームの角度調整は、ウインカーレバー(ステアリングの左側)の根本にあるつまみで調整します。最近流行の光軸調整がされていない、明るすぎる前照灯は本当に迷惑ですね。
2011年09月30日
全40件 (40件中 1-40件目)
1
-
-
- ξバイク好きの交流所ξ
- 別冊付録「RIDE」final 「バイクに…
- (2024-05-01 18:51:15)
-
-
-
- モータースポーツ
- フォーミュラE 2024シーズン最終戦を…
- (2024-07-27 00:40:11)
-
-
-

- BMWのある暮らし
- BMW X4 xDrive28i M…
- (2022-10-30 12:49:52)
-


